


前言
图片上传使用Ant Design Vue中的upload组件,预览使用Ant Design Vue中的Model组件,拖拽则使用vuedraggable。
介绍
vuedraggable为基于Sortable.js的vue组件,用以实现拖拽功能。
官方地址:https://github.com/SortableJS/Vue.Draggable
中文版文档:https://www.itxst.com/vue-draggable/tutorial.html
安装
npm install vuedraggable -S
使用
import Draggable from ‘vuedraggable’
接下来回到主题,实现功能
代码如下:
// 上传部分
<Upload
action="自己的上传地址"
list-type="picture"
v-model:fileList="fileList1"
@change="handleChange"
@preview="handlePreview"
class="upload-list-inline"
accept=".png,.jpg"
:before-upload="beforeUpload"
multiple="true"
>
<div class="upload">
<plus-outlined />
<div class="ant-upload-text">Upload</div>
</div>
</Upload>
//预览
<Modal :visible="previewVisible" :footer="null" @cancel="handleCancel">
<img alt="" style="width: 100%" :src="previewImage" />
</Modal>
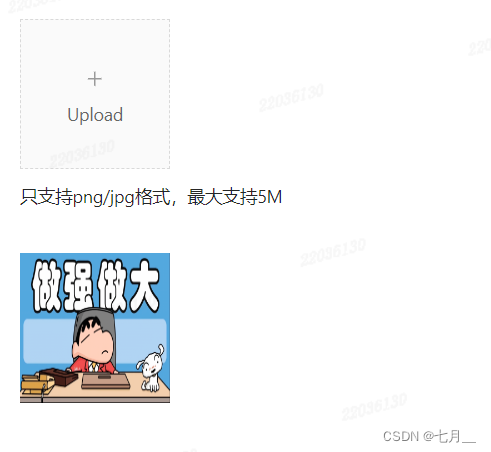
<div class="tip"> 只支持png/jpg格式,最大支持5M </div>
//拖拽
<draggable :list="fileListArr" @dragend="dragComplete">
<template #item="{ element }">
<div class="imgList">
<a>
<div class="mask">
<EyeOutlined class="icon-preview" @click="handlePreview(element.imageUrl)" />
<DeleteOutlined class="icon-delete" @click="deleteImg(element)" />
</div>
</a>
<img :src="element.imageUrl" alt="" class="img" />
</div>
</template>
</draggable>
// typescript
export default defineComponent({
    name: 'InstructionContentItemTemplateImagesDrawer',
    components: {
      PlusOutlined,
      Upload,
      Modal,
      draggable,
      DeleteOutlined,
      EyeOutlined,
    },
    setup(_, { emit }) {
      const isUpdateView = ref(true);
      const previewVisible = ref<boolean>(false);
      const previewImage = ref<string | undefined>('');
      const fileList = ref<FileItem[]>([]);
      const fileList1 = ref([]);
      const fileListArr = ref<any>([]);
      const recordId = ref('');
      let num = ref();

      const handleCancel = () => {
        previewVisible.value = false;
      };

	//点击图片预览
      const handlePreview = async (item) => {
        previewImage.value = item;
        previewVisible.value = true;
      };

	//上传文件状态改变时
      const handleChange = ({ file, fileList }) => {
        if (file.status == 'done') {
          if (fileListArr.value.length >= num.value) {
            fileListArr.value.push({ ...file });
            fileListArr.value[fileListArr.value.length - 1].sort = String(
              fileListArr.value.length - 1,
            );
            fileListArr.value[fileListArr.value.length - 1].instructionContentId = recordId.value;
            //下面的删除是因为接口返回的数据有些不需要,所以删掉,根据实际情况选择,后面涉及到的delete同理;imageUrl,instructionContentId 等属性命名根据实际情况修改
            delete fileListArr.value[fileListArr.value.length - 1].lastModified;
            delete fileListArr.value[fileListArr.value.length - 1].lastModifiedDate;
            delete fileListArr.value[fileListArr.value.length - 1].name;
            delete fileListArr.value[fileListArr.value.length - 1].originFileObj;
            delete fileListArr.value[fileListArr.value.length - 1].percent;
            delete fileListArr.value[fileListArr.value.length - 1].response;
            delete fileListArr.value[fileListArr.value.length - 1].size;
            delete fileListArr.value[fileListArr.value.length - 1].status;
            delete fileListArr.value[fileListArr.value.length - 1].thumbUrl;
            delete fileListArr.value[fileListArr.value.length - 1].type;
            delete fileListArr.value[fileListArr.value.length - 1].uid;
            delete fileListArr.value[fileListArr.value.length - 1].xhr;
          } else {
            for (let i in fileList) {
              fileListArr.value.push({ ...fileList[i] });
              fileListArr.value[i].sort = String(i);
              fileListArr.value[i].imageUrl = fileList[i].response.data.url;
              fileListArr.value[i].instructionContentId = recordId.value;
              delete fileListArr.value[i].lastModified;
              delete fileListArr.value[i].lastModifiedDate;
              delete fileListArr.value[i].name;
              delete fileListArr.value[i].originFileObj;
              delete fileListArr.value[i].percent;
              delete fileListArr.value[i].response;
              delete fileListArr.value[i].size;
              delete fileListArr.value[i].status;
              delete fileListArr.value[i].thumbUrl;
              delete fileListArr.value[i].type;
              delete fileListArr.value[i].uid;
              delete fileListArr.value[i].xhr;
            }
          }
        }
      };

	//拖拽时位置计算
      const dragComplete = (event) => {
        let oldIndex = event.oldIndex; //移动初始位置
        let newIndex = event.newIndex; //运动终止位置
        let diff = Math.abs(newIndex - oldIndex); //插值绝对值
        let index = fileListArr.value[oldIndex];
        if (eval(oldIndex) > eval(newIndex)) {
          for (let i = 0; i < diff; i++) {
            fileListArr.value[oldIndex - i] = fileListArr.value[oldIndex - i - 1];
          }
          fileListArr.value[newIndex] = index;
        } else {
          for (let i = 0; i < diff; i++) {
            fileListArr.value[oldIndex + i] = fileListArr.value[oldIndex + i + 1];
          }
          fileListArr.value[newIndex] = index;
        }
        for (let i = 0; i < fileListArr.value.length; i++) {
          fileListArr.value[i].sort = String(i);
        }
      };

      const deleteImg = (value) => {
          fileListArr.value.findIndex((element) => element.imageUrl === value.imageUrl),
        );
        fileListArr.value.splice(
          fileListArr.value.findIndex((element) => element.imageUrl === value.imageUrl),
          1,
        );
        num.value = num.value - 1;
      };

	//这里使用了代码中封装的组件,以及调用了接口,仅供参考
      const [registerDrawer, { closeDrawer }] = useDrawerInner(async (data) => {
        fileListArr.value = [];
        recordId.value = data.record.id;

        const res = await retrieveInstructionContentAttachmentApi(recordId.value);
        if (res) {
          for (let i = 0; i < res.length; i++) {
            fileListArr.value[i] = { ...res[i] };
            delete fileListArr.value[i].createdAt;
            delete fileListArr.value[i].createdBy;
            delete fileListArr.value[i].delFlag;
            delete fileListArr.value[i].id;
            delete fileListArr.value[i].revision;
            delete fileListArr.value[i].tenantId;
            delete fileListArr.value[i].updatedAt;
            delete fileListArr.value[i].updatedBy;
          }
        }
        num.value = fileListArr.value.length;
      });

      const beforeUpload = (file) => {
        const isLt2M = file.size / 1024 / 1024 < 5;
        if (!isLt2M) {
          message.error('Image must smaller than 5MB!');
        }
        return isLt2M;
      };

      return {
        previewVisible,
        previewImage,
        fileList,
        fileList1,
        handleCancel,
        handlePreview,
        handleChange,
        fileListArr,
        dragComplete,
        deleteImg,
        beforeUpload,
      };
    },
  });
// css
.upload {
    width: 120px;
    height: 120px;
    border: 1px rgb(217 217 217) dashed;
    background-color: rgb(250 250 250);
    cursor: pointer;
  }

  .anticon {
    margin: 40px 52px 10px;
    color: #999;
  }

  .ant-upload-text {
    color: #666;
    text-align: center;
  }

  .upload-list-inline :deep(.ant-upload-list-item) {
    width: 120px;
    height: 120px;
    margin-right: 8px;
    padding: 0;
    float: left;
  }

  .upload-list-inline :deep(.ant-upload-animate-enter) {
    animation-name: uploadAnimateInlineIn;
  }

  .upload-list-inline :deep(.ant-upload-animate-leave) {
    animation-name: uploadAnimateInlineOut;
  }

  :deep(.ant-upload-list-item-name) {
    display: none;
  }

  :deep(
      .ant-upload-list-picture .ant-upload-list-item-thumbnail,
      .ant-upload-list-picture-card .ant-upload-list-item-thumbnail
    ) {
    width: 118px;
    height: 118px;
  }

  :deep(
      .ant-upload-list-picture .ant-upload-list-item-thumbnail img,
      .ant-upload-list-picture-card .ant-upload-list-item-thumbnail img
    ) {
    width: 118px;
    height: 118px;
  }

  :deep(
      .ant-upload-list-text .ant-upload-list-item-card-actions,
      .ant-upload-list-picture .ant-upload-list-item-card-actions
    ) {
    margin-left: -30px;
  }

  .tip {
    margin-top: 10px;
    margin-bottom: 20px;
  }

  .imgList {
    position: relative;
    float: left;
  }

  .mask {
    position: absolute;
    top: 0;
    left: 0;
    width: 120px;
    height: 120px;
    margin-top: 15px;
    margin-right: 10px;
    opacity: 0;
    background: rgb(101 101 101 / 60%);
    color: #fff;
  }

  .imgList a:hover .mask {
    opacity: 1;
  }

  .icon-delete {
    position: absolute;
    margin-top: 55px;
    margin-left: 65px;
    color: white;
    cursor: pointer;
  }

  .icon-preview {
    position: absolute;
    margin-top: 55px;
    margin-left: 40px;
    color: white;
    cursor: pointer;
  }

  .img {
    width: 120px;
    height: 120px;
    margin-top: 15px;
    margin-right: 10px;
  }

  :deep(.ant-upload-list) {
    display: none;
  }
效果


 7785
7785


 被折叠的 条评论
为什么被折叠?
被折叠的 条评论
为什么被折叠?
 到【灌水乐园】发言


