


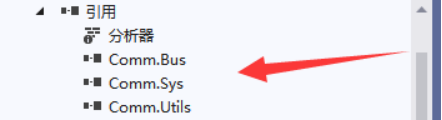
1:添加引用Comm.Utils,Comm.Bus.dll,Comm.Sys.dll,完成后台代码实现

2:App.config配置服务器端的访问地址

<?xml version="1.0" encoding="utf-8"?>
<configuration>
  <startup>
    <supportedRuntime version="v4.0" sku=".NETFramework,Version=v4.5" />
  </startup>
  <appSettings>
    <!-- 服务端接口请求地址 -->
    <add key="ServiceUrl" value="http://localhost/ServerLogin/Index.ashx" />
    <add key="ClientSettingsProvider.ServiceUri" value="" />
  </appSettings>
  <system.web>
    <membership defaultProvider="ClientAuthenticationMembershipProvider">
      <providers>
        <add name="ClientAuthenticationMembershipProvider" type="System.Web.ClientServices.Providers.ClientFormsAuthenticationMembershipProvider, System.Web.Extensions, Version=4.0.0.0, Culture=neutral, PublicKeyToken=31bf3856ad364e35" serviceUri="" />
      </providers>
    </membership>
    <roleManager defaultProvider="ClientRoleProvider" enabled="true">
      <providers>
        <add name="ClientRoleProvider" type="System.Web.ClientServices.Providers.ClientRoleProvider, System.Web.Extensions, Version=4.0.0.0, Culture=neutral, PublicKeyToken=31bf3856ad364e35" serviceUri="" cacheTimeout="86400" />
      </providers>
    </roleManager>
  </system.web>
</configuration>
3:在“MainWindow.xaml”中添加代码,完成界面制作
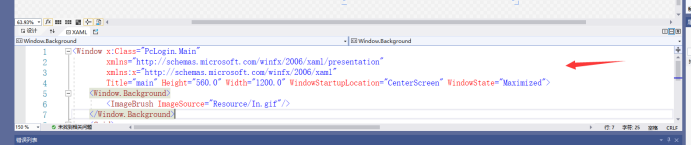
<Window x:Class="PcLogin.Main"
        xmlns="http://schemas.microsoft.com/winfx/2006/xaml/presentation"
        xmlns:x="http://schemas.microsoft.com/winfx/2006/xaml"
        Title="main" Height="560.0" Width="1200.0" WindowStartupLocation="CenterScreen" WindowState="Maximized">
    <Window.Background>
        <ImageBrush ImageSource="Resource/In.gif"/>
    </Window.Background>
    <Grid>

        <Image x:Name="image"  Source="Resource/smart_community.png" MouseLeftButtonDown="image_MouseLeftButtonDown" HorizontalAlignment="Left" Height="61" Margin="537,210,0,0" VerticalAlignment="Top" Width="78" Stretch="Fill"/>
    </Grid>
</Window>
4:在MainWindow.xam.cs中添加代码

namespace PcLogin
{
    /// <summary>
    /// main.xaml 的交互逻辑
    /// </summary>
    public partial class Main : Window
    {
        public Main()
        {
            InitializeComponent();
        }
        private void Button_Click_1(object sender, RoutedEventArgs e)
        {
            //退出程序
            Environment.Exit(0);
        }

        private void button_Click(object sender, RoutedEventArgs e)
        {
            this.Hide();
            huanjingjc h = new huanjingjc ();
            h.ShowDialog();
        }

        private void image_MouseLeftButtonDown(object sender, MouseButtonEventArgs e)
        {

        }
    }
}
5:启动测试

6:环境监测模块实现

7:在“MainWindow.xaml”中添加代码,完成界面制作

<Window x:Class="PcLogin.huanjingjc"
            xmlns="http://schemas.microsoft.com/winfx/2006/xaml/presentation"
        xmlns:x="http://schemas.microsoft.com/winfx/2006/xaml"
        Title="四模拟量数据采集" Height="350" Width="525" Loaded="Window_Loaded">
    <Grid>
        <Grid.ColumnDefinitions>
            <ColumnDefinition Width="100*"/>
            <ColumnDefinition Width="150*"/>
        </Grid.ColumnDefinitions>
        <Grid.RowDefinitions>
            <RowDefinition Height="50*"/>
            <RowDefinition Height="50*"/>
            <RowDefinition Height="50*"/>
            <RowDefinition Height="50*"/>
            <RowDefinition Height="50*"/>
        </Grid.RowDefinitions>
        <Label Content="串口:" HorizontalAlignment="Right" VerticalAlignment="Center"/>
        <ComboBox Name="cmbPortList"  HorizontalAlignment="Left" VerticalAlignment="Center" Width="120" Grid.Column="1"/>
        <Label Content="光照:" HorizontalAlignment="Right" VerticalAlignment="Center" Grid.Row="1"/>
        <Label Name="lblLight" Content="N/A" HorizontalAlignment="Left" VerticalAlignment="Center" Grid.Row="1" Grid.Column="1"/>
        <Label Content="温度:" HorizontalAlignment="Right" VerticalAlignment="Center" Grid.Row="2"/>
        <Label Name="lblTemperature" Content="N/A" HorizontalAlignment="Left" VerticalAlignment="Center" Grid.Row="2" Grid.Column="1"/>
        <Label Content="湿度:" HorizontalAlignment="Right" VerticalAlignment="Center" Grid.Row="3"/>
        <Label Name="lblHumidity" Content="N/A" HorizontalAlignment="Left" VerticalAlignment="Center" Grid.Row="3" Grid.Column="1"/>
        <Button Name="btnGet" Content="获取" Grid.Column="1" HorizontalAlignment="Left" Grid.Row="4" VerticalAlignment="Center" Width="75" Click="btnGet_Click"/>
        <Button x:Name="button" Content="返回" HorizontalAlignment="Left" Height="33" Margin="10,12,0,0" VerticalAlignment="Top" Width="62" Click="button_Click" RenderTransformOrigin="-6.933,5.833"/>
    </Grid>
</Window>
8:添加引用Comm.Utils,Comm.Bus.dll,Comm.Sys.dll,完成后台代码实现
9:在MainWindow.xam.cs中添加代码

namespace PcLogin
{

    /// <summary>
    /// MainWindow.xaml 的交互逻辑
    /// </summary>
    public partial class huanjingjc : Window
    {
        private static inPut_4 input4;
        /// <summary>
        /// 四输入模拟量操作类(需要引用Comm.Bus.dll、Comm.Sys.dll、Comm.Utils.dll、Newland.DeviceProviderImpl.dll、Newland.DeviceProviderIntf.dll、NewlandLibrary.dll)
        /// </summary>
        public static inPut_4 InPut_4
        {
            get
            {
                if (input4 == null)
                {
                    input4 = new inPut_4();
                }
                return input4;
            }
        }

        public huanjingjc()
        {
            InitializeComponent();
            this.Loaded += Window_Loaded;
        }


        private void GetPortList()
        {
            //SerialPort.GetPortNames()获取当前计算机的串口名称数组
            //遍历串口名称数组,并将其添加到ComboBox控件中
            foreach (string item in SerialPort.GetPortNames())
            {
                cmbPortList.Items.Add(item);
            }

            //若ComboBox控件记录数大于0,即有选项,则将当前选择的第一个项索引设置为索引0
            //否则添加一个“未找到串口”的项,并禁用“发送按钮”
            if (cmbPortList.Items.Count > 0)
            {
                cmbPortList.SelectedIndex = 0;
            }
            else
            {
                MessageBox.Show("未找到串口");
            }
        }

        private void btnGet_Click(object sender, RoutedEventArgs e)
        {
            if (cmbPortList.SelectedIndex == -1)
            {
                MessageBox.Show("请选择串口号");
                return;
            }


            if (!InPut_4.IsOpen)
            {
                InPut_4.Open(cmbPortList.SelectedValue.ToString());
            }

            //获取传感器数据
            lblLight.Content = InPut_4.getInPut4_Illumination();
            lblTemperature.Content = InPut_4.getInPut4_Temp();
            lblHumidity.Content = InPut_4.getInPut4_Humidity();
        }

        private void Window_Loaded(object sender, RoutedEventArgs e)
        {
            GetPortList();
        }

        private void button_Click(object sender, RoutedEventArgs e)
        {
            this.Hide();
            //创建主窗体的对象并显示主窗体
            Main m = new Main();
            m.ShowDialog();


        }
    }
}
10:启动项目测试

熟悉操作用户登入
掌握温度,湿度,光照度等环境监测的方法


 1312
1312


 被折叠的 条评论
为什么被折叠?
被折叠的 条评论
为什么被折叠?
 到【灌水乐园】发言


