


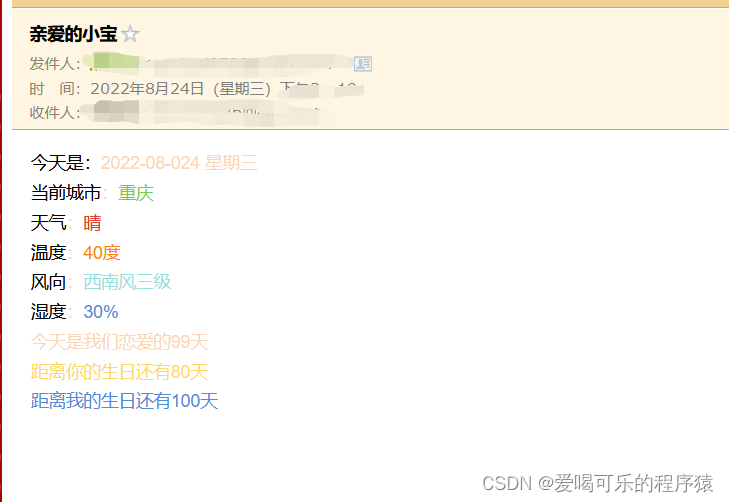
最近给女朋友的接口测试号很流行,但是需要商家或者企业资质,但是我们可以通过邮箱实现相同的功能。大致效果如下(源代码底部):
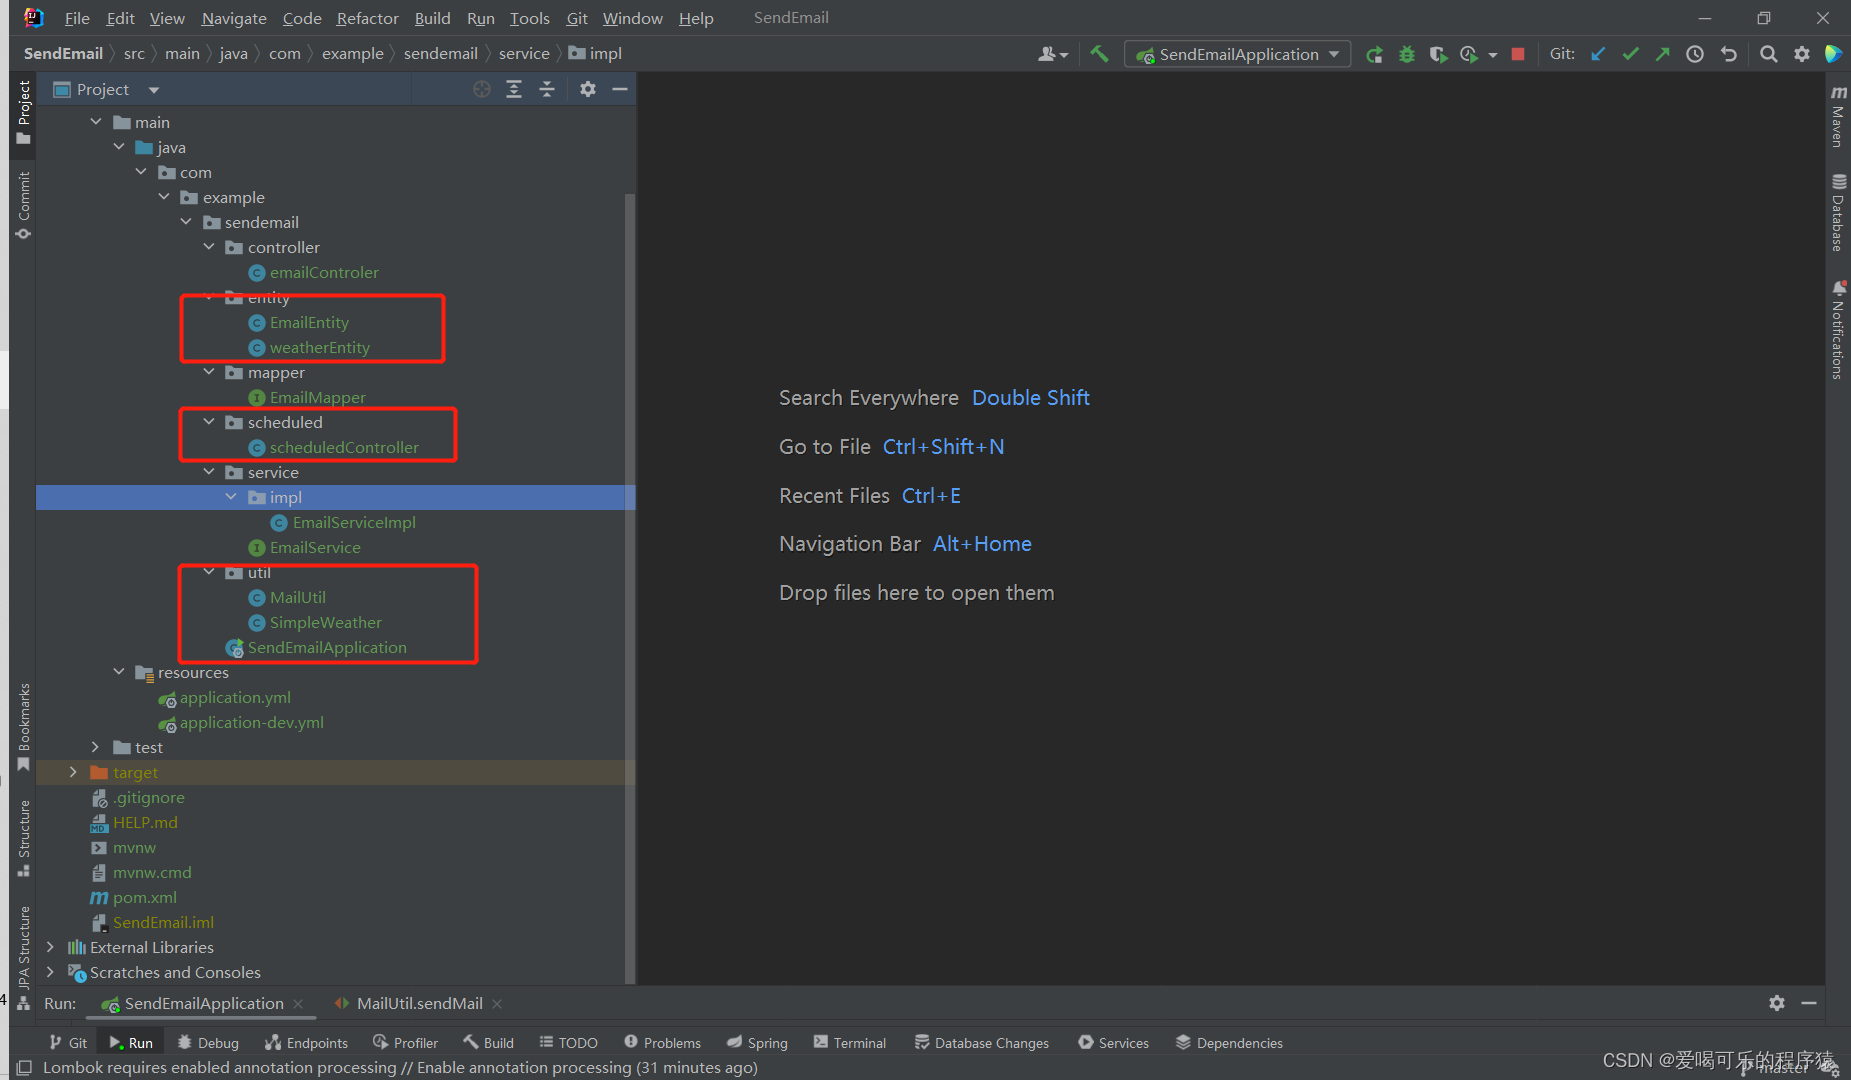
话不多说,直接上教程,首先新建spring boot项目,这个过程不复杂我就不过多阐述了,直接上页面图,画框部分是我们需要关注的代码片段,其他的属于无关代码。如果自己重新创建项目可以只创建这几个类。
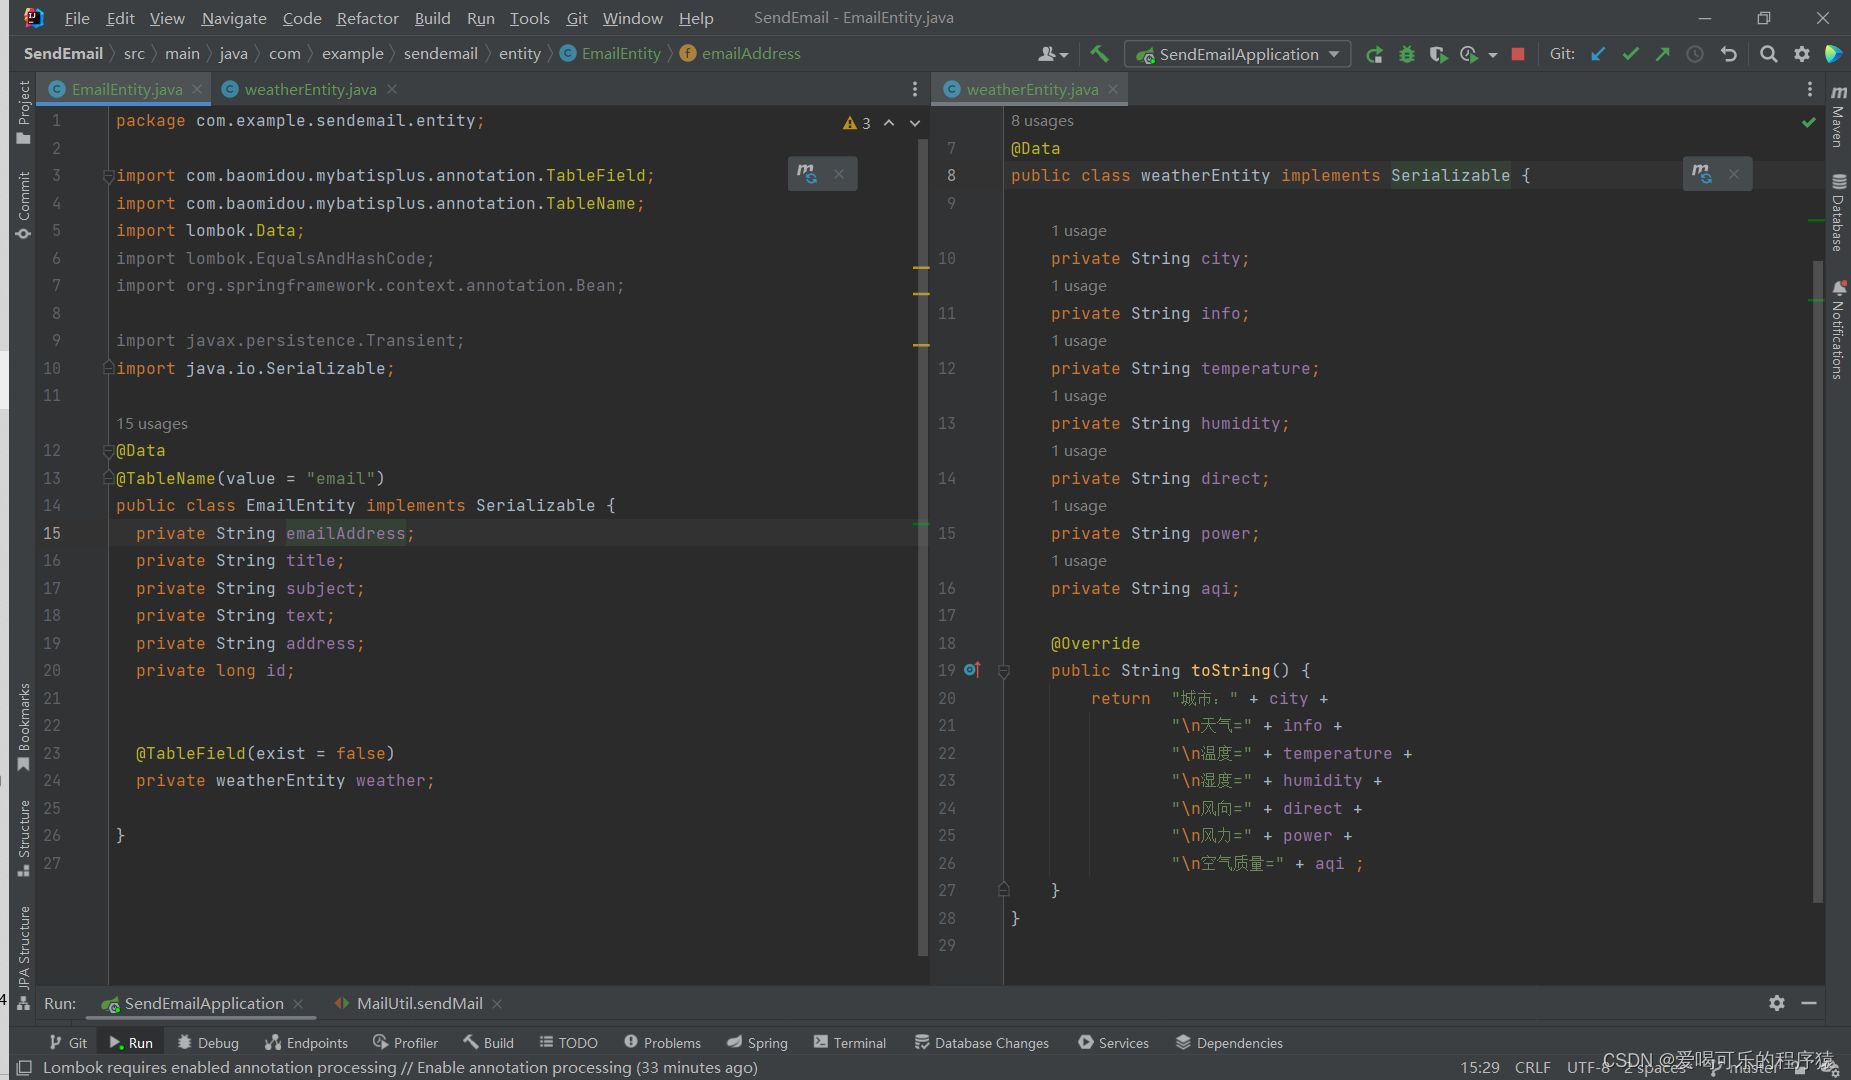
新建两个实体类,其中一些注解不用管,原本是想从数据库中拿但只是教学就没必要了。
 天气查询的方法,这里使用的是第三方接口,聚合数据,进入官网搜索天气预报api,找到就行了。点击申请是免费的,一天拥有30次权限,申请过后在个人中心里面找到天气预报api,然后有一串key,自己更换下就好。
package com.example.sendemail.util;

import com.example.sendemail.entity.weatherEntity;
import net.sf.json.JSONObject;
import org.springframework.stereotype.Component;

import javax.annotation.Resource;
import java.io.*;
import java.net.HttpURLConnection;
import java.net.URL;
import java.net.URLEncoder;
import java.nio.charset.StandardCharsets;
import java.util.HashMap;
import java.util.Map;

@Component
public class SimpleWeather {
    // 天气情况查询接口地址
    public static String API_URL = "http://apis.juhe.cn/simpleWeather/query";
    // 接口请求Key
    public static String API_KEY = "你自己的key";
    public static weatherEntity weather =new weatherEntity();

    /**
     * 根据城市名查询天气情况
     *
     * @param cityName
     */
    public  weatherEntity queryWeather(String cityName) {
        Map<String, Object> params = new HashMap<>();//组合参数
        params.put("city", cityName);
        params.put("key", API_KEY);
        String queryParams = urlencode(params);
        String response = doGet(API_URL, queryParams);
        try {
            JSONObject jsonObject = JSONObject.fromObject(response);
            int error_code = jsonObject.getInt("error_code");
            if (error_code == 0) {
                JSONObject result = jsonObject.getJSONObject("result");
                JSONObject realtime = result.getJSONObject("realtime");
                System.out.printf("城市:%s%n", result.getString("city"));
                System.out.printf("天气:%s%n", realtime.getString("info"));
                System.out.printf("温度:%s%n", realtime.getString("temperature"));
                System.out.printf("湿度:%s%n", realtime.getString("humidity"));
                System.out.printf("风向:%s%n", realtime.getString("direct"));
                System.out.printf("风力:%s%n", realtime.getString("power"));
                System.out.printf("空气质量:%s%n", realtime.getString("aqi"));
                weather.setCity(result.getString("city"));
                weather.setInfo(realtime.getString("info"));
                weather.setTemperature(realtime.getString("temperature"));
                weather.setHumidity(realtime.getString("humidity"));
                weather.setDirect(realtime.getString("direct")+realtime.getString("power"));
                weather.setAqi(realtime.getString("aqi"));
                weather.setPower(realtime.getString("power"));
                return weather;
            } else {
                weather.setCity("重庆");
                weather.setInfo("查询失败");
                weather.setTemperature("查询失败");
                weather.setHumidity("查询失败");
                weather.setDirect("查询失败");
                weather.setAqi("查询失败");
                weather.setPower("查询失败");
                System.out.println("调用接口失败:" + jsonObject.getString("reason"));
                return weather;
            }
        } catch (Exception e) {
            e.printStackTrace();
        }
        return null;
    }

    /**
     * get方式的http请求
     *
     * @param httpUrl 请求地址
     * @return 返回结果
     */
    public static String doGet(String httpUrl, String queryParams) {
        HttpURLConnection connection = null;
        InputStream inputStream = null;
        BufferedReader bufferedReader = null;
        String result = null;// 返回结果字符串
        try {
            // 创建远程url连接对象
            URL url = new URL(new StringBuffer(httpUrl).append("?").append(queryParams).toString());
            // 通过远程url连接对象打开一个连接,强转成httpURLConnection类
            connection = (HttpURLConnection) url.openConnection();
            // 设置连接方式:get
            connection.setRequestMethod("GET");
            // 设置连接主机服务器的超时时间:15000毫秒
            connection.setConnectTimeout(5000);
            // 设置读取远程返回的数据时间:60000毫秒
            connection.setReadTimeout(6000);
            // 发送请求
            connection.connect();
            // 通过connection连接,获取输入流
            if (connection.getResponseCode() == 200) {
                inputStream = connection.getInputStream();
                // 封装输入流,并指定字符集
                bufferedReader = new BufferedReader(new InputStreamReader(inputStream, StandardCharsets.UTF_8));
                // 存放数据
                StringBuilder sbf = new StringBuilder();
                String temp;
                while ((temp = bufferedReader.readLine()) != null) {
                    sbf.append(temp);
                    sbf.append(System.getProperty("line.separator"));
                }
                result = sbf.toString();
            }
        } catch (IOException e) {
            e.printStackTrace();
        } finally {
            // 关闭资源
            if (null != bufferedReader) {
                try {
                    bufferedReader.close();
                } catch (IOException e) {
                    e.printStackTrace();
                }
            }
            if (null != inputStream) {
                try {
                    inputStream.close();
                } catch (IOException e) {
                    e.printStackTrace();
                }
            }
            if (connection != null) {
                connection.disconnect();// 关闭远程连接
            }
        }
        return result;
    }

    /**
     * 将map型转为请求参数型
     *
     * @param data
     * @return
     */
    public static String urlencode(Map<String, ?> data) {
        StringBuilder sb = new StringBuilder();
        for (Map.Entry<String, ?> i : data.entrySet()) {
            try {
                sb.append(i.getKey()).append("=").append(URLEncoder.encode(i.getValue() + "", "UTF-8")).append("&");
            } catch (UnsupportedEncodingException e) {
                e.printStackTrace();
            }
        }
        String result = sb.toString();
        result = result.substring(0, result.lastIndexOf("&"));
        return result;
    }
}
发送邮件使用的是spring boot已经封装好的工具‘
package com.example.sendemail.util;

import com.example.sendemail.entity.EmailEntity;
import org.junit.jupiter.api.Test;
import org.springframework.boot.autoconfigure.mail.MailProperties;
import org.springframework.mail.SimpleMailMessage;
import org.springframework.mail.javamail.JavaMailSender;
import org.springframework.stereotype.Component;

import javax.annotation.Resource;

@Component
public class MailUtil {

    @Resource
    private JavaMailSender javaMailSender;
    @Resource
    private MailProperties mailProperties;


    public void sendMail(EmailEntity email){
        SimpleMailMessage message = new SimpleMailMessage();
        message.setTo(email.getEmailAddress());
        message.setFrom(mailProperties.getUsername());
        message.setSubject(email.getSubject());
        message.setText(email.getWeather().toString()+email.getText());
        javaMailSender.send(message);
    }
}
然后就是发送邮件的类,这里我写了两个,一个是调用接口区发送,也就是地址栏输入地址,还有个是定时任务,可根据自己的需求,定时发送,这里天气是实时获取的。
package com.example.sendemail.scheduled;

import com.example.sendemail.entity.EmailEntity;
import com.example.sendemail.entity.weatherEntity;
import com.example.sendemail.service.EmailService;
import com.example.sendemail.util.MailUtil;
import com.example.sendemail.util.SimpleWeather;
import org.junit.jupiter.api.Test;
import org.springframework.beans.factory.annotation.Autowired;
import org.springframework.context.annotation.Configuration;
import org.springframework.scheduling.annotation.EnableScheduling;
import org.springframework.scheduling.annotation.Scheduled;
import org.springframework.web.bind.annotation.RequestMapping;
import org.springframework.web.bind.annotation.ResponseBody;

import javax.annotation.Resource;
import javax.mail.MessagingException;
import java.text.SimpleDateFormat;
import java.util.Date;


@Configuration
@EnableScheduling
@RequestMapping("/test")
public class scheduledController {

    @Resource
    private MailUtil mailUtil;

    @Resource
    private SimpleWeather simpleWeather;

    @Autowired
    private EmailService service;


    @RequestMapping("/test")
    @ResponseBody
    public String start() throws MessagingException {

        //地址城市
        String city = "重庆";
        weatherEntity weather = simpleWeather.queryWeather(city);
        EmailEntity email = new EmailEntity();
        //收件人
        email.setEmailAddress("xxxxx@qq.com");
        //标题
        email.setSubject("dear");
        //正文
        email.setText("\n元气满满");
        email.setWeather(weather);
        mailUtil.sendMail(email);
        return "发送成功";
    }

    //定时任务(周一至周五)  秒 分 时  日    月   星期
    @Scheduled ( cron = "0 21 14 1-31 1-12 1-5 ")
    public void start2() throws MessagingException {
        //地址城市
        String city = "重庆";
        weatherEntity weather = simpleWeather.queryWeather(city);
        EmailEntity email = new EmailEntity();
        //收件人
        email.setEmailAddress("xxxxxx@qq.com");
        //标题
        email.setSubject("dear");
        //设置天气
        email.setWeather(weather);
        //正文(天气后的内容)
        email.setText("\n元气满满");
        mailUtil.sendMail(email);
    }


}
然后是配置文件yml
server:
  port: 8080
spring:
  datasource:
    driver-class-name: com.mysql.cj.jdbc.Driver
    url: jdbc:mysql://localhost:3306/email?useUnicode=true&characterEncoding=utf-8
    username: root
    password: 123456
# 邮箱配置
  mail:
    host: smtp.163.com
    username: yaojiayi0720@163.com
    password: ACUIDKYDKXEXIAJJ
最后是依赖,pom.xml
<?xml version="1.0" encoding="UTF-8"?>
<project xmlns="http://maven.apache.org/POM/4.0.0" xmlns:xsi="http://www.w3.org/2001/XMLSchema-instance"
         xsi:schemaLocation="http://maven.apache.org/POM/4.0.0 https://maven.apache.org/xsd/maven-4.0.0.xsd">
    <modelVersion>4.0.0</modelVersion>
    <parent>
        <groupId>org.springframework.boot</groupId>
        <artifactId>spring-boot-starter-parent</artifactId>
        <version>2.7.3</version>
        <relativePath/> <!-- lookup parent from repository -->
    </parent>
    <groupId>com.example</groupId>
    <artifactId>SendEmail</artifactId>
    <version>0.0.1-SNAPSHOT</version>
    <name>SendEmail</name>
    <description>SendEmail</description>
    <properties>
        <java.version>18</java.version>
    </properties>
    <dependencies>
        <dependency>
            <groupId>org.springframework.boot</groupId>
            <artifactId>spring-boot-starter</artifactId>
        </dependency>
        <dependency>
            <groupId>org.springframework.boot</groupId>
            <artifactId>spring-boot-starter-test</artifactId>
            <scope>test</scope>
        </dependency>
<!--        邮箱依赖-->
        <dependency>
            <groupId>org.springframework.boot</groupId>
            <artifactId>spring-boot-starter-mail</artifactId>
        </dependency>
        <dependency>
            <groupId>org.projectlombok</groupId>
            <artifactId>lombok</artifactId>
            <optional>true</optional>
        </dependency>

        <dependency>
            <groupId>org.springframework.boot</groupId>
            <artifactId>spring-boot-starter-web</artifactId>
        </dependency>

        <dependency>
            <groupId>mysql</groupId>
            <artifactId>mysql-connector-java</artifactId>
            <scope>runtime</scope>
        </dependency>
        <dependency>
            <groupId>org.projectlombok</groupId>
            <artifactId>lombok</artifactId>
            <optional>true</optional>
        </dependency>
        <dependency>
            <groupId>org.springframework.boot</groupId>
            <artifactId>spring-boot-starter-test</artifactId>
            <scope>test</scope>
        </dependency>

        <dependency>
            <groupId>commons-lang</groupId>
            <artifactId>commons-lang</artifactId>
            <version>2.6</version>
        </dependency>

        <dependency>
            <groupId>com.baomidou</groupId>
            <artifactId>mybatis-plus-boot-starter</artifactId>
            <version>3.3.2</version>
        </dependency>

        <dependency>
            <groupId>org.springframework.boot</groupId>
            <artifactId>spring-boot-starter-aop</artifactId>
        </dependency>

        <dependency>
            <groupId>io.springfox</groupId>
            <artifactId>springfox-swagger2</artifactId>
            <version>2.8.0</version>
        </dependency>
        <dependency>
            <groupId>io.springfox</groupId>
            <artifactId>springfox-swagger-ui</artifactId>
            <version>2.8.0</version>
        </dependency>
        <dependency>
            <groupId>com.github.xiaoymin</groupId>
            <artifactId>swagger-bootstrap-ui</artifactId>
            <version>1.8.5</version>
        </dependency>
        <dependency>
            <groupId>org.springframework.boot</groupId>
            <artifactId>spring-boot-starter-data-jpa</artifactId>
        </dependency>
        <dependency>
            <groupId>com.auth0</groupId>
            <artifactId>java-jwt</artifactId>
            <version>3.2.0</version>
        </dependency>
        <dependency>
            <groupId>com.alibaba</groupId>
            <artifactId>fastjson</artifactId>
            <version>1.2.75</version>
        </dependency>
        <dependency>
            <groupId>net.oschina.zcx7878</groupId>
            <artifactId>fastdfs-client-java</artifactId>
            <version>1.27.0.0</version>
        </dependency>
        <dependency>
            <groupId>com.github.tobato</groupId>
            <artifactId>fastdfs-client</artifactId>
            <version>1.26.4</version>
        </dependency>
        <dependency>
            <groupId>net.sf.json-lib</groupId>
            <artifactId>json-lib</artifactId>
            <version>2.4</version>
            <classifier>jdk15</classifier>
        </dependency>
        <dependency>
            <groupId>org.apache.httpcomponents</groupId>
            <artifactId>httpclient</artifactId>
            <version>4.5.5</version>
        </dependency>
        <dependency>
            <groupId>org.springframework.boot</groupId>
            <artifactId>spring-boot-starter-test</artifactId>
        </dependency>
        <dependency>
            <groupId>org.springframework.boot</groupId>
            <artifactId>spring-boot-starter-test</artifactId>
        </dependency>

    </dependencies>

    <build>
        <plugins>
            <plugin>
                <groupId>org.springframework.boot</groupId>
                <artifactId>spring-boot-maven-plugin</artifactId>
            </plugin>
        </plugins>
    </build>
</project>
代码链接:https://gitee.com/yao-jiayi/SendEmail.git
下载这个就行,直接上传的rar包


 1001
1001


 被折叠的 条评论
为什么被折叠?
被折叠的 条评论
为什么被折叠?
 到【灌水乐园】发言


