


P命名空间
在Spring框架中,P命名空间是一种用于简化XML配置文件中属性注入的方式。通过引入P命名空间,可以使用更简洁的语法来设置bean的属性值,而无需显式地使用<property>子元素。这使得XML配置文件更加简洁和易于阅读。
要在Spring的XML配置文件中使用p命名空间,你需要遵循以下步骤:
- 导入命名空间:首先,在根
<beans>元素中导入p命名空间。这通常是在xmlns之后添加xmlns:p="http://www.springframework.org/schema/p"。
<?xml version="1.0" encoding="UTF-8"?>
<beans xmlns="http://www.springframework.org/schema/beans"
       xmlns:xsi="http://www.w3.org/2001/XMLSchema-instance"
       xmlns:p="http://www.springframework.org/schema/p"
       xsi:schemaLocation="http://www.springframework.org/schema/beans
           http://www.springframework.org/schema/beans/spring-beans.xsd">
-
使用p命名空间:然后,你可以在
<bean>元素中使用p:propertyName="value"的形式来设置bean的属性。例如,假设我们有一个Person类,其中包含firstName和lastName属性,我们可以这样配置:<bean id="person" class="com.example.Person" p:firstName="John" p:lastName="Doe"/>这等价于使用
<property>元素的以下配置:<bean id="person" class="com.example.Person"> <property name="firstName" value="John"/> <property name="lastName" value="Doe"/> </bean>
使用p命名空间可以显著减少配置文件的大小和复杂度,尤其是在处理具有多个属性的bean时。然而,对于更复杂的注入场景(例如,集合类型或引用类型的注入),我们可能仍然需要使用传统的<property>元素。
需要注意的是,p命名空间仅适用于那些具有默认无参构造函数的bean。如果bean的构造函数需要参数,那么我们可能需要使用构造函数注入,此时p命名空间可能无法完全替代<constructor-arg>元素。
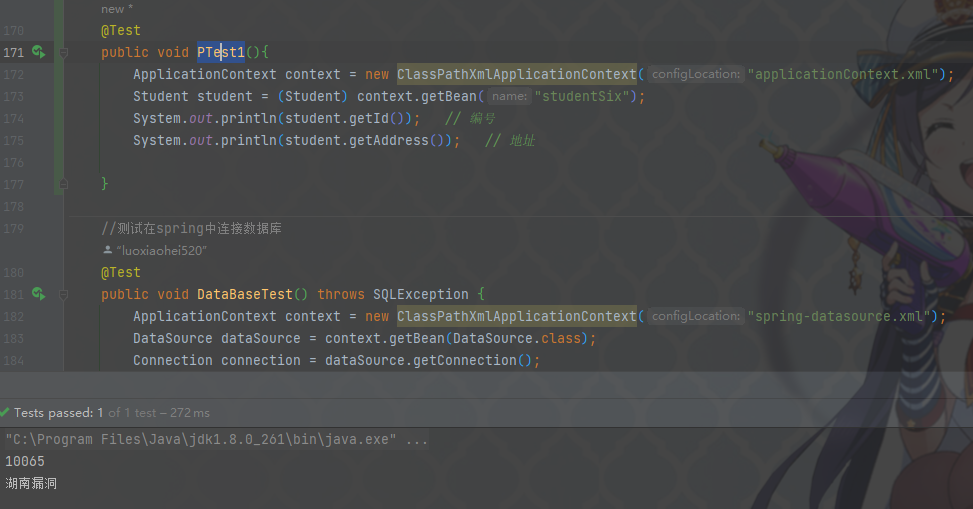
    <bean id="studentSix" class="com.miaow.spring.bean.Student"
          p:id = '10065' p:address="湖南"
    ></bean>
    @Test
    public void PTest(){
        ApplicationContext context = new ClassPathXmlApplicationContext("applicationContext.xml");
        Student student = (Student) context.getBean("studentSix");
        System.out.println(student.getId());
        System.out.println(student.getAddress());
    }
在Spring中实现引入MySQL外部链接属性文件
我们目前惯用的一套先引入依赖:
<!-- MySQL驱动 -->
<dependency>
    <groupId>mysql</groupId>
    <artifactId>mysql-connector-java</artifactId>
    <version>8.0.16</version>
</dependency>
<!-- 数据源 -->
<dependency>
    <groupId>com.alibaba</groupId>
    <artifactId>druid</artifactId>
    <version>1.0.31</version>
</dependency>
我们在Resources文件下创建一个db.properties文件
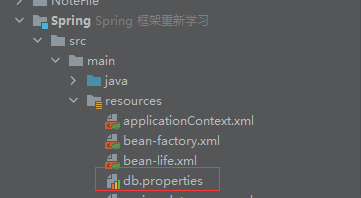
jdbc.user=root
jdbc.password=123456
jdbc.url=jdbc:mysql://localhost:3306/test?serverTimezone=UTC
jdbc.driver=com.mysql.cj.jdbc.Driver
之后我们创建一个spring-datasource.xml文件中配置
<?xml version="1.0" encoding="UTF-8"?>
<beans xmlns="http://www.springframework.org/schema/beans"
       xmlns:xsi="http://www.w3.org/2001/XMLSchema-instance"
       xmlns:context="http://www.springframework.org/schema/context"
       xsi:schemaLocation="http://www.springframework.org/schema/beans http://www.springframework.org/schema/beans/spring-beans.xsd http://www.springframework.org/schema/context https://www.springframework.org/schema/context/spring-context.xsd">

<!--    链接数据库分几种类型 第一种 db.properties 配置文件引入 -->
    <!-- 引入外部属性文件 -->
    <context:property-placeholder location="classpath:db.properties"/>

    <bean id="druidDataSource" class="com.alibaba.druid.pool.DruidDataSource">
        <property name="url" value="${jdbc.url}"/>
        <property name="driverClassName" value="${jdbc.driver}"/>
        <property name="username" value="${jdbc.user}"/>
        <property name="password" value="${jdbc.password}"/>
    </bean>

    <!--   第二种直接配置 直接将上述引入的配置文件的值填写进去就可 -->

</beans>
    @Test
    public void DataBaseTest() throws SQLException {
        ApplicationContext context = new ClassPathXmlApplicationContext("spring-datasource.xml");
        DataSource dataSource = context.getBean(DataSource.class);
        Connection connection = dataSource.getConnection();
        System.out.println(connection);
    }
出现如图所示,代表我们已经和数据库建立连接了,之后我们就可以创建相关库和表进行数据操作了。


 被折叠的 条评论
为什么被折叠?
被折叠的 条评论
为什么被折叠?
 到【灌水乐园】发言


