


导出excle表
需求场景
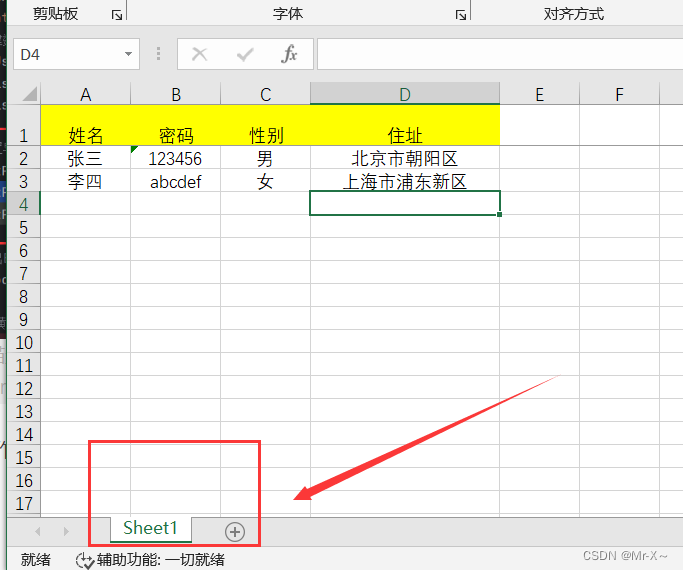
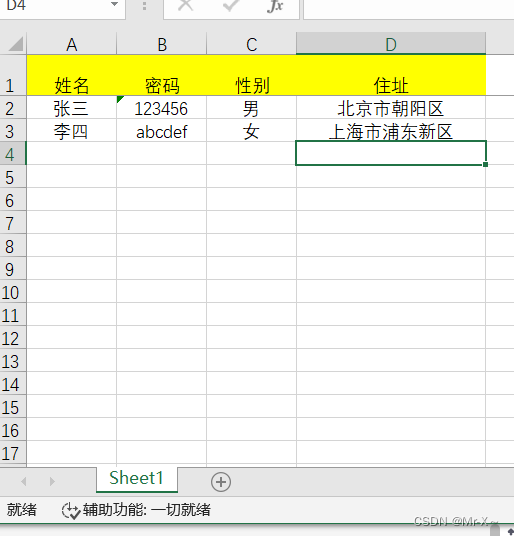
假设我们有一个需求,现在数据库中有一些用户信息,我们想要把这些信息导出到excle表格中,然后存储到本地磁盘中。要求:excle表格的第一行需要有黄色背景,然后单元格文字居中,正文的所有行高度和宽度都是自适应。
引入依赖
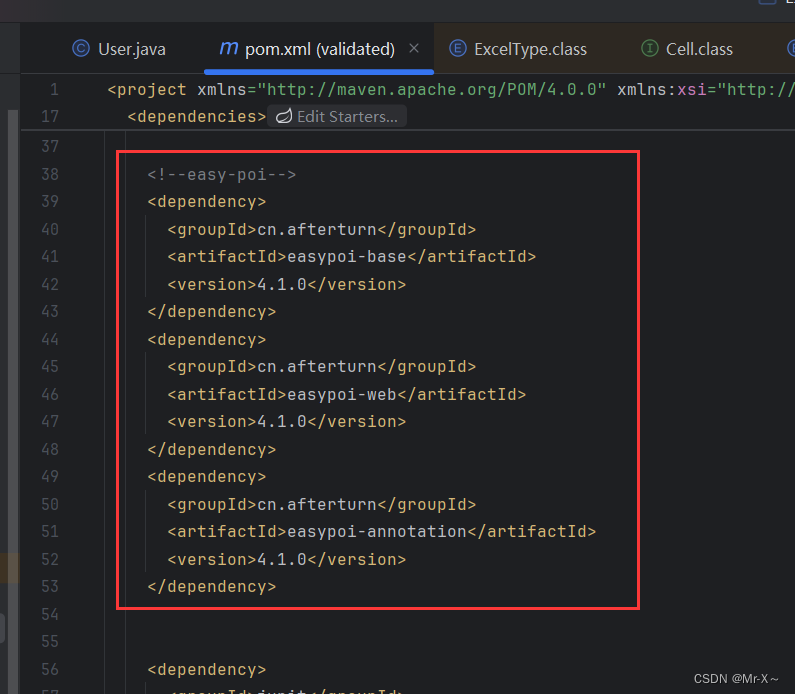
关键依赖是下面这三个,如下图:
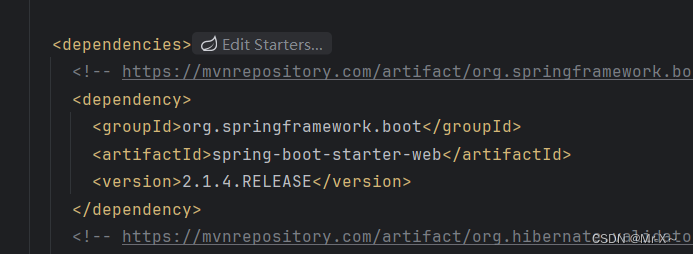
不过需要注意的是必须要和引入的spring-boot-starter-web依赖互相匹配,如下图:
全部代码如下:
<project xmlns="http://maven.apache.org/POM/4.0.0" xmlns:xsi="http://www.w3.org/2001/XMLSchema-instance"
  xsi:schemaLocation="http://maven.apache.org/POM/4.0.0 http://maven.apache.org/xsd/maven-4.0.0.xsd">
  <modelVersion>4.0.0</modelVersion>

  <groupId>org.example</groupId>
  <artifactId>validated</artifactId>
  <version>1.0-SNAPSHOT</version>
  <packaging>jar</packaging>

  <name>validated</name>
  <url>http://maven.apache.org</url>

  <properties>
    <project.build.sourceEncoding>UTF-8</project.build.sourceEncoding>
  </properties>

  <dependencies>
    <!-- https://mvnrepository.com/artifact/org.springframework.boot/spring-boot-starter-web -->
    <dependency>
      <groupId>org.springframework.boot</groupId>
      <artifactId>spring-boot-starter-web</artifactId>
      <version>2.1.4.RELEASE</version>
    </dependency>
    <!-- https://mvnrepository.com/artifact/org.hibernate.validator/hibernate-validator -->
    <dependency>
      <groupId>org.hibernate.validator</groupId>
      <artifactId>hibernate-validator</artifactId>
      <version>6.1.7.Final</version>
    </dependency>

    <!-- https://mvnrepository.com/artifact/org.projectlombok/lombok -->
    <dependency>
      <groupId>org.projectlombok</groupId>
      <artifactId>lombok</artifactId>
      <version>1.18.12</version>
    </dependency>

    <!--easy-poi-->
    <dependency>
      <groupId>cn.afterturn</groupId>
      <artifactId>easypoi-base</artifactId>
      <version>4.1.0</version>
    </dependency>
    <dependency>
      <groupId>cn.afterturn</groupId>
      <artifactId>easypoi-web</artifactId>
      <version>4.1.0</version>
    </dependency>
    <dependency>
      <groupId>cn.afterturn</groupId>
      <artifactId>easypoi-annotation</artifactId>
      <version>4.1.0</version>
    </dependency>


    <dependency>
      <groupId>junit</groupId>
      <artifactId>junit</artifactId>
      <version>3.8.1</version>
      <scope>test</scope>
    </dependency>
    <dependency>
      <groupId>org.slf4j</groupId>
      <artifactId>slf4j-api</artifactId>
      <version>1.7.16</version>
    </dependency>

    <dependency>
      <groupId>org.jetbrains</groupId>
      <artifactId>annotations-java5</artifactId>
      <version>RELEASE</version>
      <scope>compile</scope>
    </dependency>

  </dependencies>
</project>
具体代码
首先我们写一个User导出excle的类,注意需要通过@Excle属性指定excle的列名以及每列的顺序,如下图:
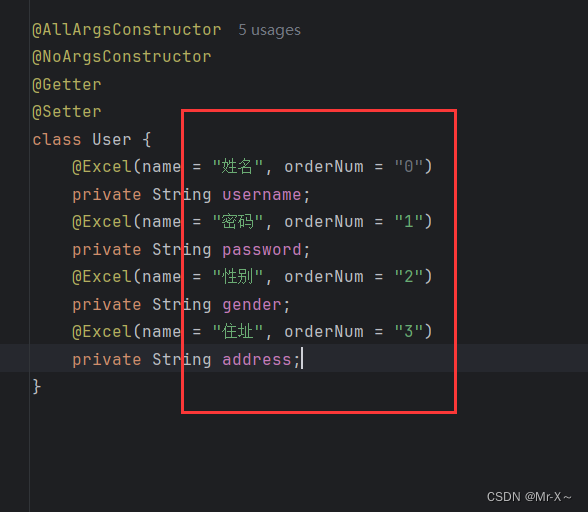
第一列是姓名,第二列是密码,第三列是性别,第四列是住址;
接着看一下具体的导出代码,如下:
package org.example.excel;
import cn.afterturn.easypoi.excel.ExcelExportUtil;
import cn.afterturn.easypoi.excel.entity.ExportParams;
import cn.afterturn.easypoi.excel.entity.enmus.ExcelType;
import org.apache.poi.ss.usermodel.*;
import java.io.FileOutputStream;
import java.io.IOException;
import java.util.ArrayList;
import java.util.List;
public class ExportExcelExample {
public static void main(String[] args) throws IOException {
// 创建数据列表
List<User> userList = new ArrayList<User>();
userList.add(new User("张三", "123456", "男", "北京市朝阳区"));
userList.add(new User("李四", "abcdef", "女", "上海市浦东新区"));
// 设置导出参数
ExportParams exportParams = new ExportParams();
exportParams.setSheetName("Sheet1"); // 设置工作表名称
exportParams.setType(ExcelType.XSSF); // 设置Excel类型为xlsx
// 导出Excel
Workbook workbook = ExcelExportUtil.exportExcel(exportParams, User.class, userList);
//创建黄色背景样式
CellStyle yellowBackground = workbook.createCellStyle();
yellowBackground.setFillForegroundColor(IndexedColors.YELLOW.getIndex());
yellowBackground.setFillPattern(FillPatternType.SOLID_FOREGROUND);
// 将两个样式合并到一个新的样式中
CellStyle combinedStyle = workbook.createCellStyle();
combinedStyle.cloneStyleFrom(yellowBackground);
//集合居中样式
combinedStyle.setAlignment(HorizontalAlignment.CENTER);
// 设置第一行背景颜色为黄色,单元格字体居中
Sheet sheet = workbook.getSheetAt(0);
Row row = sheet.getRow(0);
for (int i = 0; i < row.getLastCellNum(); i++) {
// 应用新的样式到单元格,把第一行的背景颜色设置为黄色,并且内容设置居中
row.getCell(i).setCellStyle(combinedStyle);
}
// 自适应列宽和行高
for (int i = 1; i < sheet.getPhysicalNumberOfRows(); i++) {
Row currentRow = sheet.getRow(i);
if (currentRow != null) {
currentRow.setHeight((short) -1); // 自动调整行高
for (int j = 0; j < currentRow.getPhysicalNumberOfCells(); j++) {
Cell cell = currentRow.getCell(j);
if (cell != null) {
int columnWidth = sheet.getColumnWidth(j);
int contentLength = cell.toString().getBytes().length;
columnWidth = Math.max(columnWidth, contentLength * 256);
sheet.setColumnWidth(j, columnWidth);
}
}
}
}
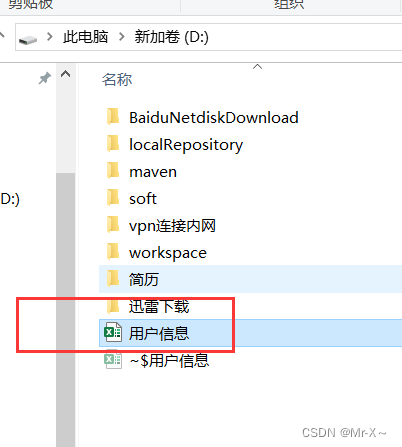
// 保存到文件
try {
FileOutputStream fileOut = new FileOutputStream("D:/用户信息.xlsx");
workbook.write(fileOut);
} catch (Exception e) {
e.printStackTrace();
}
// 关闭工作簿
workbook.close();
}
}
几个关键地方如下图:
首先是ExportParams导出参数的设置
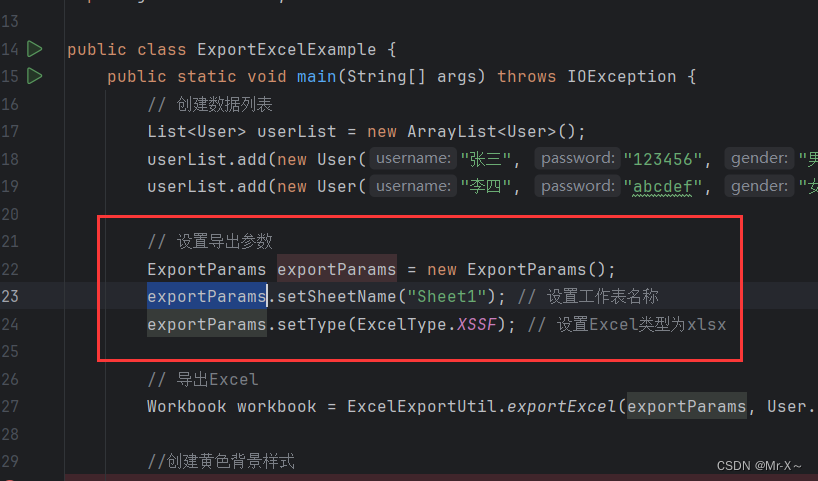
这里是设置我们工作表的名字为Sheet1,效果如下图:
具体的导出结果会存放到WorkBook类中
看下我们导出数据到excle的工具方法,如下图:
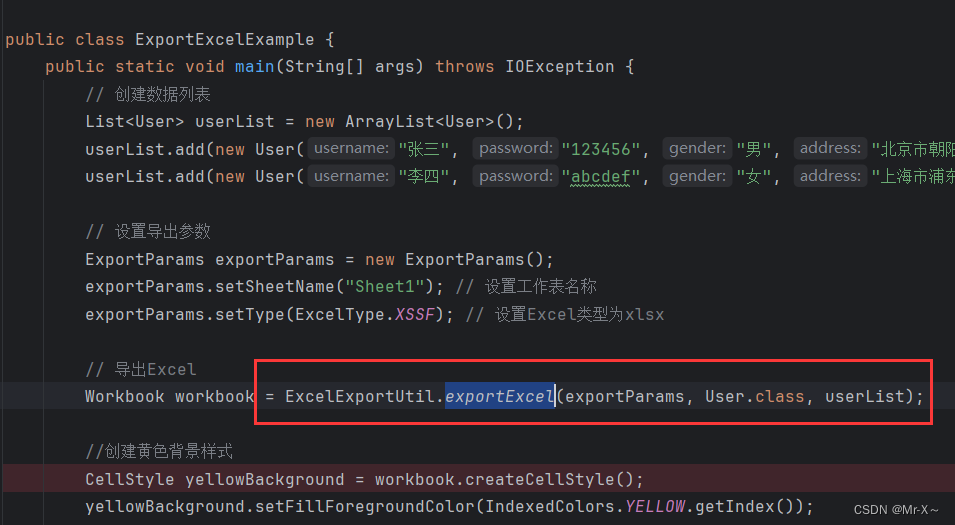
ExcelExportUtil.exportExcel工具方法可以把数据导出到excel中,它有三个参数,第一个参数是“导出参数类”,第二个参数是导出列对应的类User,第三个参数就是具体的导出数据集合;
最后会得到一个Workbook类,这个类中存储着我们所有的导出数据,就相当于是一个excel文件的工作簿;
其实到这里我们就已经完成了把数据导出到excel表中的操作,但是我们有时候需要给excel表设置样式,因此就有了下面的操作;
首行设置黄色背景、单元格字体居中;正文所有行高度宽度自适应
首先来看下首行设置黄色背景、单元格字体居中,如下图:
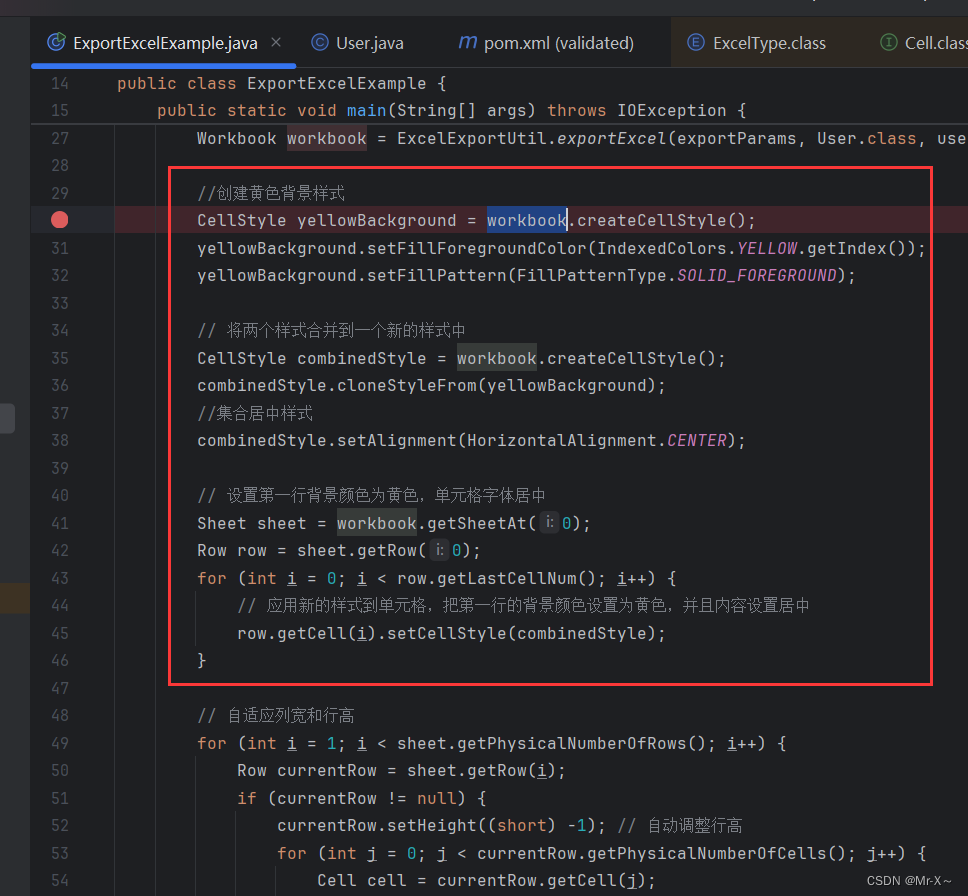
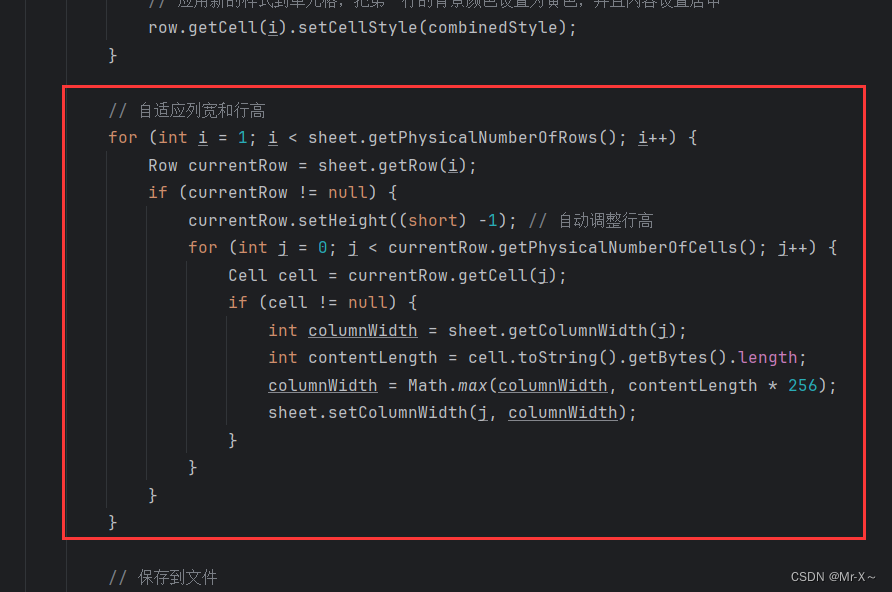
接着再来看下正文所有行高度宽度自适应,如下图:
最后一步:通过输出流把excel导出到具体的磁盘位置;然后关闭Workbook工作簿释放资源
如下图:

看一下导出结果,如下图:


 8460
8460


 被折叠的 条评论
为什么被折叠?
被折叠的 条评论
为什么被折叠?
 到【灌水乐园】发言


