


简介
该文档旨在介绍一个基于Spring Boot框架的简单文件上传功能的实现方式。本文档将详细介绍相关代码的功能和配置以及如何使用它们。
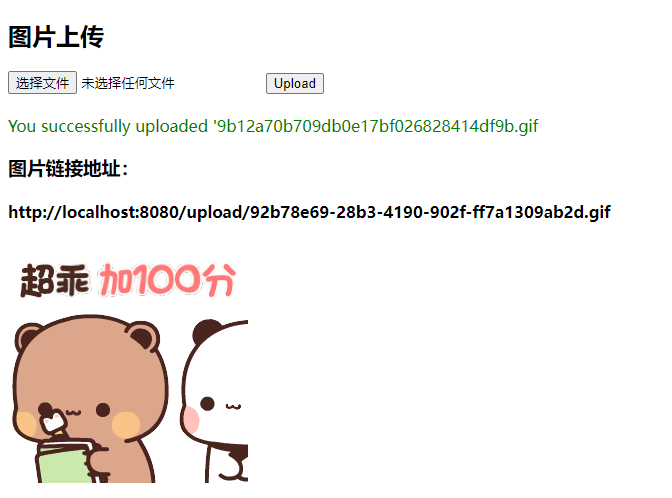
样例
技术栈
- Spring Boot:一个用于快速开发基于Spring的应用程序的框架。
- Thymeleaf:一个用于在Web应用程序中创建动态内容的Java模板引擎。
- YAML:一种人类可读的数据序列化语言。
文件结构
- upload:存放上传的文件。
- src
  - main
    - java
      - com.example
        - controller
          - ImageUploadController.java:处理文件上传请求的控制器类。
    - resources
      - static:存放静态资源文件。
      - templates
        - index.html:文件上传表单页面。
      - application.yml:配置文件,指定了文件上传路径。
文件上传功能介绍
文件上传功能允许用户通过一个简单的界面上传图片,并提供了显示已上传图片的链接以及预览功能。
代码解析
1. ImageUploadController.java
@Controller
public class ImageUploadController {

    // 从配置文件中注入上传路径
    @Value("${upload.path}")
    private String uploadDir;

    // 显示文件上传表单页面
    @GetMapping("/")
    public String showUploadForm() {
        return "index";
    }

    // 处理文件上传请求
    @PostMapping("/upload")
    public String handleFileUpload(@RequestParam("file") MultipartFile file, RedirectAttributes redirectAttributes) {
        if (file.isEmpty()) {
            redirectAttributes.addFlashAttribute("message", "文件为空,请重新上传!");
            return "redirect:/";
        }
        try {
            // 生成一个唯一的文件名
            String newFileName = UUID.randomUUID().toString();
            // 获取文件原始名称
            String originalFilename = StringUtils.cleanPath(file.getOriginalFilename());
            // 提取文件后缀名
            String suffix = originalFilename.substring(originalFilename.lastIndexOf("."));
            newFileName = newFileName + suffix;

            // 创建上传文件夹的路径对象
            Path uploadPath = Paths.get(uploadDir);
            // 如果上传文件夹不存在,创建该文件夹
            if (!Files.exists(uploadPath)) {
                Files.createDirectories(uploadPath);
            }
            // 上传文件的完整路径
            Path filePath = uploadPath.resolve(newFileName);

            // 将上传的文件内容写入到磁盘
            try (InputStream inputStream = file.getInputStream();
                 OutputStream outputStream = Files.newOutputStream(filePath)) {
                byte[] buffer = new byte[1024];
                int bytesRead;
                while ((bytesRead = inputStream.read(buffer)) != -1) {
                    outputStream.write(buffer, 0, bytesRead);
                }
            }

            // 构建上传文件的URL
            String fileUrl = ServletUriComponentsBuilder.fromCurrentContextPath().path("/upload/").path(newFileName).toUriString();

            // 将上传成功的消息和文件链接放入重定向属性中
            redirectAttributes.addFlashAttribute("message", "You successfully uploaded '" + file.getOriginalFilename() + "'");
            redirectAttributes.addFlashAttribute("fileUrl", fileUrl);

        } catch (IOException e) {
            e.printStackTrace();
        }

        // 重定向回上传页面
        return "redirect:/";
    }

    // 处理获取已上传文件的请求,提供文件下载功能
    @GetMapping("/upload/{fileName:.+}")
    @ResponseBody
    public ResponseEntity<Resource> serveFile(@PathVariable String fileName) {
        Resource file = loadFileAsResource(fileName);
        return ResponseEntity.ok()
                .header(HttpHeaders.CONTENT_DISPOSITION, "attachment; filename=\"" + file.getFilename() + "\"")
                .contentType(MediaType.IMAGE_JPEG)
                .body(file);
    }

    // 加载已上传的文件资源
    private Resource loadFileAsResource(String fileName) {
        try {
            // 获取文件路径
            Path filePath = Paths.get(uploadDir).resolve(fileName).normalize();
            // 根据文件路径创建资源对象
            Resource resource = new org.springframework.core.io.UrlResource(filePath.toUri());
            // 如果资源存在,返回资源对象
            if (resource.exists()) {
                return resource;
            } else {
                throw new RuntimeException("File not found " + fileName);
            }
        } catch (MalformedURLException ex) {
            throw new RuntimeException("File not found " + fileName, ex);
        }
    }
}
2. index.html
<!DOCTYPE html>
<html lang="zh-CN" xmlns:th="http://www.thymeleaf.org">
  <head>
    <meta charset="UTF-8">
    <title>图片上传</title>
  </head>
  <body>
    <h2>图片上传</h2>
    <form action="/upload" method="post" enctype="multipart/form-data">
      <!-- 文件上传表单 -->
      <input type="file" name="file" accept="image/*">
      <button type="submit">Upload</button>
    </form>

    <br>

    <!-- 上传成功消息 -->
    <div th:if="${message}" th:text="${message}" style="color: green;"></div>
    <h3>图片链接地址:</h3>
    <h4 th:text="${fileUrl}"></h4>
    <!-- 图片预览 -->
    <div th:if="${fileUrl}">
      <img th:src="${fileUrl}" alt="Uploaded Image" style="max-width: 300px;">
    </div>
  </body>
</html>
3. application.yml
upload:
  path: upload/  # 文件上传路径配置
如何使用
- 启动应用程序。
- 访问应用程序的根路径(通常是http://localhost:8080/)。
- 在页面上选择要上传的图片文件并点击"Upload"按钮。
- 等待上传完成,页面将显示上传成功的消息和图片链接。
- 可以点击图片链接查看上传的图片。
注意事项
- 上传的文件将保存在指定的上传路径中,请确保该路径的权限设置正确。
- 本示例中仅支持图片文件上传,其他类型的文件可能无法正常预览或下载。
- 请根据实际需求修改上传路径和其他配置参数。
结论
该文档详细介绍了一个基于Spring Boot的简单文件上传功能的实现方式,提供了代码解析和使用说明,希望能够帮助您理解和使用该功能。


 1万+
1万+

 被折叠的 条评论
为什么被折叠?
被折叠的 条评论
为什么被折叠?
 到【灌水乐园】发言


