


3.可以通过@Param注解标识mapper接口中的方法参数
一.关于mybatis 的基础知识
1.mybatis的特点
1) MyBatis 是支持定制化 SQL、存储过程以及高级映射的优秀的持久层框架
2) MyBatis 避免了几乎所有的 JDBC 代码和手动设置参数以及获取结果集
3) MyBatis可以使用简单的XML或注解用于配置和原始映射,将接口和Java的POJO(Plain Old JavaObjects,普通的Java对象)映射成数据库中的记录
4) MyBatis 是一个 半自动的ORM(Object Relation Mapping)框架
2.映射文件
1、映射文件的命名规则:
表所对应的实体类的类名+Mapper.xml
例如:表t_user,映射的实体类为User,所对应的映射文件为UserMapper.xml
因此一个映射文件对应一个实体类,对应一张表的操作
MyBatis映射文件用于编写SQL,访问以及操作表中的数据
MyBatis映射文件存放的位置是src/main/resources/mappers目录下
2、MyBatis中可以面向接口操作数据,要保证两个一致:
a>mapper接口的全类名和映射文件的命名空间(namespace)保持一致
b>mapper接口中方法的方法名和映射文件中编写SQL的标签的id属性保持一致
3.sqlSession
SqlSession:代表Java程序和数据库之间的会话。(HttpSession是Java程序和浏览器之间的
会话)
SqlSessionFactory:是“生产”SqlSession的“工厂”。
工厂模式:如果创建某一个对象,使用的过程基本固定,那么我们就可以把创建这个对象的
相关代码封装到一个“工厂类”中,以后都使用这个工厂类来“生产”我们需要的对象
二 框架搭建
1.所需要的依赖
  <dependencies>
        <dependency>
            <groupId>junit</groupId>
            <artifactId>junit</artifactId>
            <version>4.12</version>
            <scope>test</scope>
        </dependency>
        <!-- https://mvnrepository.com/artifact/mysql/mysql-connector-java 和自己的MySQL版本一样 -->
        <dependency>
            <groupId>mysql</groupId>
            <artifactId>mysql-connector-java</artifactId>
            <version>8.0.21</version>
        </dependency>
        <!-- https://mvnrepository.com/artifact/org.mybatis/mybatis -->
        <dependency>
            <groupId>org.mybatis</groupId>
            <artifactId>mybatis</artifactId>
            <version>3.5.7</version>
        </dependency>
        <!-- https://mvnrepository.com/artifact/log4j/log4j 日志功能 -->
        <dependency>
            <groupId>log4j</groupId>
            <artifactId>log4j</artifactId>
            <version>1.2.17</version>
        </dependency>


    </dependencies>
2.核心配置文件(常用的已经配上注释)
<?xml version="1.0" encoding="UTF-8" ?>
<!DOCTYPE configuration
        PUBLIC "-//mybatis.org//DTD Config 3.0//EN"
        "http://mybatis.org/dtd/mybatis-3-config.dtd">
<configuration>
    <!--  标签顺序 需要按照顺序填写(properties?,settings?,
typeAliases?,typeHandlers?,objectFactory?,objectWrapperFactory?,
reflectorFactory?,plugins?,environments?,databaseIdProvider?,mappers?)"-->
    <!--    导入数据库配置文件 -->
    <properties resource="jdbc.properties"/>
    <!--    设置类型别名(不区分大小写)  -->
    <settings>
<!--        将自动映射为驼峰 emp_name empName-->
<!--        <setting name="mapUnderscoreToCamelCase" value="true"/>-->
        <!--        开启延迟加载 意义 分布查询第一步的后面都不会执行-->
    <setting name="lazyLoadingEnabled" value="true"/>
    </settings>
    <typeAliases>
        <!--    默认是类名   alias别名内容(可省略)-->
        <!-- <typeAlias type="com.remained.pojo.Student" alias="User"/>-->

        <package name="top.remained.pojo"/>
    </typeAliases>
    <!--    environments 配置连接数据库的多个环境
                default 默认使用的一个环境
                   id   单个环境的唯一标识-->
    <environments default="development">
        <environment id="development">
            <transactionManager type="JDBC"/>
            <!--    transactionManager 设置事务管理方式
        属性type="JDBC/MANAGED"
            JDBC 表示当前环境执行sql时用的是原生的JDBC事务管理(即需要手动处理)
            MANAGED:被管理(例如spring)-->

<!-- 上面的并没有提交事务,所以我们要手动提交-->
<!-- NPOOLED - 每次请求的时候简单的打开和关闭一个连接。不需要性能和立即响应的简单应用
POOLED - 这个数据源缓存 JDBC 连接对象用于避免每次都要连接和生成连接实例而需要的
0验证时间。对于并发 WEB 应用,它有最快的响应时间。
JNDI - 和 Spring 或应用服务一起使用,可以在外部和内部配置这个数据源,
然后在 JNDI 上下文中引用它。这个数据源配置只需要两上属性-->
            <dataSource type="POOLED">
                <property name="driver" value="${jdbc.driver}"/>
                <property name="url" value="${jdbc.url}"/>
                <property name="username" value="${jdbc.user}"/>
                <property name="password" value="${jdbc.pwd}"/>
            </dataSource>
        </environment>
    </environments>
    <!--    引入映射文件-->
    <mappers>
        <!--       引入单个映射文件-->
<!--   <mapper resource="top/remained/mapper/StudentMapper.xml"/>-->
        <!--        如果映射多个文件也可以使用package标签-->
        <!-- 1.mapper接口所在的包要和映射接口所在的包一致
             2.mapper接口要和映射文件的名字一致       -->
        <package name="top.remained.mapper"/>
    </mappers>
</configuration>
3.jdbc配置文件
jdbc.driver=com.mysql.cj.jdbc.Driver
jdbc.url=jdbc:mysql://localhost/mybatis_test?serverTimezone=UTC
jdbc.user=root
jdbc.pwd=123456
4.log4j的配置文件
<?xml version="1.0" encoding="UTF-8" ?>
<!DOCTYPE log4j:configuration SYSTEM "log4j.dtd">
<log4j:configuration xmlns:log4j="http://jakarta.apache.org/log4j/">
    <appender name="STDOUT" class="org.apache.log4j.ConsoleAppender">
        <param name="Encoding" value="UTF-8"/>
        <layout class="org.apache.log4j.PatternLayout">
            <param name="ConversionPattern" value="%-5p %d{MM-dd HH:mm:ss,SSS}
%m (%F:%L) \n"/>
        </layout>
    </appender>
    <logger name="java.sql">
        <level value="debug"/>
    </logger>
    <!--    name 是范围-->
    <!--    level是级别FATAL(致命)>ERROR(错误)
>WARN(警告)>INFO(信息)>DEBUG(调试)-->
    <logger name="org.apache.ibatis">
        <level value="info"/>
    </logger>
    <root>
        <level value="debug"/>
        <appender-ref ref="STDOUT"/>
    </root>
</log4j:configuration>
5.框架所需要的基本结构
1.mapper接口
public interface StudentMapper {
}
2.实体类
package top.remained.pojo;

/**
 * Project:mybaitis_final
 * Date:2022/7/18
 * Time:14:23
 * Description:TODO
 *

 * @version 1.0
 */

public class Student {
    private int sId;
    private int cId;
    private String sName;
    private int sAge;
    private String sSex;
    private Course course;

    public Student() {
    }

    public Student(int sId, String sName) {
        this.sId = sId;
        this.sName = sName;
    }

    public Student(int cId, String sName, Course course) {
        this.cId = cId;
        this.sName = sName;
        this.course = course;
    }

    public Student(int sId, int cId, String sName, int sAge, String sSex) {
        this.sId = sId;
        this.cId = cId;
        this.sName = sName;
        this.sAge = sAge;
        this.sSex = sSex;
    }

    public Course getCourse() {
        return course;
    }

    public void setCourse(Course course) {
        this.course = course;
    }

    public int getsId() {
        return sId;
    }

    public void setsId(int sId) {
        this.sId = sId;
    }

    public int getcId() {
        return cId;
    }

    public void setcId(int cId) {
        this.cId = cId;
    }

    public String getsName() {
        return sName;
    }

    public void setsName(String sName) {
        this.sName = sName;
    }

    public int getsAge() {
        return sAge;
    }

    public void setsAge(int sAge) {
        this.sAge = sAge;
    }

    public String getsSex() {
        return sSex;
    }

    public void setsSex(String sSex) {
        this.sSex = sSex;
    }

    @Override
    public String toString() {
        return "Student{" +
                "sId=" + sId +
                ", cId=" + cId +
                ", sName='" + sName + '\'' +
                ", sAge=" + sAge +
                ", sSex='" + sSex + '\'' +
                ", course=" + course +
                '}';
    }
}
3.数据库的表

4.与mapper对应的映射文件
<?xml version="1.0" encoding="UTF-8" ?>
<!--上面的是声明-->
<!--表示约束 <!DOCTYPE mapper
        PUBLIC "-//mybatis.org//DTD Mapper 3.0//EN"
        "http://mybatis.org/dtd/mybatis-3-mapper.dtd">
         DOCTYPE 后面的必是配置文件中的根标签-->
<!DOCTYPE mapper
        PUBLIC "-//mybatis.org//DTD Mapper 3.0//EN"
        "http://mybatis.org/dtd/mybatis-3-mapper.dtd">
<mapper namespace="top.remained.mapper.StudentMapper">


</mapper>
6.测试
//    获取所有学生的信息
      public List<Student> getAllStudent();
<select id="getAllStudent" resultType="Student">
select *
from student
</select>public class Te {
@Test
public void te() throws Exception {
//1.创建IO读取配置文件 import org.apache.ibatis.io.Resources;
InputStream fis = Resources.getResourceAsStream("mybatisConfig.xml");
// 2.通过该文件Builder创建SqlSessionFactory对象
SqlSessionFactory sf = new SqlSessionFactoryBuilder().build(fis);
// 3.通过SqlSessionFactory对象创建SqlSession //参数ture 就是可以自动提交事务
// openSession()
SqlSession ss = sf.openSession();
List<Student> list = ss.selectList("top.remained.mapper.StudentMapper.getAllStudent");
for (Student stu :
list) {
System.out.println(stu);
}
}三. mybatis的常用知识
1 .自动映射和自定义映射
1、查询的标签select必须设置属性resultType或resultMap,用于设置实体类和数据库表的映射
关系
resultType:自动映射,用于属性名和表中字段名一致的情况
resultMap:自定义映射,用于一对多或多对一或字段名和属性名不一致的情况
2、当查询的数据为多条时,不能使用实体类作为返回值,只能使用集合,否则会抛出异常
TooManyResultsException;但是若查询的数据只有一条,可以使用实体类或集合作为返回值
2. 获取参数
注:mybatis获取参数时只获取到了其值并没有获取参数名
1.${}和#{}
MyBatis获取参数值的两种方式:${}和#{}
${}的本质就是字符串拼接,#{}的本质就是占位符赋值
${}使用字符串拼接的方式拼接sql,若为字符串类型或日期类型的字段进行赋值时,需要手动加单引号;但是#{}使用占位符赋值的方式拼接sql,此时为字符串类型或日期类型的字段进行赋值时,可以自动添加单引号
注 #{}使用时自动加引号 ${}不加引号
2.若mapper接口中的方法参数为实体类对象时
此时可以使用${属性名}和#̲{属性名}直接访问问
3.可以通过@Param注解标识mapper接口中的方法参数
此时,会将这些参数放在map集合中,以@Param注解的value属性值为键,以参数值为值;以
param1,param2…为键,以参数值为值;
4.若mapper接口中的方法参数为多个时
此时MyBatis会自动将这些参数放在一个map集合中,以arg0,arg1…为键,以参数值为值;
以param1,param2…为键,以参数值为值;
3.根据上面知识的一些常用的查询
1. 增删改查
<!-- 增加数据-->
<insert id="addStudent">
insert into student values (#{sId},#{cId},#{sName},#{sAge},#{sSex})
</insert>
<!-- 删除数据-->
<delete id="delStudent">
delete from student where sId=#{sId}
</delete>
<!-- 修改数据-->
<update id="updateStudent">
update student set sName=#{sName} where sId=#{sId}
</update>
 <select id="getAllStudent" resultType="Student">
        select *
        from student
 </select>
      //    获取所有学生的信息
      public List<Student> getAllStudent();
      //      增加数据
      public void addStudent(Student student);
      //    删除一行数据
      public void delStudent(@Param("sId") int sId);
      //      根据id修改名字
      public  void updateStudent(Student student);
注 :这里因为一直重复新建SqlSession所以封装成了工具类如下
package top.remained.util;

import org.apache.ibatis.io.Resources;
import org.apache.ibatis.session.SqlSession;
import org.apache.ibatis.session.SqlSessionFactory;
import org.apache.ibatis.session.SqlSessionFactoryBuilder;

import java.io.IOException;
import java.io.InputStream;

/**
 * Project:mybaitis_final
 * Date:2022/7/18
 * Time:20:07
 * Description:TODO
 *

 * @version 1.0
 */
public class SqlSessionFactoryT {
    public  static SqlSession getSqlSession() throws Exception {
        InputStream is = Resources.getResourceAsStream("mybatisConfig.xml");
        SqlSessionFactory s = new SqlSessionFactoryBuilder().build(is);
        return s.openSession(true);
    }
}
    //    增加数据
    @Test
    public void te5() throws Exception {
        SqlSession sqlSession = SqlSessionFactoryT.getSqlSession();
        sqlSession.insert("top.remained.mapper.StudentMapper.addStudent", new Student(20, 12, "gg", 12, "男"));
        sqlSession.commit();
    }

    //    删除数据
    @Test
    public void te6() throws Exception {
        SqlSession sqlSession = SqlSessionFactoryT.getSqlSession();
        StudentMapper mapper = sqlSession.getMapper(StudentMapper.class);
        mapper.delStudent(10);
        sqlSession.commit();
    }

    //    修改数据
    @Test
    public void te7() throws Exception {
        SqlSession s = SqlSessionFactoryT.getSqlSession();
        StudentMapper mapper = s.getMapper(StudentMapper.class);
        mapper.updateStudent(new Student(8, "李四"));
    }
    //  查询数据
    @Test
    public void te1() throws Exception {
//        1.
        InputStream is = Resources.getResourceAsStream("mybatisConfig.xml");
//        2.
        SqlSessionFactory sf = new SqlSessionFactoryBuilder().build(is);
//        3.
        SqlSession s = sf.openSession();
//        4.
        StudentMapper mapper = s.getMapper(StudentMapper.class);
//
        List<Student> list = mapper.getAllStudent();

        for (Student student :
                list) {
            System.out.println(student);
        }

        System.out.println(mapper.getStudentById(10));

    }
2.模糊查询
    //    模糊查询
    @Test
    public void te4() throws Exception {
        SqlSession sqlSession = SqlSessionFactoryT.getSqlSession();
        StudentMapper mapper = sqlSession.getMapper(StudentMapper.class);
        List<Student> s = mapper.getStudentByName("三");
        for (Student stu :
                s) {
            System.out.println(stu);
        }
    }
// 根据姓名进行模糊查询(多个结果集,不能只返回一个)
public List<Student> getStudentByName(@Param("sName") String sName); <!-- 模式查询 占位符会被当成字符串 因为有引号 导致我们为占位符赋值时找不到通配符-->
<!-- 可以用字符串拼接 select * from m_student where name like concat('%',#{name},'%')-->
<!-- 最常用的 select * from m_student where name like “%”#{name}”%“-->
<select id="getStudentByName" resultType="Student">
select *
from student where sName like "%"#{sName}"%"
</select>3.以map传参方式实现登录
准备另一张表Course 结构同上

//    用map实现登录功能
    public Course login(Map<String,Object> map) ;
<!-- sql登录功能-->
<select id="login" resultType="Course">
select * from course where cId=#{userId} and cName=#{password}
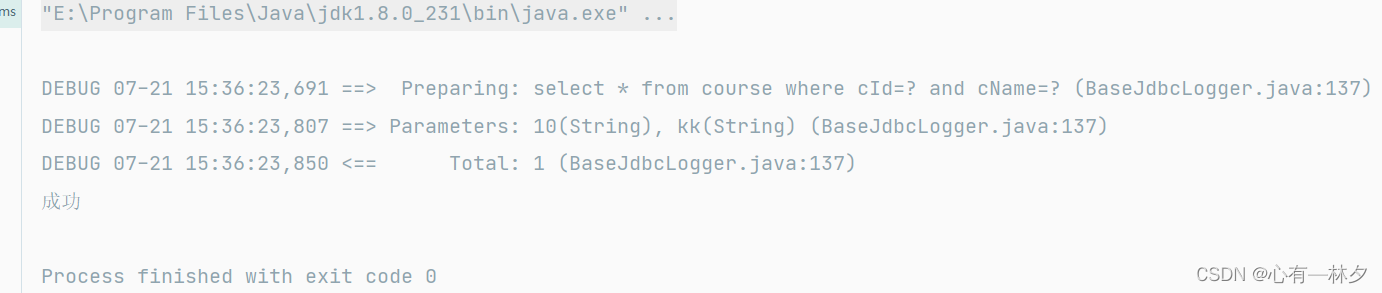
</select> @Test
public void test30() throws Exception {
SqlSession sqlSession = SqlSessionFactoryT.getSqlSession();
CourseMapper mapper = sqlSession.getMapper(CourseMapper.class);
HashMap<String, Object> map = new HashMap<>();
map.put("userId","10");
map.put("password","kk");
System.out.println();
if (mapper.login(map) == null) {
System.out.println("defeat");
}else {
System.out.println("成功");
}
} 
4.多对一的映射
在一里面创建多的对象 即在学生类里创建course属性,并设置其set,get方法
1.级联属性赋值
//      多对一进行查询
      public List<Student> getTwoTable();
<!-- 1.级联属性赋值-->
<resultMap id="TwoTable1" type="Student">
<id property="sId" column="sId"/>
<result property="cId" column="cId"/>
<result property="sName" column="sName"/>
<result property="sAge" column="sAge"/>
<result property="sSex" column="sSex"/>
<result property="course.cId" column="cId"/>
<result property="course.cName" column="cName"/>
<result property="course.tName" column="tName"/>
</resultMap>
<select id="getTwoTable" resultMap="TwoTable1">
select sName,course.cId,cName,tName from student,course
where course.cId=student.cId
</select>
<!-- Student{sId=0, cId=1, sName='zz', sAge=0, sSex='null',
course=Course{cId=1, cName='java', tName='zz'}}
虽然没查但还是返回默认值 本来以为没有与之对应的构造器,
结果就算有构造器结果还是一样 把不需要的注释掉也没用
-->2.采用association
<!--    2.  采用association 处理多对一的映射
            JavaType 该属性的类型 通常是实体类
                property 处理多对关系的属性名
            输出结果完全和上面一样-->
    <resultMap id="TwoTable2" type="Student">
        <id property="sId" column="sId"/>
        <result property="cId" column="cId"/>
        <result property="sName" column="sName"/>
        <result property="sAge" column="sAge"/>
        <result property="sSex" column="sSex"/>
        <association property="course" javaType="Course">
            <id property="cId" column="cId"/>
            <result property="cName" column="cName"/>
            <result property="tName" column="tName"/>
        </association>
    </resultMap>
    <select id="getTwoTable" resultMap="TwoTable2">
        select  sName,course.cId,cName,tName from student,course
        where course.cId=student.cId
    </select>
3.采用分布查询(最常用)
通过分布查询 顾名思义 第一步 查询学生的信息 第二步 根据查到的cId课程信息查询课程-->
    <!--    分布查询提第一步-->
     <select id="getTwoTable"    resultMap="TwoTable3">
        select * from student
    </select>
  <!--    分布查询第二步 根据查到的cId查询课程信息这个要放在courseMapper里-->
<!--    <select id="getCourseById" resultType="Course">-->
<!--        select * from course where cId=#{cId}-->
<!--    </select>-->
<!--    select 分布查询时的sql的唯一标识 全类名.方法名
        column 分布查询第二步的条件
        开启延迟加载之后 fetchType才可以操作
         fetchType="eager"  立即加载
         fetchType="lazy"  延迟加载
         -->
    <resultMap id="TwoTable3" type="Student">
        <id property="sId" column="sId"/>
        <result property="cId" column="cId"/>
        <result property="sName" column="sName"/>
        <result property="sAge" column="sAge"/>
        <result property="sSex" column="sSex"/>
        <association property="course"
select="top.remained.mapper.CourseMapper.getCourseById"
        column="cId"  fetchType="eager"
        />
    </resultMap>
4.测试
    //    多对一进行查询
    @Test
    public void te10() throws Exception {
        SqlSession s = SqlSessionFactoryT.getSqlSession();
        StudentMapper mapper = s.getMapper(StudentMapper.class);
        List<Student> twoTable = mapper.getTwoTable();
        for (Student student :
                twoTable) {
            System.out.println(student);
        }
    }
5.结果

5.动态SQL
特点:动态SQL技术是一种根据特定条件动态拼装SQL语句的功能.
1 IF标签
if标签可通过test属性的表达式进行判断,若表达式的结果为true,则标签中的内容会执行;反之标签中的内容不会执行
<!--List<Emp> getEmpListByMoreTJ(Emp emp);-->
<select id="getEmpListByMoreTJ" resultType="Emp">
select * from t_emp where 1=1
<if test="ename != '' and ename != null">
and ename = #{ename}
</if>
<if test="age != '' and age != null">
and age = #{age}
</if>
<if test="sex != '' and sex != null">
and sex = #{sex}
</if>
</select>
2 where标签
a>若where标签中的if条件都不满足,则where标签没有任何功能,即不会添加where关键字
b>若where标签中的if条件满足,则where标签会自动添加where关键字,并将条件最前方多余的and去掉
注意:where标签不能去掉条件最后多余的and
<select id="getEmpListByMoreTJ2" resultType="Emp">
select * from t_emp
<where>
<if test="ename != '' and ename != null">
ename = #{ename}
</if>
<if test="age != '' and age != null">
and age = #{age}
</if>
<if test="sex != '' and sex != null">
and sex = #{sex}
</if>
</where>
</select>
3.trim
用于去掉或添加标签中的内容
常用属性:
prefix:在trim标签中的内容的前面添加某些内容
prefixOverrides:在trim标签中的内容的前面去掉某些内容
suffix:在trim标签中的内容的后面添加某些内容
suffixOverrides:在trim标签中的内容的后面去掉某些内容
<select id="getEmpListByMoreTJ" resultType="Emp">
select * from t_emp
<trim prefix="where" suffixOverrides="and">
<if test="ename != '' and ename != null">
ename = #{ename} and
</if>
<if test="age != '' and age != null">
age = #{age} and
</if>
<if test="sex != '' and sex != null">
常用属性:
prefix:在trim标签中的内容的前面添加某些内容
prefixOverrides:在trim标签中的内容的前面去掉某些内容
suffix:在trim标签中的内容的后面添加某些内容
suffixOverrides:在trim标签中的内容的后面去掉某些内容
4、choose、when、otherwise
choose、when、otherwise相当于if...else if..else
5、foreach
sex = #{sex}
</if>
</trim>
</select>
4.foreach(常用)
属性:
collection:设置要循环的数组或集合
item:表示集合或数组中的每一个数据
separator:设置循环体之间的分隔符
open:设置foreach标签中的内容的开始符
close:设置foreach标签中的内容的结束符
批量添加
//      批量添加数据
    public int addCourses(@Param("courses") List<Course> list) ;
<!-- 批量添加数据-->
<insert id="addCourses">
insert into course values
<foreach collection="courses" item="course" separator=",">
(${course.cId},#{course.cName},#{course.tName})
</foreach>// 批量添加
@Test
public void te21() throws Exception {
SqlSession s = SqlSessionFactoryT.getSqlSession();
CourseMapper mapper = s.getMapper(CourseMapper.class);
Course course = new Course(120, "kk", "ll");
Course course1 = new Course(10, "kk", "ll");
List<Course> courses = Arrays.asList(course1, course);
System.out.println(mapper.addCourses(courses));
}批量删除
//    批量删除
    @Test
    public void te22() throws Exception {
        SqlSession s = SqlSessionFactoryT.getSqlSession();
        CourseMapper mapper = s.getMapper(CourseMapper.class);
        System.out.println(mapper.delCourses(new int[]{110, 120}));

    }
// 批量删除数据 也可以用String foreach的写法不同
public int delCourses(@Param("cIds") int[] cIds) ; <!-- 批量删除数据 #{}带引号 ${}不带引号 -->
<delete id="delCourses" >
delete from course where cId in
<foreach collection="cIds" item="cId" separator="," open="(" close=")">
${cId}
</foreach>
</delete>5.sql片段
一些常用的查询字段可以写成sql片段
<!--    sql片段 虽报错,但能用
        id标识 使用时include refid="bs" 很简单-->
    <sql id="bs">cId,cName</sql>
    <select id="sqlPart" resultType="Course">
        select <include refid="bs"/> from course where cId=#{cId}
    </select>
四. mybatis的缓存
1. 一级缓存
一级缓存是SqlSession级别的,通过同一个SqlSession查询的数据会被缓存,下次查询相同的数据,就
会从缓存中直接获取,不会从数据库重新访问
使一级缓存失效的四种情况:
不同的SqlSession对应不同的一级缓存
同一个SqlSession但是查询条件不同
同一个SqlSession两次查询期间执行了任何一次增删改操作
同一个SqlSession两次查询期间手动清空了缓存
2.二级缓存
二级缓存是SqlSessionFactory级别,通过同一个SqlSessionFactory创建的SqlSession查询的结果会被
缓存;此后若再次执行相同的查询语句,结果就会从缓存中获取
二级缓存开启的条件:
a>在核心配置文件中,设置全局配置属性cacheEnabled=“true”,默认为true,不需要设置
b>在映射文件中设置标签
c>二级缓存必须在SqlSession关闭或提交之后有效
d>查询的数据所转换的实体类类型必须实现序列化的接口
使二级缓存失效的情况:
两次查询之间执行了任意的增删改,会使一级和二级缓存同时失效
3.二级缓存的配置
在mapper配置文件中添加的cache标签可以设置一些属性:
eviction属性:缓存回收策略
LRU(Least Recently Used) – 最近最少使用的:移除最长时间不被使用的对象。
FIFO(First in First out) – 先进先出:按对象进入缓存的顺序来移除它们。
SOFT – 软引用:移除基于垃圾回收器状态和软引用规则的对象。
WEAK – 弱引用:更积极地移除基于垃圾收集器状态和弱引用规则的对象。默认的是 LRU。
flushInterval属性:刷新间隔,单位毫秒默认情况是不设置,也就是没有刷新间隔,缓存仅仅调用语句时刷新
size属性:引用数目,正整数代表缓存最多可以存储多少个对象,太大容易导致内存溢出
readOnly属性:只读,true/false
true:只读缓存;会给所有调用者返回缓存对象的相同实例。因此这些对象不能被修改。这提供了很重要的性能优势。
false:读写缓存;会返回缓存对象的拷贝(通过序列化)。这会慢一些,但是安全,因此默认是false
4. MyBatis缓存查询的顺序
先查询二级缓存,因为二级缓存中可能会有其他程序已经查出来的数据,可以拿来直接使用。
如果二级缓存没有命中,再查询一级缓存如果一级缓存也没有命中,则查询数据库,SqlSession关闭之后,一级缓存中的数据会写入二级缓存


 458
458


 被折叠的 条评论
为什么被折叠?
被折叠的 条评论
为什么被折叠?
 到【灌水乐园】发言


