


1.Spring
1.1简介
- Spring是一个轻量级控制反转(IoC)和面向切面(AOP)的容器框架。
- 解决企业开发的复杂性。
- Spring理念:使现有的技术更加容易使用,本身是个大杂烩,整合了现有的技术框架。
1.2优点
- Spring是一个开源的免费的框架(容器);
- Spring是一个轻量级,非入侵式(引入了spring 不会改变原来的代码,不会对原项目产生影响)的框架;
- 控制反转(IOC)和面向切面编程(AOP);
- 支持事务的处理,对框架整合的支持;
1.3Spring组成及扩展
- 组成

1.4扩展
- SpringBoot:一个快速开发的脚手架,基于SpringBoot可以快速开发单个微服务。约定大于配置。
- SpringCloud:基于SpringBoot实现的
- 大部分公司使用Spring Boot进行快速开发,学习SpringBoot前提是掌握Spring和SpringMVC。
2.IOC理论推导
- UserDao接口
- UserDaoImpl接口
- UserService业务接口
- UserServiceImpl业务实现类
2.1控制反转思想
- 在我们的业务中,用户的需求可能会影响我们 的源代码,我们需要根据用户的需求去修改源代码!如果程序代码量十分大,修改一次的成本十分昂贵!
- 我们使用一个Set接口实现,发生了革命性变化
 private UserDao userDao;
    //利用set方法动态实现值的注入
    public void setUserDao(UserDao userDao) {
        this.userDao = userDao;
    }
- 之前是程序主动创建对象,控制权在程序员手上!
- 使用了set注入后,程序不在具有主动性,而是变成被动接收对象。
- 此思想从本质解决了问题,程序员不用再管理对象的创建。系统耦合性大大降低,可以更加专注与业务实现。
2.2 IOC本质
- 之前结构:

- 反转后结构:

- IoC本质:控制反转IoC是一种设计思想,DI(依赖注入)是实现IoC(思想)的一种方法,没有IoC的程序中,我们使用面向对象编程,对象的创建和对象间的依赖关系完全硬编在程序中,对象的创建由程序自己控制,控制反转后将对象的创建转移给第三方,获得依赖对象的方式反转了。
- IoC是Spring框架的核心内容,有很多种方式实现IoC,可以使用XML配置,也可以使用注解,最新版本的Spring可以使用零配置实现IoC.
- Spring容器在初始化时会先读取配置文件吗,根据配置文件或元数据与组织对象存入容器中吗,程序使用时在从IoC容器中取出需要的对象。

- 采用XML配置Bean的时候,Bean 的定义和实现时分离的,使用注解可以把两者合为一体,。
2.3HelloSpring
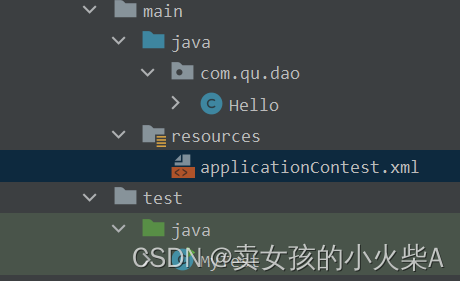
package com.qu.dao;
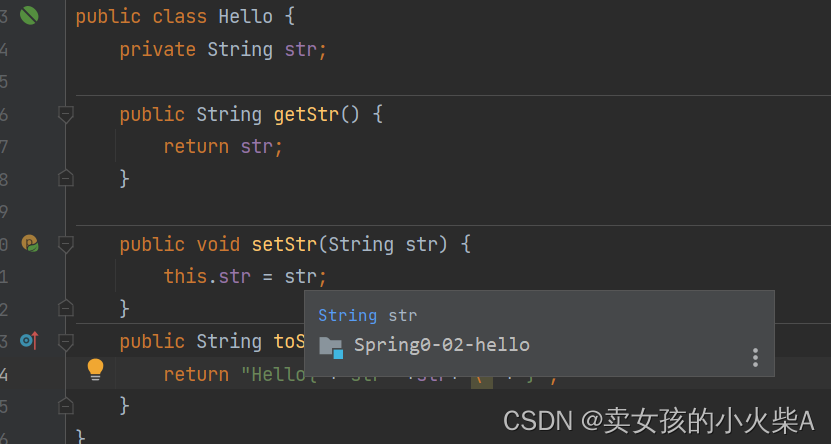
public class Hello {
private String str;
public String getStr() {
return str;
}
public void setStr(String str) {
this.str = str;
}
public String toString(){
return "Hello{"+"str'"+str+"\'"+"}";
}
}
<?xml version="1.0" encoding="UTF-8"?>
<beans xmlns="http://www.springframework.org/schema/beans"
       xmlns:xsi="http://www.w3.org/2001/XMLSchema-instance"
       xsi:schemaLocation="http://www.springframework.org/schema/beans http://www.springframework.org/schema/beans/spring-beans.xsd">
<!--使用Spring创建对象,id=对象名,class=需要new对象的类的路径
property相当于给对象中的属性设置一个值。
-->
    <bean id="hello" class="com.qu.dao.Hello">
    <property name="str" value="Spring"></property>
    </bean>
</beans>
- 使用IoC容器需要配置其元数据在resources文件中配置xml文件,先建立xml文件,文件名即上图中的applicationContest.xml
- 在xml中使用Spring来创建对象,在Spring中这些称作为bean。即对象=bean
- 加载xml文件,固定格式,ApplicationContest contest=new ClassPathXmlApplicationContest (“applicationContest”);//参数可以有多个,就是我们创建的xml文件名。
- contest称为获取Spring的上下文对象,我们的对象都在spring 中管理,想要使用直接去里面取出。
- contest.getBean(“hello”);//参数传入bean的id即可取出对应的对象。需要强转一下类型。
import com.qu.dao.Hello;
import org.springframework.context.ApplicationContext;
import org.springframework.context.support.ClassPathXmlApplicationContext;

public class MyTest {
    public static void main(String[] args) {
        //获取Spring上下文对象,解析beans.xml文件,生成Bean对象
        ApplicationContext context=new ClassPathXmlApplicationContext("applicationContest.xml");
        //我们的对象现在都在Spring中管理,需要时直接通过id取出,getBean的参数就是配置文件中的id
        Hello hello=(Hello)context.getBean("hello");//并不需要去new一个Hello对象
        System.out.println(hello.toString());
    }
}
 代码左边的叶子表示类已经被Spring托管
- Hello的对象谁创建的?hello对象由Spring生成。
- Hello的对象属性怎么设置的?hello对象属性由Spring容器设置。
- 控制 :谁来控制对象的创建,传统的程序的对象由程序本身控制创建,使用Spring后,现在交给Spring去做;反转:程序本身不创建对象,而编程被动的接收对象,这就是控制反转。
- 总结:所谓的IoC就是对象由Spring来创建,管理,分配。
        <property name="str1" ref=""/>
         <property name="str1" value=""/>
- ref:引用Spring中已经创建好的对象
- value:具体值,基本数据类型。
2.4IoC创建对象的方式
- 项目结构:

- Spring中仍然使用无参构造创建对象
package com;

public class User {
   private String name;
   public User(){
       System.out.println("使用了无参构造");
   }

    public String getName() {
        return name;
    }

    public void setName(String name) {
        this.name = name;
    }
    public void show(){
        System.out.println("name="+name);
    }
}
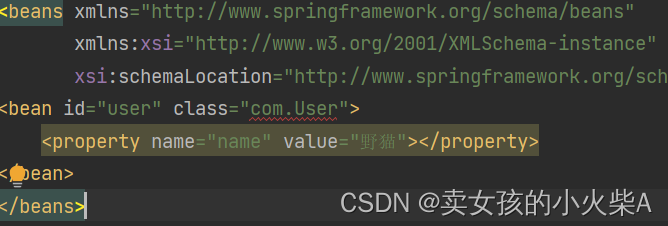
<?xml version="1.0" encoding="UTF-8"?>
<beans xmlns="http://www.springframework.org/schema/beans"
       xmlns:xsi="http://www.w3.org/2001/XMLSchema-instance"
       xsi:schemaLocation="http://www.springframework.org/schema/beans http://www.springframework.org/schema/beans/spring-beans.xsd">
<bean id="user" class="com.User">
    <property name="name" value="野猫"></property>
</bean>
</beans>
import com.User;
import org.springframework.context.ApplicationContext;
import org.springframework.context.support.ClassPathXmlApplicationContext;

public class MyTest {
    public static void main(String[] args) {
    //Spring容器
        ApplicationContext context =new ClassPathXmlApplicationContext("Beans.xml");
        User user=(User)context.getBean("user");//拿过来强转一下
        user.show();

    }

}
- Spring中使用有参构造创建对象
package com;

public class User {
   private String name;
   //创建有参构造
   public User(String name){
      this.name=name;
   }

    public String getName() {
        return name;
    }

    public void setName(String name) {
        this.name = name;
    }
    public void show(){
        System.out.println("name="+name);
    }
}
- 此时Xml出错
- 解决:用有参构造创建对象有三个方法
- 方法一:index=0表示下标为0的参数,也就是有参构造中第一个参数
<?xml version="1.0" encoding="UTF-8"?>
<beans xmlns="http://www.springframework.org/schema/beans"
       xmlns:xsi="http://www.w3.org/2001/XMLSchema-instance"
       xsi:schemaLocation="http://www.springframework.org/schema/beans http://www.springframework.org/schema/beans/spring-beans.xsd">
<!--  方法一:用下标是方式创建对象  index=0表示下标为0的参数,也就是有参构造中第一个参数-->
<bean id="user" class="com.User">
    <constructor-arg index="0" value="小王"></constructor-arg>
</bean>
</beans>
- 方法二:还可以通过参数的类型去匹配,不建议使用,因为当有参构造有两个String参数时就会出错。
<?xml version="1.0" encoding="UTF-8"?>
<beans xmlns="http://www.springframework.org/schema/beans"
       xmlns:xsi="http://www.w3.org/2001/XMLSchema-instance"
       xsi:schemaLocation="http://www.springframework.org/schema/beans http://www.springframework.org/schema/beans/spring-beans.xsd">
<!--  方法二,通过类型type,String类型用一下表示形式-->
<bean id="user" class="com.User">
    <constructor-arg type="java.lang.String" value="小张"></constructor-arg>
</bean>
</beans>
- 方法三:ref去指向
<?xml version="1.0" encoding="UTF-8"?>
<beans xmlns="http://www.springframework.org/schema/beans"
       xmlns:xsi="http://www.w3.org/2001/XMLSchema-instance"
       xsi:schemaLocation="http://www.springframework.org/schema/beans http://www.springframework.org/schema/beans/spring-beans.xsd">
<!--  方法三,直接通过参数名设置,ref引用-->
<bean id="user" class="com.User">
   <constructor-arg name="name" value="小李"></constructor-arg>
</bean>
</beans>
总结:在配置文件加载的时候,容器中管理的对象就已经初始化了!
2.5Bean的配置
- 别名在后面引用对象名时user和user2一样。
- id:bean的唯一标识符,也就相当于对象名。
- class:bean对象所对应的权限定名,:包+类型
- name:也就是别名,而且name可以取多个名
<bean id="user" class="com.User" name="user3,user4">
   <constructor-arg name="name" value="小李"></constructor-arg>
</bean>
 <alias name="user" alias="user2"></alias>
2.6 import
- 一般用于团队开发使用,他可以将多个配置文件,导入合并为一个
- 定义多个beans.xml,在applicationContest.xml中导入其他几个,相当于合并
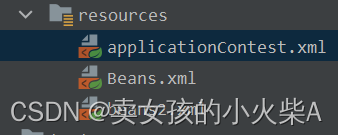
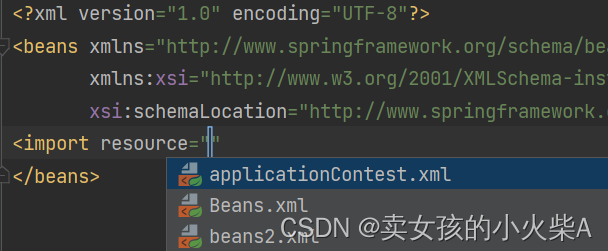
<import resource="Beans.xml"></import>
    <import resource="beans2.xml"></import>
- 假如某项目有三个人开发,这三个人负责不同的类的开发,而不同的类需要注册在不同的bean中,我们可以利用import将所有的beans合并为一个总的配置文件,使用时只用使用这个总的配置。
3. 依赖注入
3.1构造器注入(已讲2.4)
3.2Set方式注入【重点】
- 依赖注入:Set注入
- 依赖:bean对象的创建依赖于容器
- 注入:bean对象中所有属性由容器来注入
- 环境搭建:
- (1)复杂类型
package com.qu.pojo;
//复杂类型,将地址作为一个引用对象
public class Address {
    private String address;

    public String getAddress() {
        return address;
    }

    public void setAddress(String address) {
        this.address = address;
    }
}
- (2)真实测试对象
package com.qu.pojo;

import java.util.List;
import java.util.Map;
import java.util.Properties;
import java.util.Set;

public class Student {
    private String name;
    private Address address;
    private String[] book;
    private List<String> hobbys;
    private Map<String,String> card;
    private Set<String> games;
    private Properties info;//配置类型,学生信息我们自定义
    private String wife;

    public String getName() {
        return name;
    }

    public void setName(String name) {
        this.name = name;
    }

    public Address getAddress() {
        return address;
    }

    public void setAddress(Address address) {
        this.address = address;
    }

    public String[] getBook() {
        return book;
    }

    public void setBook(String[] book) {
        this.book = book;
    }

    public List<String> getHobbys() {
        return hobbys;
    }

    public void setHobbys(List<String> hobbys) {
        this.hobbys = hobbys;
    }

    public Map<String, String> getCard() {
        return card;
    }

    public void setCard(Map<String, String> card) {
        this.card = card;
    }

    public Set<String> getGames() {
        return games;
    }

    public void setGames(Set<String> games) {
        this.games = games;
    }

    public Properties getInfo() {
        return info;
    }

    public void setInfo(Properties info) {
        this.info = info;
    }

    public String getWife() {
        return wife;
    }

    public void setWife(String wife) {
        this.wife = wife;
    }
}
- (3)Beans.xml
<?xml version="1.0" encoding="UTF-8"?>
<beans xmlns="http://www.springframework.org/schema/beans"
       xmlns:xsi="http://www.w3.org/2001/XMLSchema-instance"
       xsi:schemaLocation="http://www.springframework.org/schema/beans http://www.springframework.org/schema/beans/spring-beans.xsd">
<!--第一种,普通值注入,value-->
    <bean name="student" class="com.qu.pojo.Student">
        <property name="name" value="张三"></property>
    </bean>
</beans>
- 测试类:
import com.qu.pojo.Student;
import org.springframework.context.ApplicationContext;
import org.springframework.context.support.ClassPathXmlApplicationContext;

public class MyTest {
    public static void main(String[] args) {
        ApplicationContext context =new ClassPathXmlApplicationContext("Beans.xml");
        Student student = (Student)context.getBean("student");
        System.out.println(student.getName());
    }
}
- (4)完善注入信息,集合数组等值的注入
<?xml version="1.0" encoding="UTF-8"?>
<beans xmlns="http://www.springframework.org/schema/beans"
       xmlns:xsi="http://www.w3.org/2001/XMLSchema-instance"
       xsi:schemaLocation="http://www.springframework.org/schema/beans http://www.springframework.org/schema/beans/spring-beans.xsd">
<!--    先引入Address-->
    <bean id="address" class="com.qu.pojo.Address"/>
    <bean name="student" class="com.qu.pojo.Student">
        <!--第一种,普通值注入,value-->
        <property name="name" value="张三"></property>
        <!--  第二种注入,bean注入,使用ref-->
        <property name="address" ref="address"></property>
        <!-- 数组注入,ref-->
        <property name="book"  >
            <array>
                <value>红楼梦</value>
                <value>水浒传</value>
                <value>三国</value>
            </array>
        </property>
        <!-- list注入-->
        <property name="hobbys">
            <list>
                <value>听歌</value>
                <value>看电影</value>
                <value>敲代码</value>
            </list>
        </property>
        <!--  map注入-->
        <property name="card">
            <map>
                <entry key="身份证" value="12345678"></entry>
                <entry key="银行卡" value="87654321"></entry>
            </map>
        </property>
        <!--set-->
        <property name="games">
            <set>
                <value>LOL</value>
                <value>CF</value>
            </set>
        </property>
<!--  null值注入-->
        <property name="wife" >
            <null></null>
        </property>
<!-- Properties-->
        <property name="info">
            <props>
                <prop key="学号">12345</prop>
                <prop key="分数">90</prop>
            </props>
        </property>
    </bean>
</beans>
3.3拓展方式
4.Bean作用域(Bean scopes)
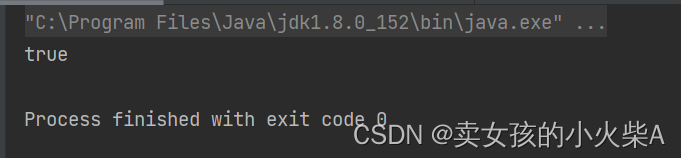
4.1单例模式(spring默认就是单例)
定义bean的scope=singleton,只有一个实例。共享一个对象。
<bean id="user" class="com.User" name="user3,user4" scope="singleton">
   <constructor-arg name="name" value="小李"></constructor-arg>
</bean>
public class MyTest {
    public static void main(String[] args) {
        ApplicationContext context =new ClassPathXmlApplicationContext("Beans.xml");

        User user=(User)context.getBean("user3");//拿过来强转一下
        User user2=(User)context.getBean("user4");
        System.out.println(user==user2);

    }

}
取出对象user和user2,他俩其实指向同一个东西。
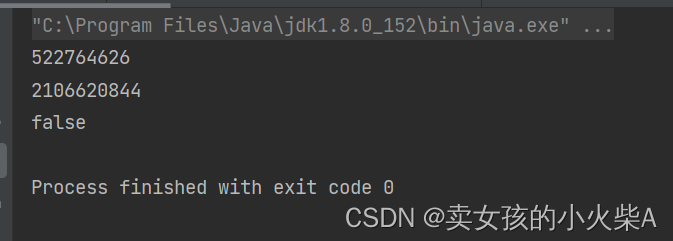
4.2原型模式,每次从容器中get的时候都会产生一个新对象
设置scope为prototype
<bean id="user" class="com.User" name="user3,user4" scope="prototype">
   <constructor-arg name="name" value="小李"></constructor-arg>
</bean>
public class MyTest {
    public static void main(String[] args) {
        ApplicationContext context =new ClassPathXmlApplicationContext("Beans.xml");

        User user=(User)context.getBean("user3");//拿过来强转一下
        User user2=(User)context.getBean("user4");

        System.out.println(user.hashCode());
        System.out.println(user2.hashCode());
        System.out.println(user==user2);

    }

}
4.3其他的request,session,application,这些只能在web开发中用到
5.Bean的自动装配
- 自动装配是Spring满足bean依赖的一种方式。
- Spring上下文中自动寻找,并自动给bean装配属性。
- 在Spring中有三种装配的方式。(1)在xml中显示配置(手动编写xml)(2)在java中显示配置(3)隐式的自动装配(重点)
5.1测试
- 环境搭建:(1)一个人拥有两个宠物(2)创建Cat,Dog,People三个类(3)并在Xml中配置(4)在MyTest中测试
package com.qu;

public class Cat {
    public void shout(){
        System.out.println("喵喵");
    }
}
package com.qu;

public class Dog {
    public void shout(){
        System.out.println("汪汪");
    }
}
若更改id名称后不可用
    <bean id="cat" class="com.qu.Cat"></bean>
    <bean id="dog" class="com.qu.Dog"></bean>
    <bean id="people" class="com.qu.People">
        <property name="name" value="老王"></property>
        <property name="cat"  ref="cat"></property>
        <property name="dog" ref="dog"></property>
import com.qu.People;
import org.springframework.context.ApplicationContext;
import org.springframework.context.support.ClassPathXmlApplicationContext;

public class MyTest {
    public static void main(String[] args) {
        ApplicationContext context= new ClassPathXmlApplicationContext("beans.xml");
        People people= context.getBean("people", People.class);
       people.getDog().shout();
       people.getCat().shout();
    }

}
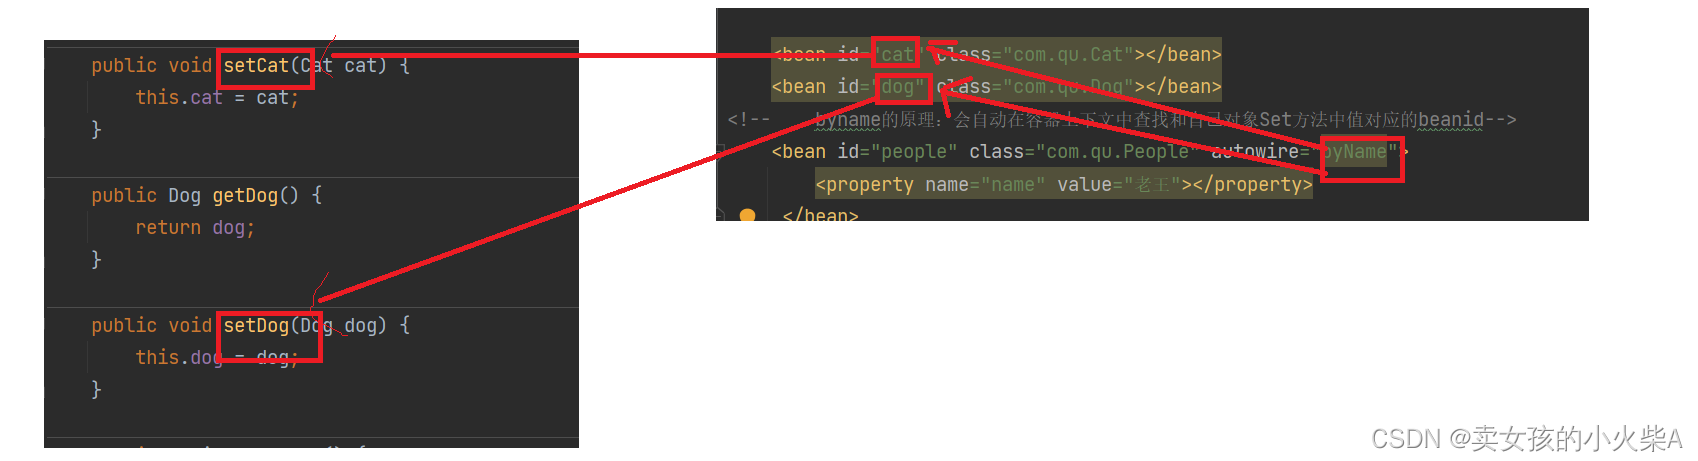
5.2ByName自动装配
    <bean id="cat" class="com.qu.Cat"></bean>
    <bean id="dog" class="com.qu.Dog"></bean>
<!--    byname的原理:会自动在容器上下文中查找和自己对象Set方法中值对应的beanid-->
    <bean id="people" class="com.qu.People" autowire="byName">
        <property name="name" value="老王"></property>
     </bean>
5.3byType自动配置
更改id名称不影响。因为他是根据类型class来判断。
    <bean id="cat" class="com.qu.Cat"></bean>
    <bean id="dog222" class="com.qu.Dog"></bean>
<!--    byname的原理:会自动在容器上下文中查找和自己对象Set方法中值对应的beanid-->
<!--    byType的原理:会自动在容器上下文中查找和自己对象属性类型相同的bean-->
    <bean id="people" class="com.qu.People" autowire="byType">
        <property name="name" value="老王"></property>
     </bean>
5.4小结
- byName:需要保证所有的bean的id唯一,并且这个bean需要和自动注入的属性set方法的值一致。
- byType:需要保证bean的所有的class唯一,并且这个bean需要和自动注入的属性的类型一致。


 1万+
1万+


 被折叠的 条评论
为什么被折叠?
被折叠的 条评论
为什么被折叠?
 到【灌水乐园】发言


