


介绍:
移动应用开发是日益复杂的任务,本文将带领您深入探索如何无缝集成Capacitor5.5.1、Vue2和Android Studio,以加速您的开发流程
- Capacitor 是一个用于构建跨平台移动应用程序的开源框架。
- Vue 是一个流行的 JavaScript 框架,用于构建用户界面。
- Android Studio 是用于开发 Android 应用程序的官方集成开发环境(IDE)。
环境设置:
Capacitor 官方支持三个应用目标:Android、iOS 和 Web
(vue、recat…capacitor并不限制你使用特定的框架,根据偏好)
1、Android需要在Android studio 、Android SDK 环境下运行
Capacitor 5 至少需要 Android Studio 2022.2.1
2、IOS 需要在Xcode或者MacOS环境下运行
3、web是以下环境
3.1.首先你得有vue的开发环境
3.2.确保您已经正确安装并配置了Vue Cli、Capacitor和Android Studio,如果尚未安装,请按照以下步骤进行设置。
项目创建:
使用 Vue CLI 创建一个新的 Vue 2 项目,并通过 Capacitor 初始化您的项目
使用 npm 或 yarn 在命令行中安装 Vue CLI:npm install -g @vue/cli 或 yarn global add @vue/cli

vue create my-vue-app
cd my-vue-app
npm install @capacitor/core @capacitor/cli
npx cap init
平台版本:
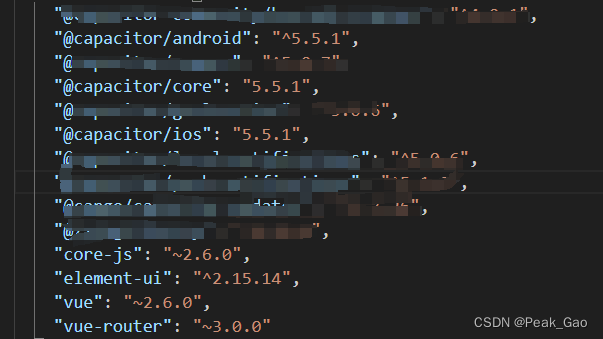
capacitor使用5.5.1的话,安卓和IOS 的版本都需要5.5.1、不然会报一堆奇怪的错误,导致耽误开发进度
Android平台集成:
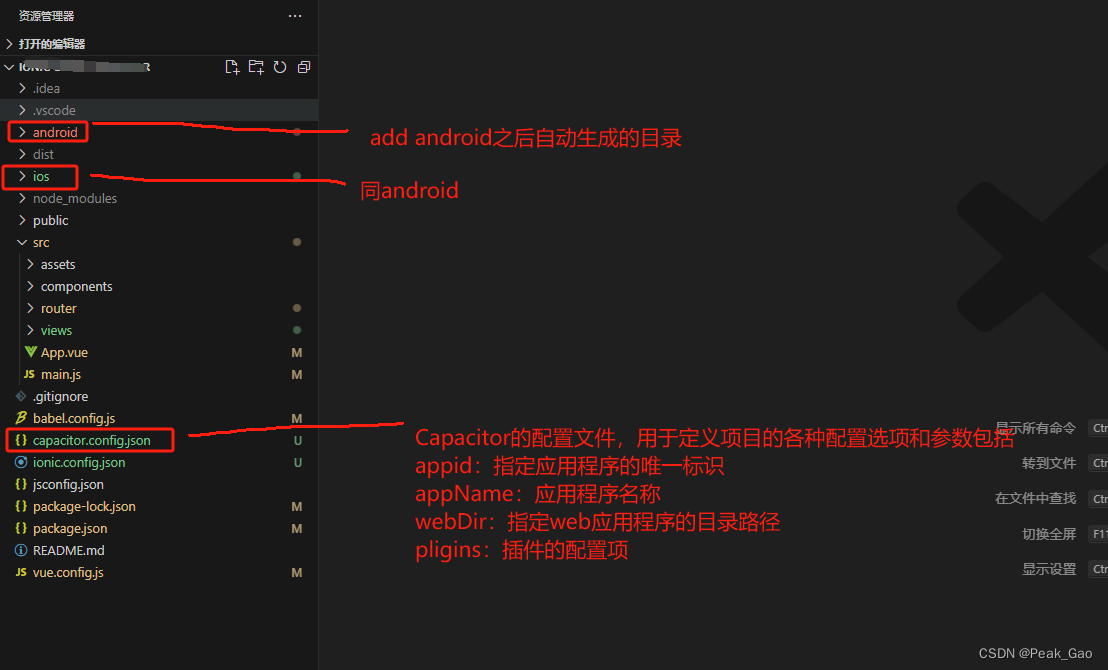
添加 Android 平台,以便在 Android Studio 中进行原生开发。导入 Android Studio 并配置您的开发环境。
npx cap add android
打开 Android Studio,导入 Capacitor 项目的 Android 文件夹。
配置 Android Studio:
- 在 Android Studio 中,打开 settings.gradle 文件,确保项目正确配置。
- 在 build.gradle 文件中,添加 Capacitor 插件和依赖项。
- 在 MainActivity.java 文件中,添加 Capacitor 相关的初始化代码。
构建和运行应用程序:
- 在命令行中运行 npm run build 命令,构建 Vue 项目。
- 在命令行中运行 npx cap copy 命令,将构建后的文件复制到 Android 项目中,确保两者保持同步
- 在 Android Studio 中,点击 “Sync Project with Gradle Files” 按钮,确保项目正确同步。
- 在 Android Studio 中,点击 “Run” 按钮,运行应用程序。
IOS平台集成:
npx cap add
可以自己安装一个苹果环境测试
WebView 集成:
在 Vue 中使用 WebView 组件,可以按照以下步骤进行:
1.安装 vue-webview 插件:
在 Vue 项目的根目录下,使用 npm 或 yarn 安装 vue-webview 插件:
npm install vue-webview
或
yarn add vue-webview
2.在 Vue 组件中引入 WebView 组件:
在需要使用 WebView 的 Vue 组件中,引入 vue-webview 插件,并注册 WebView 组件:
import VueWebView from 'vue-webview';

export default {
  components: {
    VueWebView,
  },
  // ...
}
3.在模板中使用 WebView 组件:
在 Vue 组件的模板中,使用 标签来包裹 WebView 组件,并设置相应的属性:
<template>
  <div>
    <vue-webview
      :src="webViewUrl"
      :options="webViewOptions"
      @loadstart="handleLoadStart"
      @loadend="handleLoadEnd"
    ></vue-webview>
  </div>
</template>
在这个示例中,webViewUrl 是 WebView 加载的 URL,webViewOptions 是 WebView 的配置选项。你可以根据需要设置其他属性,如 WebView 的宽度、高度、样式等。
4.在 Vue 组件中处理 WebView 事件和方法:
在 Vue 组件的方法中,处理 WebView 的事件和方法。例如,你可以在 handleLoadStart 和 handleLoadEnd 方法中处理 WebView 的加载开始和加载结束事件。
export default {
  // ...
  methods: {
    handleLoadStart() {
      // WebView 加载开始时的处理逻辑
    },
    handleLoadEnd() {
      // WebView 加载结束时的处理逻辑
    },
  },
}
通过以上步骤,你就可以在 Vue 项目中使用 WebView 组件来呈现 Vue 2 项目的内容。可以根据需要设置 WebView 的属性和处理 WebView 的事件,以实现更丰富的交互和功能。
插件和功能:
插件:分为官方插件、社区插件
其实你使用了vue框架开发的也可以自己写所需要的插件,以下给大家看看如何使用官方插件
**官方插件使用:**地理位置、相机、本地通知
地理位置:
注:需要在项目的根目录下的AndroidManifest.xml文件中添加获取位置权限(在获取地理位置插件的xml中添加或者在主目录下的xml)
<uses-permission android:name="android.permission.ACCESS_FINE_LOCATION" />
<uses-permission android:name="android.permission.ACCESS_COARSE_LOCATION" />
引入依赖
npm install @capacitor/geolocation
在需要的页面注入
import { Geolocation } from '@capacitor/geolocation';
Ex:
   // 获取地理位置(得到经纬度,需要墙,由于这里调用的是google map)
    async getCurrentPosition() {
      // 在这里编写按钮点击后的处理逻辑
      console.log('Button clicked!');
      // 在需要获取地理位置的地方调用以下代码
      const coordinates = await Geolocation.getCurrentPosition();
      this.latitude = coordinates.coords.latitude;
      this.longitude = coordinates.coords.longitude;
      console.log('Current position:', coordinates);
    },
相机(支持拍照和相册上传):
引入依赖
npm install @capacitor/camera
在需要的页面注入
import { Camera, CameraResultType } from '@capacitor/camera';
Ex:
    // 在需要拍照的地方调用该方法
    async takePicture() {
      const image = await Camera.getPhoto({
        quality: 90,
        allowEditing: false,
        resultType: CameraResultType.Uri
      });
      console.log("Current image", image.webPath);
      // 处理拍摄的照片,例如显示在页面上
      this.photo = image.webPath;
    },

    //在windows 中的web打开之后会报错,在项目的main.js中添加
    // 某些 Capacitor 插件(例如Camera或Toast)在未本机运行时具有基于 Web 的 UI。
// 例如,Camera.getPhoto()在网络上运行时,调用将加载响应式拍照体验:

 import { defineCustomElements } from '@ionic/pwa-elements/loader';
// Call the element loader before the render call

defineCustomElements(window);
本地通知:
引入依赖
npm install @capacitor/local-notifications
在需要的页面注入
import { LocalNotifications } from '@capacitor/local-notifications';
Ex:
   getMsg() {
      LocalNotifications.schedule({
        notifications: [
          {
            title: '新消息',
            body: '测试消息',
            id: 1,
            schedule: { at: new Date(Date.now() + 1000 * 5) }
          }
        ]
      });
    },
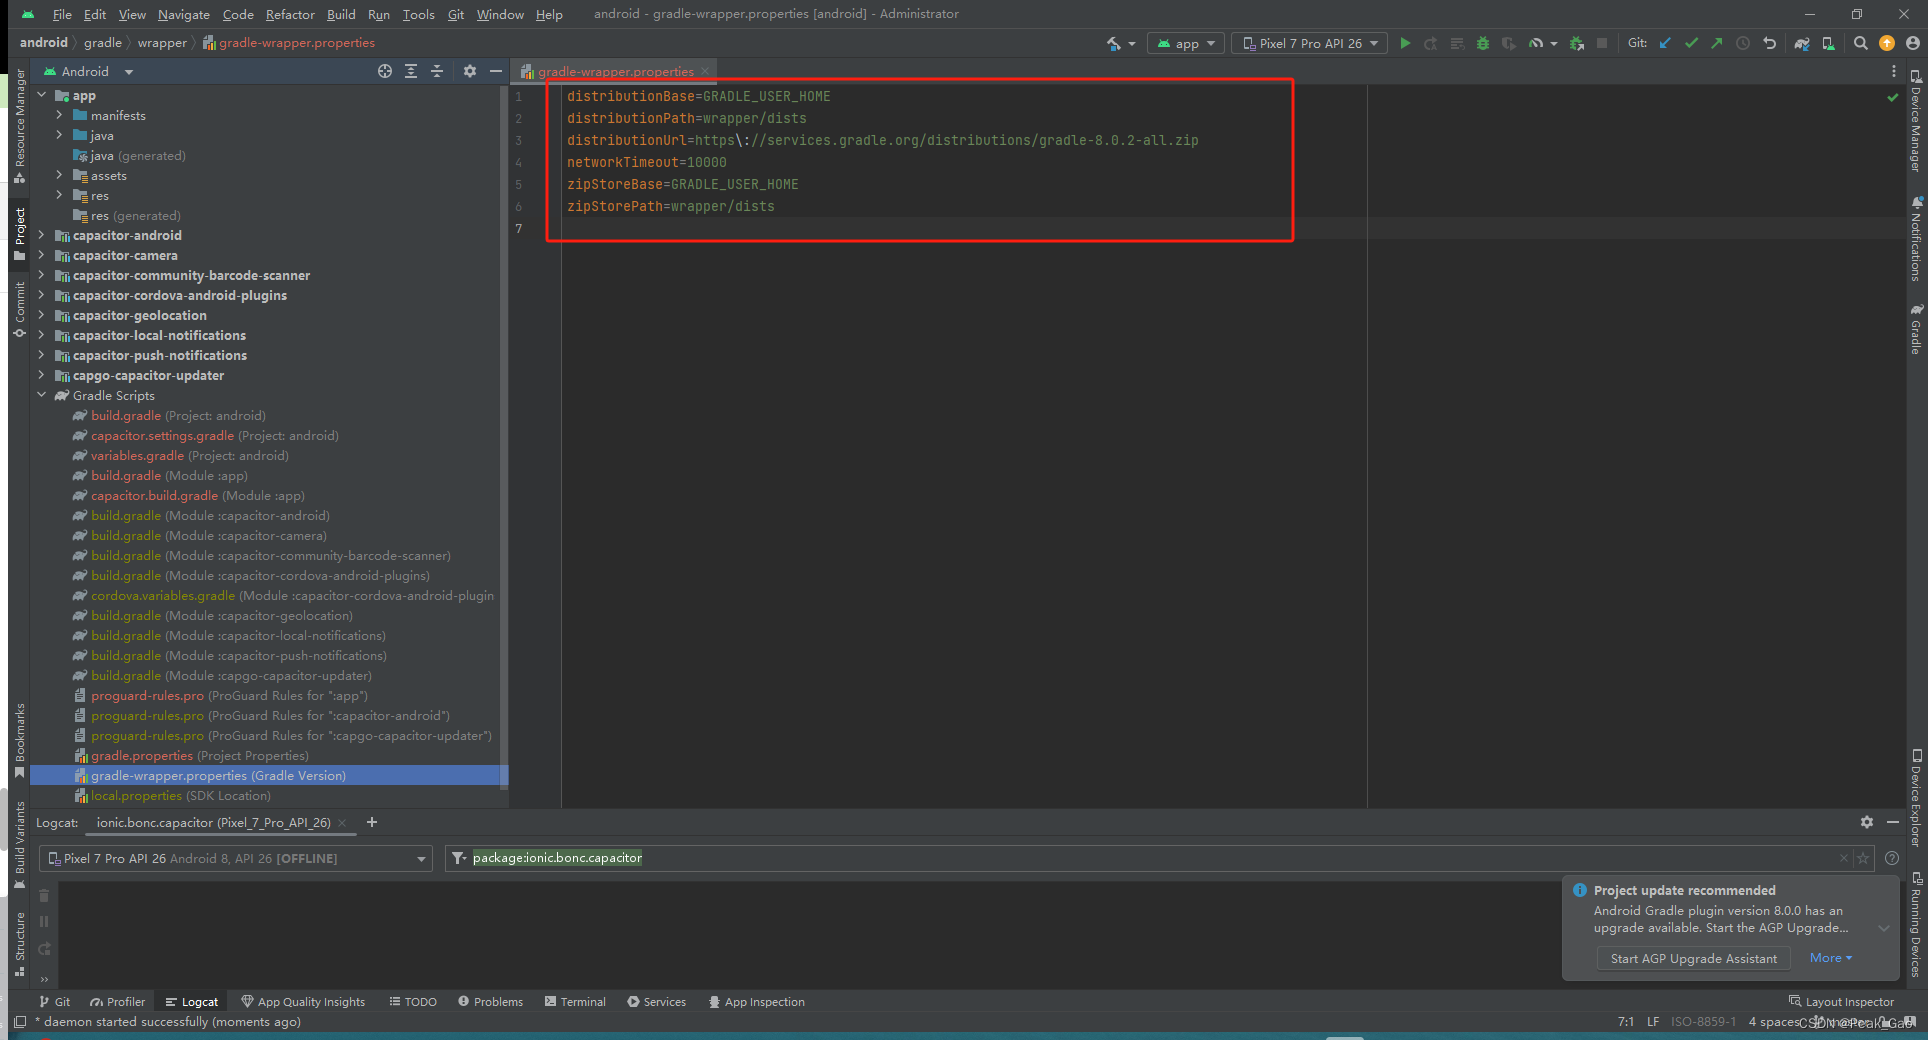
调试和测试:
这是一个繁琐的过程
需要安装Android SDK 在官网下载完之后千万不要放在C盘,安装一个模拟器需要10多个G

这里可以看到Gradle版本,可以去Gradle下载生成后需要的版本,会花费好长时间
发布和部署:
常见问题和解决方案:
常见问题:
i.Capacitor版本为5.5.1,Android、IOS 版本都应该为5.5.1否则不兼容 见 ”平台版本“
ii:权限报错:
 E  Error send stats: {"error":"response_error","message":"Error send stats: com.android.volley.NoConnectionError: java.net.UnknownHostException:
  Unable to resolve host \"api.capgo.app\": No address associated with hostname"}
解决方案:
The error message indicates that there is an issue with connecting to the host "api.capgo.app" due to a "java.net.UnknownHostException," suggesting that the hostname cannot be resolved to an IP address. This issue is commonly related to network connectivity problems. Here are some steps you can take to troubleshoot and resolve this issue:

1. **Check Internet Connection:**
   Ensure that your device or emulator has a stable internet connection. If you are using a physical device, check if it is connected to a network, and if you are using an emulator, make sure your computer has an active internet connection.

2. **DNS Resolution:**
   The error suggests a problem resolving the hostname to an IP address. Ensure that the DNS (Domain Name System) configuration on your device or network is functioning correctly. You can try accessing "api.capgo.app" from a web browser to see if the domain resolves correctly.

3. **Hosts File:**
   Check if there are any entries related to "api.capgo.app" in your device's hosts file. If there are, ensure that they are correctly configured, and if necessary, remove or correct any incorrect entries.

4. **Firewall and Proxy Settings:**
   If you are behind a firewall or using a proxy, ensure that it is configured correctly to allow connections to "api.capgo.app." Check if there are any network restrictions that might be preventing your application from reaching the server.

5. **Server Status:**
   Check the status of the "api.capgo.app" server. It's possible that the server is temporarily down or experiencing issues. You can try accessing the API from a browser or using a tool like cURL to see if there are any issues with the server.

6. **Network Permissions:**
   Ensure that your application has the necessary network permissions in its AndroidManifest.xml file. You should have the `<uses-permission android:name="android.permission.INTERNET" />` permission declared.

7. **Retry Mechanism:**
   Implement a retry mechanism in your code to handle temporary network issues. If the error persists, your application can retry the network request after a short delay.

8. **Logs and Debugging:**
   Utilize logging statements in your code to trace the flow and identify where the error occurs. Check if there are additional details in the logs that might provide more information about the issue.

By going through these steps, you should be able to identify and address the underlying cause of the "UnknownHostException" and resolve the issue with connecting to the host "api.capgo.app."
iii.Capacitor5 需要Gradle8和java17 :是由我用的 Capacitor 5.5.1、Gradle 4.10.1、JDK 1.8
iv.Android Studio运行空白,没有显示任何控件 我的问题是由于使用vue Router 的index.js的默认的base没有指定,导致在Android Studio中报错从而显示空白
v.以下报错:大概意思就是:在Android studio 中初始化 报错,这个错误是由于在你的项目中同时引入了 androidx.core:core:1.10.0 和 com.android.support:support-v4:23.2.1 这两个库,导致了重复的类冲突。解决这个问题的方法是统一使用 androidx 库或者 com.android.support 库,避免同时引入两个版本不同的库。你可以根据你的项目需要,选择其中一个库并将另一个库的引用移除,然后重新构建你的项目。如果你需要更详细的解决方法,可以查阅相关文档或者搜索相关问题的解决方案。
Execution failed for task ':app:checkDebugDuplicateClasses'.
> A failure occurred while executing com.android.build.gradle.internal.tasks.CheckDuplicatesRunnable
   > Duplicate class android.support.v4.app.INotificationSideChannel found in modules core-1.10.0-runtime (androidx.core:core:1.10.0) and support-v4-23.2.1-runtime (com.android.support:support-v4:23.2.1)
     Duplicate class android.support.v4.app.INotificationSideChannel$Stub found in modules core-1.10.0-runtime (androidx.core:core:1.10.0) and support-v4-23.2.1-runtime (com.android.support:support-v4:23.2.1)
     Duplicate class android.support.v4.app.INotificationSideChannel$Stub$Proxy found in modules core-1.10.0-runtime (androidx.core:core:1.10.0) and support-v4-23.2.1-runtime (com.android.support:support-v4:23.2.1)
     Duplicate class android.support.v4.os.IResultReceiver found in modules core-1.10.0-runtime (androidx.core:core:1.10.0) and support-v4-23.2.1-runtime (com.android.support:support-v4:23.2.1)
     Duplicate class android.support.v4.os.IResultReceiver$Stub found in modules core-1.10.0-runtime (androidx.core:core:1.10.0) and support-v4-23.2.1-runtime (com.android.support:support-v4:23.2.1)
     Duplicate class android.support.v4.os.IResultReceiver$Stub$Proxy found in modules core-1.10.0-runtime (androidx.core:core:1.10.0) and support-v4-23.2.1-runtime (com.android.support:support-v4:23.2.1)
     Duplicate class android.support.v4.os.ResultReceiver found in modules core-1.10.0-runtime (androidx.core:core:1.10.0) and support-v4-23.2.1-runtime (com.android.support:support-v4:23.2.1)
     Duplicate class android.support.v4.os.ResultReceiver$1 found in modules core-1.10.0-runtime (androidx.core:core:1.10.0) and support-v4-23.2.1-runtime (com.android.support:support-v4:23.2.1)
     Duplicate class android.support.v4.os.ResultReceiver$MyResultReceiver found in modules core-1.10.0-runtime (androidx.core:core:1.10.0) and support-v4-23.2.1-runtime (com.android.support:support-v4:23.2.1)
     Duplicate class android.support.v4.os.ResultReceiver$MyRunnable found in modules core-1.10.0-runtime (androidx.core:core:1.10.0) and support-v4-23.2.1-runtime (com.android.support:support-v4:23.2.1)
该错误消息表明您的项目中存在重复的类,特别是与android.support.v4库相关的类。当您的项目中混合使用旧支持库和 AndroidX 库时,通常会出现此问题。
要解决此问题,请按照下列步骤操作:
1、更新依赖项:确保您使用的是最新版本的依赖项,尤其是 AndroidX 库。更新您的build.gradle文件以使用最新版本的库。
将任何出现的 替换com.android.support为相应的 AndroidX 库。例如,替换com.android.support:support-v4:23.2.1为androidx.core:core:1.10.0.
2、检查已弃用的库:
删除任何已弃用或过时的依赖项,并将其替换为更新版本。
3、使用 AndroidX:将您的项目迁移到 AndroidX(如果您尚未这样做)。AndroidX是Google提供的新的包结构,它取代了旧的支持库。确保您的所有依赖项和您自己的代码都使用 AndroidX 工件。
您可以通过将以下行添加到gradle.properties文件中来迁移到 AndroidX:
android.useAndroidX=true
android.enableJetifier=true (我是以这种方式解决掉)
这会自动将您的依赖项迁移到 AndroidX。
4、检查传递依赖关系:有时,问题可能是由传递依赖关系引起的。使用该./gradlew app:dependencies命令检查依赖关系树并识别任何冲突的依赖关系。
一旦确定了冲突的依赖项,您就可以排除build.gradle文件中的特定传递依赖项。例如:
implementation (‘com.example.library:library:1.0’) {
exclude group: ‘com.android.support’
}
5、清理并重建:
进行这些更改后,清理您的项目并重建它。
在 Android Studio 中,您可以通过选择“Build”->“Clean Project”,然后选择“Build”->“Rebuild Project”来完成此操作。
6、使用该–stacktrace选项:
如果问题仍然存在并且您需要有关错误的更多详细信息,请尝试使用该
–stacktrace
选项运行构建。
这可能会提供有关项目的哪个部分导致冲突的更多见解。
./gradlew clean assembleDebug --stacktrace
7、检查第三方库:
如果您在项目中使用第三方库,请确保它们与 AndroidX 兼容。
检查每个库的文档或发行说明以确认兼容性
解决方案
去官方社区提交你的问题,响应速度还是可以的


 3475
3475


 被折叠的 条评论
为什么被折叠?
被折叠的 条评论
为什么被折叠?
 到【灌水乐园】发言


