


初次书写博客,不足之处请多体谅
Thymeleaf官方文档中英文版本
链接:link
提取码:z6od
1、Thymeleaf介绍
- Thymeleaf是用来开发Web和独立环境项目的服务器端的Java模版引擎
- JSP也是模板引擎,不过SpringBoot官方推荐使用thymeleaf模板引擎
2、在SpringBoot中使用
引入Thymeleaf(IDEA)
1、创建引入thymeleaf的SpringBoot项目


项目结构:

2、创建成功后在pom.xml文件中会自动导入依赖
<dependency>
           <groupId>org.springframework.boot</groupId>
           <artifactId>spring-boot-starter-thymeleaf</artifactId>
       </dependency>
       <dependency>
           <groupId>org.springframework.boot</groupId>
           <artifactId>spring-boot-starter-web</artifactId>
       </dependency>
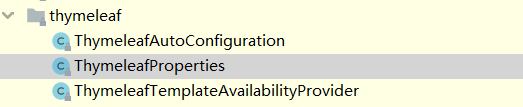
3、可在源码中查看thymeleaf的一些配置

- SpringBoot会自动帮我们配置thymeleaf
@Configuration(
   proxyBeanMethods = false
)
@EnableConfigurationProperties({ThymeleafProperties.class})
@ConditionalOnClass({TemplateMode.class, SpringTemplateEngine.class})
@AutoConfigureAfter({WebMvcAutoConfiguration.class, WebFluxAutoConfiguration.class})
public class ThymeleafAutoConfiguration {
   public ThymeleafAutoConfiguration() {
   }
}
- 属性集文件中所配置的thymeleaf的一些相关信息
@ConfigurationProperties(
    prefix = "spring.thymeleaf"
)
public class ThymeleafProperties {
	//默认的读取存储thymeleaf渲染文件的地址
    private static final Charset DEFAULT_ENCODING;
    public static final String DEFAULT_PREFIX = "classpath:/templates/";
    public static final String DEFAULT_SUFFIX = ".html";
    private boolean checkTemplate = true;
    private boolean checkTemplateLocation = true;
    private String prefix = "classpath:/templates/";
    private String suffix = ".html";
    private String mode = "HTML";
    private Charset encoding;
    private boolean cache;
    private Integer templateResolverOrder;
    private String[] viewNames;
    private String[] excludedViewNames;
    private boolean enableSpringElCompiler;
    private boolean renderHiddenMarkersBeforeCheckboxes;
    private boolean enabled;
    private final ThymeleafProperties.Servlet servlet;
    private final ThymeleafProperties.Reactive reactive;
}
4、Controller层以及前台页面的功能实现展示
Controller层代码展示
package com.heihei.springboot.controller;

import com.heihei.springboot.entity.Student;
import org.springframework.stereotype.Controller;
import org.springframework.ui.Model;
import org.springframework.web.bind.annotation.RequestMapping;
import org.springframework.web.bind.annotation.RestController;

import java.util.ArrayList;
import java.util.Arrays;
import java.util.List;

@Controller
public class MyController {

    @RequestMapping("index")
    public String index(){
        return "index";
    }

    @RequestMapping("/show")
    public String show(Model model){
        model.addAttribute("hello","Hello Springboot templates");
        model.addAttribute("test01","<p>解析还是不解析</p>");
        model.addAttribute("list", Arrays.asList("弟弟","嘿嘿","啦啦啦"));
        List<Student> students=new ArrayList<>();
        students.add(new Student("黑虎",5,"男"));
        students.add(new Student("阿福",7,"女"));
        model.addAttribute("student",students);
        model.addAttribute("stu",new Student("龙龙",21,"男孩子"));
        return "index";
    }
    @RequestMapping("/shows")
    public String shows(int id){
        System.out.println(id);
        return "index";
    }
}
html文件中代码:
<!DOCTYPE html>
<html	xmlns:th="http://www.thymeleaf.org">
<head>
    <meta charset="UTF-8">
    <title>Title</title>
</head>
<body>
    welcome to thymleaf index page!
    <hr>
    <h3 th:text="${hello}">多多多</h3>
    <hr>
    <h3 th:text="${test01}"></h3>
    <hr>
    <h3 th:utext="${test01}"></h3>
    <!--使用thymeleaf可以替换我们原有的所有属性值-->
    <input type="text" name="username" value="123123123" th:type="password" th:name="${hello}" th:value="${hello}">
    <!-- 超链接 --><br><br>
    <a href="https://www.baidu.com" th:href="@{https://www.taobao.com}">百度一下</a>
    <br>
    <!--文本内容的填充  在标签中间使用-->
    <p>[[${hello}]]</p>
    <br>

    <a th:href="@{/shows(id=1)}">请求资源参数传递</a>
    <br>
    <h3>List Iteration</h3>
    <!--集合的遍历--><br>
    <p th:each="li:${list}" th:text="${li}"></p>
    <!--对象集合的遍历-->
    <table border="1">
        <tr>
            <th>Name</th>
            <th>Age</th>
            <th>Sex</th>
        </tr>
        <tr th:each="students:${student}">
            <td th:text="${students.name}"></td>
            <td th:text="${students.age}"></td>
            <td th:text="${students.sex}"></td>
        </tr>
    </table>
    <br>
    <!--* 和 $ 之间的区别-->
    <div th:object="${stu}">
        <p>Name:<span th:text="*{name}"></span></p>
        <p>Age:<span th:text="*{age}"></span></p>
        <p>Sex:<span th:text="*{sex}"></span></p>
    </div>
</body>
</html>
在使用thymeleaf时首先需要引入相关语法提示
<html xmlns:th="http://www.thymeleaf.org">
5、对应页面功能展示:


 9372
9372


 被折叠的 条评论
为什么被折叠?
被折叠的 条评论
为什么被折叠?
 到【灌水乐园】发言


