文章目录
前言
在Electron应用中结合使用Vue.js,可以创建功能强大的桌面应用程序。为了将Electron与Vue.js集成,你可以使用electron-vue,一个流行的工具包,它简化了在Electron项目中使用Vue.js的过程。
该篇文章参考:搭建Electron vue项目过程
使用 electron-vue 创建项目
electron-vue 是一个已经配置好的项目模板,集成了Vue.js和Electron,可以快速启动开发。以下是使用electron-vue创建项目的步骤:
1. 安装 vue-cli(如果未安装)
如果你还没有安装vue-cli,需要先安装它:
npm install -g @vue/cli
2. 使用 electron-vue 模板创建项目
使用以下命令创建一个新项目:
vue create my-project
然后,在询问要使用的模板时,选择Manually select features并选择需要的特性(如Babel、Router等)。创建完成后,进入项目目录:
cd my-project
3. 安装和配置 electron-builder
安装electron-builder来处理打包和发布:
vue add electron-builder
4. 运行Electron项目
在安装完所有依赖后,你可以通过以下命令来启动你的Electron应用:
npm run electron:serve
这个命令会启动Electron,并在Vue的开发服务器上运行你的应用。
5. 打包应用
要打包你的Electron应用,可以运行以下命令:
npm run electron:build
这个命令会生成一个适合分发的应用程序包。
可能遇到的问题
参考文章:解决Electron vue-cli3.0+首次启动巨慢无法加载 vue-devtool 插件
首次启动可能会等待很久,出现以下信息:
INFO  Launching Electron...
Failed to fetch extension, trying 4 more times
Failed to fetch extension, trying 3 more times
Failed to fetch extension, trying 2 more times
如图

解决方案:
找到background.js,将下面代码注释:
// import installExtension, { VUEJS3_DEVTOOLS } from 'electron-devtools-installer'
如果遇到执行打包命令反应很慢,如下

具体代码是:
electron-builder  version=22.14.13 os=10.0.22000
 • description is missed in the package.json  appPackageFile=C:\Users\16566\Desktop\demo\my-project\dist_electron\bundled\package.json·
 • author is missed in the package.json  appPackageFile=C:\Users\16566\Desktop\demo\my-project\dist_electron\bundled\package.json
 • writing effective config  file=dist_electron\builder-effective-config.yaml
 • packaging       platform=win32 arch=x64 electron=11.5.0 appOutDir=dist_electron\win-unpacked
 • downloading     url=https://github.com/electron/electron/releases/download/v11.5.0/electron-v11.5.0-win32-x64.zip size=78 MB parts=8
 • canceling       signal=interrupt
 • cancelled by SIGINT
 • downloaded      url=https://github.com/electron/electron/releases/download/v11.5.0/electron-v11.5.0-win32-x64.zip duration=1m11.907s
 • cannot unpack electron zip file, will be re-downloaded  error=zip: not a valid zip file
解决方法如下:
参考文章:electron-builder 打包过慢解决

上图这个目录下找到这个文件 将以下内容粘贴进去就可以了
registry=https://registry.npmmirror.com/
disturl=https://registry.npmmirror.com/-/binary/node/
sass_binary_site=https://registry.npmmirror.com/node-sass
phantomjs_cdnurl=https://registry.npmmirror.com/phantomjs
chromedriver_cdnurl=https://registry.npmmirror.com/-/binary/chromedriver/
operadriver_cdnurl=https://registry.npmmirror.com/-/binary/operadriver/
electron_mirror=https://registry.npmmirror.com/-/binary/electron/
electron_builder_binaries_mirror=https://registry.npmmirror.com/-/binary/electron-builder-binaries/
always-auth=false
参考文章:
electron打包应用logo及名称更改
5 分钟配置好 Electron 应用的图标
Electron 打包安装包 更换系统图标(Windows)
可能使用的工具:
图片转ICO、ICO图标生成
准备好图标文件icon.png,然后在background.js 中 找到并添加一行代码
const win = new BrowserWindow({
  width: 1200,
  height:800,
  webPreferences: {
    // Use pluginOptions.nodeIntegration, leave this alone
    // See nklayman.github.io/vue-cli-plugin-electron-builder/guide/security.html#node-integration for more info
    nodeIntegration: process.env.ELECTRON_NODE_INTEGRATION,
    contextIsolation: !process.env.ELECTRON_NODE_INTEGRATION,
  },
  icon: __dirname + '/icon.png' // 设置应用图标路径
});
添加后的文件代码:
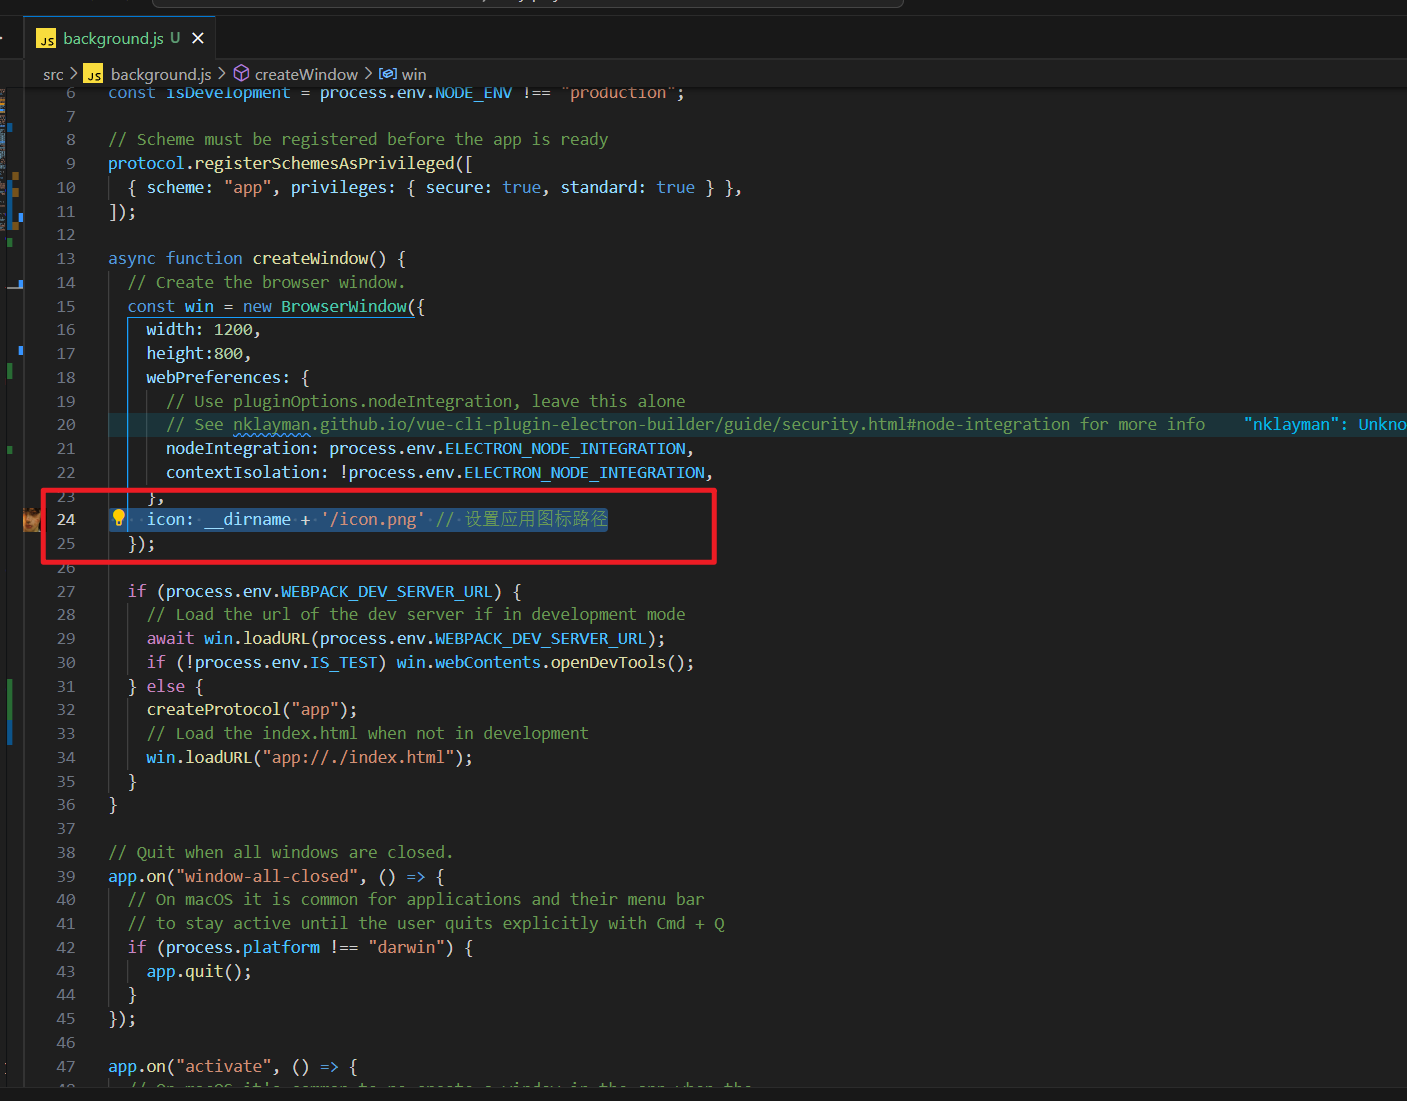
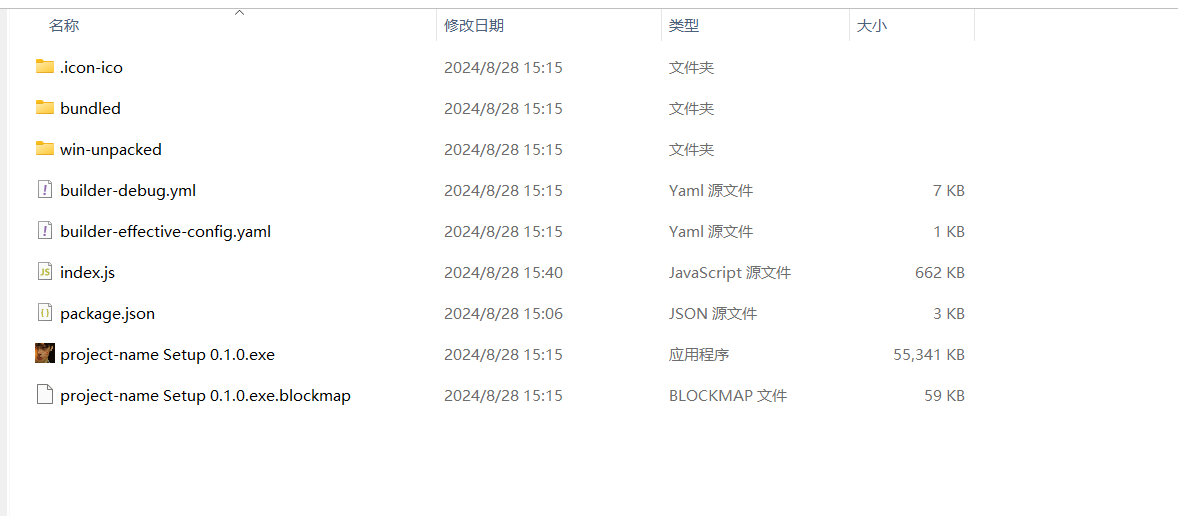
再次执行打包命令 打包后的logo就更换好了
在background.js中找到width与height 就是窗口的大小
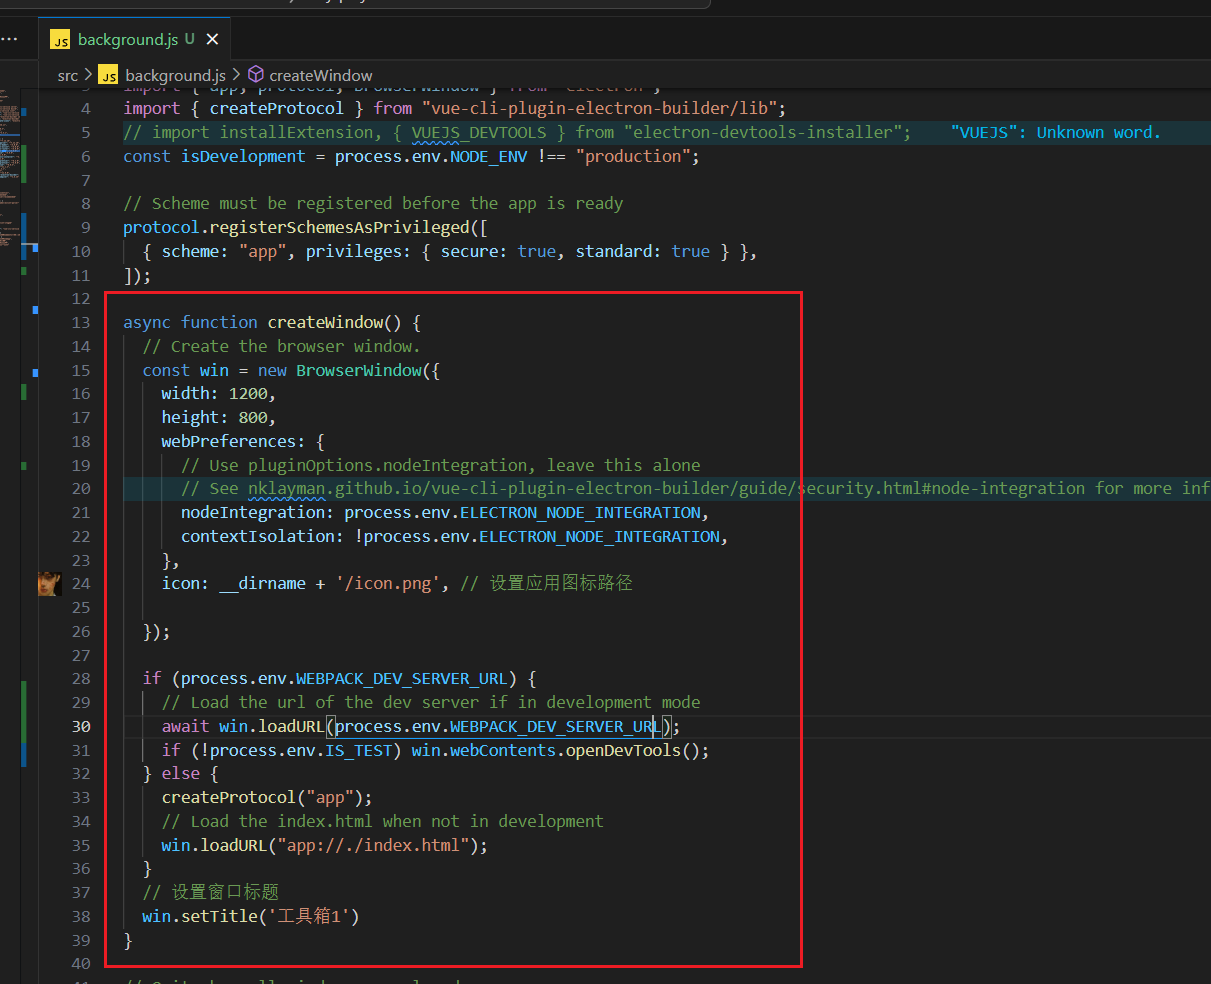
在background.js中添加代码,如下图
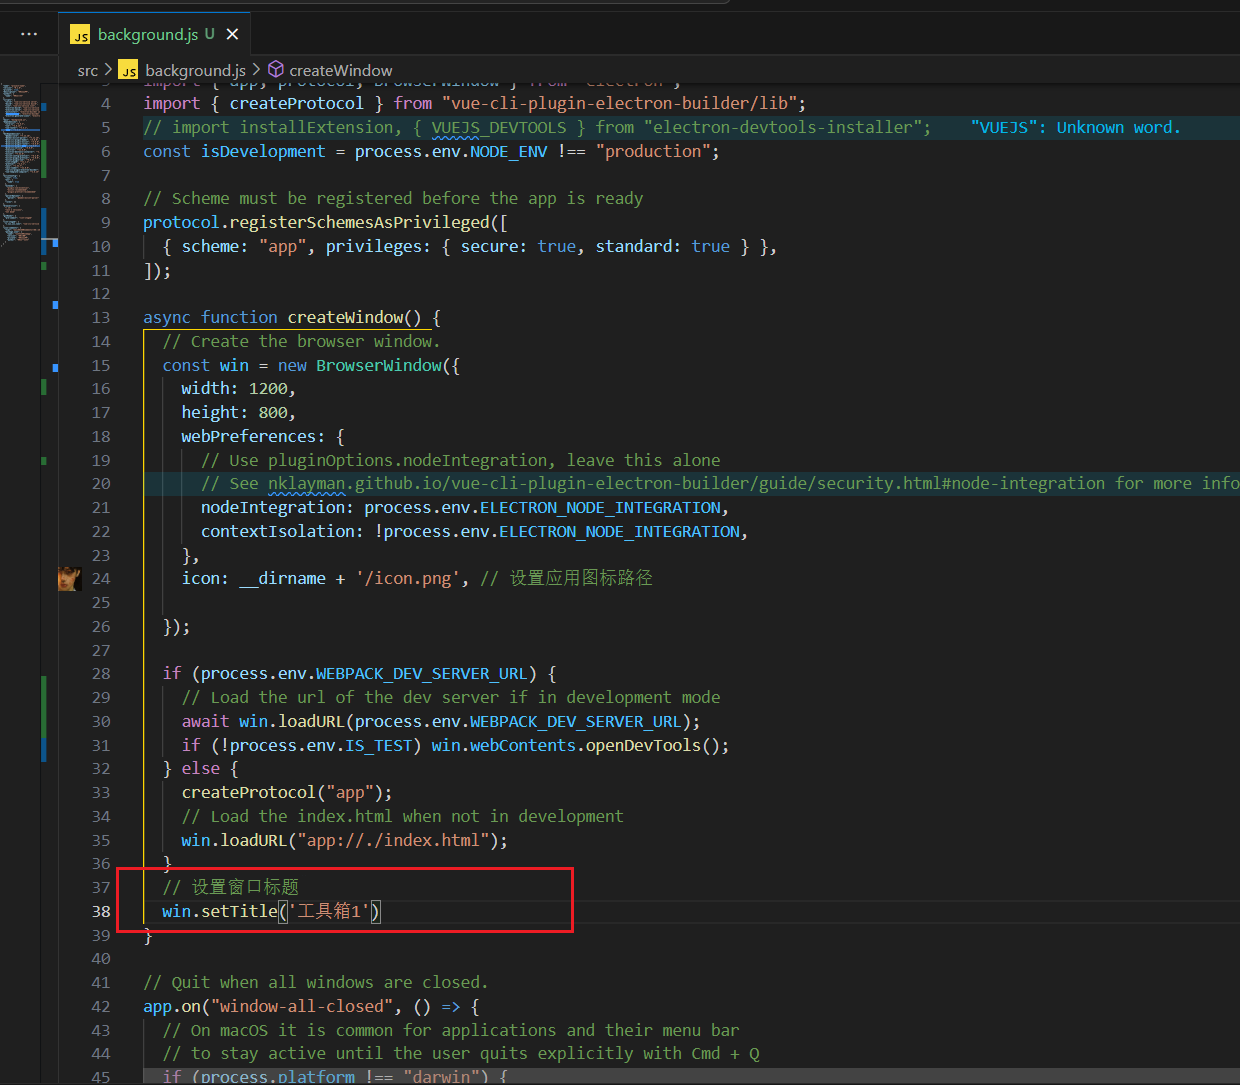
添加后的效果图
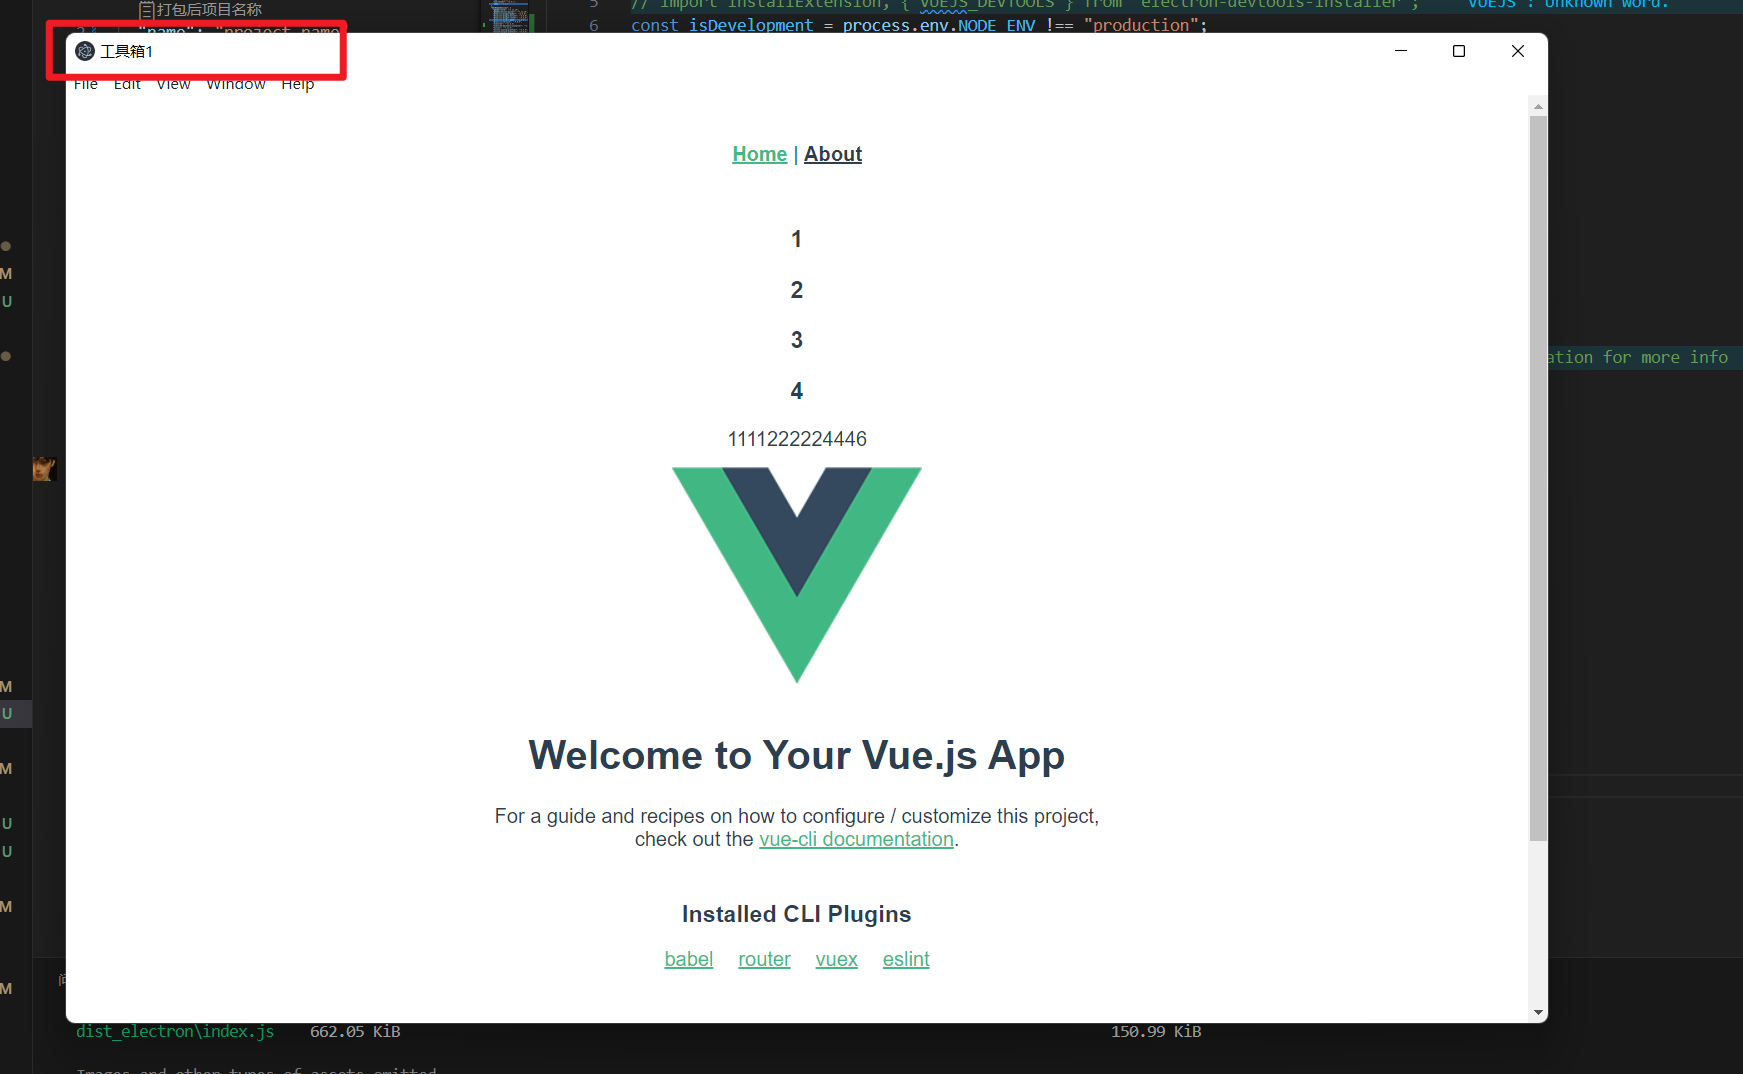
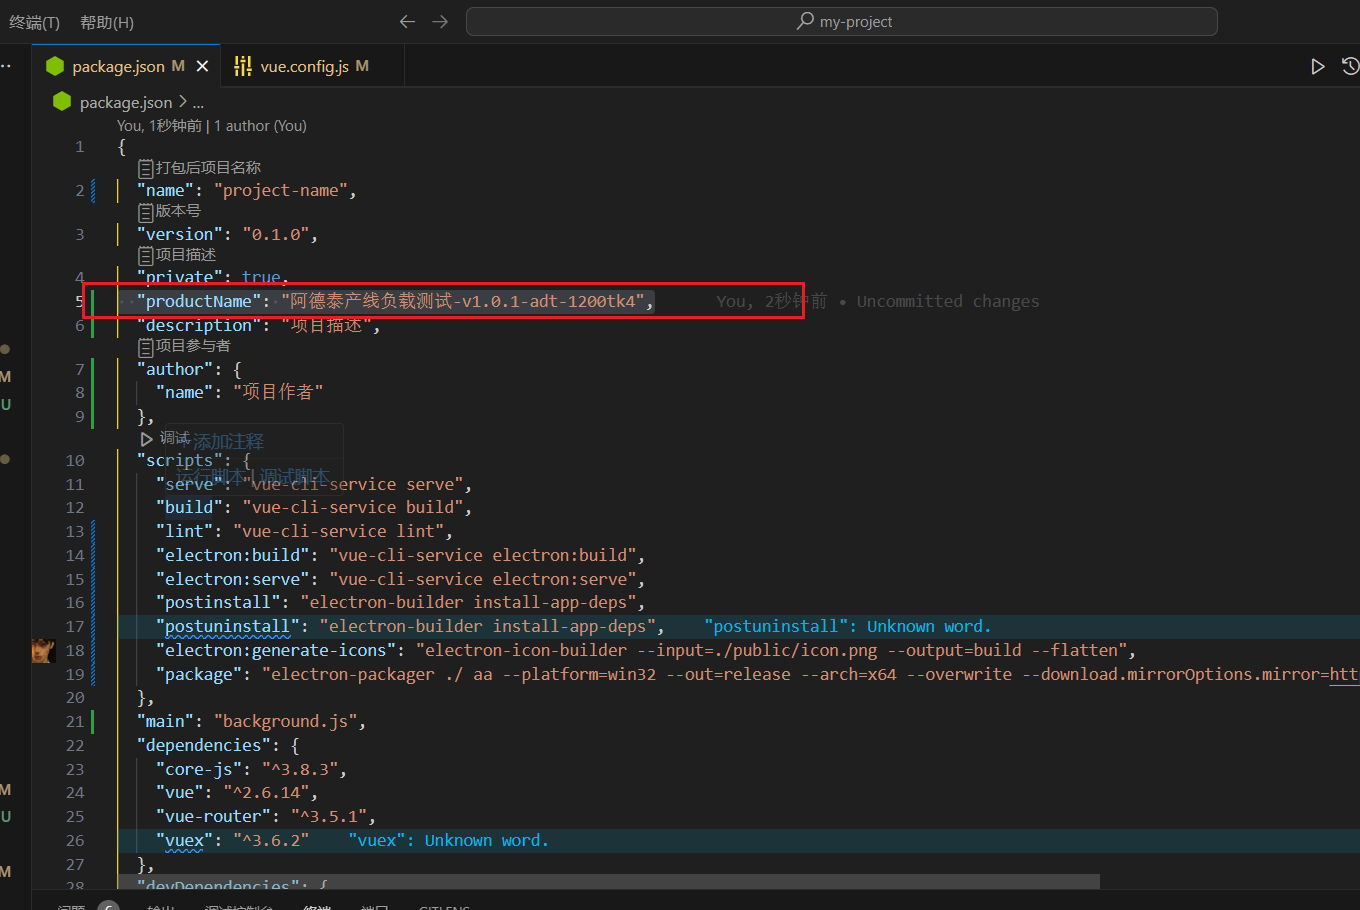
第一种方法:找到package.json文件 添加下面代码
"productName": "阿德泰产线负载测试-v1.0.1-adt-1200tk4",
添加代码后的文件图
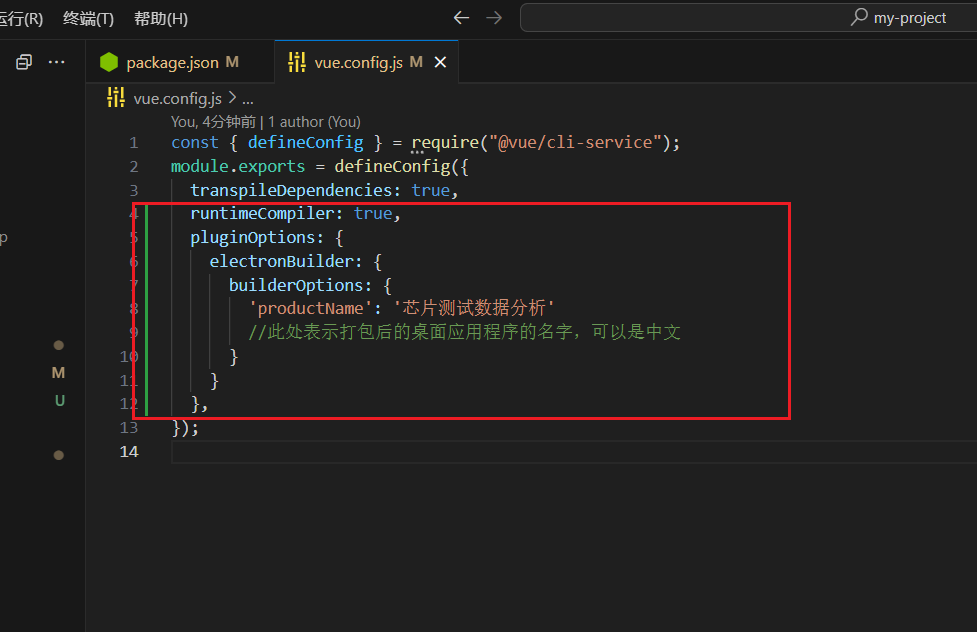
第二种方法:找到vue.config.js 文件添加下面代码
参考文章:vue+electron-builder打包桌面应用程序改变其名字
module.exports = {
    runtimeCompiler: true,
    pluginOptions: {
        electronBuilder: {
            builderOptions: {
                'productName': '芯片测试数据分析'
                //此处表示打包后的桌面应用程序的名字,可以是中文
            }
        }
    },
}
添加代码后的文件图
这样打包后的文件名就是按照自定义的了
其他注意事项
- 主进程和渲染进程:在使用Vue.js时,注意将UI相关的逻辑放在渲染进程中,而业务逻辑可以放在Electron的主进程中。
- 调试:你可以使用Chrome DevTools调试渲染进程中的Vue.js代码。electron-builder 也支持热重载功能,可以方便地进行调试。
- Vuex 和 Vue Router:vue-cli-plugin-electron-builder 支持Vuex和Vue Router,适用于构建复杂的Electron应用。


 2243
2243

 被折叠的 条评论
为什么被折叠?


