


安装Mock.JS
npm install mockjs -D
安装axios
这里建议安装axios,因为我们的mock是拦截请求,所以我们需要安装axios进行请求,当然使用原生的ajax也是可以的!
npm install axios
使用
-
创建mock文件夹
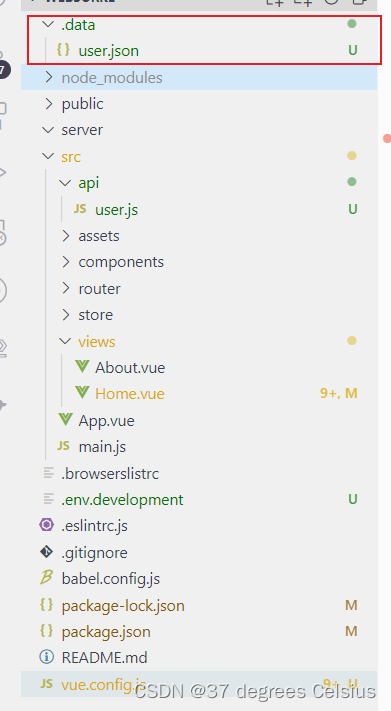
1.1 在最外层目录下面创建mock文件夹(当然也可以创建其他名称的,我这里取名为.data)
以下的.data取代mock文件夹1.2 在
.data文件夹中创建你所需的接口文件(所谓的接口文件,下文会有解释)
-
在
vue.config.js文件中新增配置
我们下面借助vue-cli 里面的 webpack的devServer来启动一个后端服务器

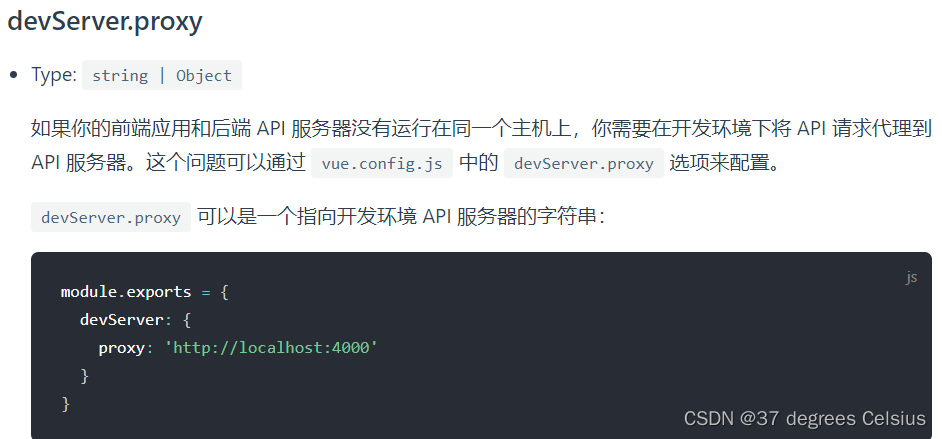
vue.config.js
const fs = require("fs");
const path = require("path");
const Mock = require("mockjs");

module.exports = {
  publicPath: "",
  devServer: {
    before: bindDevServerAfter,
  },
};
function bindDevServerAfter(app) {
  // serve mock data
  app.all("*", function (req, resp, next) {
    let pathname = req.path;
    if (pathname.endsWith("/")) {
      pathname = pathname.substring(0, pathname.length - 1);
    }
    // __dirname: 当前文件的上一级目录的绝对路径
    // 获取文件绝对路径  path.join用于连接路径
    const realpathname = path.join(__dirname, "./.data", pathname);
    // path.dirname(p) 返回路径中代表文件夹的部分,同 Unix 的dirname 命令类似。
    const dirname = path.dirname(realpathname);
    // 获取文件名 	path.basename(p[, ext]) 返回路径中的最后一部分。同 Unix 命令 bashname 类似。
    const filename = path.basename(realpathname) + ".json";
    const localpath = [
      realpathname,
      dirname + "/" + req.method.toLowerCase() + "-" + filename,
      dirname + "/" + filename,
    ].filter(function (pathstr) {
    	// fs.exists 检测给定的路径是否存在
      return fs.existsSync(pathstr) && fs.lstatSync(pathstr).isFile();
    })[0];
    if (localpath) {
      smartResponse(req, resp, localpath);
    } else {
      next();
    }
  });
}

// 处理接口返回
function smartResponse(req, resp, file) {
  const directives = [];
  let pos1 = 0;
  let pos2 = 0;
  let line;
  const regexp = /^\s*\/\//;
  // 读取文件内容
  const text = fs.readFileSync(file, "utf-8");
  while (pos2 < text.length) {
    pos2 = text.indexOf("\n", pos1);
    line = text.substring(pos1, pos2);
    if (regexp.test(line)) {
      directives.push(line.substring(2));
      pos1 = pos2 + 1;
    } else {
      break;
    }
  }
  const actions = directives.reduce(
    function (actions, text) {
      const pos = text.indexOf(":");
      const key = text.substring(0, pos).trim();
      let value = text.substring(pos + 1).trim();
      try {
        value = JSON.parse(value);
      } catch (e) {
        // ignore
      }
      actions[key] = value;
      return actions;
    },
    { code: 200, delay: false, stop: false, error: false }
  );
  let jsonData;
  try {
    jsonData = JSON.parse(text.substring(pos1));
  } catch (e) {
    actions.code = 500;
    actions.error = "parse json file " + file + " error: " + e.message;
  }
  const doResponse = function () {
    if (actions.stop) {
      return resp.socket.destroy();
    }
    resp.status(actions.code);
    if (actions.error) {
      resp.end(actions.error);
    } else {
      resp.set("Content-Type", "application/json");
      resp.json(Mock.mock(jsonData));
    }
  };
  setTimeout(doResponse, actions.delay || 0);
}
-
.data接口文件中代码编写
在这里文件名表示的是你的请求url,如:eg: .data>user.json url: /user eg: data>demo>demo>demo>user.json url: /demo/demo/demo/user
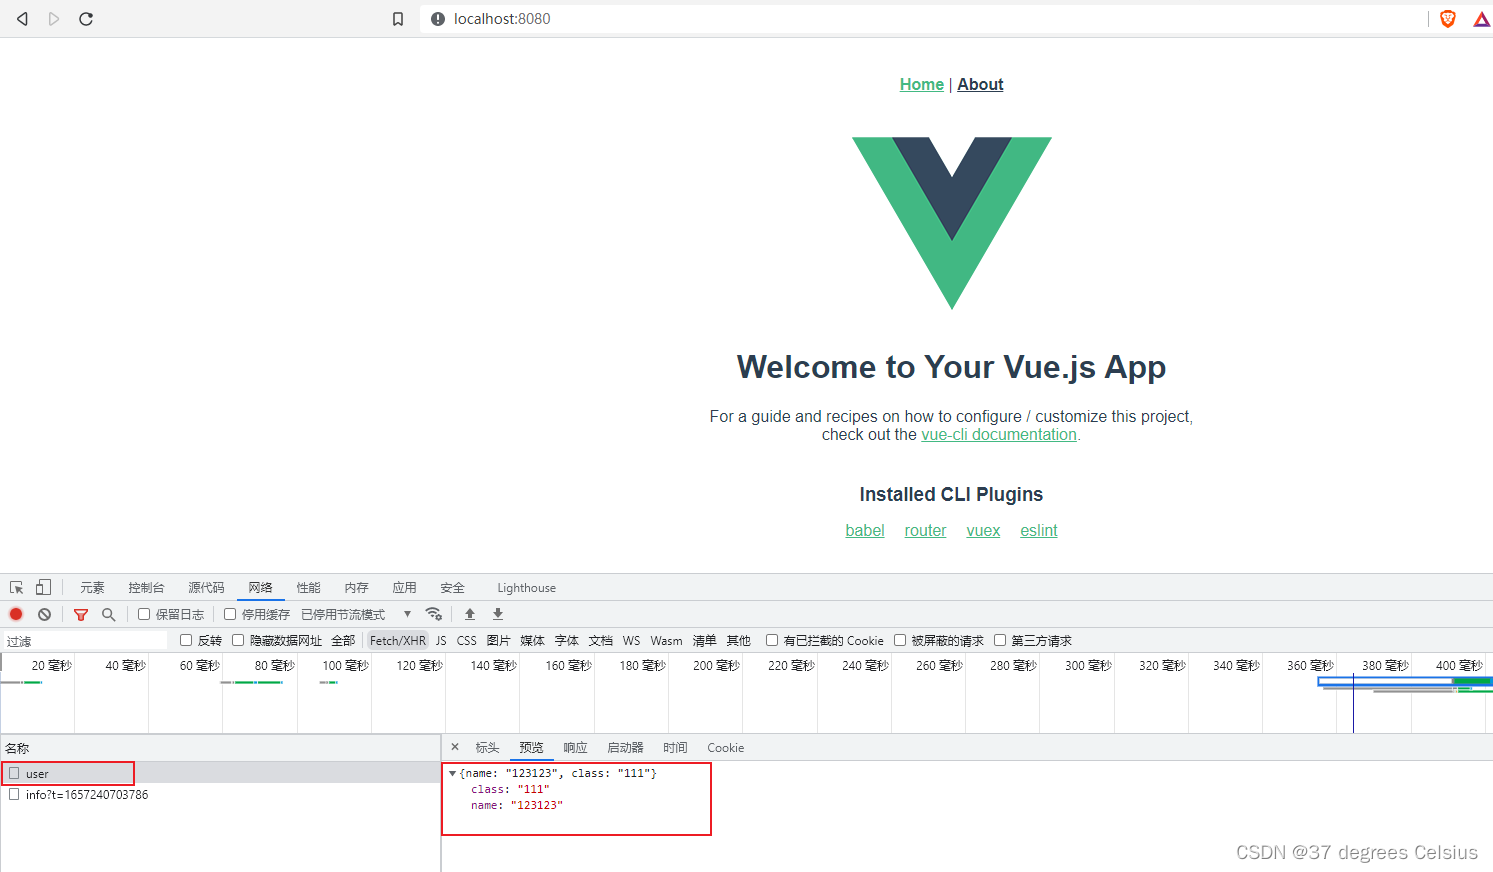
user.json
{
  "name": "123123",
  "class": "111"
}
- 运行项目
这里是使用的vue项目所以这样运行,如果是其他项目可以使用其他方式运行项目
npm run serve
- 发送请求
你需要在哪里请求该接口就直接调用你之前使用的文件名即可,这里的axios我没有封装,如果需要封装可以看我另外一篇文章
<script>
  import axios from 'axios'

  export default {
  	name: 'HelloWorld',
  	props: {
  		msg: String
  	},
  	created() {
  	    axios.get("/user").then((response) => {
  	      console.log(response);
  	    });
  	  },
  }
</script>
效果


 949
949


 被折叠的 条评论
为什么被折叠?
被折叠的 条评论
为什么被折叠?
 到【灌水乐园】发言


