


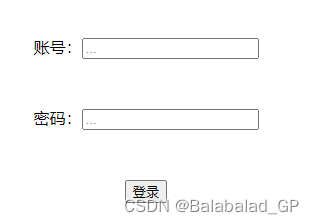
- 首先得明白自己想要做一个什么样的登录页,所以进行页面的简单设计,只需要用到的东西给码出来就行。
以下是登录页面:<!-- login.html --> <!DOCTYPE html> <html lang="en" > <head> <meta charset="UTF-8"> <title>Login 页面</title> <style type="text/css"> .bd{ text-align: center; } .tt{ margin-top: 50px; } </style> </head> <body> <form action="/login" method="post" class="bd"> 账号:<input type="text" name="username" placeholder="..." class="tt"> <br/> 密码:<input type="password" name="password" placeholder="..." class="tt"> <br/> <input type="submit" value="登录" class="tt"> </form> </body> </html>效果图:
这个是登录成功的页面:
<!-- success.html -->

<!DOCTYPE html>
<html lang="en">
<head>
    <meta charset="UTF-8">
    <title>成功页面</title>
</head>
<body>
  <h1 style="width: 100%;height: 100px;text-align: center;color: aqua">登录成功</h1>
</body>
</html>
效果图:

-
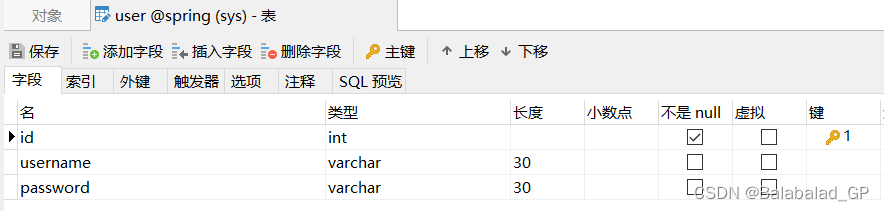
接下来就是进行数据库的设计与实现,因为只是实现简单的登录功能,所以只需要两个字段,命名自己决定,不过还是建议使用一眼就能看懂的。我这里把账号(username)和密码(password)分别命名好,id使用默认自增的。
往字段中添加数据
基础学习1:Springboot+MyBatis实现简单的登录功能
最新推荐文章于 2024-05-28 20:05:10 发布

 最低0.47元/天 解锁文章


 1840
1840


 被折叠的 条评论
为什么被折叠?
被折叠的 条评论
为什么被折叠?
 到【灌水乐园】发言


