


简介
本文主要讲解axios的概念和基本使用。
axios时目前最流行的ajax封装库之一,用于很方便地实现ajax请求的发送。
支持的功能:
- 从浏览器发出 XMLHttpRequests请求。
- 从 node.js 发出 http 请求。
- 支持 Promise API。
- 能拦截请求和响应。
- 能转换请求和响应数据。
- 取消请求。
- 实现JSON数据的自动转换。
- 客户端支持防止 XSRF攻击。
先借助json-server创建一个简单的服务,供ajax发送请求,json-server是一个简单的可以接收restful的服务。
github地址:https://github.com/typicode/json-server
第一步:安装:npm install -g json-server

第二步:创建一个名为db.json的文件,把网站的数据复制进去。
{
  "posts": [
    { "id": 1, "title": "json-server", "author": "typicode" }
  ],
  "comments": [
    { "id": 1, "body": "some comment", "postId": 1 }
  ],
  "profile": { "name": "typicode" }
}
第三步:启动命令:json-server --watch db.json
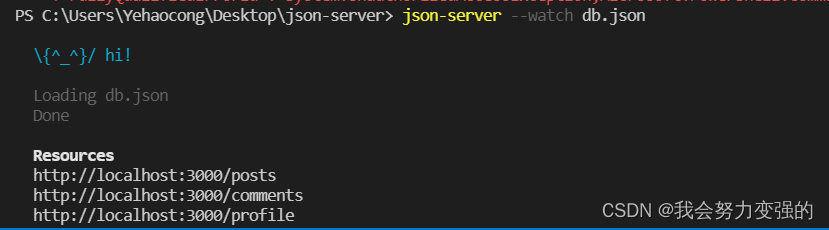
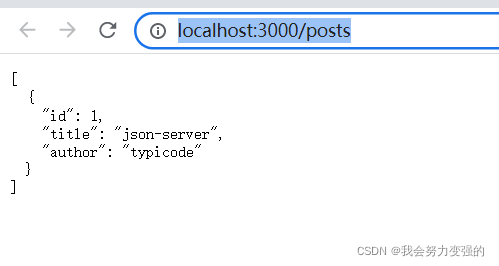
访问http://localhost:3000/posts 下面页面为成功
使用axios
GitHub地址:https://github.com/axios/axios
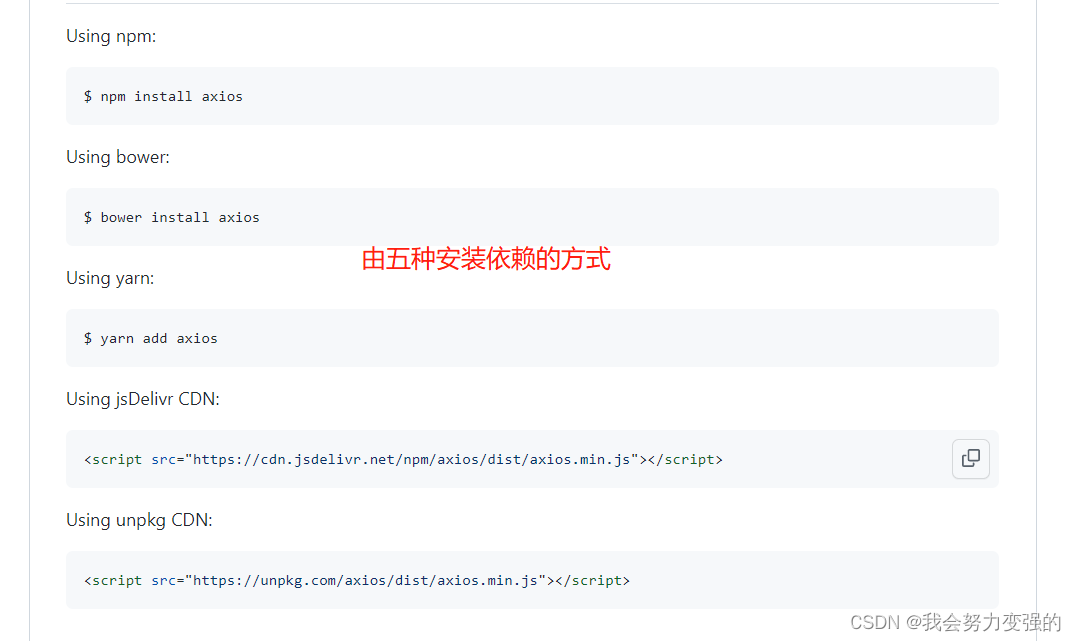
为了方便,我们直接使用第四种。
<!DOCTYPE html>
<html lang="en">
<head>
    <meta charset="UTF-8">
    <title>axios基本使用</title>
</head>
<body>
    <button id="btn1">发送get请求</button> <br><br>
    <button id="btn2">发送post请求</button><br><br>
    <button id="btn3">发送put请求</button><br><br>
    <button id="btn4">发送delete请求</button>

    <hr>

    <div>其他发送请求的api:</div><br><br>
    <button id="btn5">发送get请求1</button> <br><br>
    <button id="btn6">发送post请求1</button><br><br>
    <button id="btn7">发送put请求1</button><br><
最低0.47元/天 解锁文章


 2万+
2万+


 被折叠的 条评论
为什么被折叠?
被折叠的 条评论
为什么被折叠?
 到【灌水乐园】发言


