


- 下载c/c++插件
- 新建一个文件夹,用code打开

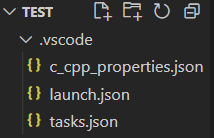
- 建立.vscode文件夹(注意有个点),再建立以下4个文件
- c_cpp_properties.json
- launch.json
- tasks.json
- settings.json
- 在4个文件夹里分别粘贴如下代码
c_cpp_properties.json
{
    "configurations": [
        {
            "name": "GCC",
            "includePath": [
                "${workspaceFolder}/**"
            ],
            "defines": [
                "_DEBUG",
                "UNICODE",
                "_UNICODE"
            ],
            "windowsSdkVersion": "10.0.22000.0",
            "compilerPath": "D:\\Software\\CodeBlocks\\MinGW\\bin\\g++.exe",
            "cStandard": "c17",
            "cppStandard": "c++17",
            "intelliSenseMode": "windows-gcc-x64"
        }
    ],
    "version": 4
}
launch.json
{
   "configurations": [
      {
         "name": "C/C++: g++.exe build and debug active file",
         "type": "cppdbg",
         "request": "launch",
         "program": "${fileDirname}\\${fileBasenameNoExtension}.exe",
         "args": [],
         "stopAtEntry": false,
         "cwd": "${fileDirname}",
         "environment": [],
         "externalConsole": true,
         "MIMode": "gdb",
         "miDebuggerPath": "D:\\Software\\CodeBlocks\\MinGW\\bin\\gdb.exe",
         "setupCommands": [
            {
               "description": "Enable pretty-printing for gdb",
               "text": "-enable-pretty-printing",
               "ignoreFailures": true
            },
            {
               "description": "Set Disassembly Flavor to Intel",
               "text": "-gdb-set disassembly-flavor intel",
               "ignoreFailures": true
            }
         ],
         "preLaunchTask": "C/C++: g++.exe build active file"
      }
   ],
   "version": "2.0.0"
}
tasks.json
{
    "tasks": [
        {
            "type": "cppbuild",
            "label": "C/C++: g++.exe build active file",
            "command": "D:\\Software\\CodeBlocks\\MinGW\\bin\\g++.exe",
            "args": [
                "-fdiagnostics-color=always",
                "-g",
                "${file}",
                "-o",
                "${fileDirname}\\${fileBasenameNoExtension}.exe"
            ],
            "options": {
                "cwd": "D:\\Software\\CodeBlocks\\MinGW\\bin"
            },
            "problemMatcher": [
                "$gcc"
            ],
            "group": {
                "kind": "build",
                "isDefault": true
            },
            "detail": "Task generated by Debugger."
        }
    ],
    "version": "2.0.0"
}
settings.json
{
    "files.associations": {
        "*.cpp": "cpp",
        "ostream": "cpp",
        "iostream": "cpp"
    }
}- 最重要的一步
找到你Code Blocks安装文件夹的MinGW文件夹的bin文件夹,复制路径,并添加到环境变量,如下是我的


在c_cpp_properties.json,launch.json,tasks.json这3个文件里找到有路径的地方(可以搜索MinGW),替换成你的路径,一共有4处(应该是)
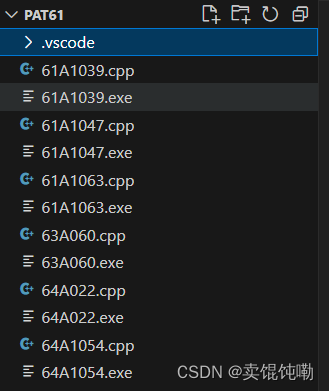
至此已经完成,注意要在与.vscode文件夹同目录建立cpp文件。之后每次开启新项目,要把.vscode文件夹复制到新项目的文件夹里。
碎碎念:之所以会用VSCode写C++,是因为它可以实现这样的功能——在文件夹里同时放很多有main函数的cpp文件,每次可以只运行选择的那个cpp文件(见下图)。这样刷题很方便。如果有其他实现类似功能的方法,也欢迎大家评论。
留个坑:过几天把VScode的代码自动格式化、利用GitHub备份、写markdown笔记以及利用markdown做PPT等等我的各种配置记录一下。


 1646
1646


 被折叠的 条评论
为什么被折叠?
被折叠的 条评论
为什么被折叠?
 到【灌水乐园】发言


