


尝试使用centos nginx+uwsgi部署一个以前的django项目,解决问题的过程漫长且艰辛,但结果证明是值得的,如果你正在部署一个Django项目,希望能帮到你
前提
我使用的:python3.6 mysql5.7 django项目3.2
首先在centos里面下好python及pip,使用git把gitee仓库里面的django项目下载好。
正文
安装virtualenv
pip install virtualenv创建一个aa ---虚拟环境
mkdir /env
virtualenv /env/aa --python=python3.6.8
激活虚拟环境
source /env/aa/bin/activate 退出虚拟环境则为 deactivate
如图显示进入虚拟环境
![]()
mysql的安装和远程连接
高版本的mysql兼容低版本
安装mysql
yum install mysql-server
启动mysql
sudo systemctl start mysqld
状态
sudo systemctl status mysqld
安装启动后的状态如下

远程连接本地mysql
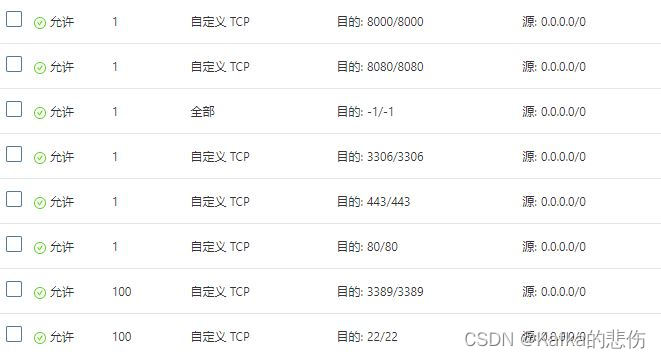
mysql -uroot -p第一次安装我直接回车进入了mysql界面(还有...你的安全组记得添加3306端口)这个时候远程连接出现了一个关于权限的问题导致无法远程连接 dabase--->mysql--->user 里面需要改
update user set host="%" where user = "root";打开本地的navacat mysql
连接名:随意
主机/ip地址:你的阿里云虚拟机公网IP/虚拟机地址
其他暂时不用填 因为第一次并没有设置密码
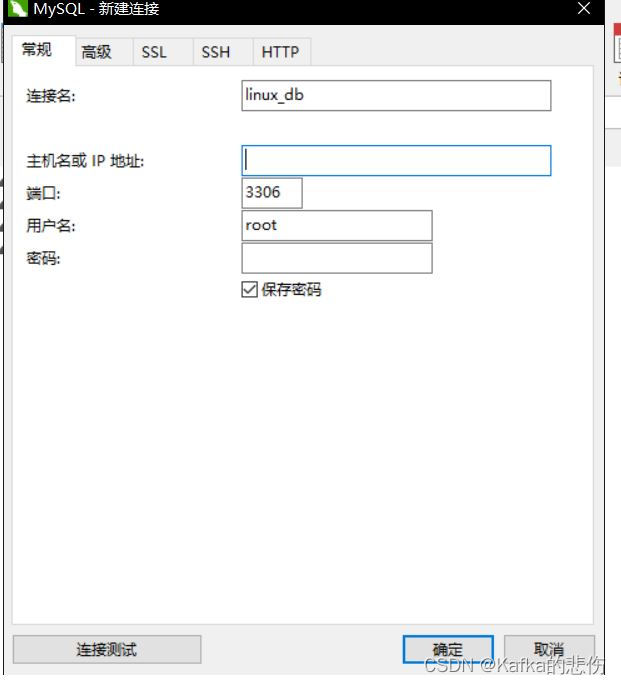
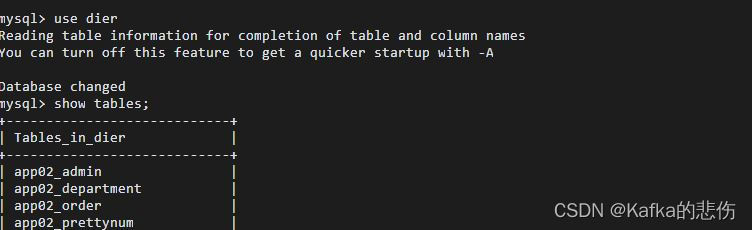
连接测试完成,创建连接后直接在navacat mysql里面创建一个同名db dier 将以前的数据库
转储到现在同名的数据库,之后尝试在 linux里面查询一下
django项目的本地运行
进入你项目的目录,运行manage.py
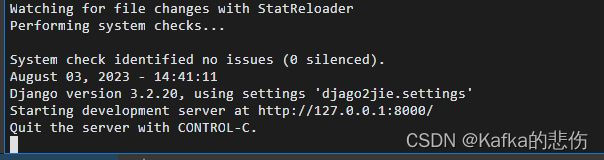
cd /home/www/day1python manage.py runserver
如果python manage.py runserver 0.0.0.1:8000
可以尝试公网ip:8000访问一下(安全组加端口)本地运行成功的图片
如果没有成功,如问题:Did you install mysqlclient?则需要安装相应的依赖包
pip install Django
pip install pillow
pip install mysqlclient或者是yum install mysql-devel
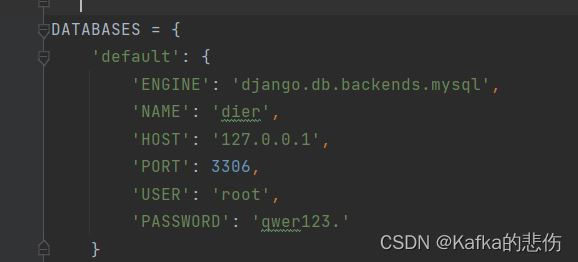
.....附:如果你的django项目setting.py连接数据库是设置了密码的则需要改密码。这里不在多述
安装uwsgi+nginx
其实重要的就是修改两个文件
pip install libpcre3 libpcre3-dev
pip install uwsgi
pip install nginx
进入 /etc/nginx 修改nginx.conf(这里是写好的 直接复制即可)
修改http---》server 里面的server_name 域名
必改 location /static {alias /home/www/day1/app02/static; }
是django项目的静态文件没了样式这些无法加载
# For more information on configuration, see:
#   * Official English Documentation: http://nginx.org/en/docs/
#   * Official Russian Documentation: http://nginx.org/ru/docs/

user nginx;
worker_processes auto;
error_log /var/log/nginx/error.log;
pid /run/nginx.pid;

# Load dynamic modules. See /usr/share/doc/nginx/README.dynamic.
include /usr/share/nginx/modules/*.conf;

events {
    worker_connections 1024;
}

http {
    log_format  main  '$remote_addr - $remote_user [$time_local] "$request" '
                      '$status $body_bytes_sent "$http_referer" '
                      '"$http_user_agent" "$http_x_forwarded_for"';

    access_log  /var/log/nginx/access.log  main;

    sendfile            on;
    tcp_nopush          on;
    tcp_nodelay         on;
    keepalive_timeout   65;
    types_hash_max_size 2048;

    include             /etc/nginx/mime.types;
    default_type        application/octet-stream;

    # Load modular configuration files from the /etc/nginx/conf.d directory.
    # See http://nginx.org/en/docs/ngx_core_module.html#include
    # for more information.
    include /etc/nginx/conf.d/*.conf;


    server {
        listen       80 default_server;
        listen       [::]:80 default_server;
        server_name  www.xxxa.cn xxxa.cn;
        charset      utf-8;
        root         /usr/share/nginx/html;

        # Load configuration files for the default server block.
        include /etc/nginx/default.d/*.conf;
        location /static {
            alias   /home/www/day1/app02/static;

        }

        location /{
            uwsgi_pass   127.0.0.1:8000;
            include      /etc/nginx/uwsgi_params;

        }

        error_page 404 /404.html;
            location = /40x.html {
        }

        error_page 500 502 503 504 /50x.html;
            location = /50x.html {
        }
    }

# Settings for a TLS enabled server.
#
#    server {
#        listen       443 ssl http2 default_server;
#        listen       [::]:443 ssl http2 default_server;
#        server_name  _;
#        root         /usr/share/nginx/html;
#
#        ssl_certificate "/etc/pki/nginx/server.crt";
#        ssl_certificate_key "/etc/pki/nginx/private/server.key";
#        ssl_session_cache shared:SSL:1m;
#        ssl_session_timeout  10m;
#        ssl_ciphers PROFILE=SYSTEM;
#        ssl_prefer_server_ciphers on;
#
#        # Load configuration files for the default server block.
#        include /etc/nginx/default.d/*.conf;
#
#        location / {
#        }
#
#        error_page 404 /404.html;
#            location = /40x.html {
#        }
#
#        error_page 500 502 503 504 /50x.html;
#            location = /50x.html {
#        }
#    }

}
systemctl start nginx启动服务或在sbin目录下 ./nginx -s reload 重启服务
然后在nginx目录下验证
cd /etc/nginx
nginx -t
出现如下代码表示配置完成
nginx: the configuration file /etc/nginx/nginx.conf syntax is ok
nginx: configuration file /etc/nginx/nginx.conf test is successful
此时访问公网ip:80如图

接下来配置uwsgi
在django---》manage.py目录新建一个文件aa_uwsgi.ini 内容
chdir 虚拟环境下的项目目录
module =项目内的wsgi.py所在
virtualenv=关于独立python环境
[uwsgi]

socket=127.0.0.1:8000
chdir=/home/www/day1
module = djago2jie.wsgi
virtualenv=/env/aa/
processes=1
master = true
vacuum = true

buffer-size=65535
完成保存然后在django项目目录下运行此文件uwsgi --ini aa_uwsgi.ini
网页 公网ip:80/主页 访问,手机端同样能够访问
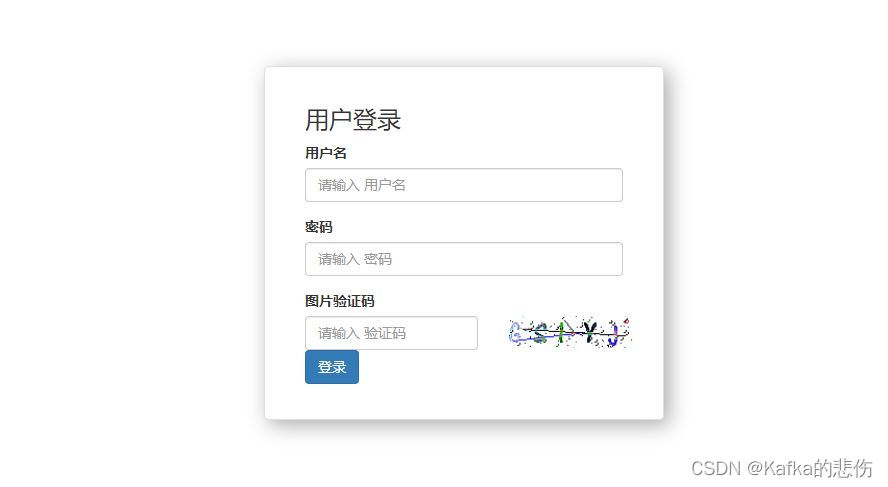
以及在安全组配置的端口
留:域名解析


 3万+
3万+


 被折叠的 条评论
为什么被折叠?
被折叠的 条评论
为什么被折叠?
 到【灌水乐园】发言


