


最近项目上用到了聊天的功能,下面来分享一下关于websocket,键盘弹出等问题,避免别的朋友踩坑。
先给大家看看效果图
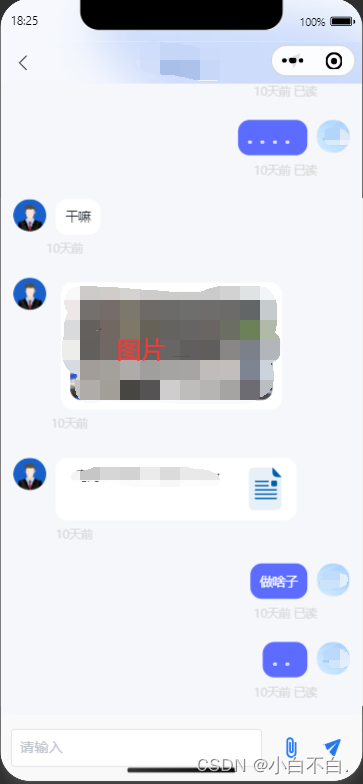
接着进入正文了!!!!!
一、需要注意的几个点
1.scroll-view的高度
先看看整体的页面布局
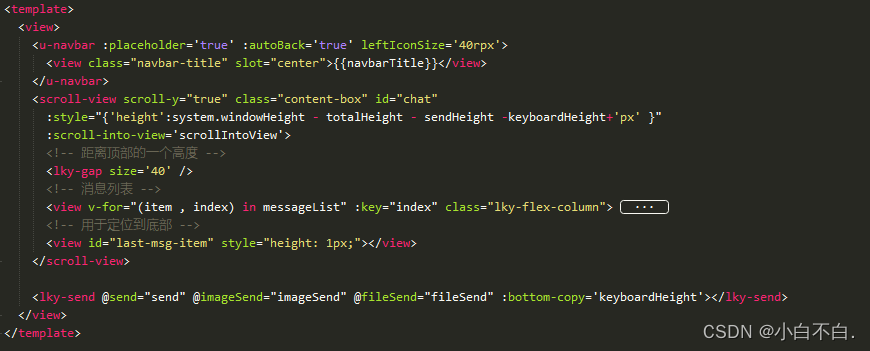
system.windowHeight : 页面总高度
totalHeight:顶部导航栏高度
sendHeight:底部输入框高度 (设置样式的时候自己设置的)
keyboardHeight:键盘高度(键盘没有弹出的时候为0)
	            uni.getSystemInfo({
					success: res => {
						this.system = res
					}
				})

				// #ifdef MP-WEIXIN
				//获取胶囊信息
				this.menu = uni.getMenuButtonBoundingClientRect()

				//计算组件高度
				this.statusBarHeight = this.system.statusBarHeight //状态栏高度
				this.navigatorHeight = (this.menu.top - this.system.statusBarHeight) * 2 + this.menu.height //导航栏高度
				this.totalHeight = this.statusBarHeight + this.navigatorHeight //总高度
				// 保存到全局
				this.$store.state.totalHeight = this.totalHeight
				this.$store.state.system = this.system
				// #endif

				// #ifdef APP
				this.statusBarHeight = this.system.statusBarHeight //状态栏高度
				this.navigatorHeight = this.system.statusBarHeight + 45 //导航栏高度
				this.totalHeight = this.navigatorHeight //总高度
				// 保存到全局
				this.$store.state.totalHeight = this.totalHeight
				this.$store.state.system = this.system

				// #endif
这里需要注意的是scroll-view没有高度就和view差不多,scroll-into-view属性就不生效。
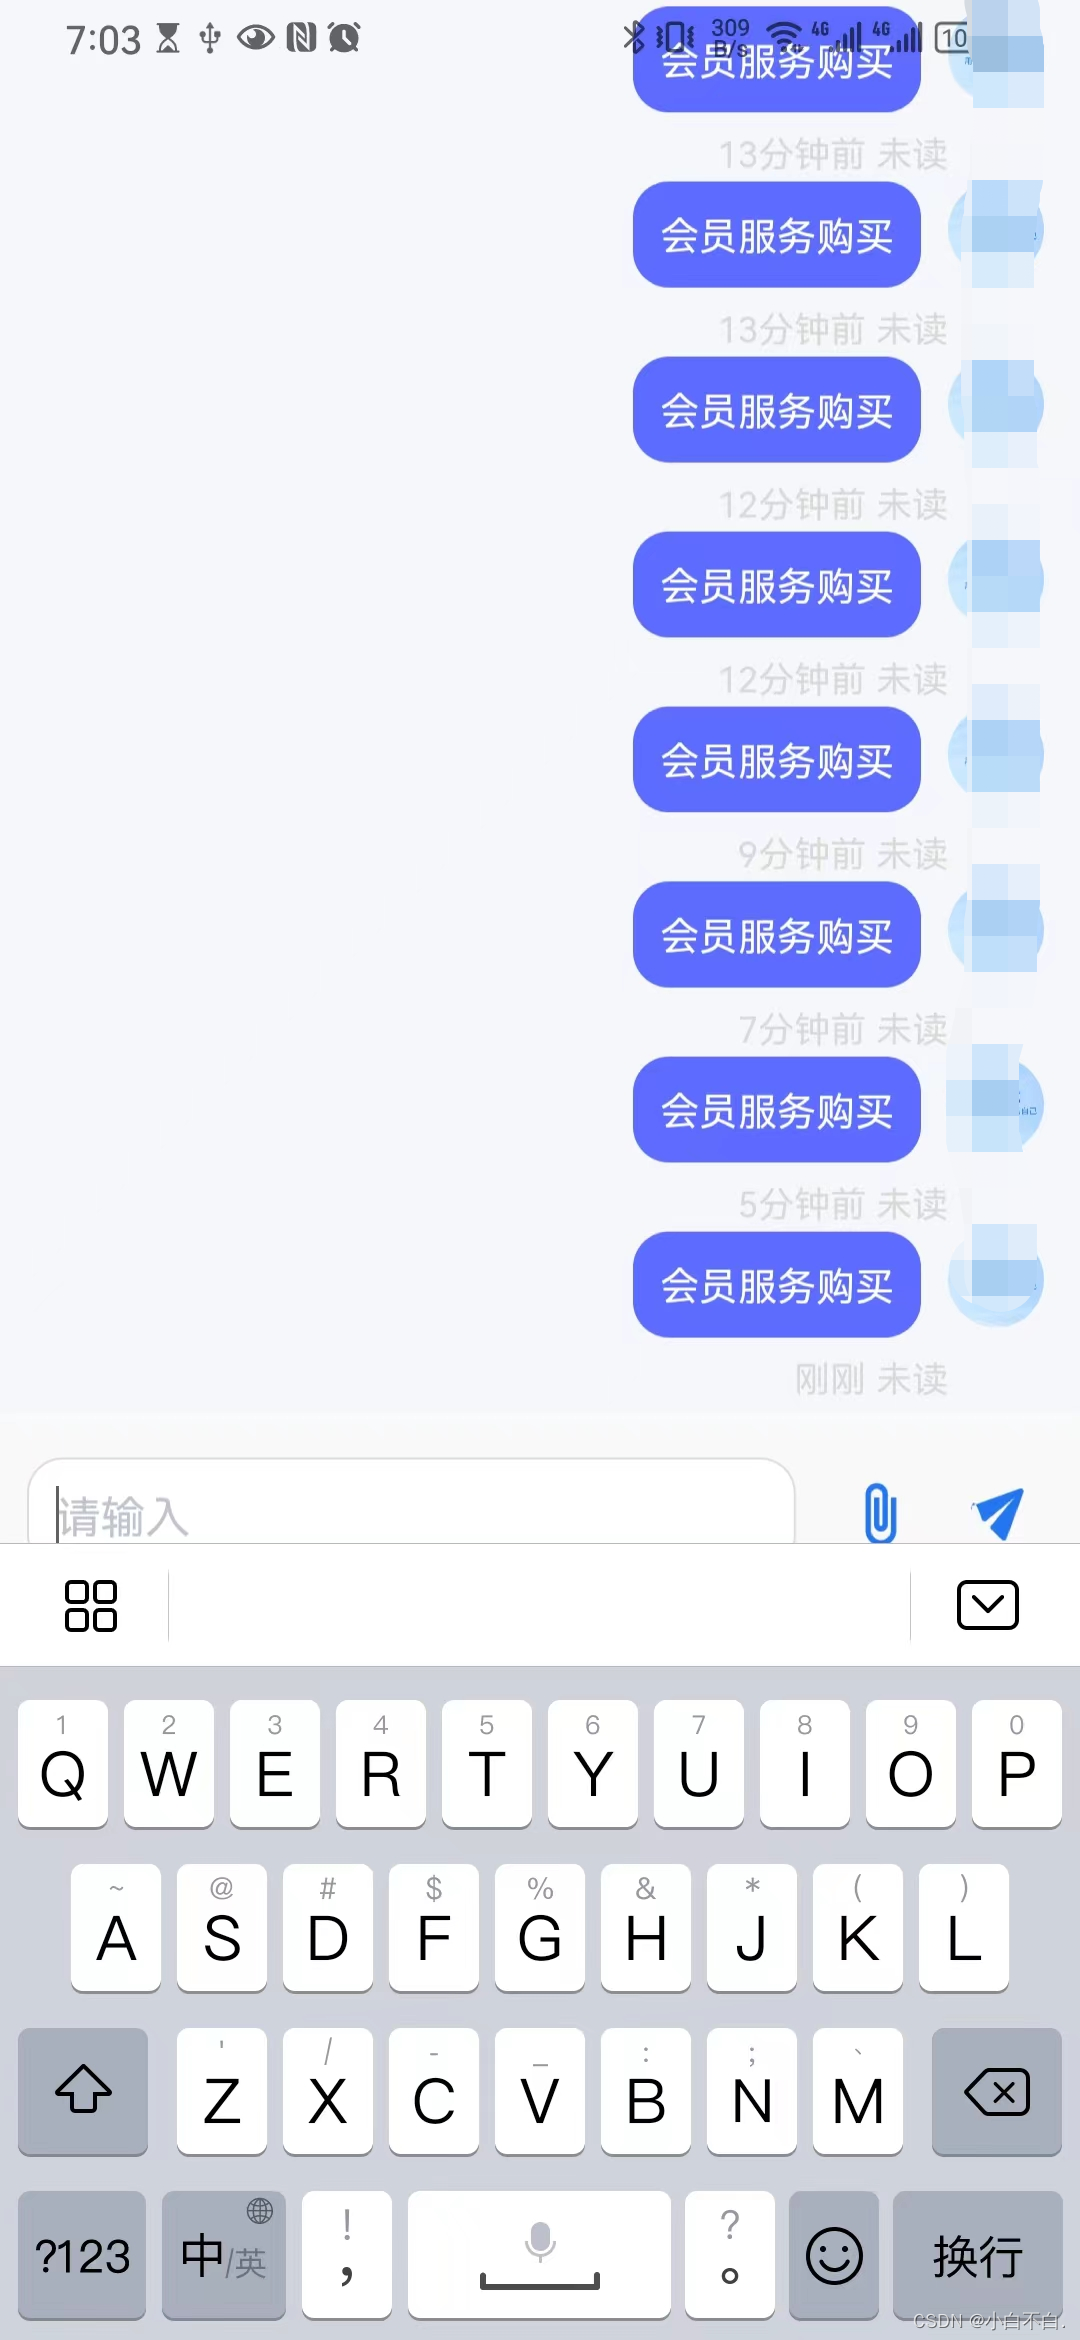
2.键盘弹起时,使页面向上移动,顶部导航栏不动
使用textarea原生的键盘弹起时,页面向上移是这样的
解决后的图片:

是不是看着顺眼多了
首先的话需要在页面加载的时候监听一下键盘的高度
		listenerKeyboardHeight() {
			this.listener = (res) => {
				console.log("键盘高度", res.height)
				this.keyboardHeight = res.height
				this.$nextTick(() => {
					this.scrollToBottom()
				})
			}
			uni.onKeyboardHeightChange(this.listener)
		}
当键盘弹出的时候,将scroll-view的高度减去键盘高度,底部发送框向上移动‘键盘高度’的px
底部的发送框一般都是position: fixed;来定位的,将bottom属性变一下就行了
		<view class="information-box lky-flex-items-center" :style="{bottom: bottom+'px'}">
			<view style="margin-right: 20rpx; width: 100%">
				<u--textarea :confirmType="null" v-model="value" placeholder="请输入" height="40rpx" :showConfirmBar="false"
					:placeholderStyle="placeholderStyle" @focus="textfocus" :adjustPosition="false" />
			</view>
			<image src="@/static/images/chat/icon_attachment.svg" class="icon" v-if="isUploadFile" @click="openFile" />
			<image src="@/static/images/chat/icon_send.svg" class="icon" @click="send" />
		</view>
3.定位到底部
先再来看看我们的页面布局
最后一条是用于定位到底部的
<!-- 用于定位到底部 -->
<view id="last-msg-item" style="height: 1px;"></view>
方法:
		// 定位到底部
		scrollToBottom() {
			this.$nextTick(() => {
				this.scrollIntoView = "last-msg-item"
                // 清空,为下一次定位做准备
				this.$nextTick(() => {
					this.scrollIntoView = ""
				})
			})
		},
二、websocket代码
这是封装的一个mixin类
import {
	socket
} from "@/common/mixin/socket.js"

//引入方法
export default {
    mixins: [socket],
}
socket.js
export const socket = {
	data() {
		return {
			// socket是否开启
			socketOpen: false,
			// 定时器
			timer: null,

			// 链接
			surl: `websocket链接`,

			// 底部id用于定位到底部
			scrollIntoView: "",

			// 键盘高度
			keyboardHeight: 0,

			// 监听键盘高度的方法
			listener: null
		}
	},

	onLoad(option) {
		// 开启键盘高度监听
		this.listenerKeyboardHeight()

		// socket初始化
		this.init()

		// 定时器,定时判断socket有没有掉线
		this.timer = setInterval(() => {
			this.isSocketConnct()
		}, 2000)

	},
	beforeDestroy() {
		// 关闭定时器
		clearInterval(this.timer)

		// 关闭键盘高度监听
		uni.offKeyboardHeightChange(this.listener)

		// 关闭Socket
		this.closeSocket()
	},
	methods: {
		// 发送消息
		sendSocketMessage(msg) {
			console.log("发送消息", msg);
			let that = this
			if (this.socketOpen) {
				uni.sendSocketMessage({
					data: msg,
					success: (res) => {
						setTimeout(() => {
                            // json转对象
							let param = JSON.parse(msg)
							that.sendMessageHandle(param)
						}, 300)
					},
					fail(err) {
						// 发送失败处理
					}
				});
			} else {
				// Socket没有开启,重新连接并重新发送消息
				this.init()
				setTimeout(() => {
					this.sendSocketMessage(msg)
				},300)
			}
		},

		// 判断是否连接
		isSocketConnct() {
			if (!this.socketOpen) {
				console.log("WebSocket 再次连接!");
				this.init()
			}
		},

		// 初始化
		init() {
			this.connect()
			this.openSocket()
			this.onclose()
			this.onSocketMessage()
		},

		// 建立连接
		connect() {
			console.log(this.surl);
			uni.connectSocket({
				url: this.surl,
				method: 'GET'
			});
		},

		// 监听关闭
		onclose() {
			let that = this
			uni.onSocketClose((res) => {
				that.socketOpen = false
				console.log('WebSocket 已关闭!');
			});
		},

		// 关闭
		closeSocket() {
			uni.closeSocket();
		},

		// 打开Soceket
		openSocket() {
			let that = this
			uni.onSocketOpen((res) => {
				that.socketOpen = true
				console.log('WebSocket连接已打开!');
			});
		},

		// 接收事件
		onSocketMessage() {
			let that = this
			uni.onSocketMessage((res) => {
				let obj = JSON.parse(res.data)
				console.log("接收事件", obj);
				this.onMessageHandle(obj)
			});
		},

		// 接收到事件后处理的方法(可自己重写)
		onMessageHandle(obj) {
			// 根据自己业务逻辑重写
		},

		// 发送消息后处理的方法(可自己重写)
		sendMessageHandle(msg) {
			// 根据自己业务逻辑重写
		},


		// 定位到底部
		scrollToBottom() {
			this.$nextTick(() => {
				this.scrollIntoView = "last-msg-item"
				this.$nextTick(() => {
					this.scrollIntoView = ""
				})
			})
		},

        // 开启键盘高度的监听
		listenerKeyboardHeight() {
			this.listener = (res) => {
				console.log("键盘高度", res.height)
				this.keyboardHeight = res.height
				this.$nextTick(() => {
					this.scrollToBottom()
				})
			}
			uni.onKeyboardHeightChange(this.listener)
		}
	}

}
直接引入就可以使用啦 , 接下来说说几个可能用到的方法,在自己的页面直接用就可以啦
	// 发送消息方法
	send(value) {
        // 自定义消息体
		let param = {
			"type": 1,
			"content": value,
	   	}

        // 对象转json
		let m = JSON.stringify(param)
		this.sendSocketMessage(m)
	},
// 接收到事件后处理的方法(可自己重写)
onMessageHandle(obj) {
// obj 接收到的事件对象
},
// 发送消息后处理的方法(可自己重写)
sendMessageHandle(msg) {
// msg 发送的消息对象
}三、页面布局代码
<template>
	<view>
        <!-- 自定义顶部导航栏 用原生的话下面scroll-view应该可以不用减去导航栏的高度的-->
		<u-navbar :placeholder='true' :autoBack='true' leftIconSize='40rpx'>
			<view class="navbar-title" slot="center">{{navbarTitle}}</view>
		</u-navbar>

		<scroll-view
            scroll-y="true"
            class="content-box" id="chat"
			:style="{'height':system.windowHeight - totalHeight - sendHeight - keyboardHeight+'px' }"
			:scroll-into-view='scrollIntoView'>
			<lky-gap size='40' />
			<view id="msglistview"></view>
			<view id="last-msg-item" style="height: 1px;"></view>
		</scroll-view>

		<lky-send
            @send="send"
            :is-upload-file="false"
            @imageSend="imageSend"
            @fileSend="fileSend"
			:bottom-copy='keyboardHeight'></lky-send>
	</view>
</template>

<script>

	import {
		mapState
	} from 'vuex'

	import {
		socket
	} from "@/common/mixin/socket.js"


	import LkySend from "../component/lky-p-send/lky-p-send.vue"

	export default {
		components: {
		},
		mixins: [socket],
		data() {
			return {
				src: '',

                // 聊天记录列表
				messageList: [],

                // socket链接,如果在socket.js中改了的话就不用写这个了
				surl: ``,

			};
		},

        //  我的高度存在vuex的
		computed: mapState([
			"totalHeight", "system", "sendHeight"
		]),

		onLoad(option) {
			// 获取聊天记录
			this.messageList = uni.getStorageSync(`messageList_${this.$store.state.userInfo.id}`) || []
			console.log("缓存中的聊天记录", this.messageList);
			this.scrollToBottom()
		},

		methods: {

			send(value) {
				let param = {
					"type": 1,
					"content": value,
				}
				let m = JSON.stringify(param)
				this.sendSocketMessage(m)
			},


            // 预览图片
			imageClick(url) {
				uni.previewImage({
					urls: [
						url
					]
				})
			},

            // 发送图片
			imageSend(url) {
				let param = {
					"type": 3,
					"text": "",
					"url": url,
					"userId": this.$store.state.userInfo.id
				}
				let m = JSON.stringify(param)
				this.sendSocketMessage(m)
			},

            // 发送文件
			fileSend(url, name) {
				let param = {
					"type": 4,
					"text": name,
					"url": url,
					"userId": this.$store.state.userInfo.id
				}
				let m = JSON.stringify(param)
				this.sendSocketMessage(m)
			},

            // 打开文件
			openFile(item) {
				uni.downloadFile({
					url: item.url,
					success: (res) => {
						var filePath = res.tempFilePath;
						uni.openDocument({
							filePath: filePath,
							showMenu: true,
							success: function(res) {}
						});
					}
				});
			},

			// 接收到事件后处理的方法(可自己重写)
			onMessageHandle(obj) {
                //根据业务逻辑重写
                // obj接收到的事件

			},

			// 发送消息后处理的方法(可自己重写)
			sendMessageHandle(msg) {
				 //根据业务逻辑重写
                // msg 发送的消息
			},
		}
	}
</script>

<style lang="scss">
	body {
		box-sizing: border-box;
		padding: 0 ;
		background-color: $lky-hui-bg ;
	}
</style>

<style lang="scss" scoped>

	.content-box {
		padding: 0 28rpx;
		box-sizing: border-box;
		height: auto;
		z-index: -1;
		overflow: hidden;
	}
</style>


 2775
2775

 被折叠的 条评论
为什么被折叠?
被折叠的 条评论
为什么被折叠?
 到【灌水乐园】发言


