


0 知识学习
01 yaml文件相关知识
k8s中的yaml文件详解
里边详细介绍了:
-
语法规则:其中最重要的是缩进时不允许使用Tal键,只允许使用空格;每个键值对的冒号后面要加一个空格
-
k8s中yaml文件的两种结构:
maps:顾名思义指的是字典,即一个Key:Value 的键值对信息 lists:列表,说白了就是数组 -
如何使用yaml文件创建Pod以及deployment
02 容器交付流程
- 开发代码阶段:编写代码并测试;编写Dockerfile
- 持续交付阶段:java代码需要打成jar/war包,python程序无需这个步骤;制作镜像;上传镜像到镜像仓库中。
- 应用部署阶段:环境准备-pod、service、ingress
- 运维阶段:监控;升级优化等
03 k8s部署项目流程
- dockerfile制作镜像
- 推送到镜像仓库(阿里云,dockerhub)
- 控制器部署镜像:deployment
- 对外暴露应用:service或ingress
- 运维:监控;升级优化等
04 部分重要操作命令
尚硅谷教程
# 创建deployment
kubectl create deployment [控制器名称] --image=[基于的镜像及版本号] --dry-run -o yaml > [ymal文件名称].ymal
# 此命令可以创建导出deployment对应的ymal文件

kubectl apply -f [ymal文件名称].ymal
# 此命令可以创建该deployment

kubectl scale deployment [控制器名称] --replicas=3
# 此命令可以将控制器扩容为3个副本

kubectl expose deployment [控制器名称] --port=[对外暴露的端口] --target-port=[容器本身的端口] --type=NodePort
# 此命令可以创建service以NodePort的方式暴露端口,以便访问
另一个b站教程
# 直接创建deployment的yml文件
vim [ymal文件名].yml
# 在里边粘贴相应的内容

kubectl apply -f [ymal文件名称].ymal
# apply创建deployment

# 创建service的yml文件
vim [service名称],yml
# 粘贴对应内容

kubectl apply -f [service名称].ymal
# apply创建service
05 yaml文件详解
# 输出pod的yaml文件
kubectl get po [容器名-NMAES] -o yaml

# 输出deployment的yaml文件
kubectl get -o ymal deploy [deployment-NAMES]
根据以下指令默认创建的yaml文件:
root@master:/home/hqc/k8s_test/flask-hello-world# kubectl create deployment helloworld-deployment --image=registry.cn-beijing.aliyuncs.com/hqc-k8s/ali-flask-hello-world:v1.0  --dry-run -o yml > helloworld-deployment.ymal
	W1130 17:20:57.067197   23541 helpers.go:535] --dry-run is deprecated and can be replaced with --dry-run=client.
 yaml文件还不是很熟悉,需要进一步学习。
1 部署第一个项目(nginx)到k8s集群上
第一步:在master上创建一个deployment
# 查看deployment
root@master:/home/hqc# kubectl get deploy
	No resources found in default namespace.
# 可看到,一开始没有任何deployments

# 创建一个基于nginx镜像的名为nginx的deployment
root@master:/home/hqc# kubectl create deployment nginx --image=nginx
	deployment.apps/nginx created
# 创建成功

#查看deployment
root@master:/home/hqc# kubectl get deploy
	NAME    READY   UP-TO-DATE   AVAILABLE   AGE
	nginx   0/1     1            0           11s
# 需等待一段时间

# 过一段时间再次查看
root@master:/home/hqc# kubectl get deployments
NAME    READY   UP-TO-DATE   AVAILABLE   AGE
nginx   1/1     1            1           3m49s
# 已经ready
第二步:创建一个service
# 创建一个nodeport方式的service
root@master:/home/hqc# kubectl create service nodeport nginx --tcp 80:80
	service/nginx created
# 创建成功

# 查看service
root@master:/home/hqc# kubectl get svc
	NAME         TYPE        CLUSTER-IP       EXTERNAL-IP   PORT(S)        AGE
	kubernetes   ClusterIP   10.96.0.1        <none>        443/TCP        11d
	nginx        NodePort    10.109.178.122   <none>        80:30650/TCP   68s
# 可见暴露的端口为30650,可由公网访问
第三步:验证是否部署成功
# 查看运行的pod
root@master:/home/hqc# kubectl get pod -o wide
	NAME                    READY   STATUS    RESTARTS   AGE   IP            NODE     NOMINATED NODE   READINESS GATES
	nginx-f89759699-ksgcb   1/1     Running   0          16m   10.244.1.12   node01   <none>           <none>
# 可见该nginx应用运行在node01上

# 在node上验证是否部署成功
root@node01:/home/user# curl 192.168.43.48:30650
	<!DOCTYPE html>
	<html>
	<head>
	<title>Welcome to nginx!</title>
	<style>
	html { color-scheme: light dark; }
	body { width: 35em; margin: 0 auto;
	font-family: Tahoma, Verdana, Arial, sans-serif; }
	</style>
	</head>
	<body>
	<h1>Welcome to nginx!</h1>
	<p>If you see this page, the nginx web server is successfully installed and
	working. Further configuration is required.</p>

	<p>For online documentation and support please refer to
	<a href="http://nginx.org/">nginx.org</a>.<br/>
	Commercial support is available at
	<a href="http://nginx.com/">nginx.com</a>.</p>

	<p><em>Thank you for using nginx.</em></p>
	</body>
	</html>
# 成功!!并且注意,换成:
root@node01:/home/user# curl 192.168.43.48:30650
# 换成master的IP访问也成功
 浏览器也访问成功!!
2 部署自己的python项目到k8s集群上
以flask-hello-world.py文件作测试
dockerfile制作自己的镜像并推送到阿里云私有仓库
第一次尝试失败(前面都顺利,最后访问不了)
01 yaml文件创建deployment
# 自动创建基于registry.cn-beijing.aliyuncs.com/hqc-k8s/ali-flask-hello-world:v1.0镜像并命名为helloworld-deployment的deployment相对应的yaml文件
root@master:/home/hqc/k8s_test/flask-hello-world# kubectl create deployment helloworld-deployment --image=registry.cn-beijing.aliyuncs.com/hqc-k8s/ali-flask-hello-world:v1.0  --dry-run -o yml > helloworld-deployment.ymal
	W1130 17:20:57.067197   23541 helpers.go:535] --dry-run is deprecated and can be replaced with --dry-run=client.
注意:当时并未发现文件后缀错写为ymal,但后面创建竟然成功了,后缀错了没影响吗,咱也不大懂阿。
# 修改yaml配置文件
root@master:/home/hqc/k8s_test/flask-hello-world# vim helloworld-deployment.ymal
	apiVersion: apps/v1
	kind: Deployment
	metadata:
	  creationTimestamp: null
	  labels:
	    app: helloworld-deployment
	  name: helloworld-deployment
	spec:
	  replicas: 2
	  selector:
	    matchLabels:
	      app: helloworld-deployment
	  strategy: {}
	  template:
	    metadata:
	      creationTimestamp: null
	      labels:
	        app: helloworld-deployment
	    spec:
	      containers:
	      - image: registry.cn-beijing.aliyuncs.com/hqc-k8s/ali-flask-hello-world:v1.0
	        name: ali-flask-hello-world
	        resources: {}
	        ports:
	        - containerPort: 8080
	        imagePullPolicy: IfNotPresent
	status: {}

# 删除本地原有镜像,看会不会从云仓库中拉取(不知道是否需要这一步骤)
root@master:/home/hqc/k8s_test/flask-hello-world# docker rmi registry.cn-beijing.aliyuncs.com/hqc-k8s/ali-flask-hello-world:v1.0
	Untagged: registry.cn-beijing.aliyuncs.com/hqc-k8s/ali-flask-hello-world:v1.0
	Untagged: registry.cn-beijing.aliyuncs.com/hqc-k8s/ali-flask-hello-world@sha256:af862fb9415a8121710e7d87b0ddb085df8a70cc744d6ebe4a8cd64f6d242b2a

# 创建deployment
root@master:/home/hqc/k8s_test/flask-hello-world# kubectl create -f helloworld-deployment.ymal
	error: error validating "helloworld-deployment.ymal": error validating data: ValidationError(Deployment.spec.template.spec.containers[0].ports[0]): invalid type for io.k8s.api.core.v1.ContainerPort: got "string", expected "map"; if you choose to ignore these errors, turn validation off with --validate=false
# 报错原因后面发现:是containerPort:后边没有接空格,不符合语法

# 更改后重新创建,成功
root@master:/home/hqc/k8s_test/flask-hello-world# kubectl create -f helloworld-deployment.ymal
	deployment.apps/helloworld-deployment created
02 yaml文件创建service
# 编写yaml文件以创建service
root@master:/home/hqc/k8s_test/flask-hello-world# vim helloworld-service.yaml
	apiVersion: v1 # 注意此处不能和deployment一样为‘apps/v1’
	kind: Service
	metadata:
	  name: helloworld-deployment
	  labels:
	    app: helloworld-deployment
	spec:
	  ports:
	  - port: 80
	    targetPort: 8080
	    nodePort: 30001
	    protocol: TCP
	  selector:
	    app: helloworld-deployment
	  type: NodePort

# 应用
root@master:/home/hqc/k8s_test/flask-hello-world# kubectl create -f helloworld-service.yaml
	service/helloworld-deployment created
03 查看是否成功
root@master:/home/hqc/k8s_test/flask-hello-world# kubectl get all
NAME                                         READY   STATUS    RESTARTS   AGE
pod/helloworld-deployment-79cbf4dcbb-lr6fv   1/1     Running   0          64m
pod/helloworld-deployment-79cbf4dcbb-rb2p7   1/1     Running   0          64m
pod/nginx-f89759699-ksgcb                    1/1     Running   0          167m

NAME                            TYPE        CLUSTER-IP       EXTERNAL-IP   PORT(S)        AGE
service/helloworld-deployment   NodePort    10.98.6.46       <none>        80:30001/TCP   55m
service/kubernetes              ClusterIP   10.96.0.1        <none>        443/TCP        12d
service/nginx                   NodePort    10.109.178.122   <none>        80:30650/TCP   157m

NAME                                    READY   UP-TO-DATE   AVAILABLE   AGE
deployment.apps/helloworld-deployment   2/2     2            2           64m
deployment.apps/nginx                   1/1     1            1           167m

NAME                                               DESIRED   CURRENT   READY   AGE
replicaset.apps/helloworld-deployment-79cbf4dcbb   2         2         2       64m
replicaset.apps/nginx-f89759699                    1         1         1       167m

# 全部运行正常
但是master和node的IP都访问不了

尝试解决问题
01 觉得和应用内部端口有关,不应该是80,而应该是5000
# 首先得先删除该服务,才能修改之后应用成功
root@master:/home/hqc/k8s_test/flask-hello-world# kubectl delete service helloworld-deployment
	service "helloworld-deployment" deleted

# 修改yaml文件
root@master:/home/hqc/k8s_test/flask-hello-world# vim helloworld-service.yaml
	# 修改内容:
	- port: 5000 # 由80改为5000
	# 其中5000为应用的暴露端口

# 重新应用
root@master:/home/hqc/k8s_test/flask-hello-world# kubectl create -f helloworld-service.yaml
service/helloworld-deployment created

root@master:/home/hqc/k8s_test/flask-hello-world# kubectl get all
NAME                            TYPE        CLUSTER-IP       EXTERNAL-IP   PORT(S)          AGE
service/helloworld-deployment   NodePort    10.101.188.36    <none>        5000:30002/TCP   2s
service/kubernetes              ClusterIP   10.96.0.1        <none>        443/TCP          12d
service/nginx                   NodePort    10.109.178.122   <none>        80:30650/TCP     3h4m
# 可见,服务创建成功
但是,仍然无法访问。qswl
02 再换个端口号(这几个端口有点搞不清)

service中的三种端口不够明白,可参考这篇文章
对于k8s中的三种IP不清晰,可参考这篇博客
把targetport: 8080 改为 5000
# 首先得先删除该服务,才能修改之后应用成功
root@master:/home/hqc/k8s_test/flask-hello-world# kubectl delete service helloworld-deployment
	service "helloworld-deployment" deleted

# 修改yaml文件
root@master:/home/hqc/k8s_test/flask-hello-world# vim helloworld-service.yaml
	# 修改内容:
	targetport: 5000 # 由8080改为5000
	# 其中5000为应用的暴露端口

# 重新应用
root@master:/home/hqc/k8s_test/flask-hello-world# kubectl create -f helloworld-service.yaml
service/helloworld-deployment created

root@master:/home/hqc/k8s_test/flask-hello-world# kubectl get all
NAME                            TYPE        CLUSTER-IP       EXTERNAL-IP   PORT(S)          AGE
service/helloworld-deployment   NodePort    10.101.188.36    <none>        80:30002/TCP   	2s
service/kubernetes              ClusterIP   10.96.0.1        <none>        443/TCP          12d
service/nginx                   NodePort    10.109.178.122   <none>        80:30650/TCP     3h4m
# 可见,服务创建成功
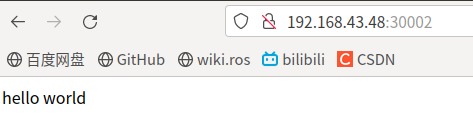
惊喜地,发现:成功!!!
原本该程序应该要访问http://172.17.0.2:5000/,现在只需要本机IP即可
成功解决!
加入node02之后扩容副本为3时出现问题
01 删除原来那个deployment
root@master:/home/hqc/k8s_test/flask-hello-world# kubectl delete deployment helloworld-deployment
	deployment.apps "helloworld-deployment" deleted
02 修改yaml文件中副本为3并应用
root@master:/home/hqc/k8s_test/flask-hello-world# vim helloworld-deployment.ymal

root@master:/home/hqc/k8s_test/flask-hello-world# kubectl create -f helloworld-deployment.ymal
	deployment.apps/helloworld-deployment created
# 创建成功
03 查看信息
root@master:/home/hqc/k8s_test/flask-hello-world# kubectl get deployment
	NAME                    READY   UP-TO-DATE   AVAILABLE   AGE
	helloworld-deployment   2/3     3            2           4s
	nginx                   1/1     1            1           22h
# 发现只成功创建了两个副本

root@master:/home/hqc/k8s_test/flask-hello-world# kubectl get pods -o wide
	NAME                                     READY   STATUS             RESTARTS   AGE   IP            NODE     NOMINATED NODE   READINESS GATES
	helloworld-deployment-79cbf4dcbb-flxfj   1/1     Running            0          24s   10.244.1.21   node01   <none>           <none>
	helloworld-deployment-79cbf4dcbb-fmgf8   1/1     Running            0          24s   10.244.1.20   node01   <none>           <none>
	helloworld-deployment-79cbf4dcbb-kzmgd   0/1     ImagePullBackOff   0          24s   10.244.2.3    node02   <none>           <none>
	nginx-f89759699-ksgcb                    1/1     Running            1          22h   10.244.1.17   node01   <none>           <none>
# 发现分配到node02的那个副本没有成功
04 尝试解决
镜像拉取不成功,可能是要登录阿里云仓库
root@master:/home/hqc/k8s_test/flask-hello-world# docker login --username=errorhqc兮 registry.cn-beijing.aliyuncs.com
# 发现没有改变
那就直接在node02中拉取镜像
root@node02:/home/user2# docker pull registry.cn-beijing.aliyuncs.com/hqc-k8s/ali-flask-hello-world:v1.0
	v1.0: Pulling from hqc-k8s/ali-flask-hello-world
	647acf3d48c2: Pull complete
	b02967ef0034: Pull complete
	e1ad2231829e: Pull complete
	5576ce26bf1d: Pull complete
	a66b7f31b095: Pull complete
	05189b5b2762: Pull complete
	af08e8fda0d6: Pull complete
	287d56f7527b: Pull complete
	dc0580965fb6: Pull complete
	c1147962ae93: Pull complete
	9310a3ae1b50: Pull complete
	Digest: sha256:af862fb9415a8121710e7d87b0ddb085df8a70cc744d6ebe4a8cd64f6d242b2a
	Status: Downloaded newer image for registry.cn-beijing.aliyuncs.com/hqc-k8s/ali-flask-hello-world:v1.0
	registry.cn-beijing.aliyuncs.com/hqc-k8s/ali-flask-hello-world:v1.0
# 拉取成功!

# 再次查看
root@master:/home/hqc/k8s_test/flask-hello-world# kubectl get pods -o wide
	NAME                                     READY   STATUS    RESTARTS   AGE   IP            NODE     NOMINATED NODE   READINESS GATES
	helloworld-deployment-79cbf4dcbb-5x6b2   1/1     Running   0          14m   10.244.1.23   node01   <none>           <none>
	helloworld-deployment-79cbf4dcbb-n5sps   1/1     Running   0          14m   10.244.1.22   node01   <none>           <none>
	helloworld-deployment-79cbf4dcbb-wfh5w   1/1     Running   0          14m   10.244.2.7    node02   <none>           <none>
	nginx-f89759699-ksgcb                    1/1     Running   1          22h   10.244.1.17   node01   <none>           <none>
# 成功创建
 dashboard中查看odk!
关闭node02(模拟突然死机)然后删除其上运行的容器
root@master:/home/hqc/k8s_test/flask-hello-world# kubectl delete pod helloworld-deployment-79cbf4dcbb-wfh5w
pod "helloworld-deployment-79cbf4dcbb-wfh5w" deleted

root@master:/home/hqc/k8s_test/flask-hello-world# kubectl get pods -o wide
	NAME                                     READY   STATUS        RESTARTS   AGE   IP            NODE     NOMINATED NODE   READINESS GATES
	helloworld-deployment-79cbf4dcbb-5x6b2   1/1     Running       0          18m   10.244.1.23   node01   <none>           <none>
	helloworld-deployment-79cbf4dcbb-n5sps   1/1     Running       0          18m   10.244.1.22   node01   <none>           <none>
	helloworld-deployment-79cbf4dcbb-sr8xf   1/1     Running       0          53s   10.244.1.24   node01   <none>           <none>
	helloworld-deployment-79cbf4dcbb-wfh5w   1/1     Terminating   0          18m   10.244.2.7    node02   <none>           <none>
	nginx-f89759699-ksgcb                    1/1     Running       1          22h   10.244.1.17   node01   <none>           <none>
# 可见,集群自动在node01上新建了一个容器副本,保证总数为3
# 原副本由于我已经关闭了node02,所以一直是Terminating,删除不了,不用管

体现了k8s的自愈能力。


 2万+
2万+


 被折叠的 条评论
为什么被折叠?
被折叠的 条评论
为什么被折叠?
 到【灌水乐园】发言


