vue3 集成 fullcalendar

最近公司要写一个填写日志功能,用到 fullcalender 实现,选择时间段写日志并且可拖拽。
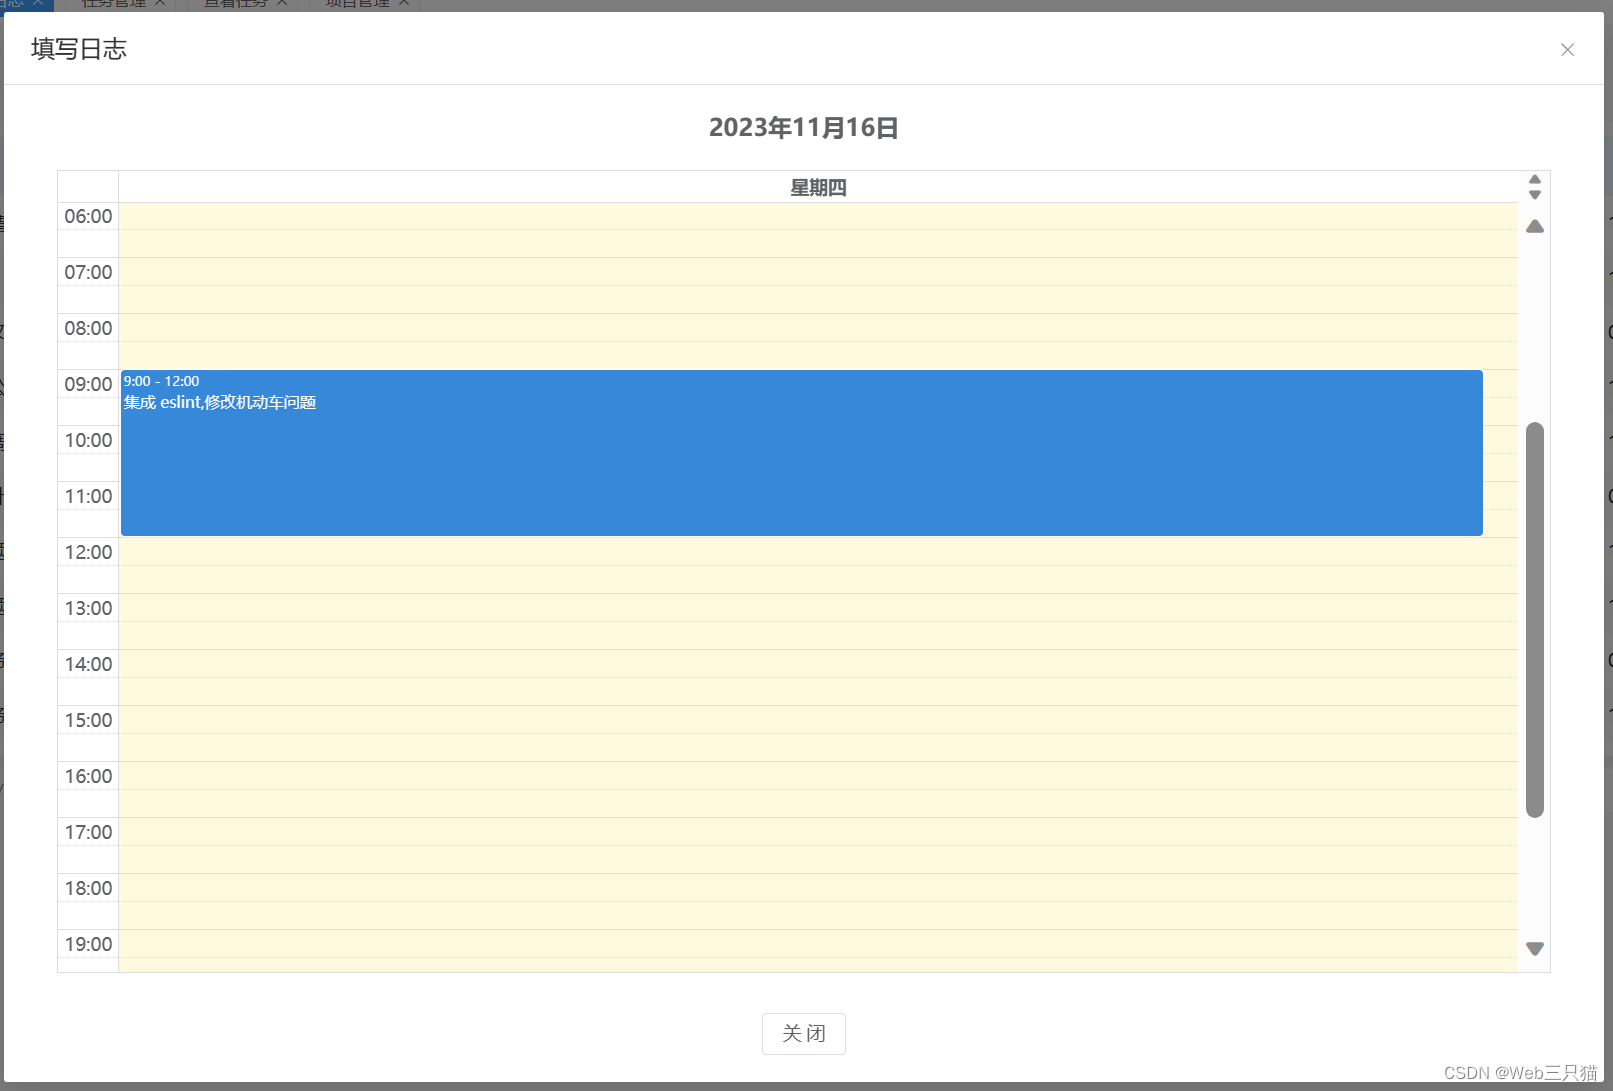
官网地址:文档 |完整日历 (fullcalendar.io)

首先需要安装依赖

       pnpm install --save 

                @fullcalendar/core
                @fullcalendar/daygrid
                @fullcalendar/interaction
                @fullcalendar/timegrid
                @fullcalendar/vue3

再vue文件中引入 FullCalendar

<FullCalendar ref="calendarRef" style="width: 100%;max-height: 60vh;min-height: 160px;" :options="calendarOptions.calendarOptions" />
import FullCalendar from "@fullcalendar/vue3";
import interactionPlugin from "@fullcalendar/interaction";
import timeGridPlugin from "@fullcalendar/timegrid";
import zhLocale from "@fullcalendar/core/locales/zh-cn";

声明 calendarOptions

const calendarOptions = reactive({
	calendarOptions: {
		headerToolbar: { // 头部
			left: "",
			center: "title",
			right: ""
		},
		locales: [zhLocale],
		locale: "zh-cn",
		editable: true, // 是否可编辑
		selectable: true, // 是否可选
		// selectMirror: true,
		droppable: true, // this allows things to be dropped onto the calendar
		plugins: [timeGridPlugin, interactionPlugin],
		// slotLabelInterval: '00:30', // 时间跨度
		// slotDuration: "00:30", // 时间间隙
		slotLabelFormat: {
			hour: "2-digit",
			minute: "2-digit",
			meridiem: false,
			hour12: false
		},
		slotMaxTime: "23:30",
		allDaySlot: false,
		allDayDefault: false,
		initialView: "timeGridOneDay",
		views: {
			timeGridOneDay: {
				type: "timeGrid",
				duration: { days: 1 }
			}
		},
		dateClick: function(info) { // 日期点击事件
			info.start = info.date;
			info.end = new Date(info.date).setMinutes(new Date(info.date).getMinutes() + 30);
			openLog(info, "dateClick");
		},
		select: function(info) { // 日期选择事件
			openLog(info, "select");
		},
		eventClick: function(info) { // 被选日期点击事件
			openLog(info.event, "eventClick");
		},
		eventChange: function(info) { // 被选日期点击事件
			openLog(info.event, "eventChange");
		},
		events: [], // 数据
	}
});

后期可以根据官方文档说明自定义组件

  • 0
    点赞
  • 0
    收藏
    觉得还不错? 一键收藏
  • 0
    评论
Vue 3 中使用 FullCalendar 切换视图有多种方式,以下是其中一种方法: 1. 首先,确保已经安装了 FullCalendar 的依赖包。可以通过 npm 或 yarn 安装: ```bash npm install @fullcalendar/vue @fullcalendar/daygrid @fullcalendar/timegrid ``` 或 ```bash yarn add @fullcalendar/vue @fullcalendar/daygrid @fullcalendar/timegrid ``` 2. 创建一个 Vue 组件,引入 FullCalendar 和所需的视图组件: ```vue <template> <div> <FullCalendar :options="calendarOptions" /> </div> </template> <script> import { FullCalendar } from '@fullcalendar/vue' import dayGridPlugin from '@fullcalendar/daygrid' import timeGridPlugin from '@fullcalendar/timegrid' export default { components: { FullCalendar }, data() { return { calendarOptions: { plugins: [dayGridPlugin, timeGridPlugin], initialView: 'dayGridMonth', // 初始视图为月视图 views: { dayGridMonth: { buttonText: '月视图', type: 'dayGridMonth' }, timeGridWeek: { buttonText: '周视图', type: 'timeGridWeek' }, timeGridDay: { buttonText: '日视图', type: 'timeGridDay' } } } } } } </script> ``` 在上述代码中,我们引入了 `FullCalendar`、`dayGridPlugin` 和 `timeGridPlugin`,并在 `calendarOptions` 中配置了初始视图为月视图,并定义了不同的视图选项。 3. 然后,你可以通过按钮或其他交互方式来切换视图。在模板中添加切换按钮: ```vue <template> <div> <FullCalendar :options="calendarOptions" /> <button @click="changeView('dayGridMonth')">月视图</button> <button @click="changeView('timeGridWeek')">周视图</button> <button @click="changeView('timeGridDay')">日视图</button> </div> </template> ``` 4. 在 Vue 组件的方法中,定义 `changeView` 方法来切换视图: ```vue <script

“相关推荐”对你有帮助么?

  • 非常没帮助
  • 没帮助
  • 一般
  • 有帮助
  • 非常有帮助
提交
评论
添加红包

请填写红包祝福语或标题

红包个数最小为10个

红包金额最低5元

当前余额3.43前往充值 >
需支付:10.00
成就一亿技术人!
领取后你会自动成为博主和红包主的粉丝 规则
hope_wisdom
发出的红包
实付
使用余额支付
点击重新获取
扫码支付
钱包余额 0

抵扣说明:

1.余额是钱包充值的虚拟货币,按照1:1的比例进行支付金额的抵扣。
2.余额无法直接购买下载,可以购买VIP、付费专栏及课程。

余额充值