


一、安装部署
1、Nginx的发行版本
常用版本分为四大阵营:
Nginx 开源版 | https://nginx.org/:赤裸裸的Web服务器、反向代理、负载均衡(功能少,开发难度大)
Nginx Plus 商业版 | https://www.nginx.com/:什么都有全家桶(付费版本)
OpenResty | https://openresty.org/cn/:是一个基于 Nginx 与 Lua 的高性能 Web 平台,其内部集成了大量精良的 Lua 库、第三方模块以及大多数的依赖项。
Tengine | https://tengine.taobao.org/:淘宝二开的Nginx。它在Nginx的基础上,针对大访问量网站的需求,添加了很多高级功能和特性。
2、编译安装Nginx(开源版)
1)下载地址:nginx: download | https://nginx.org/en/download.html
2)配置编译安装环境
[root@localhost ~]# tar -xf nginx-1.22.1.tar.gz
[root@localhost ~]# cd nginx-1.22.1
[root@localhost nginx-1.22.1]# ll
total 800
drwxr-xr-x 6 1001 1001    326 Apr 21 18:00 auto
-rw-r--r-- 1 1001 1001 317399 Oct 19  2022 CHANGES
-rw-r--r-- 1 1001 1001 485035 Oct 19  2022 CHANGES.ru
drwxr-xr-x 2 1001 1001    168 Apr 21 18:00 conf
-rwxr-xr-x 1 1001 1001   2590 Oct 19  2022 configure
drwxr-xr-x 4 1001 1001     72 Apr 21 18:00 contrib
drwxr-xr-x 2 1001 1001     40 Apr 21 18:00 html
-rw-r--r-- 1 1001 1001   1397 Oct 19  2022 LICENSE
drwxr-xr-x 2 1001 1001     21 Apr 21 18:00 man
-rw-r--r-- 1 1001 1001     49 Oct 19  2022 README
drwxr-xr-x 9 1001 1001     91 Apr 21 18:00 src
根据编译安装报错,可以判断需要什么环境依赖
以下是关于编译安装的基础知识:
configure文件:这个文件是一个Shell脚本,用于检测系统环境、配置编译选项以及生成相应的Makefile文件。
Makefile文件是软件工程中的一种自动化构建工具文件,主要用于Unix-like操作系统(如Linux、BSD等)和一些集成开发环境(IDEs),用于管理和自动化编译、链接程序的过程。在Makefile中,开发者定义了一系列规则来指导make工具如何编译和链接源代码文件,以生成最终的目标文件(通常是可执行文件或库文件)。
Makefile的核心功能包括:
- 依赖关系:声明源代码文件之间的依赖关系,当某个源文件或其依赖的头文件发生变化时,仅重新编译受影响的部分而不是整个项目。
- 规则:定义如何从源文件生成目标文件的规则,包括编译器选项、编译命令、链接命令等。
- 自动化:通过比较文件的修改时间和目标文件的存在与否,make能自动判断哪些目标需要更新,并执行相应的命令。
- 目标:可以定义多种目标,如编译调试版、发布版,或者执行测试、清理等任务。
- 变量和函数:Makefile支持变量和函数,可以用来简化命令行参数和路径名的管理。
- 模式规则:允许定义通用的转换规则,适用于多个源文件到目标文件的转换情况。
在实际使用中,程序员通过编写Makefile来组织和控制整个项目的构建流程,只需简单地运行
make命令,make工具就会读取Makefile文件,分析依赖关系,并执行必要的编译和链接步骤来生成最终的产品。
第一次报错+排查(注意看代码注释)
[root@localhost nginx-1.22.1]# ./configure --prefix=/usr/local/nginx
checking for OS
 + Linux 3.10.0-862.el7.x86_64 x86_64
checking for C compiler ... not found   # 缺少C语言编译器

./configure: error: C compiler cc is not found

# 配置Yum
curl -o /etc/yum.repos.d/CentOS-Base.repo https://mirrors.aliyun.com/repo/Centos-7.repo
yum install -y epel-release

# gcc是c语言编译器的一种
yum install -y gcc
第二次报错+排查(注意看代码注释)
[root@localhost nginx-1.22.1]# ./configure --prefix=/usr/local/nginx
...
...
checking for PCRE library in /usr/pkg/ ... not found
checking for PCRE library in /opt/local/ ... not found

./configure: error: the HTTP rewrite module requires the PCRE library.  # 缺少pcpe库
You can either disable the module by using --without-http_rewrite_module
option, or install the PCRE library into the system, or build the PCRE library
statically from the source with nginx by using --with-pcre=<path> option.

# 安装 pcre
yum install -y pcre pcre-devel
第三次报错+排查(注意看代码注释)
# 再次执行编译安装
[root@localhost nginx-1.22.1]# ./configure --prefix=/usr/local/nginx
checking for zlib library ... not found

./configure: error: the HTTP gzip module requires the zlib library. # 确实zlib库
You can either disable the module by using --without-http_gzip_module
option, or install the zlib library into the system, or build the zlib library
statically from the source with nginx by using --with-zlib=<path> option.

[root@localhost nginx-1.22.1]# yum install -y zlib zlib-devel


# 再次执行,成功安装完成,并可以看到当前目录下生成了Makefile文件
[root@localhost nginx-1.22.1]# ./configure --prefix=/usr/local/nginx
creating objs/Makefile

Configuration summary
  + using system PCRE library
  + OpenSSL library is not used
  + using system zlib library

  nginx path prefix: "/usr/local/nginx"
  nginx binary file: "/usr/local/nginx/sbin/nginx"
  nginx modules path: "/usr/local/nginx/modules"
  nginx configuration prefix: "/usr/local/nginx/conf"
  nginx configuration file: "/usr/local/nginx/conf/nginx.conf"
  nginx pid file: "/usr/local/nginx/logs/nginx.pid"
  nginx error log file: "/usr/local/nginx/logs/error.log"
  nginx http access log file: "/usr/local/nginx/logs/access.log"
  nginx http client request body temporary files: "client_body_temp"
  nginx http proxy temporary files: "proxy_temp"
  nginx http fastcgi temporary files: "fastcgi_temp"
  nginx http uwsgi temporary files: "uwsgi_temp"
  nginx http scgi temporary files: "scgi_temp"
3)编译安装
# make命令的功能是编译内核或源码文件。
make
# 安装已经编译好的程序。复制文件树中到文件到指定的位置
make install
# 卸载已经编译好的程序。暂不执行
make uninstall
操作与配置
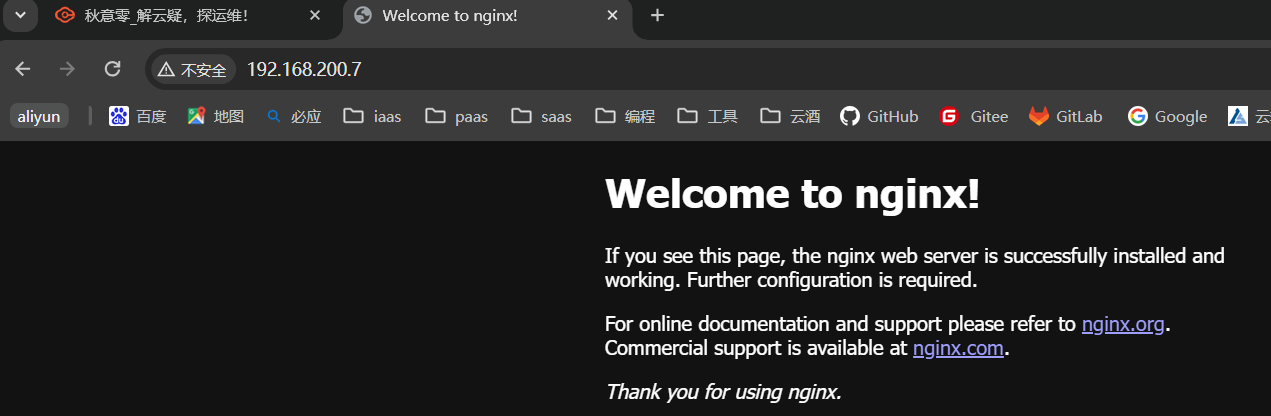
1)启动Nginx

[root@localhost sbin]# ./nginx
[root@localhost sbin]# ps -aux| grep nginx
root      14712  0.0  0.0  20576   616 ?        Ss   18:48   0:00 nginx: master process ./nginx
nobody    14713  0.0  0.0  21020  1316 ?        S    18:48   0:00 nginx: worker process
root      14715  0.0  0.0 112812   968 pts/1    S+   18:48   0:00 grep --color=auto nginx
nginx -s reload命令看似只是重新加载配置。其实是创建了新线程Work来替换的老的线程Work。
浏览器如果访问不到,请关闭防火墙
2)关于防火墙
防火墙内网可以不开。一般IP需要暴露在外网才开。如果需要防范内部人员也可开启。
# 关闭防火墙
systemct1 stop firewalld.service
# 禁止防火墙开机启动
systemct1 disable firewalld.service
# 放行端口
firewa11-cmd --zone=public --add-port=80/tcp --permanent
# 重启防火墙
firewa11-cmd --reload
3)配置成系统服务
注意:使用systemctl命令启动Nginx前,请使用 ./nginx -s stop命令将原方式启动的Nginx关闭
# 编辑Nginx系统服务文件
$ vi /usr/lib/systemd/system/nginx.service
[Unit]
Description=nginx - web server
After=network.target remote-fs.target nss-lookup.target

[Service]
Type=forking
PIDFile=/usr/local/nginx/logs/nginx.pid
ExecStartPre=/usr/local/nginx/sbin/nginx -t -c /usr/local/nginx/conf/nginx.conf
ExecStart=/usr/local/nginx/sbin/nginx -c /usr/local/nginx/conf/nginx.conf
ExecReload=/usr/local/nginx/sbin/nginx -s reload
ExecStop=/usr/local/nginx/sbin/nginx -s stop
PrivateTmp=true

[Install]
WantedBy=multi-user.target

# 启动Nginx
./nginx -s stop
systemctl start nginx
systemctl status nginx
systemctl enable nginx
更多运维干货,关注下方公众号


 3311
3311


 被折叠的 条评论
为什么被折叠?
被折叠的 条评论
为什么被折叠?
 到【灌水乐园】发言


