


1.登录程序
<!--index.wxml-->
<view class="container">
 <button wx:if="{{!hasUserInfo}}" bindtap="getUserProfile">获取头像昵称</button>
 <view class="userinfo">
   <image src="{{userInfo.avatarUrl}}"></image>
   <view>{{nickName}}</view>
   <view>{{userInfo.nickName}}</view>
 </view>
</view>
<!--index.js-->
data:{
    hasUserInfo: false,
    userInfo:{}
  },
  getUserProfile:function(){
    wx.getUserProfile({
      desc: '获取用户信息',
      success:(res) =>{
        console.log(res.userInfo);
        this.setData({
          hasUserInfo:true,
          userInfo:res.userInfo
        })
      }
    })
  },
<!--index.css-->
/* pages/my/my.wxss */
.userinfo{
  display: flex;
  width: 300rpx;
  height: 300rpx;
  flex-direction: column;
  align-items: center;
  justify-content: center;
}
2.微信云开发
1.小程序的get 请求数据
在js文件中使用get方法获取数据
onShow: function () {
 const db = wx.cloud.database()
 var that = this
 db.collection('UpDataLog').orderBy('time','desc').get({
   success: function(res) {
     that.setData({
       list:res.data
     })
   }
 })
},
在data定义list集合
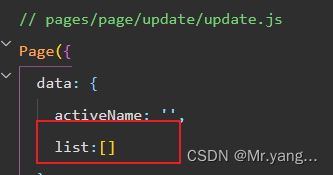
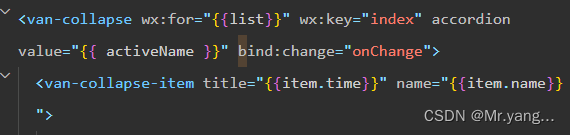
然后在wxml中去使用for循环渲染数据
2.css样式
1. 圆角边框
border-radius:20rpx;
3.功能
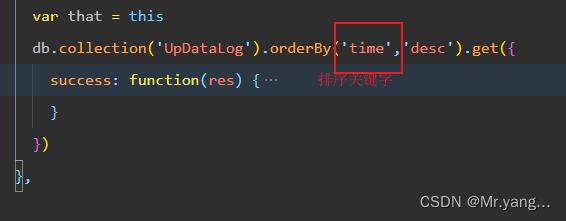
1.排序
使用.onderBy()来进行渲染列表的排序
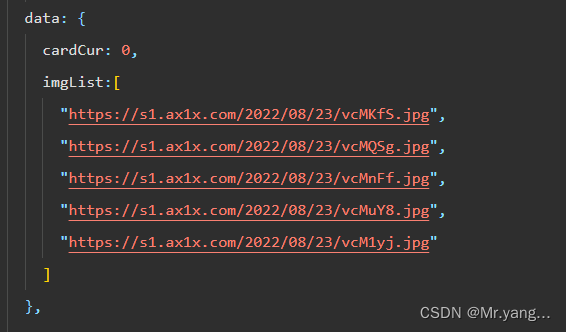
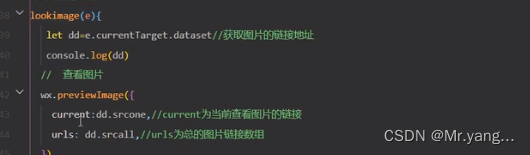
2.多张图片的渲染

3.监听页面的向上还是向下滑动

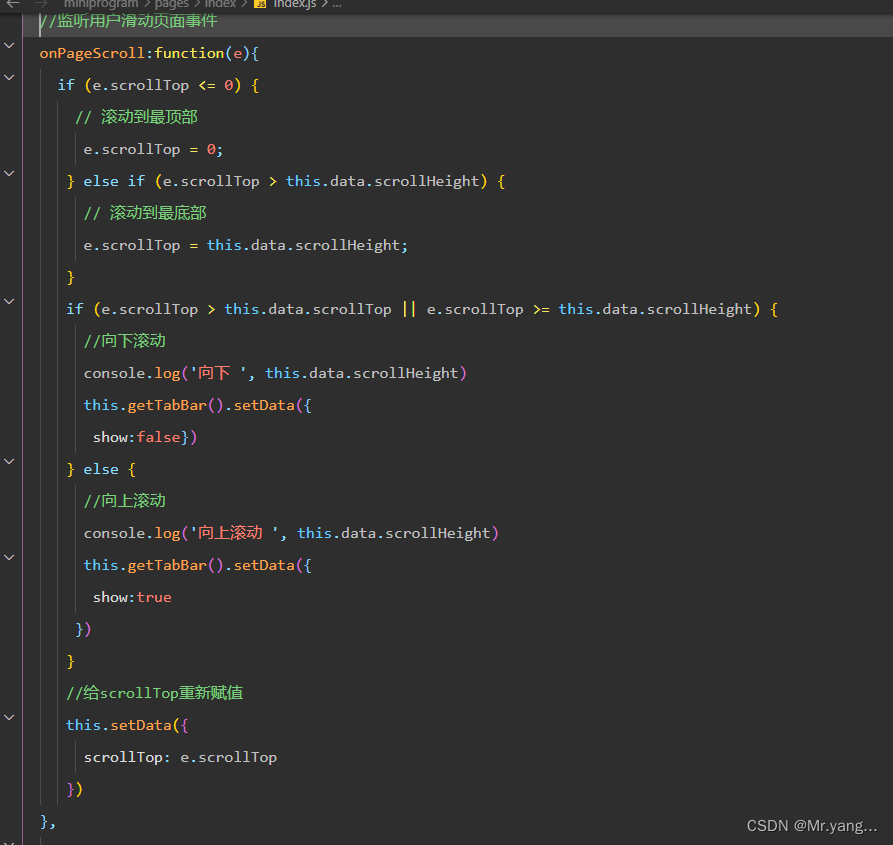
//监听用户滑动页面事件
  onPageScroll:function(e){
    if (e.scrollTop <= 0) {
      // 滚动到最顶部
       e.scrollTop = 0;
     } else if (e.scrollTop > this.data.scrollHeight) {
       // 滚动到最底部
       e.scrollTop = this.data.scrollHeight;
     }
     if (e.scrollTop > this.data.scrollTop || e.scrollTop >= this.data.scrollHeight) {
       //向下滚动
       console.log('向下 ', this.data.scrollHeight)
       this.getTabBar().setData({
        show:false})
     } else {
       //向上滚动
       console.log('向上滚动 ', this.data.scrollHeight)
       this.getTabBar().setData({
        show:true
      })
     }
     //给scrollTop重新赋值
     this.setData({
       scrollTop: e.scrollTop
     })
  },
4.轮播图片的放大
编写图片数组imgList
wxml文件
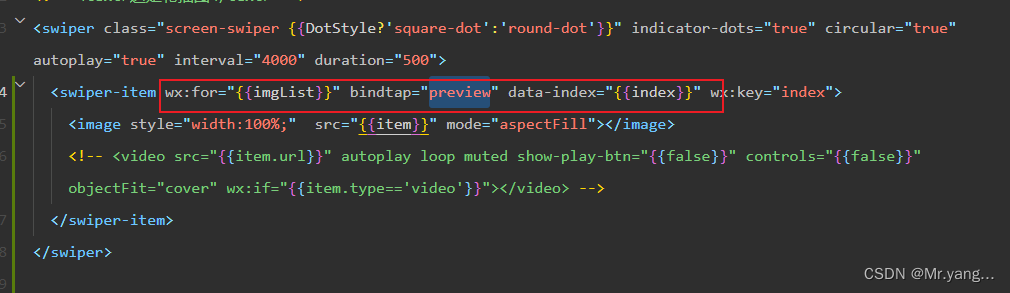
js文件中编写方法:preview
如果是组件中的话,方法必须写在methods中
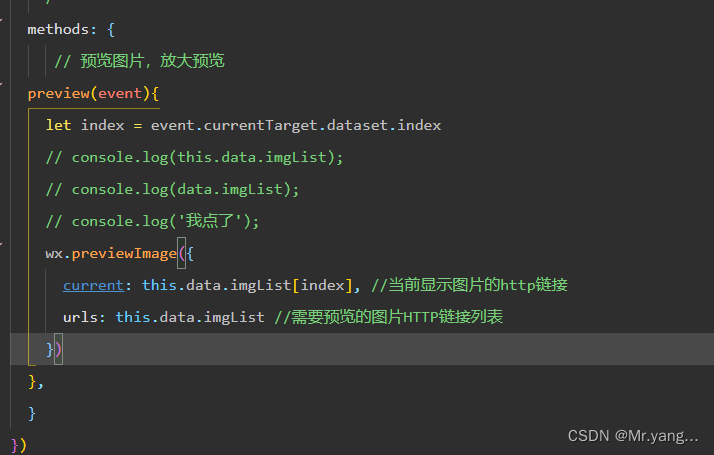
   // 预览图片,放大预览
  preview(event){
    let index = event.currentTarget.dataset.index
    // console.log(this.data.imgList);
    // console.log(data.imgList);
    // console.log('我点了');
    wx.previewImage({
      current: this.data.imgList[index], //当前显示图片的http链接
      urls: this.data.imgList //需要预览的图片HTTP链接列表
    })
  },
5.九宫格图片放大
第一张图
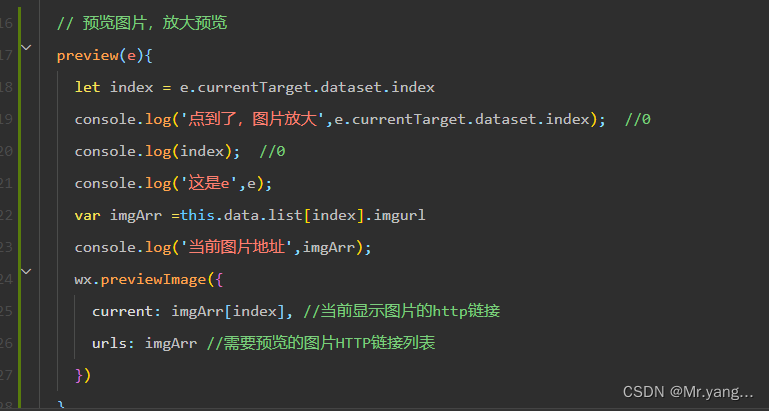
2.两张图片点击放大

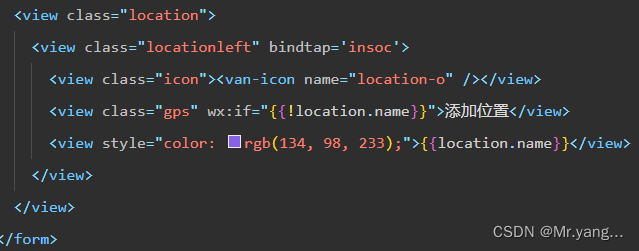
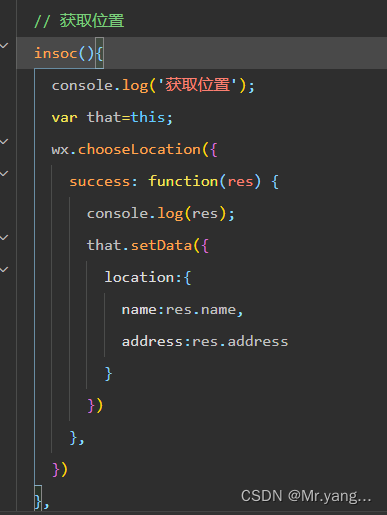
6.获取当前位置
7.查看本地缓存

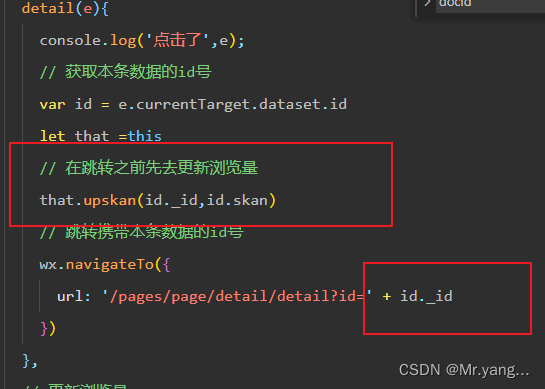
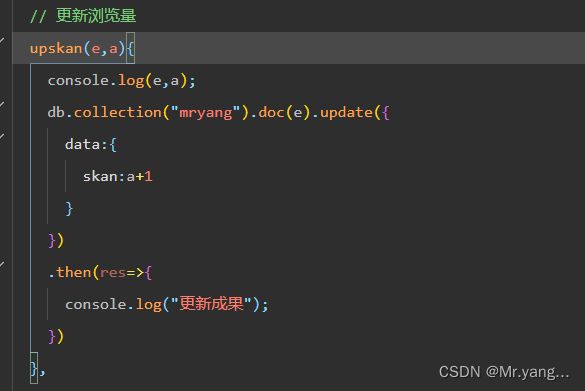
8.浏览量更新

9.获取当前时间
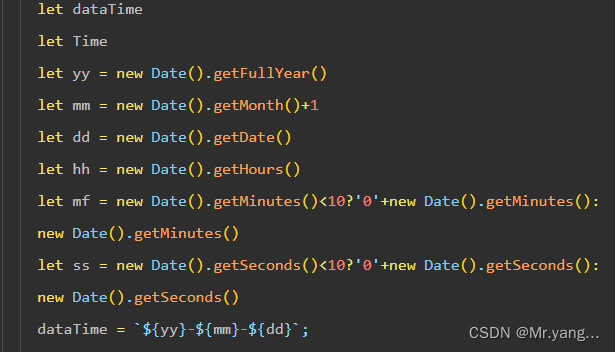
let dataTime
    let Time
    let yy = new Date().getFullYear()
    let mm = new Date().getMonth()+1
    let dd = new Date().getDate()
    let hh = new Date().getHours()
    let mf = new Date().getMinutes()<10?'0'+new Date().getMinutes():
    new Date().getMinutes()
    let ss = new Date().getSeconds()<10?'0'+new Date().getSeconds():
    new Date().getSeconds()
    dataTime = `${yy}-${mm}-${dd}`;
    Time = `${hh}:${mf}:${ss}`;
10.点赞
1.点赞效果的实现

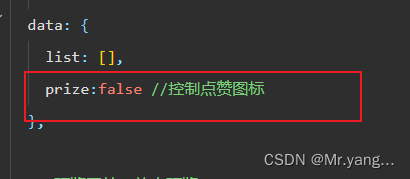
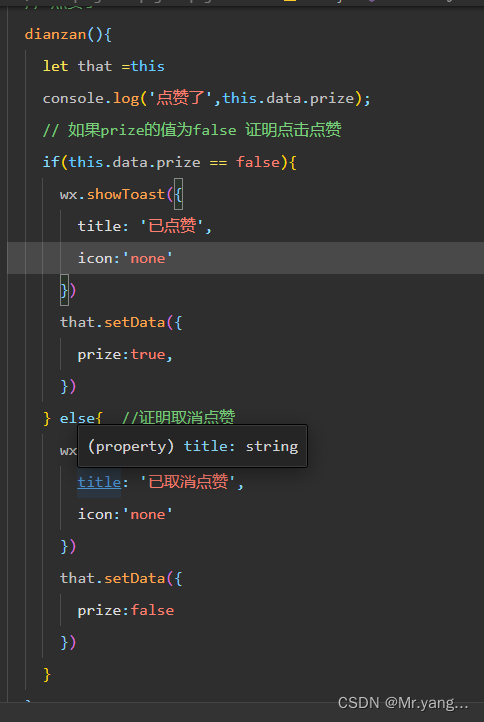
2.点赞逻辑
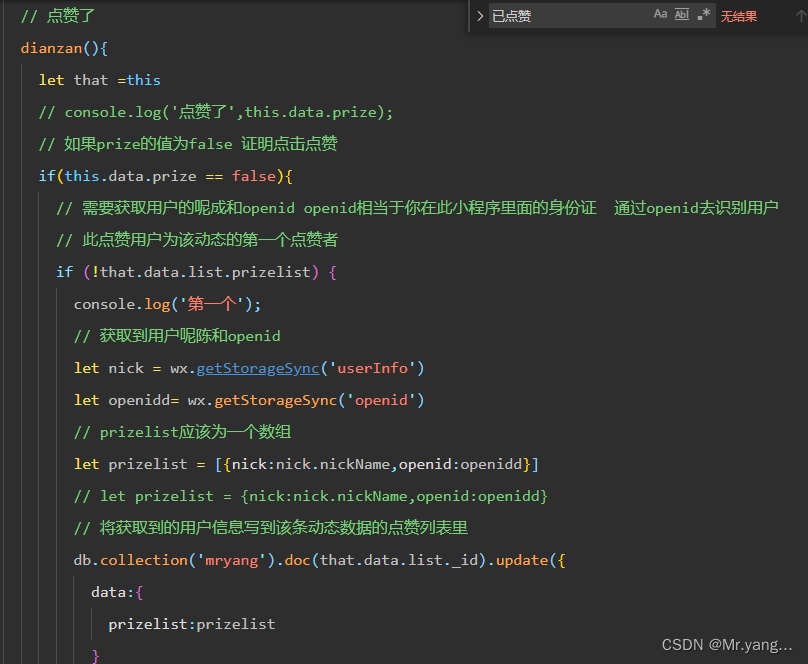

// 点赞了
dianzan(){
let that =this
// console.log('点赞了',this.data.prize);
// 如果prize的值为false 证明点击点赞
if(this.data.prize == false){
// 需要获取用户的呢成和openid openid相当于你在此小程序里面的身份证 通过openid去识别用户
// 此点赞用户为该动态的第一个点赞者
if (!that.data.list.prizelist) {
console.log('第一个');
// 获取到用户呢陈和openid
let nick = wx.getStorageSync('userInfo')
let openidd= wx.getStorageSync('openid')
// prizelist应该为一个数组
let prizelist = [{nick:nick.nickName,openid:openidd}]
// let prizelist = {nick:nick.nickName,openid:openidd}
// 将获取到的用户信息写到该条动态数据的点赞列表里
db.collection('mryang').doc(that.data.list._id).update({
data:{
prizelist:prizelist
}
})//点赞成功的反馈
.then(res=>{
that.getlist() //更新点赞
wx.showToast({
title: '点赞成功',
icon:'none'
})
that.setData({
prize:true,
})
})
// console.log(prizelist);
// return
}else{ //不是第一个点赞的
console.log('不是第一个');
// 获取到用户呢陈和openid
let nick = wx.getStorageSync('userInfo')
let openidd= wx.getStorageSync('openid')
// prizelist应该为一个数组
// let prizelist = [{nick:nick.nickName,openid:openidd}] //获取点赞者的信息
let newprizelist = that.data.list.prizelist
newprizelist.push({nick:nick.nickName,openid:openidd})
// 将获取到的用户信息写到该条动态数据的点赞列表里
db.collection('mryang').doc(that.data.list._id).update({
data:{
prizelist:newprizelist
}
})//点赞成功的反馈
.then(res=>{
that.getlist() //更新点赞
console.log(res);
wx.showToast({
title: '点赞成功',
icon:'none'
})
that.setData({
prize:true,
})
})
that.setData({
prize:true,
})
}
}
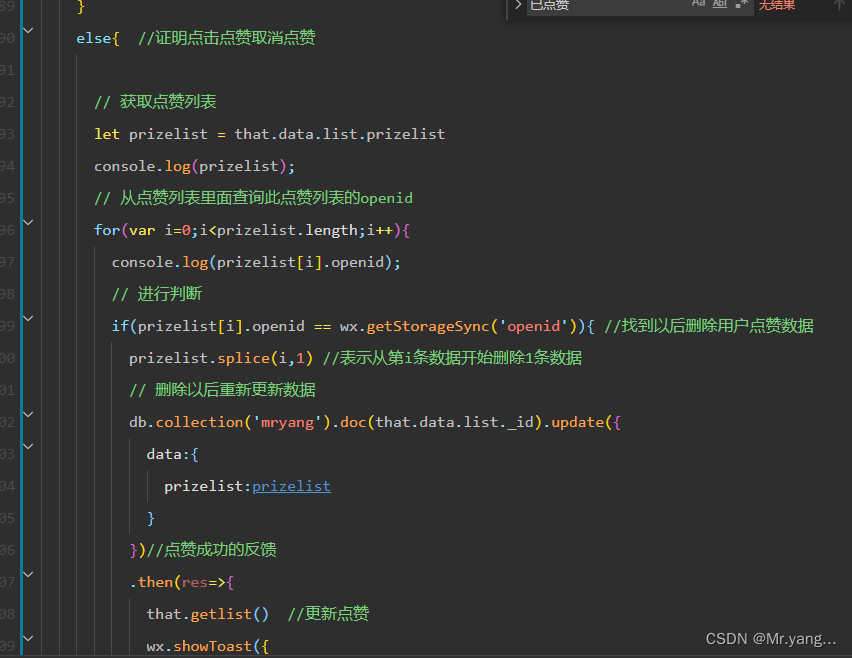
else{ //证明点击点赞取消点赞
// 获取点赞列表
let prizelist = that.data.list.prizelist
console.log(prizelist);
// 从点赞列表里面查询此点赞列表的openid
for(var i=0;i<prizelist.length;i++){
console.log(prizelist[i].openid);
// 进行判断
if(prizelist[i].openid == wx.getStorageSync('openid')){ //找到以后删除用户点赞数据
prizelist.splice(i,1) //表示从第i条数据开始删除1条数据
// 删除以后重新更新数据
db.collection('mryang').doc(that.data.list._id).update({
data:{
prizelist:prizelist
}
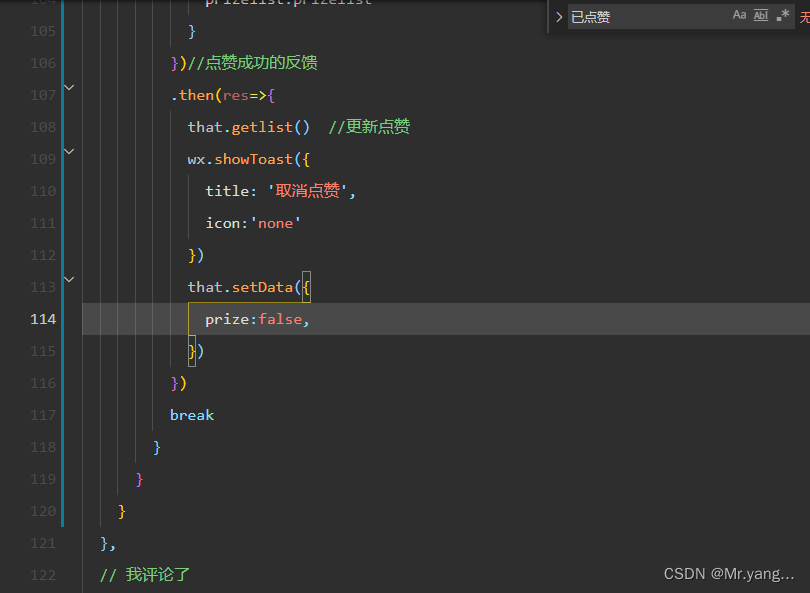
})//点赞成功的反馈
.then(res=>{
that.getlist() //更新点赞
wx.showToast({
title: '取消点赞',
icon:'none'
})
that.setData({
prize:false,
})
})
break
}
}
}
},
3.根据id获取数据
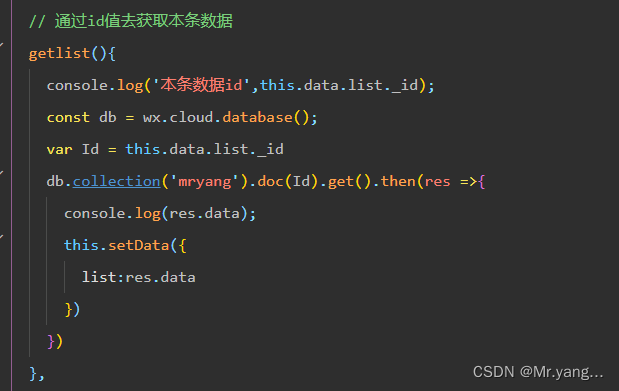
// 通过id值去获取本条数据
  getlist(){
    console.log('本条数据id',this.data.list._id);
    const db = wx.cloud.database();
    var Id = this.data.list._id
    db.collection('mryang').doc(Id).get().then(res =>{
      console.log(res.data);
      this.setData({
        list:res.data
      })
    })
  },
11. 获取openid
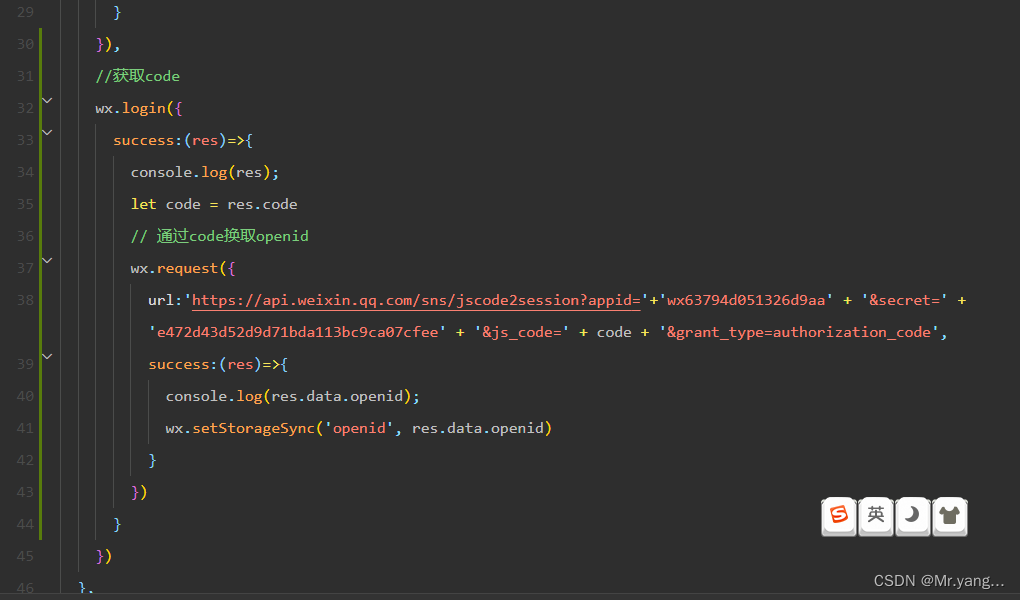
}),
    //获取code
    wx.login({
      success:(res)=>{
        console.log(res);
        let code = res.code
        // 通过code换取openid
        wx.request({
          url:'https://api.weixin.qq.com/sns/jscode2session?appid='+'wx63794d051326d9aa' + '&secret=' + 'e472d43d52d9d71bda113bc9ca07cfee' + '&js_code=' + code + '&grant_type=authorization_code',
          success:(res)=>{
            console.log(res.data.openid);
            wx.setStorageSync('openid', res.data.openid)
          }
        })
      }
    })
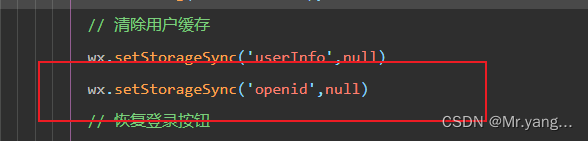
清楚openid
12.判断用户是否登录,如果没有登录,则跳回到登录页

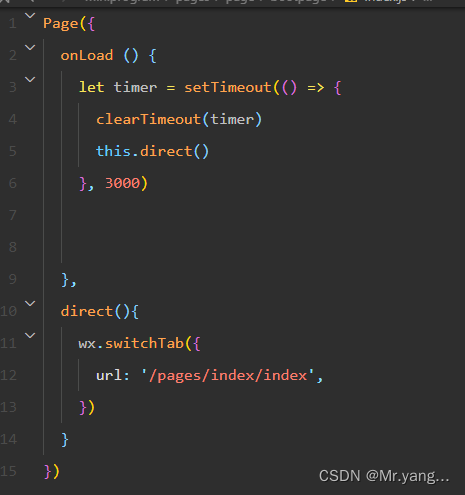
13.设置一个启动页
可以通过设置启动页面顺序来实现此功能
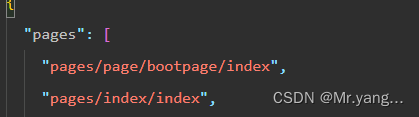
在启动页的js文件中设置一个定时器,便可以实现此功能
14.页面标题的修改

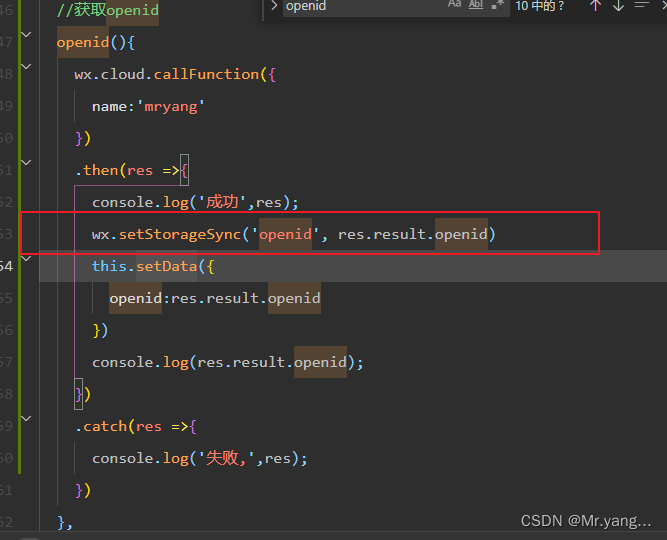
15.通过云函数获取openid
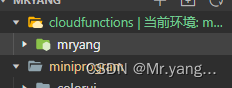
创建云函数
通过调用云函数直接返回openid,并将openid缓存
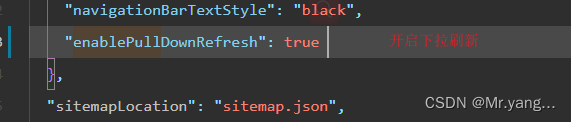
16.开启下拉刷新
在app.jaon开启下拉刷新

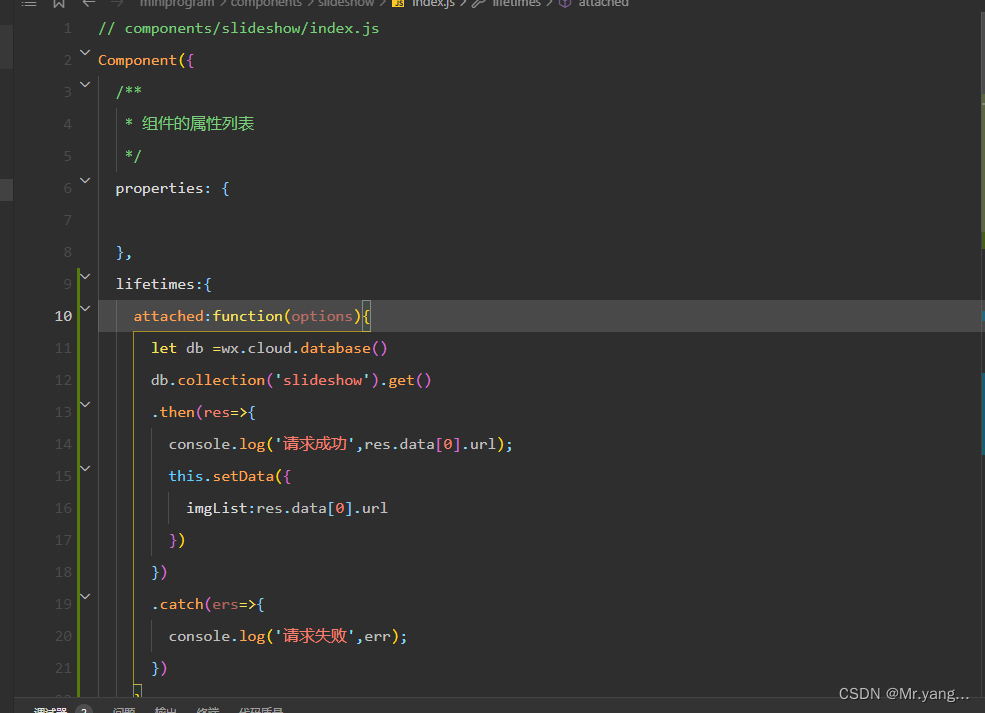
17.组件onload方法的实现
在组件Component中想实现onload的话必须将方法写在lifetimes中


 4247
4247


 被折叠的 条评论
为什么被折叠?
被折叠的 条评论
为什么被折叠?
 到【灌水乐园】发言


