


**
结构目录
**
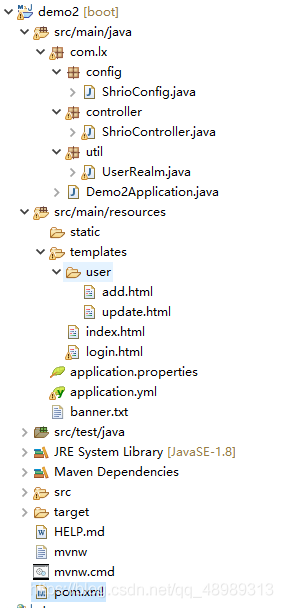
前端页面代码部分
index.html
<!DOCTYPE html>
<html>
<head>
	<meta charset="UTF-8">
	<title>首页</title>
</head>
<body>
	<h1>首页</h1>
	<p th:text="@{msg}">
	<hr>
	<a th:href="@{/user/add}">add</a>
	<a th:href="@{/user/update}">update</a>
</body>
</html>
add.html
<!DOCTYPE html>
<html>
<head>
	<meta charset="UTF-8">
	<title>添加</title>
</head>
<body>
	<h1>add</h1>
</body>
</html>
update.html
<!DOCTYPE html>
<html>
<head>
	<meta charset="UTF-8">
	<title>Insert title here</title>
</head>
<body>
	<h1>update</h1>
</body>
</html>
login.html
<!DOCTYPE html>
<html>
<head>
	<meta charset="UTF-8">
	<title>Insert title here</title>
</head>
<body>
	<h1>登录</h1>
	<p th:text="${msg}" style="color:red"></p>
	<form th:action="@{/login}">
		<p>用户名: <input type="text" name="username"></p>
		<p>密码: <input type="text" name="password"></p>
	<p><input type="submit"></p>

</form>
</body>
</html>
第一步:导入依赖
<!-- 导入shiro整合spring的包 -->
		<dependency>
		     <groupId>org.apache.shiro</groupId>
		     <artifactId>shiro-spring</artifactId>
		     <version>1.4.1</version>
		 </dependency>

<!-- thymeleaf模板引擎 -->
		<dependency>
		    <groupId>org.springframework.boot</groupId>
		    <artifactId>spring-boot-starter-thymeleaf</artifactId>
		</dependency>
		<dependency>
第二步:编写UserRealm类,ShiroConfig配置类、ShiroController控制器
只要进行登陆操作就会执行doGetAuthenticationInfo方法
package com.lx.util;

import org.apache.shiro.authz.AuthorizationInfo;

//自定义的UserRealm   extends AuthorizingRealm
public class UserRealm extends AuthorizingRealm{

	//授权
	@Override
	protected AuthorizationInfo doGetAuthorizationInfo(PrincipalCollection principals) {
		// TODO Auto-generated method stub
		System.out.println("执行了 => 授权");
		return null;
	}

	//认证
	@Override
	protected AuthenticationInfo doGetAuthenticationInfo(AuthenticationToken token) throws AuthenticationException {
		// TODO Auto-generated method stub
		System.out.println("执行了 => 认证");
		return null;
	}

}
编写配置类ShrioConfig
思路:ShiroFilterFactoryBean会拦截前端请求交给DefaultWebSecurityManager,再交给userRealm进行认证和授权处理
主要编写 userRealm、DefaultWebSecurityManager、ShiroFilterFactoryBean 三个bean对象
注意:我们可以从下往上写,逐步添加
package com.lx.config;

import org.apache.shiro.spring.web.ShiroFilterFactoryBean;
import org.apache.shiro.web.mgt.DefaultWebSecurityManager;
import org.springframework.beans.factory.annotation.Qualifier;
import org.springframework.context.annotation.Bean;
import org.springframework.context.annotation.Configuration;

import com.lx.util.UserRealm;

@Configuration
public class ShrioConfig {

	//ShiroFilterFactoryBean (第三步:连接到前端)
	@Bean
	public ShiroFilterFactoryBean shiroFilterFactoryBean(@Qualifier("SecurityManager") DefaultWebSecurityManager defaultWebSecurityManager) {
		ShiroFilterFactoryBean filterFactory = new ShiroFilterFactoryBean();
		//设置安全管理器
		filterFactory.setSecurityManager(defaultWebSecurityManager);
		return filterFactory;
	}

	//DefaultWebSecurityManager (第二步:管理realm对象)
	@Bean(name="SecurityManager")
    public DefaultWebSecurityManager getDefaultWebSecurityManager(@Qualifier("userRealm") UserRealm userRealm) {
    	DefaultWebSecurityManager SecurityManager = new DefaultWebSecurityManager();
    	//关联realm
    	SecurityManager.setRealm(userRealm);
		return SecurityManager;
    }

	// 创建realm对象,需要自定义类 (第一步:创建realm对象)
    @Bean(name="userRealm")  //@Bean注解后便被spring托管,不加name属性,默认name值为方法名,这里就加一下吧
	public UserRealm userRealm() {
		return new UserRealm();
	}
}
在ShiroFilterFactoryBean方法内添加过滤器,设置访问权限,如果没权限则进入登陆界面
	    //添加shiro的内置过滤器
		/*
		anon:  无需认证就可以访问
		authc: 必须认证了才能访问
		user:  必须拥有 记住我 功能才能用
		perms: 拥有对某个资源的权限才能访问
		role:  拥有某个角色权限才能访问
		*/
		//拦截
		Map<String, String> filterMap = new LinkedHashMap<String, String>();

		//filterMap.put("/user/add", "authc");
		//filterMap.put("/user/update", "authc");
		filterMap.put("/user/*", "authc");

		filterFactory.setFilterChainDefinitionMap(filterMap);
		//设置登录请求
		filterFactory.setLoginUrl("/toLogin");
		//设置未授权请求页面
		filterFactory.setUnauthorizedUrl("/index");
		return filterFactory;
编写Controller进行测试
@Controller
public class ShrioController {

	@RequestMapping({"/", "/index"})
    public String toIndex(Model model){
        model.addAttribute("msg", "hello");
        return "index";
    }

    @RequestMapping("/user/add")
    public String add(){
        return "user/add";
    }

    @RequestMapping("/user/update")
    public String update(){
        return "user/update";
    }

    @RequestMapping("/toLogin")
    public String toLogin(){
        return "login";
    }
 }
第三步、编写登录认证
整体流程:当我们在登陆页面输入账号密码,会执行ShrioController 的login登陆操作,在使用subject.login(token)时会执行shiro里的UserRealm里的认证方法doGetAuthenticationInfo。
在ShrioController 中添加登陆认证方法
@RequestMapping("/login")
    public String login(String username,String password,Model model) {
    	//获取当前的用户
    	Subject subject = SecurityUtils.getSubject();
    	//封装用户登录数据
    	UsernamePasswordToken token = new UsernamePasswordToken(username,password);
    	try {
        	subject.login(token);//执行登录的方法,如果没有异常就说明ok了
        	return "index";
		} catch (UnknownAccountException e) {//用户名不存在
			model.addAttribute("msg","用户名错误");
			return "login";
		}catch (IncorrectCredentialsException e) {//密码不存在
			model.addAttribute("msg","密码错误");
			return "login";

			// TODO: handle exception
		}

    }
当我们执行 subject.login登陆操作时,Shiro会执行UserRealm里的认证方法doGetAuthenticationInfo
    //认证
	@Override
	protected AuthenticationInfo doGetAuthenticationInfo(AuthenticationToken token) throws AuthenticationException {
		// TODO Auto-generated method stub
		System.out.println("执行了 => 认证");

		//用户名 密码~ 数据中取
		String name = "root";
		String password = "123456";

		UsernamePasswordToken userToken = (UsernamePasswordToken)token;

		if(!userToken.getUsername().equals(name)) {
			return null; //抛出异常 UnknowAccountException
		}

		//密码认证 shiro做~ SimpleAuthenticationInfo
		return new SimpleAuthenticationInfo("",password,"");
	}


 6051
6051


 被折叠的 条评论
为什么被折叠?
被折叠的 条评论
为什么被折叠?
 到【灌水乐园】发言


