


1. 解压安装包
tar -zxvf redis-5.0.12.tar.gz -C /opt/bdp/redis
解压完 文件里的redis.conf 配置文件很重要
2.编译Redis源文件(需要用工具来编译 提前安装gcc软件包先 yum -y install gcc gcc-c++)
执行命令 :make MALLOC=libc
出现这个就代表成功了 Hint: It's a good idea to run 'make test' ;)
3.进入 cd src 目录
里面有几个重要的脚本 redis-cli 是客户端脚本,redis-server 是服务端脚本,redis-sentinel 是哨兵脚本,redis-trib.rb 是集群脚本
执行 make install 命令 ( 启动成功Hint: It's a good idea to run 'make test' ;)
此时, cd /usr/local/bin ,可以看到多了很多脚本,这是3.X 的特性,会将脚本都放到这
![]()
4.修改配置文件 redis.conf
4.1 修改参数
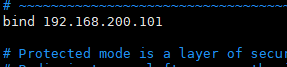
bind 192.168.72.101(自己的ip地址)
4.2 修改Redis 日志文件夹(指定日志打印位置)
mkdir /opt/bdp/redis/logs/redis.log(创建日志文件)
logfile "/opt/bdp/redis/logs/redis.log" (指定文件位置)

4.3修改数据文件存储(redis 数据存储内存 一旦宕机 保存到磁盘)
mkdir /opt/bdp/redis/datas(创建存储数据文件夹)
dbfilename dump.rdb 每隔一段时间,会将数据写到dir 指定的目录
dir /opt/bdp/redis/datas(指定文件路径) 目录会有rdb文件

5 启动
/usr/local/bin/redis-server 脚本启动命令
ps -ef | grep 6379 查看是否启动成功

有可能会报没有关闭保护模式错误
DENIED Redis is running in protected mode because protected mode is enabled, no bind address was specified, no authentication password is requested to clients. In this mode connections are only accepted from the loopback interface. If you want to connect from external computers to Redis you may adopt one of the following solutions: 1) Just disable protected mode sending the command 'CONFIG SET protected-mode no' from the loopback interface by connecting to Redis from the same host the server is running, however MAKE SURE Redis is not publicly accessible from internet if you do so. Use CONFIG REWRITE to make this change permanent. 2) Alternatively you can just disable the protected mode by editing the Redis configuration file, and setting the protected mode option to 'no', and then restarting the server. 3) If you started the server manually just for testing, restart it with the '--protected-mode no' option. 4) Setup a bind address or an authentication password. NOTE: You only need to do one of the above things in order for the server to start accepting connections from the outside
在开启redis的时候指定redis的配置文件是哪个就好了
/usr/local/bin/redis-server /opt/bdp/redis/redis.conf
6.客户端登录
./redis-cli -h 192.168.200.101 -p 6379 (h 指定ip ,p 指定端口,默认6379)
6.1客户端和服务段 关闭
客户端:quit
服务端:./redis-cli -h 192.168.200.101 -p 6379 shutdown
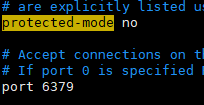
7 关闭Redis 保护模式
vi redis.conf 配置文件 把 protected-mode改为 no就行了


 531
531


 被折叠的 条评论
为什么被折叠?
被折叠的 条评论
为什么被折叠?
 到【灌水乐园】发言


