


网络插件 Cilium 更换 Calico
集群使用 submariner ,通过网络检测发现 Cilium 插件可能兼容性不太好
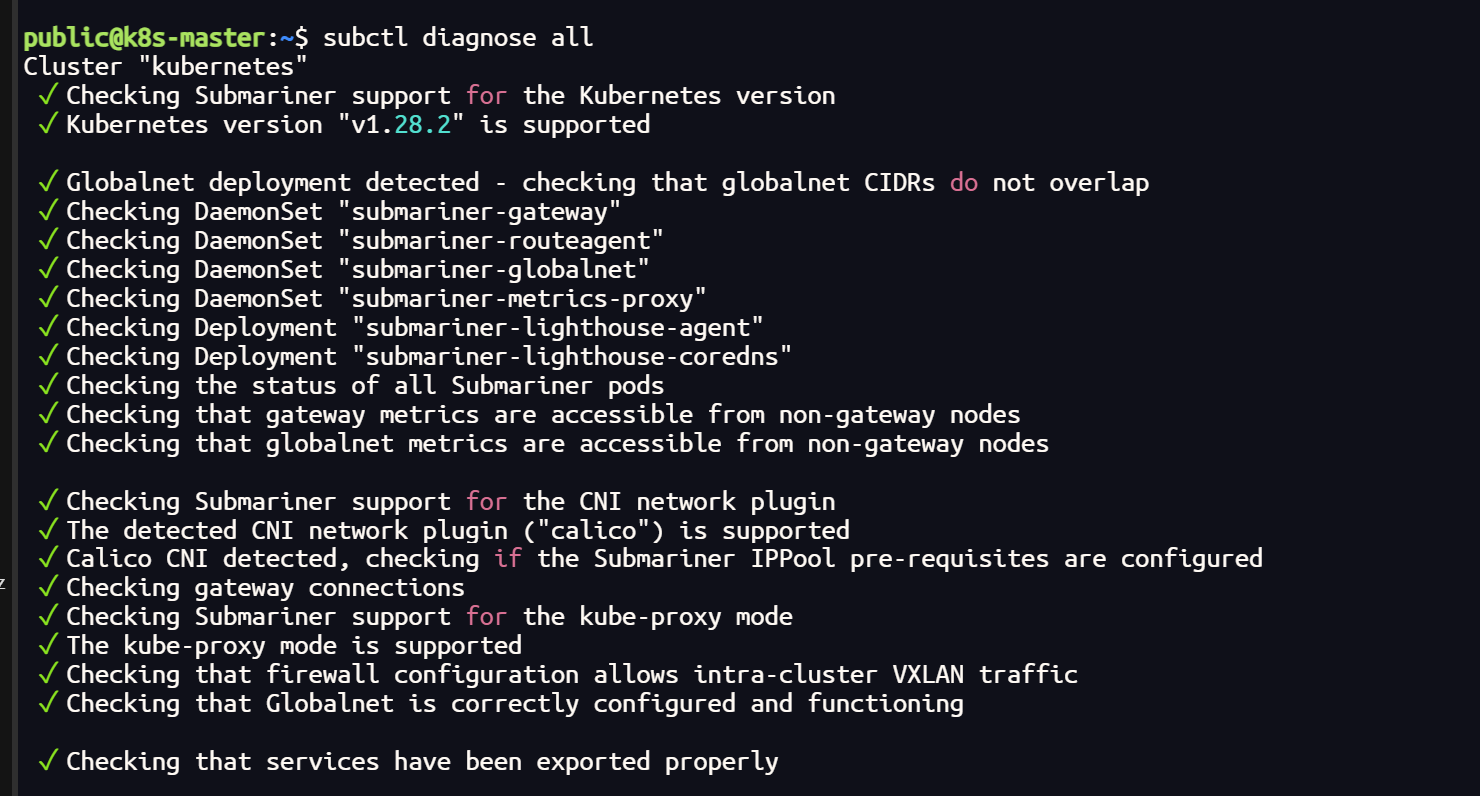
subctl diagnose all
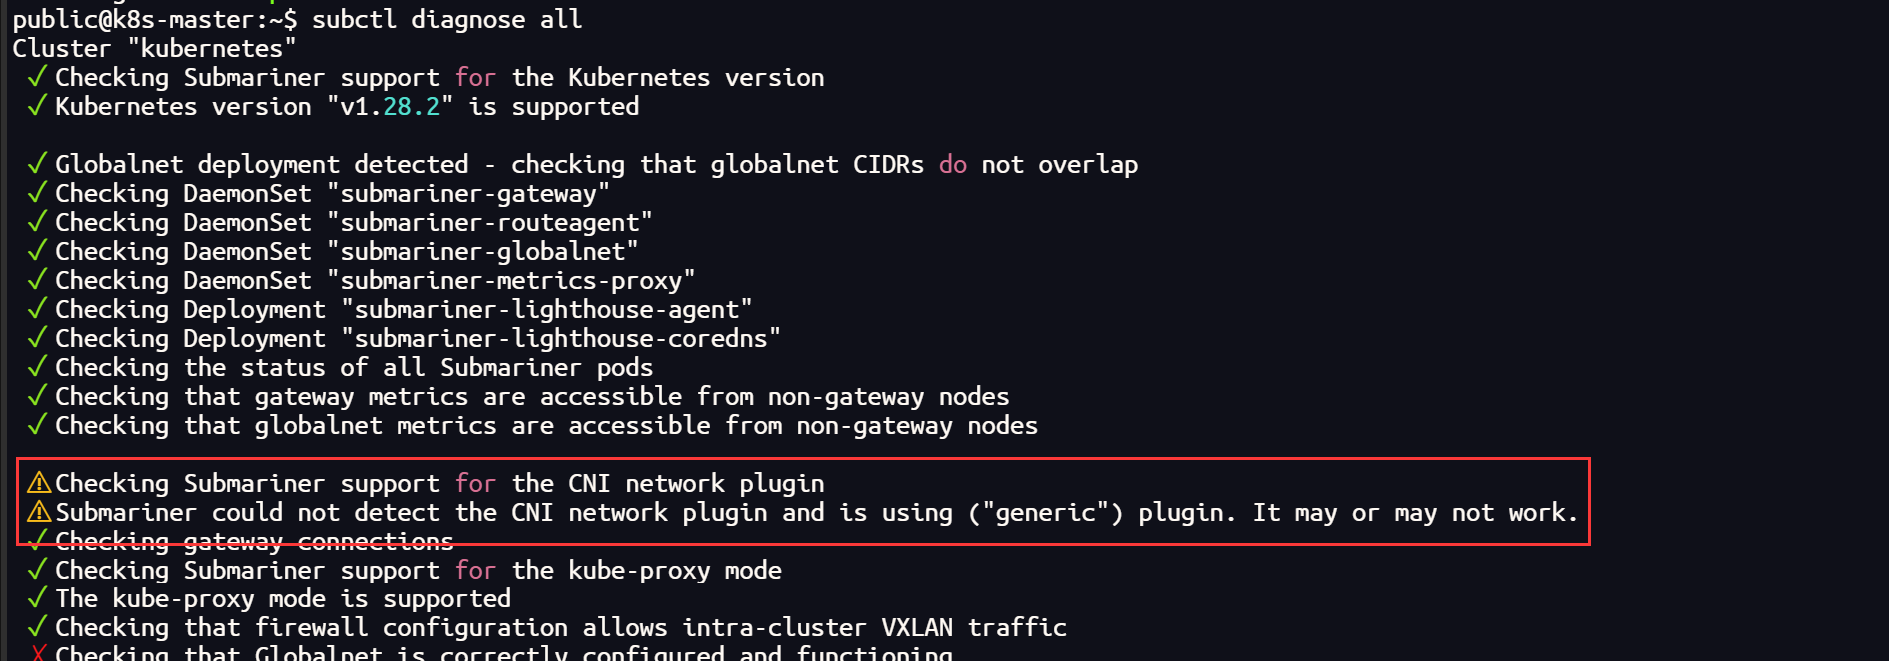
Cilium 彻底卸载
helm uninstall cilium -n kube-system

# 检查集群中的所有 CNI 插件(集群的每个节点都需要删除)
sudo ls /etc/cni/net.d/

# 删除
sudo rm /etc/cni/net.d/05-cilium.conflist
sudo rm /etc/cni/net.d/10-flannel.conflist.cilium_bak

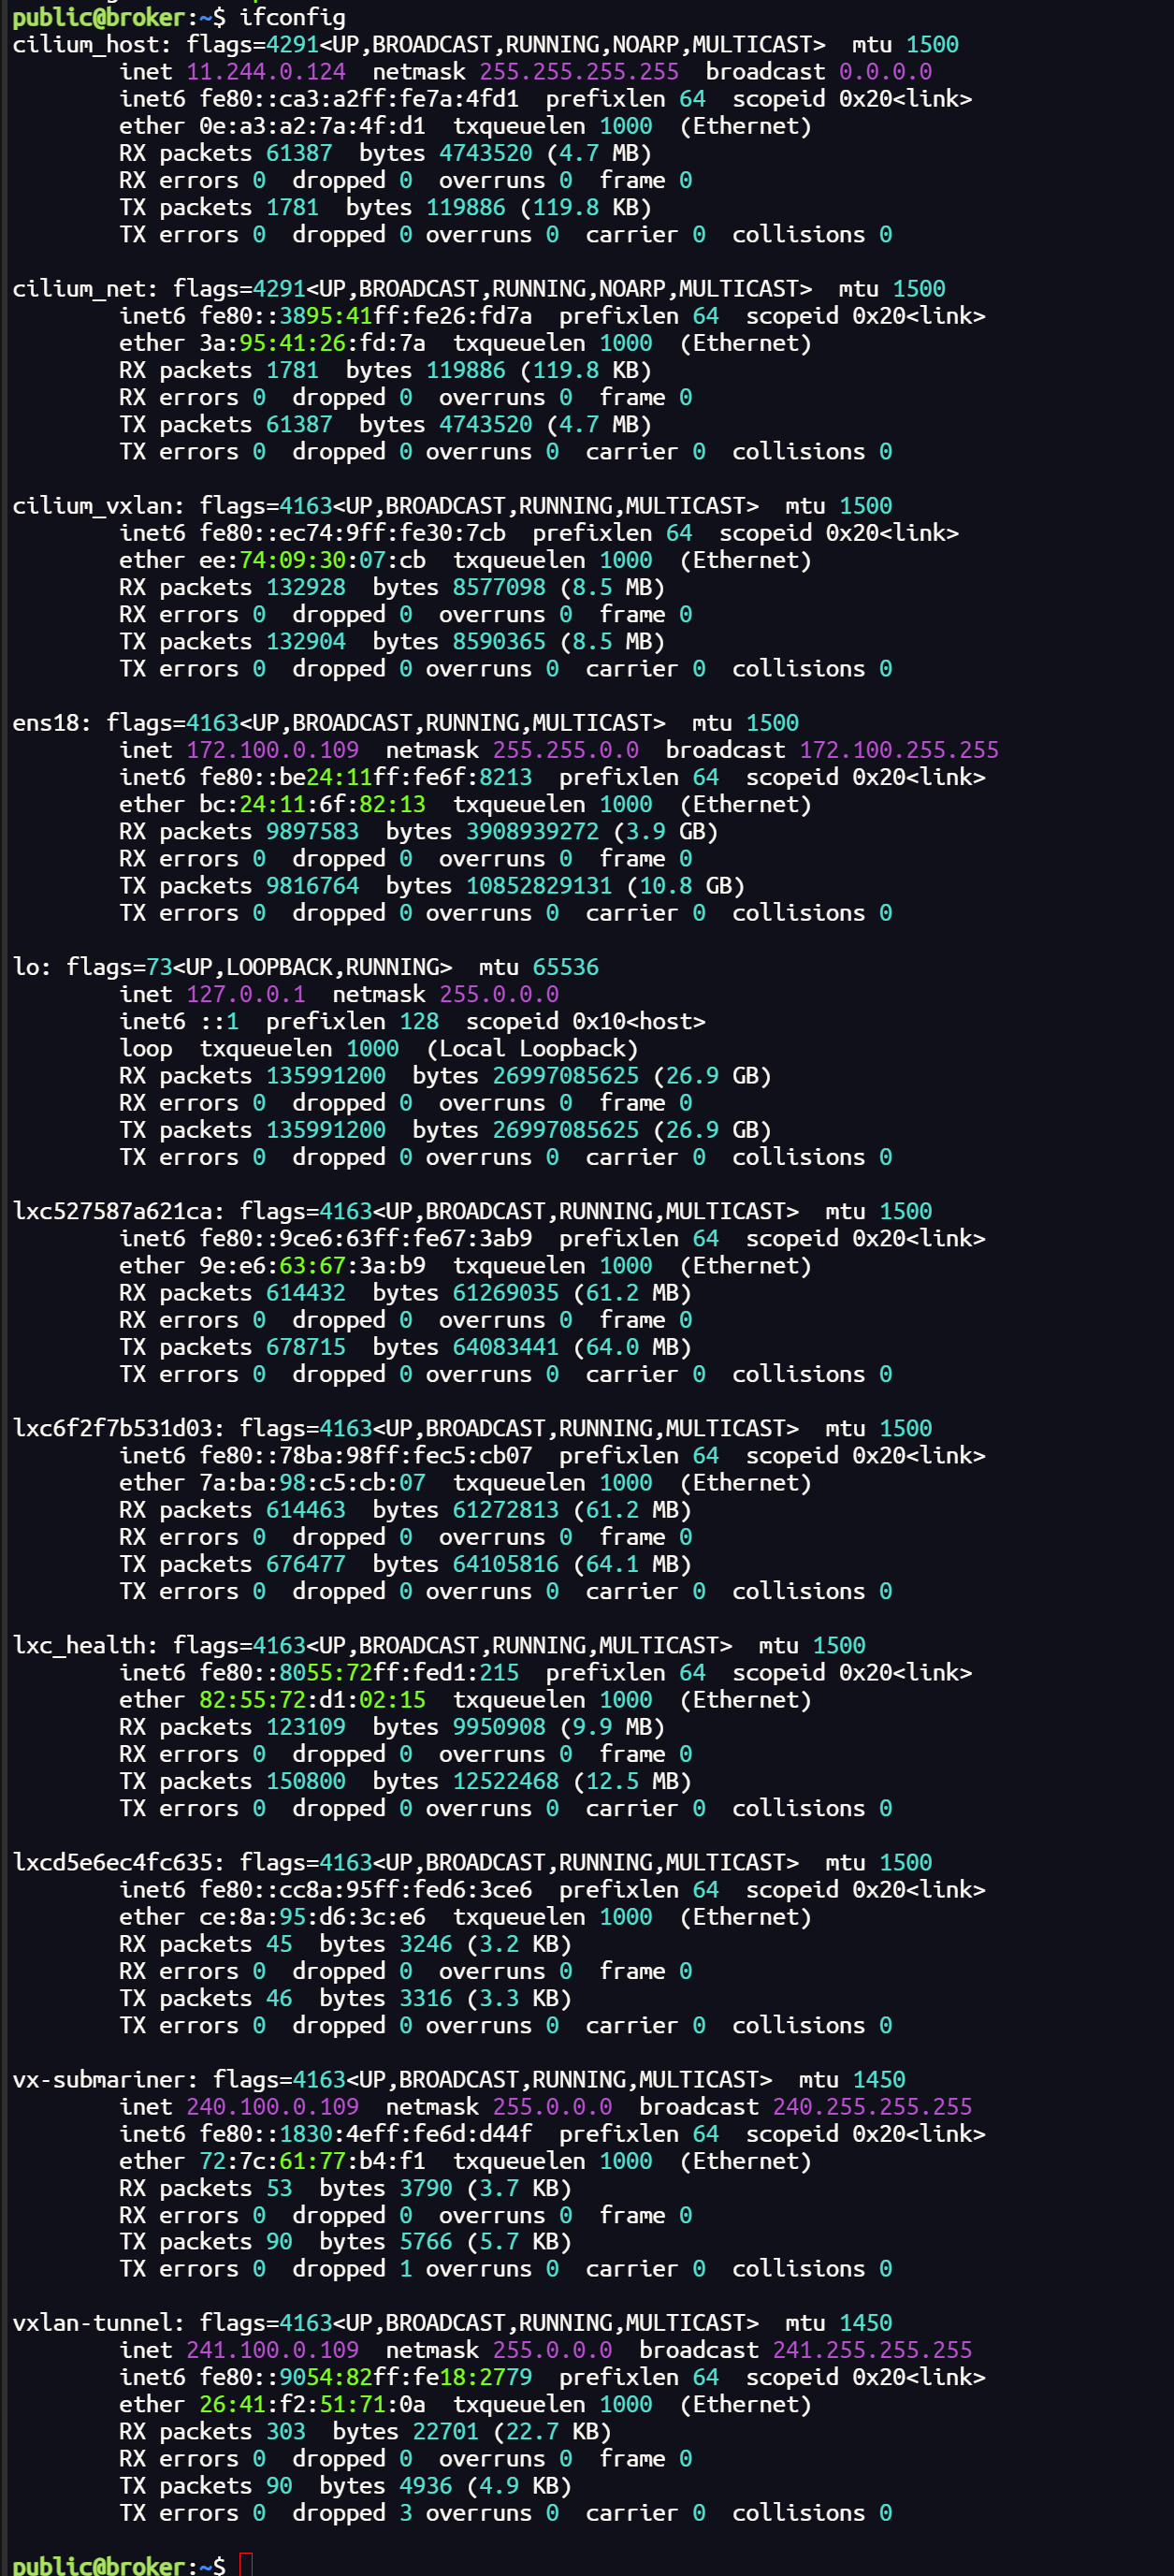
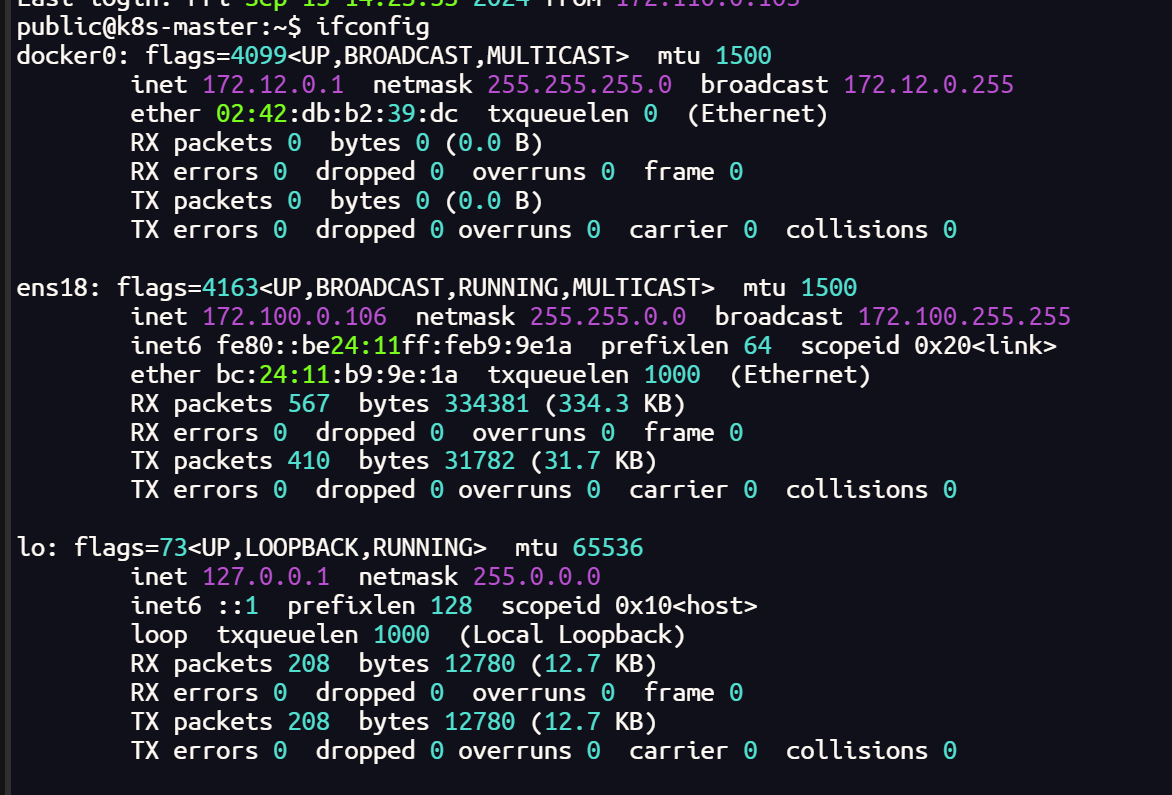
# 查询和重置网络接口
ifconfig
sudo reboot
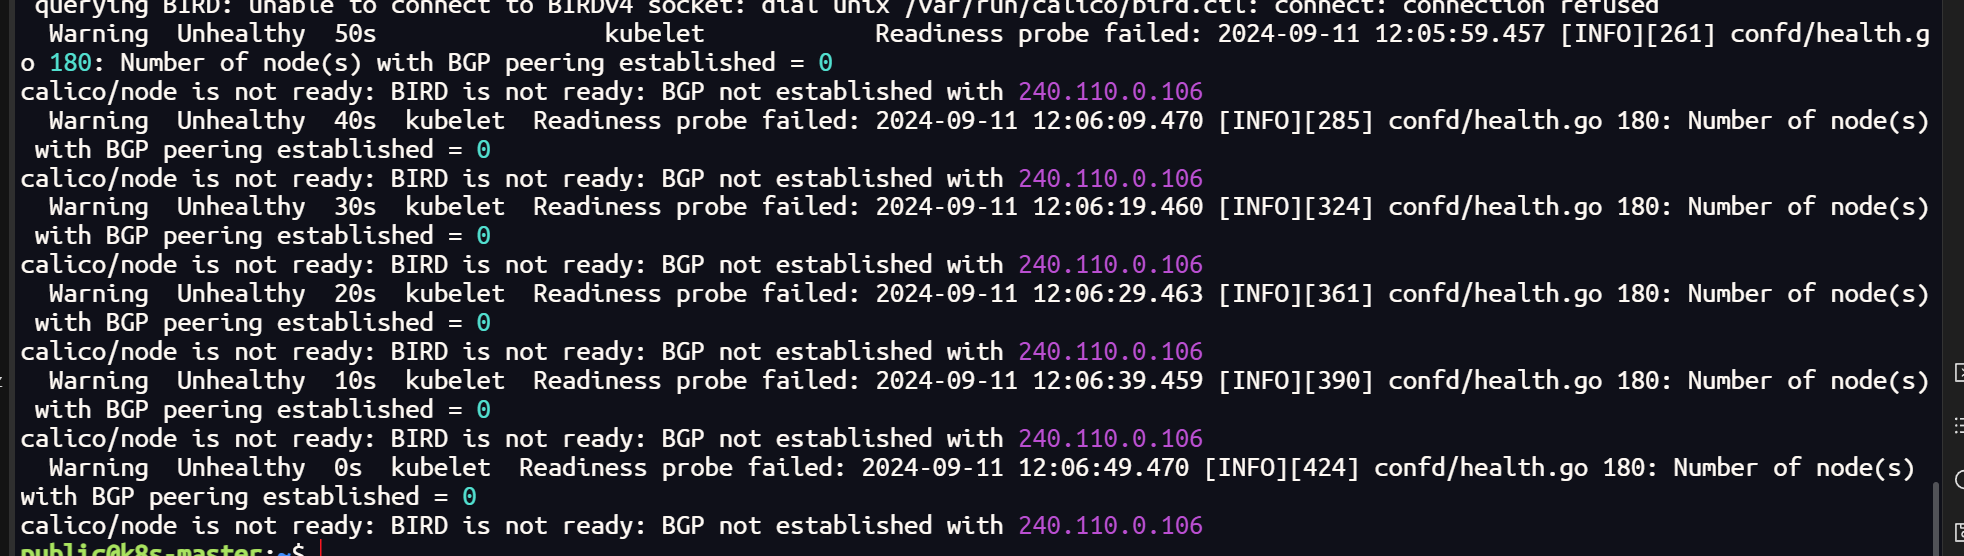
否则后续可能会出现这种错误
Calico安装
calico官网地址:https://docs.tigera.io/calico/latest/getting-started/kubernetes/quickstart
安装Tigera Calico操作符和自定义资源定义:
kubectl create -f https://raw.githubusercontent.com/projectcalico/calico/v3.27.2/manifests/tigera-operator.yaml
如果报错连接不上的话将文件手动下载下来再执行
wget https://raw.githubusercontent.com/projectcalico/calico/v3.28.0/manifests/tigera-operator.yaml
或者
curl -O https://raw.githubusercontent.com/projectcalico/calico/v3.28.0/manifests/tigera-operator.yaml

kubectl create -f tigera-operator.yaml
下载下来后不能用 kubectl apply -f 来执行,会报错
The CustomResourceDefinition “installations.operator.tigera.io” is invalid: metadata.annotations: Too long: must have at most 262144 bytes
意思是 annotation 长度过长了,原因是 apply 和 create 的处理不同
改配置文件中这个选项的长度就不改了,不用 apply 使用 create
这里没有报错就没有问题
但运行完之后要查看一下 tigera-operator 运行是否正常,如果状态为Running 则继续执行下面的步骤
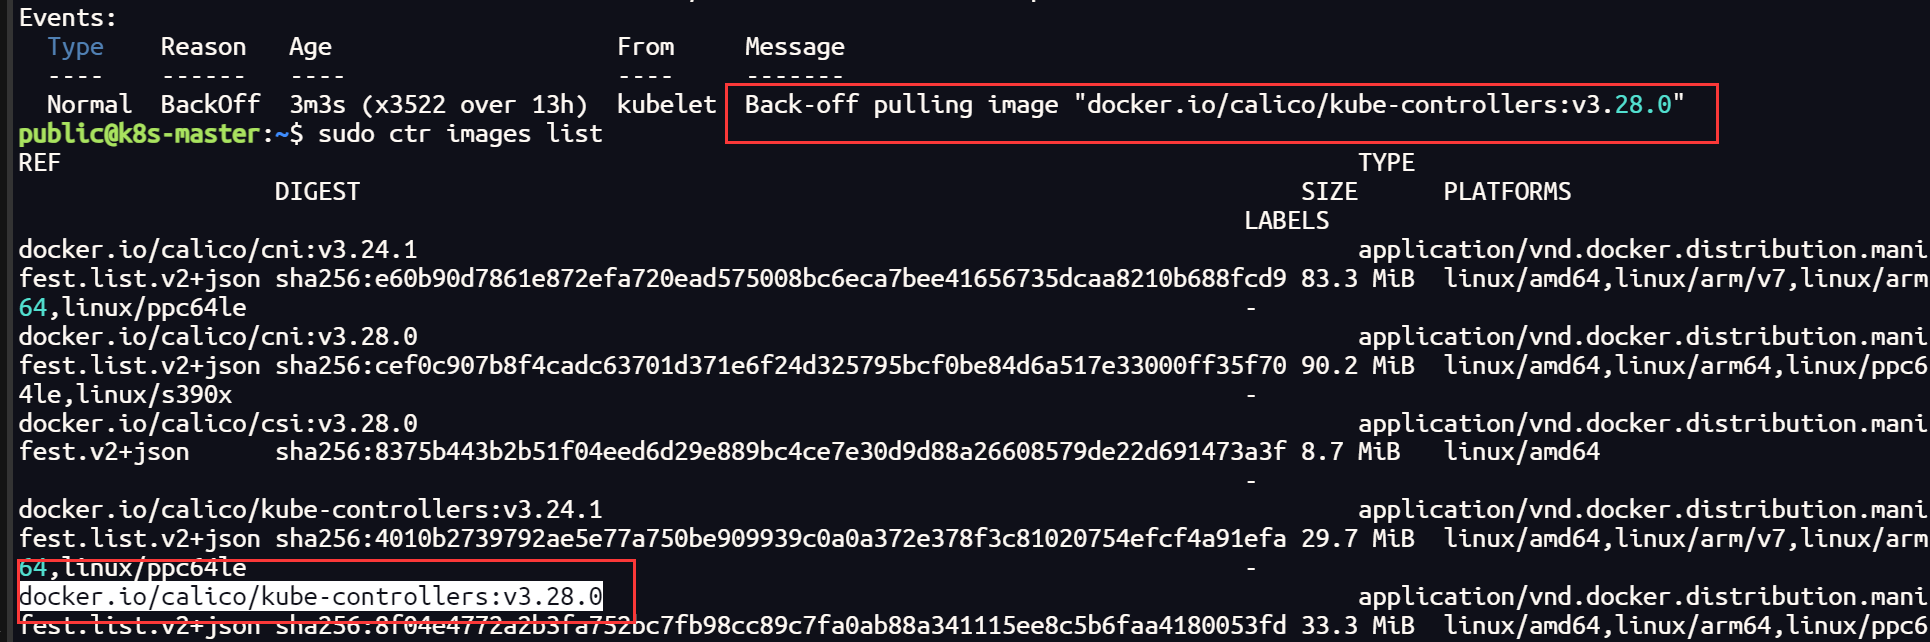
这里可能会出现 容器创建失败 的情况,查看日志一般是因为镜像拉取失败,查看配置文件关于镜像的部分,这里需要单独拉取镜像
第二步将配置文件下载下来,因为要改内容:
# 下载客户端资源文件
curl -LO https://raw.githubusercontent.com/projectcalico/calico/v3.27.2/manifests/custom-resources.yaml
这个文件中的 192.168.0.0 为 init 时指定的 --pod-network-cidr:
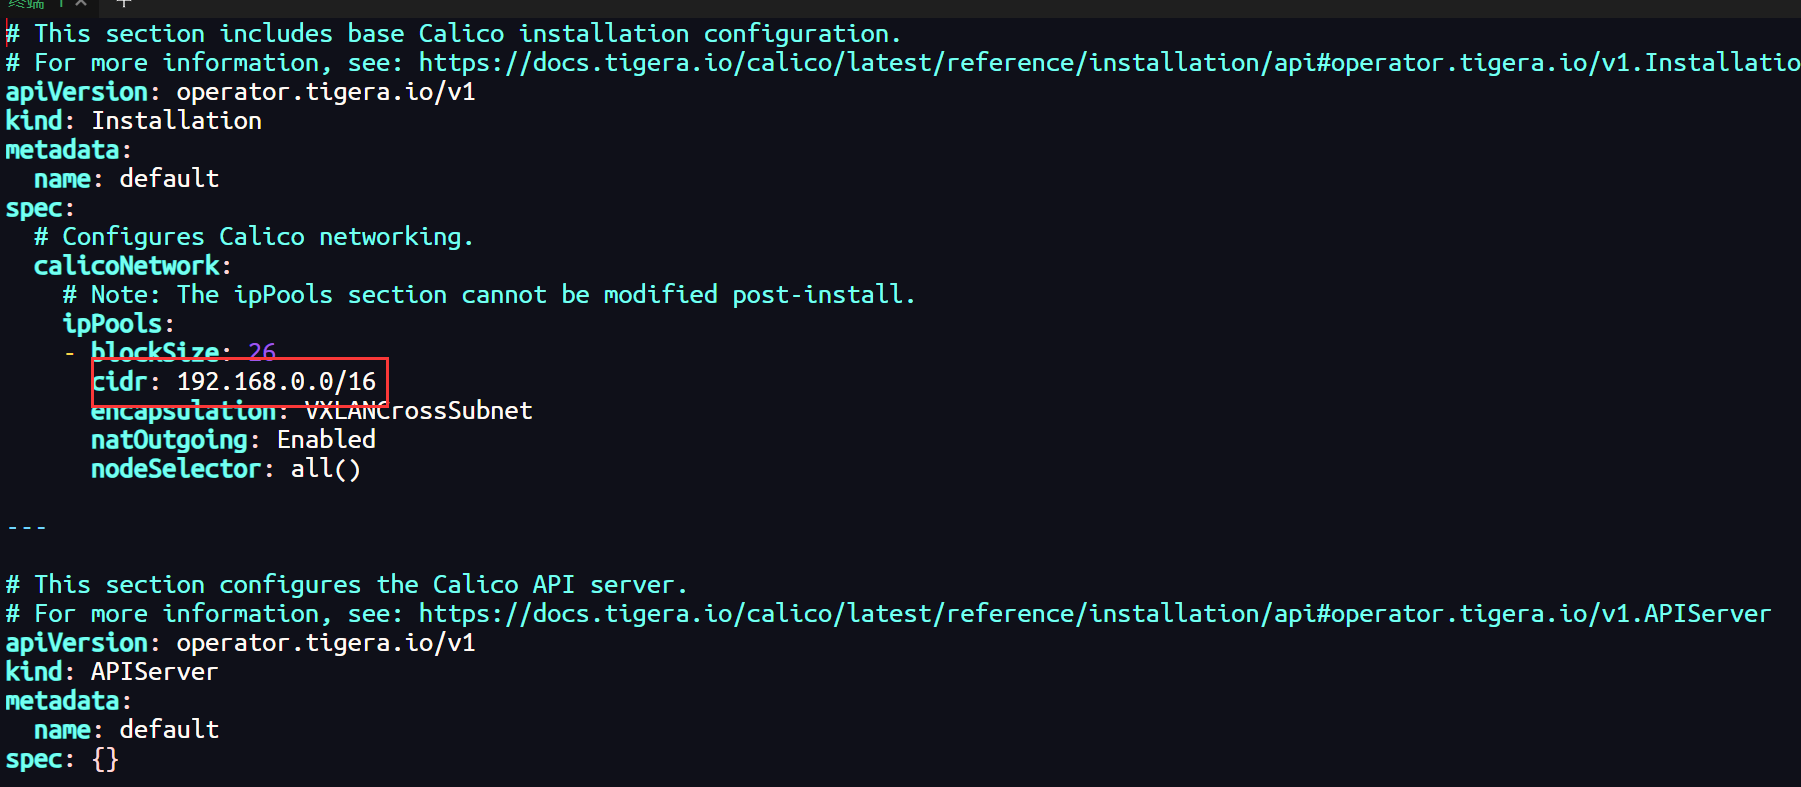
# 或者修改pod的网段地址
sed -i 's/cidr: 192.168.0.0/cidr: 10.244.0.0/16' custom-resources.yaml
最后根据这个文件创建资源,执行下面这行命令:
kubectl create -f custom-resources.yaml
这里如果你的集群无法拉取国外镜像,可以尝试配置镜像加速器
sed -i 's#config_path = ""#config_path = "/etc/containerd/certs.d"#' /etc/containerd/config.toml

mkdir /etc/containerd/certs.d/docker.io/ -p

# 这里的加速器地址可以选择阿里云的镜像加速地址
cat >/etc/containerd/certs.d/docker.io/hosts.toml <<EOF
[host."https://dbxvt5s3.mirror.aliyuncs.com",host."https://registry.docker-cn.com"]
capabilities = ["pull"]
EOF

#重启containerd
systemctl restart containerd
如果,配置了镜像加速器依然无法拉取,这时就需要比较繁琐复杂的过程了(因为我没有找到国内的可以镜像源地址,所以选择在本地拉取dockerhub 镜像传到个人镜像仓库再进行拉取,当然也可以打包直接传到主机)
需要拉取的镜像如下:
docker.io/calico/typha:v3.28.0
docker.io/calico/apiserver:v3.28.0
docker.io/calico/cni:v3.28.0
docker.io/calico/csi:v3.28.0
docker.io/calico/kube-controllers:v3.28.0
docker.io/calico/node-driver-registrar:v3.28.0
docker.io/calico/node:v3.28.0
docker.io/calico/pod2daemon-flexvol:v3.28.0
需要注意的是,如果你采用这种方式,不要只在主节点拉取镜像,部分镜像也需要在工作节点拉取
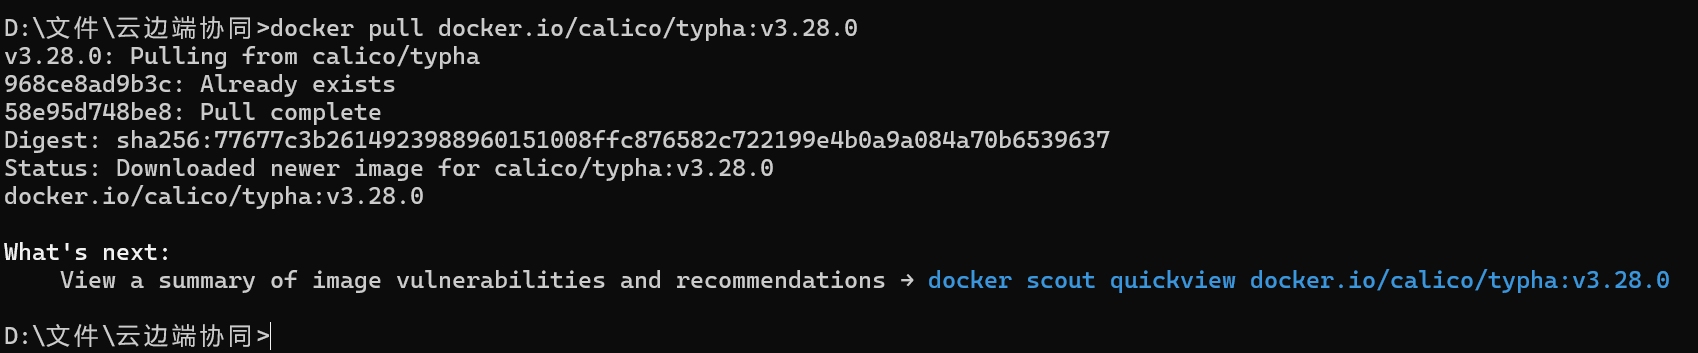
# 本地拉取镜像
docker pull docker.io/calico/typha:v3.28.0
# 上传阿里云私人仓库
docker tag [ImageId] registry.cn-hangzhou.aliyuncs.com/leung_qw/typha:[镜像版本号]
docker push registry.cn-hangzhou.aliyuncs.com/leung_qw/typha:[镜像版本号]
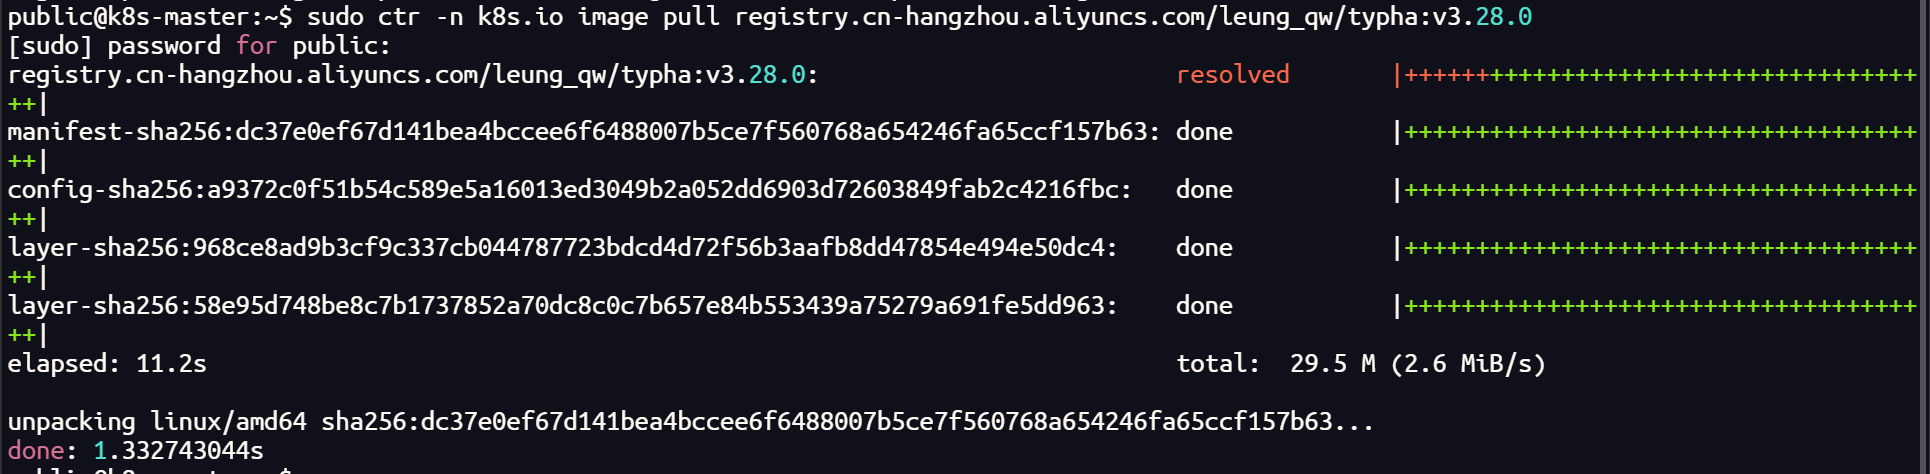
# 拉取镜像
sudo ctr -n k8s.io image pull registry.cn-hangzhou.aliyuncs.com/leung_qw/typha:v3.28.0
sudo ctr -n k8s.io image tag registry.cn-hangzhou.aliyuncs.com/leung_qw/typha:v3.28.0 docker.io/calico/typha:v3.28.0
# 查看镜像
sudo ctr -n k8s.io image list | grep calico
上传到私人镜像仓库,拉取后更改 tag


主机拉取镜像的时候,一定要带-n k8s.io 的命名空间,否则会出现,无法检测到本机镜像的情况

其他镜像如法炮制
如果,你在一台主机上已经有了上面的镜像,也可以将镜像打包,传给其他节点导入
# 镜像打包
sudo ctr -n k8s.io images export <path-to-tar-file> <image-name>:<tag>
# 例如
sudo ctr -n k8s.io images export typha.tar docker.io/calico/typha:v3.28.0

# 传递文件
scp file 远程用户名@远程服务器IP:/path/to/destination
# 例如
scp typha.tar public@172.100.0.104:~/

# 导入镜像
sudo ctr -n k8s.io images import typha.tar
使用 cilium 插件时的 submariner 以及 更换 calico 后
subctl diagnose all


 1289
1289

 被折叠的 条评论
为什么被折叠?
被折叠的 条评论
为什么被折叠?
 到【灌水乐园】发言


