


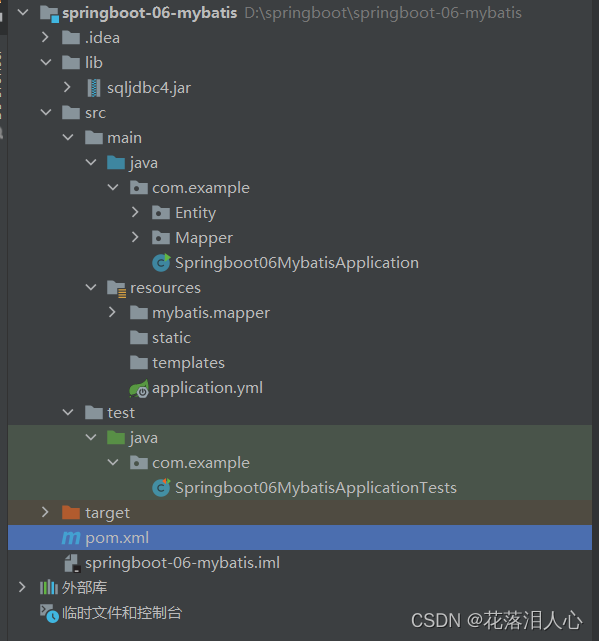
一、新建项目
二、pom.xml导入依赖
pom.xml插入依赖:
<dependencies>
		<!-- https://mvnrepository.com/artifact/org.mybatis.spring.boot/mybatis-spring-boot-starter -->
		<dependency>
			<groupId>org.mybatis.spring.boot</groupId>
			<artifactId>mybatis-spring-boot-starter</artifactId>
			<version>2.2.2</version>
		</dependency>


		<dependency>
			<groupId>org.springframework.boot</groupId>
			<artifactId>spring-boot-starter-web</artifactId>
		</dependency>
		<dependency>
			<groupId>org.mybatis.spring.boot</groupId>
			<artifactId>mybatis-spring-boot-starter</artifactId>
			<version>2.2.2</version>
		</dependency>

		<dependency>
			<groupId>com.microsoft.sqlserver</groupId>
			<artifactId>mssql-jdbc</artifactId>
			<scope>runtime</scope>
		</dependency>
		<dependency>
			<groupId>org.springframework.boot</groupId>
			<artifactId>spring-boot-starter-test</artifactId>
			<scope>test</scope>
		</dependency>
		<dependency>
			<groupId>org.springframework.boot</groupId>
			<artifactId>spring-boot-devtools</artifactId>
			<scope>runtime</scope>
			<optional>true</optional>
		</dependency>
		<dependency>
			<groupId>org.projectlombok</groupId>
			<artifactId>lombok</artifactId>
		</dependency>
	</dependencies>
三、application.yml 数据库连接操作编写(SQL Server)
application.yml
spring:
  datasource:
    driver-class-name: com.microsoft.sqlserver.jdbc.SQLServerDriver
    url: jdbc:sqlserver://127.0.0.1:1433;DatabaseName=Sports
    username: sa
    password: 123
四、进行连接数据库测试
@SpringBootTest
class Springboot06MybatisApplicationTests {

	@Autowired
	DataSource dataSource;
	@Test
	void contextLoads()  {
		/**
		 * 查看默认数据源
		 */
		System.out.println(dataSource.getClass());
		/**
		 * 获得数据库连接
		 */

		try {
			Connection connection = dataSource.getConnection();
			System.out.println(connection);
			connection.close();
		} catch (SQLException e) {
			e.printStackTrace();
		}


	}
}
五、建立实体类 User
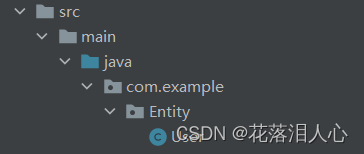
User.java类
package com.example.Entity;

import lombok.AllArgsConstructor;
import lombok.Data;
import lombok.NoArgsConstructor;

/**
 * @author
 * @ClassName User
 * @Description:
 * @Date 2022-05-22 10:50
 *
 *
 * lombok依赖
 * @Data  自动生成Get()和Set()方法
 * @NoArgsConstructor  自动生成无参构造方法
 * @AllArgsConstructor  自动生成有参构方法
 *
 */
@Data
@NoArgsConstructor
@AllArgsConstructor
public class User {

    private String userId;
    private String userName;
    private String password;
    private String jurisdiction;
}
六、建立UserMapper接口
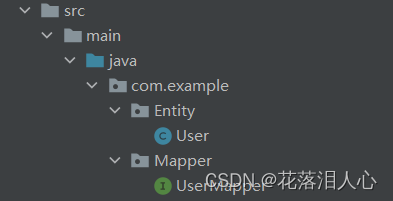
UserMapper.java 接口
package com.example.Mapper;

import com.example.Entity.User;
import org.apache.ibatis.annotations.Mapper;
import org.springframework.stereotype.Repository;

import java.util.List;

/**
 * @author
 * @ClassName UserMapper
 * @Description:
 * @Date 2022-05-22 11:00
 * @Mapper 这个注解表示这是一个mybatis 的 mapper 类;
 * @Repository 这是一个Dao层,需要这个注解
 */

@Mapper
@Repository
public interface UserMapper {

    /**
     * 查询所有用户
     *
     * @return List<User>
     */
    List<User> queryUserList();


    /**
     * 通过id查询用户
     *
     * @param id
     * @return User
     */
    User queryUserById(int id);

    /**
     * 增加用户
     *
     * @param user
     * @return int
     */
    int addUser(User user);

    /**
     * 更新用户信息
     *
     * @param user
     * @return int
     */
    int updateUser(User user);

    /**
     * 通过id删除用户
     *
     * @param id
     * @return int
     */
    int delUser(int id);
}
七、 建立UserMapper.xml
在之前需要整合MyBatis:
#整合mybatis
mybatis:
  type-aliases-package: com.example.Entity
  mapper-locations: classpath:/mybatis/mapper/*.xml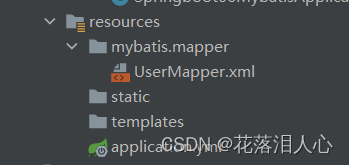
UserMapper.xml
<?xml version="1.0" encoding="UTF-8" ?>
<!DOCTYPE mapper
        PUBLIC "-//mybatis.org//DTD Mapper 3.0//EN"
        "http://mybatis.org/dtd/mybatis-3-mapper.dtd">
<!--一定要填写你是用的java接口-->
<mapper namespace="com.example.Mapper.UserMapper">

    <select id="queryUserList" resultType="User">
        select * from [User]
    </select>

    <select id="queryUserById" resultType="User">
        select * from [User] where userId = #{userId}
    </select>

    <insert id="addUser" parameterType="User">
        insert into [User] values (#{userId},#{userName},#{password},#{jurisdiction})
    </insert>

    <update id="updateUser" parameterType="User">
        update [User] set userName=#{userName},password=#{password},jurisdiction=#{jurisdiction} where userId=  #{userId}
    </update>

    <delete id="delUser" parameterType="int">
        delete from [User] where userId = #{userId}
    </delete>
</mapper>
八、建立UserController类
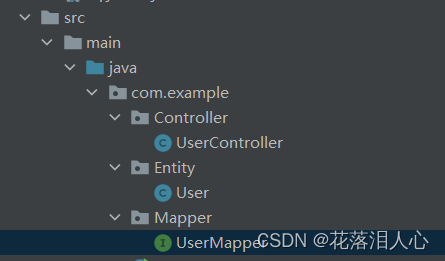
UserController.java类
package com.example.Controller;

import com.example.Entity.User;
import com.example.Mapper.UserMapper;
import org.springframework.beans.factory.annotation.Autowired;
import org.springframework.web.bind.annotation.GetMapping;
import org.springframework.web.bind.annotation.RestController;

import java.util.List;

/**
 * @author
 * @ClassName UserController
 * @Description:
 * @Date 2022-05-22 11:49
 */
@RestController
public class UserController {

    @Autowired
    private UserMapper userMapper;

    /**
     * 获取所有用户
     * @return  List<User>
     */
    @GetMapping("/queryUserList")
    public List<User> queryUserList() {
        List<User> users = userMapper.queryUserList();
        return users;
    }

    @GetMapping("/queryUserById")
    public String queryUserById() {
        userMapper.queryUserById(1);
        return "queryUserById-OK";
    }

    /**
     * 增加用户
     * @return String
     */
    @GetMapping("/addUser")
    public String addUser() {
       userMapper.addUser(new User("1","1","1","1"));
        return "addUser-OK";
    }

    /**
     * 修改用户信息
     * @return String
     */
    @GetMapping("/updateUser")
    public String updateUser() {
        userMapper.updateUser(new User("1","1","123","123"));
        return "updateUser-OK";
    }

    /**
     * 通过id删除用户
     * @return String
     */
    @GetMapping("/delUser")
    public String delUser() {
        userMapper.delUser(1);
        return "delUser-OK";
    }
}


 1638
1638


 被折叠的 条评论
为什么被折叠?
被折叠的 条评论
为什么被折叠?
 到【灌水乐园】发言


