


前言
文章介绍Ubuntu系统搭建redis,并完成主从的读写分离配置,为主节点搭建三台哨兵服务,并集成到springboot中。
本篇文章是通过其他优秀博文学习后,用作学习记录使用。
大佬博客:
https://blog.csdn.net/Wei_Naijia/article/details/125704197
https://blog.csdn.net/lssqk/article/details/127220990
1.Ubuntu安装redis
(1)工具安装
sudo apt-get install -y gcc
sudo apt-get install -y g++
sudo apt-get install -y gcc automake autoconf libtool make
(2)安装redis
a. 到redis官网(链接: https://redis.io/download/)下载redis安装包,然后上传到服务器,解压安装包
# 切换到安装包存放目录
cd /data/redis-colony
# 解压安装包
tar -zxvf redis-6.2.12.tar.gz
解压成功后,进入解压目录可以看到下面的内容,其中,redis.conf就是redis的配置文件,sentinel.conf就是redis哨兵的配置文件,待会会用这两个
 b. 编译Makefile,安装redis
# 进入解压目录
cd redis-6.2.12/
# 编译Makefile
make
# 编译完成后会看到最下面的一行字 Hint: It's a good idea to run 'make test' ; )
# 安装redis,使用PREFIX指定安装目录,默认在/usr/local/bin下
make install PREFIX=/data/redis-colony/redis
c.安装完成后可以在安装目录的bin目录下看到下面内容

这个时候就可以用redis-server启动了,redis安装就到此完成了。
2.redis主从复制,读写分离
我这先在redis-colony目录下创建一个redis-cluster文件夹,统一管理主从redis的相关文件。
# 切换到目标目录,创建redis-cluster文件夹
cd /data/redis-colony
mkdir redis-cluster
# 切换到redis解压目录
cd /data/redis-colony/redis-6.2.12
# 复制redis配置文件到这个路径下面并改名
cp redis.conf /data/redis-colony/redis-cluster/redis-6380.conf
cp redis.conf /data/redis-colony/redis-cluster/redis-6381.conf
cp redis.conf /data/redis-colony/redis-cluster/redis-6382.conf
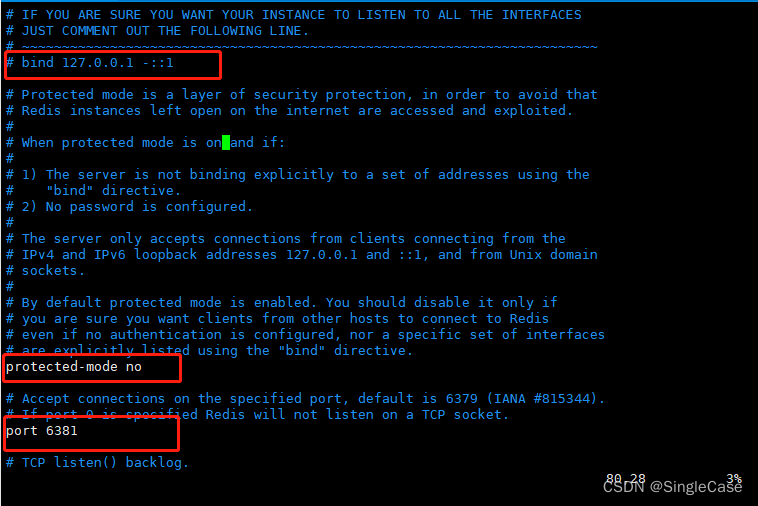
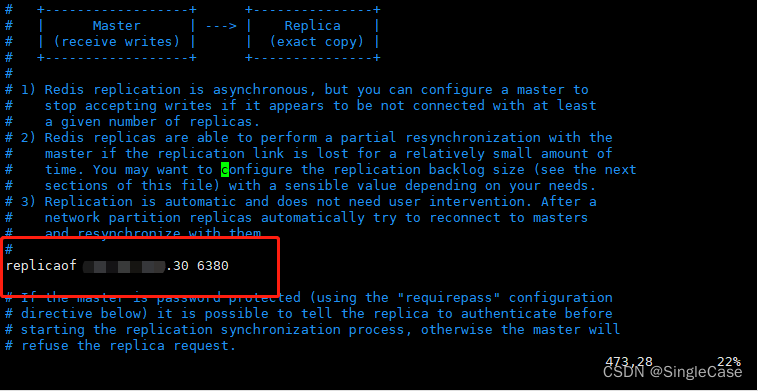
修改三个配置文件,我这里将6380作为主节点,6381和6382作为从节点
# bind 127.0.0.1 注释表示允许外机访问,不然就只能本机访问
protected-mode no # 关闭保护模式
port 6381 # 指定端口为6381
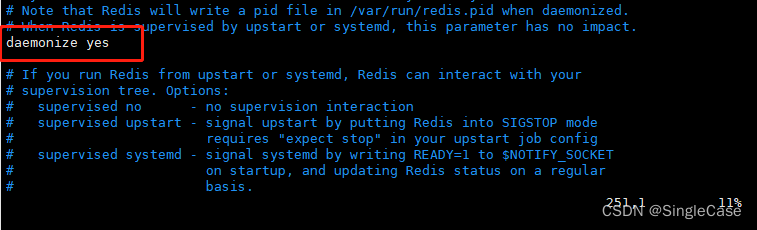
# 启动方式从前台启动改成后台启动(前台启动的话,终端关闭就会自动停止)
daemonize yes
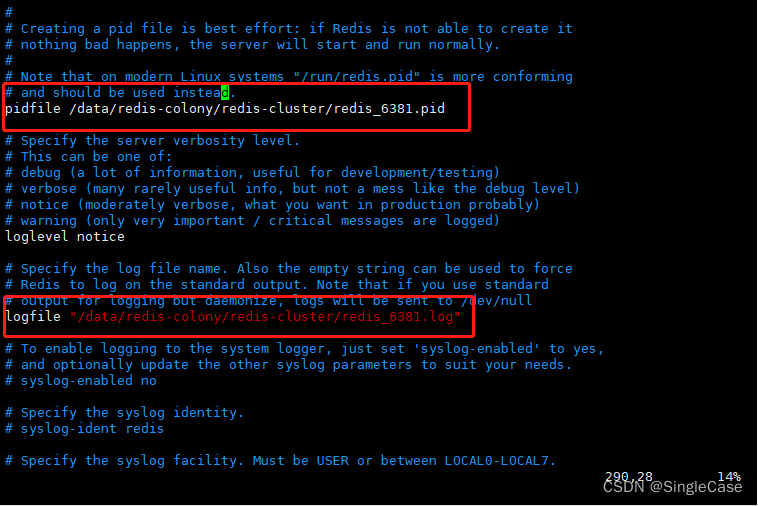
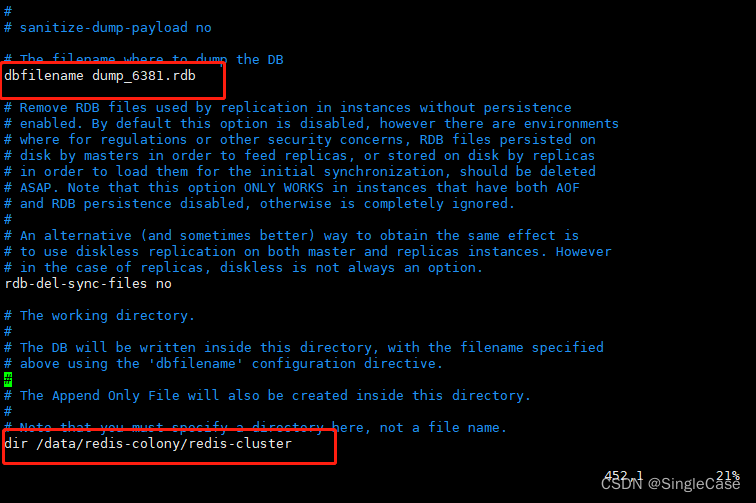
# 后续就是一些相关文件路径,文件名配置
# aof相关配置,这里没有配,可以根据需要进行配置
appendonly yes
appendfilename appendonly_6381.aof
# 连接密码配置,这里也没有配置,可以根据需要进行配置
requirepass <password>
# 从节点进行这项配置,主节点不用
replicaof <ip> 6380 # 指定当前从节点的主节点redis
# 主节点可以加一下配置
replica-read-only no # 标记当前节点可写
配置完成后就可以用redis-server启动了,我这里是想写的三个对应的启动脚本,这里拿6380示例
/data/redis-colony/redis/bin/redis-server /data/redis-colony/redis-cluster/redis-6380.conf
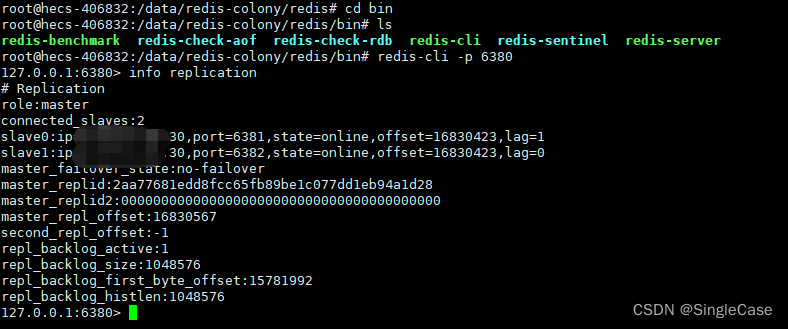
启动完成后,可以使用redis-cli进入主节点,查看当前主从情况
/data/redis-colony/redis/bin/redis-cli -p 6380
info replication
3.redis哨兵配置
前面提到了,sentinel.conf就是redis哨兵的配置,我们这里新建一个redis-sentinel文件夹,管理redis哨兵相关的文件。然后复制三个哨兵配置文件到这个路径下。
# 切换到解压文件夹下
cd /data/redis-colony/redis-6.2.12
# 复制哨兵配置文件到redis-sentinel路径下
cp sentinel.conf /data/redis-colony/redis-sentinel/sentinel-26380.conf
cp sentinel.conf /data/redis-colony/redis-sentinel/sentinel-26381.conf
cp sentinel.conf /data/redis-colony/redis-sentinel/sentinel-26382.conf
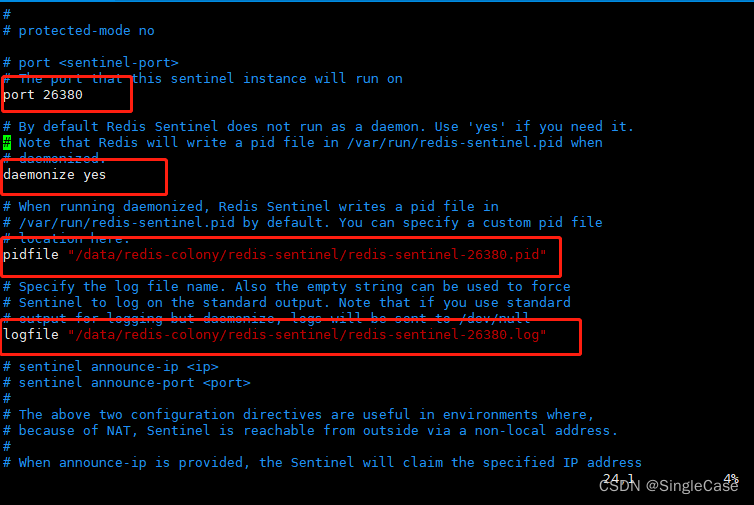
修改哨兵配置文件,三个哨兵配置文件一样,都是为主节点做哨兵配置,只是修改一下端口和相关文件即可,这里还是拿其中一个举例。
# 指定端口 26380
port 26380
# 改为后台启动
daemonize yes
# 指定文件路径
# ...
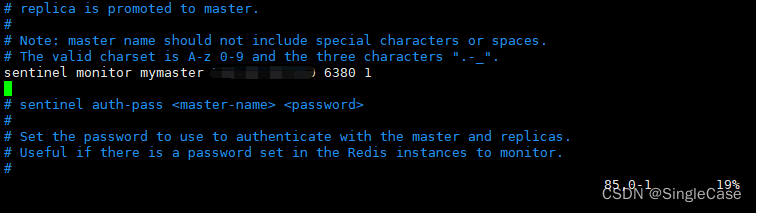
# 监控<ip> 6380 节点(将这台机器作为<ip> 6380的哨兵),命名为mymaster
# 这里的 1 代表优先级,我这给26380配置的1,其余两台分别是2和3,代表主节点宕机后,优先26380代替成为主节点
sentinel monitor mymaster <ip> 6380 1
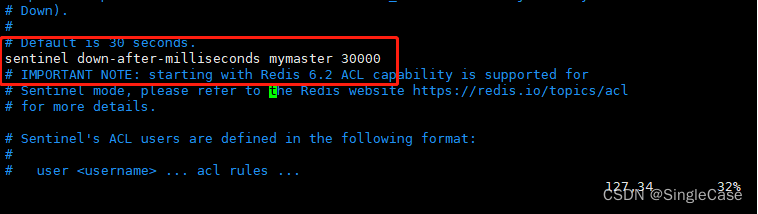
# 设置主节点无响应时间代表挂了,默认是30s
sentinel down-after-milliseconds mymaster 30000
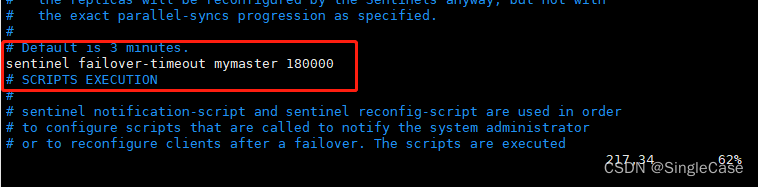
# 故障转移时间上限,默认是三分钟
sentinel failover-timeout mymaster 180000
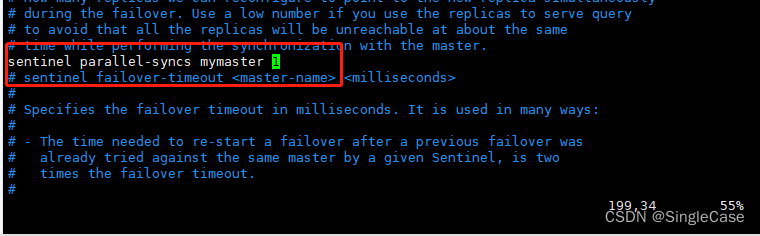
# 发生故障时最多几台从节点对新master进行同步,值越小,故障响应处理越快
sentinel parallel-syncs mymaster 1
# 在监控节点配置下方的配置,这里的master-name指代的是前面配置的主节点名称,这里指mymaster,密码指主节点配置文件中的密码
# 当密码正确时,才能和主节点建立连接,监控主节点状态信息
sentinel auth-pass <master-name> <password>
# 这里为哨兵配置连接密码,按需要配置
requirepass <password>
完成配置后可以使用安装目录下的redis-sentinel启动哨兵服务
# 路径根据自己的来定
/data/redis-colony/redis/bin/redis-sentinel /data/redis-colony/redis-sentinel/sentinel-26380.con
4.springboot集成redis完成读写分离配置
(1)导入依赖
引入依赖(我这只引入了redis依赖,其余依赖看着来)
<!--spirngboot springdata对redis支持-->
<dependency>
    <groupId>org.springframework.boot</groupId>
    <artifactId>spring-boot-starter-data-redis</artifactId>
</dependency>
(2)yml配置
编写yml配置文件,我这里的就是无密码配置,主节点,从节点,哨兵这些都没有密码,如果有配置了密码,还需要进行密码配置。通过无密码配置中的日志配置方式可以看到redis操作时的读写操作从哪个节点进行。
a.无密码yml配置
spring:
  redis:
    # 哨兵模式配置
    sentinel:
      # 这里就是前面哨兵配置文件中指定的主节点名称
      master: mymaster
      nodes:
        - <ip>:26380
        - <ip>:26381
        - <ip>:26382
# 日志配置
logging:
  level:
    # 表示根 logger 的日志级别为 info
    root: info
    # 表示 io.lettuce.core 包(redis的核心驱动包)下的日志级别为 debug
    io.lettuce.core: debug
    org.springframework.data.redis: debug
b. 主从节点密码相同,哨兵密码相同yml配置
spring:
  redis:
    sentinel:
      master: mymaster
      nodes: sentinel-host1:26380,sentinel-host2:26381
      password: sentinel-password
    cluster:
      nodes: redis-host1:6380,redis-host2:6381,redis-host3:6382
      password: cluster-password
c. 主从节点,哨兵密码各不相同yml配置
spring:
  redis:
    sentinel:
      master: mymaster
      nodes: sentinel1:26380,sentinel2:26381
      node-passwords:
        - host: sentinel1
          port: 26380
          password: sentinel1-password
        - host: sentinel2
          port: 26381
          password: sentinel2-password
    cluster:
      nodes: cluster1:6380,cluster2:6381,cluster3:6382
      node-passwords:
        - host: cluster1
          port: 6380
          password: cluster1-password
        - host: cluster2
          port: 6381
          password: cluster2-password
        - host: cluster3
          port: 6382
          password: cluster3-password
(3)RedisConfig配置类
编写redis配置类(我这直接把大佬的粘过来,写得太详细了)
@Configuration
public class RedisConfiguration {

    /**
     *  配置redis序列化json
     * @param redisConnectionFactory
     * @return
     */
    @Bean
    @Primary    //若有相同类型的Bean时,优先使用此注解标注的Bean
    public RedisTemplate<String, Object> redisTemplate(RedisConnectionFactory redisConnectionFactory) {
        // 为了开发方便,一般直接使用<String, Object>
        RedisTemplate<String, Object> template = new RedisTemplate<>();
        template.setConnectionFactory(redisConnectionFactory);

        // 配置具体的序列化方式
        // JSON解析任意对象
        Jackson2JsonRedisSerializer jackson2JsonRedisSerializer = new Jackson2JsonRedisSerializer(Object.class);
        ObjectMapper om = new ObjectMapper();
        // 指定要序列化的域,field,get和set,以及修饰符范围,ANY是都有包括private和public
        om.setVisibility(PropertyAccessor.ALL, JsonAutoDetect.Visibility.ANY);
        // 指定序列化输入的类型,类必须是非final修饰的,final修饰的类,比如String,Integer等会跑出异常
        om.activateDefaultTyping(LaissezFaireSubTypeValidator.instance, ObjectMapper.DefaultTyping.NON_FINAL);
        // 设置日期格式
        om.setDateFormat(new SimpleDateFormat("yyyy-MM-dd HH:mm:ss"));
        jackson2JsonRedisSerializer.setObjectMapper(om);
        // String的序列化
        StringRedisSerializer stringRedisSerializer = new StringRedisSerializer();


        //key采用String的序列化
        template.setKeySerializer(stringRedisSerializer);
        //hash的key也采用String的序列化
        template.setHashKeySerializer(stringRedisSerializer);
        //value的序列化方式采用jackson
        template.setValueSerializer(jackson2JsonRedisSerializer);
        //hash的value序列化方式采用jackson
        template.setHashValueSerializer(jackson2JsonRedisSerializer);
        //设置所有配置
        template.afterPropertiesSet();

        return template;
    }

    /**
     * 配置读写分离
     * @param redisProperties
     * @return
     */
    @Bean
    public RedisConnectionFactory lettuceConnectionFactory(RedisProperties redisProperties) {
        // 配置哨兵节点以及主节点
        RedisSentinelConfiguration redisSentinelConfiguration = new RedisSentinelConfiguration(
                redisProperties.getSentinel().getMaster(), new HashSet<>(redisProperties.getSentinel().getNodes())
        );

        // 配置读写分离
        LettucePoolingClientConfiguration lettuceClientConfiguration = LettucePoolingClientConfiguration.builder()
                // 读写分离,这里的ReadFrom是配置Redis的读取策略,是一个枚举,包括下面选择
                // MASTER   仅读取主节点
                // MASTER_PREFERRED   优先读取主节点,如果主节点不可用,则读取从节点
                // REPLICA_PREFERRED   优先读取从节点,如果从节点不可用,则读取主节点
                // REPLICA   仅读取从节点
                // NEAREST   从最近节点读取
                // ANY   从任意一个从节点读取
                .readFrom(ReadFrom.REPLICA_PREFERRED)
                .build();

        return new LettuceConnectionFactory(redisSentinelConfiguration, lettuceClientConfiguration);
    }

}
(4)测试
我个人习惯使用接口进行测试,不习惯用springboot测试方法,所以这里写的接口进行测试
@RequestMapping("/test/redis")
@RestController
@Api(tags = "redis测试")
@Slf4j
public class RedisTest {

    @Autowired
    private RedisTemplate<String, Object> redisTemplate;

    @PostMapping("/save")
    @ApiOperation("保存")
    public Result save(@ApiParam("key") @RequestParam("key") String key, @ApiParam("value") @RequestParam("value") String value) {
        log.info("key-> {}, value -> {}", key, value);
        redisTemplate.opsForValue().set(key, value, 30, TimeUnit.SECONDS);
        return Result.success();
    }

    @GetMapping("/get")
    @ApiOperation("取值")
    public Result<String> get(@RequestParam("key") String key) {
        log.info("取值:key -> {}", key);
        Object o = redisTemplate.opsForValue().get(key);
        log.info("redisTemplate取值:value -> {}", o);
        Object o1 = redisUtils.get(key);
        log.info("redisUtils取值:value -> {}", o1);
        return Result.success(o);
    }
}
然后通过swagger进行接口测试,查看日志(这里就不放日志截图了),可以看到调用存值接口的时候,使用的6380,调用取值接口的时候,使用的6381,至此完成redis主从配置,读写分离,哨兵配置,并集成到springboot项目中。


 1705
1705

 被折叠的 条评论
为什么被折叠?
被折叠的 条评论
为什么被折叠?
 到【灌水乐园】发言


