


一、入门
1.1简介
官网: 点击跳转
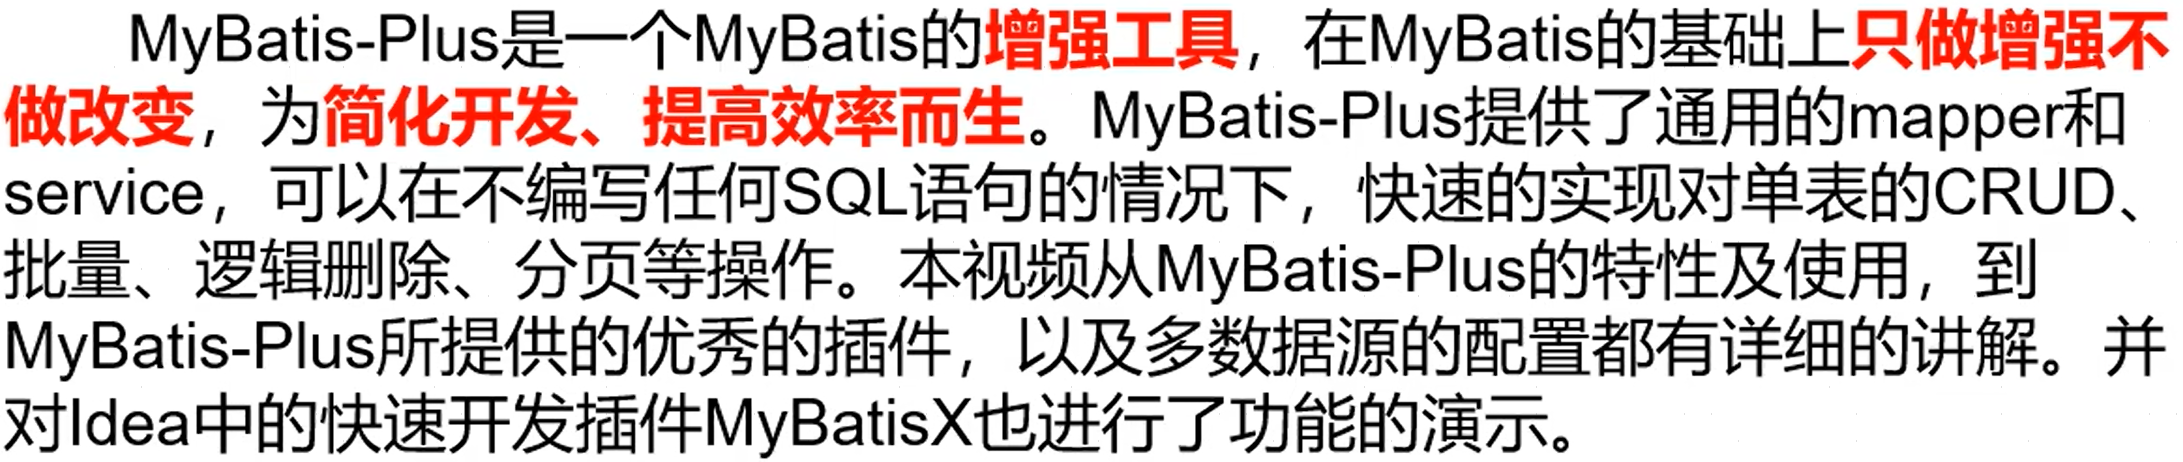
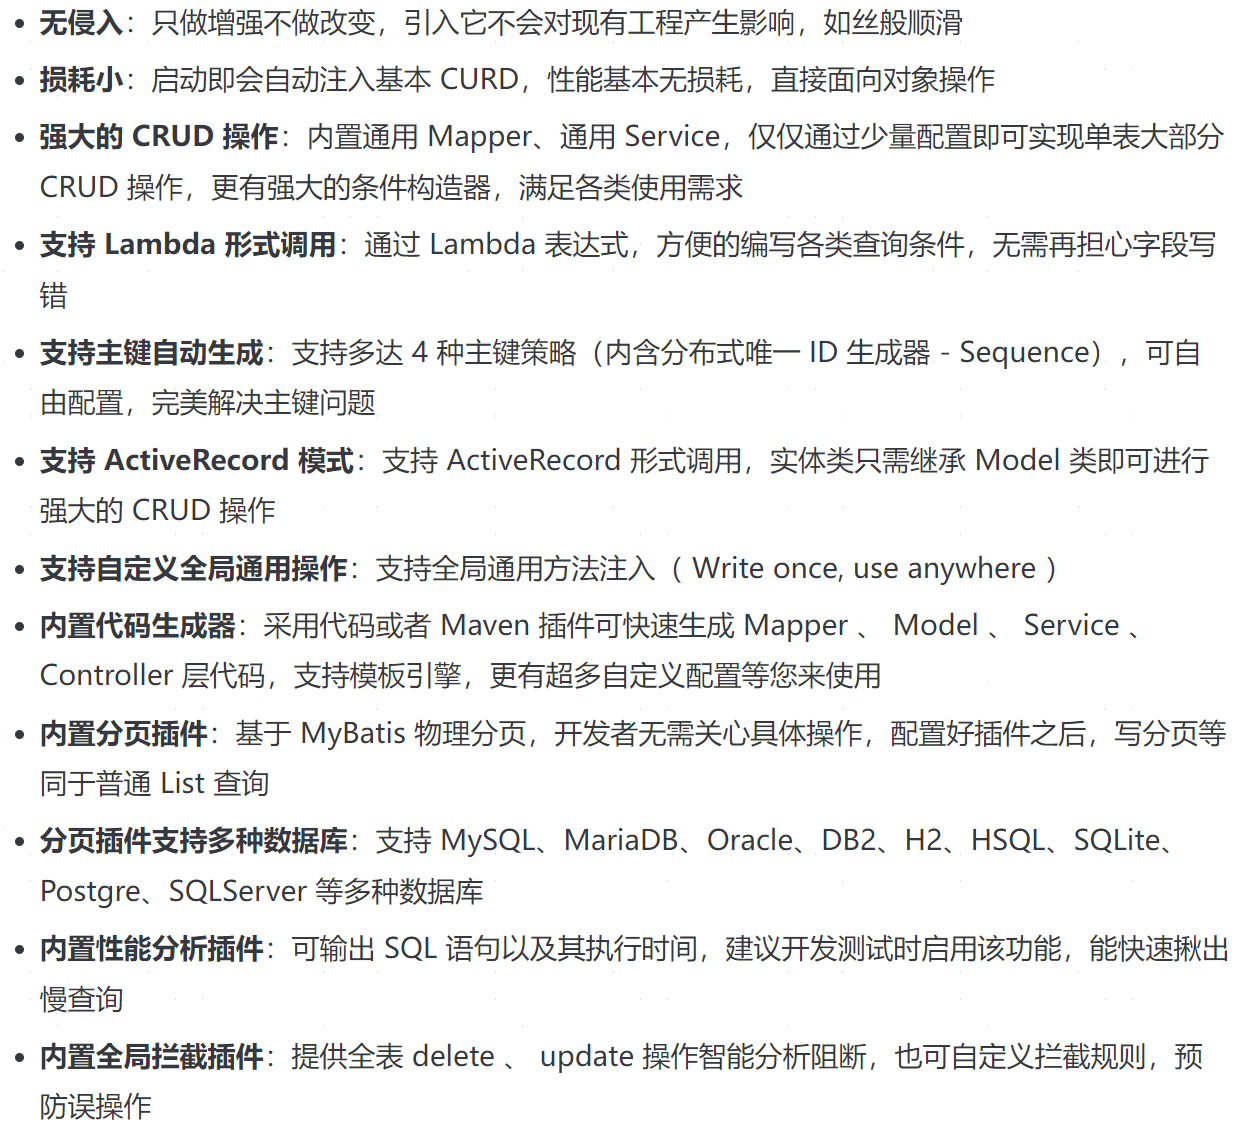
MyBatis-Plus具有如下特性:
框架结构:
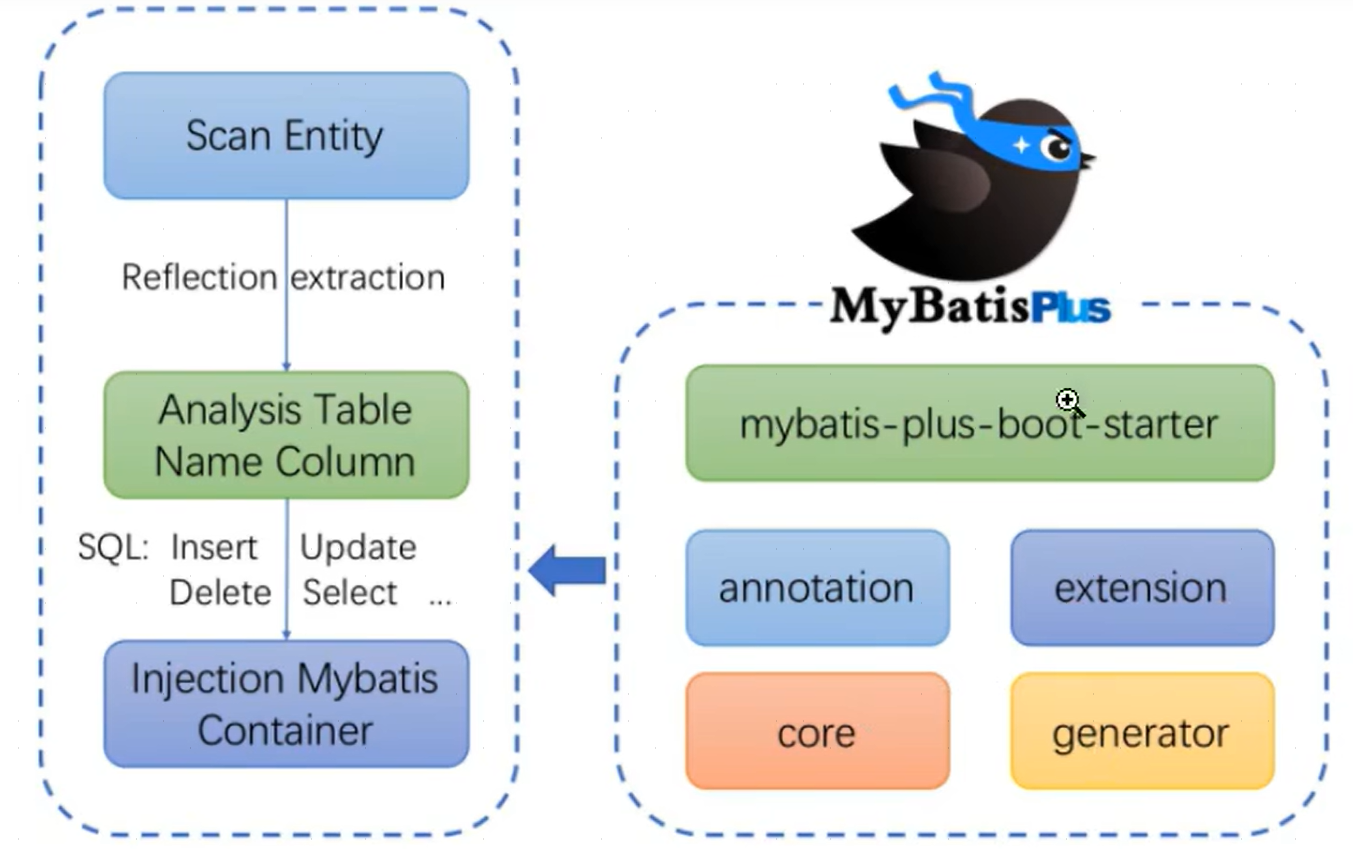
MyBatis-Plus会自动扫描实体类Entity,通过反射技术将实体类中的属性抽取(Reflection extraction)并分析表和实体类之间的关系(Analysys Table Name Column),根据当前所调用的方法生成对应的SQL语句并注入到MyBatis容器中(Injection Mybatis Container)。
1.2入门案例
1.2.1创建数据库及表
创建数据库:
CREATE DATABASE `mybatis_plus` /*!40100 DEFAULT CHARACTER SET utf8mb4 */;
use `mybatis_plus`;
CREATE TABLE `user` (
`id` bigint(20) NOT NULL COMMENT '主键ID', `name` varchar(30) DEFAULT NULL COMMENT '姓名', `age` int(11) DEFAULT NULL COMMENT '年龄', `email` varchar(50) DEFAULT NULL COMMENT '邮箱', PRIMARY KEY (`id`)
) ENGINE=InnoDB DEFAULT CHARSET=utf8;
插入数据:
INSERT INTO user (id, name, age, email) VALUES
(1, 'Jone', 18, 'test1@baomidou.com'),
(2, 'Jack', 20, 'test2@baomidou.com'),
(3, 'Tom', 28, 'test3@baomidou.com'),
(4, 'Sandy', 21, 'test4@baomidou.com'),
(5, 'Billie', 24, 'test5@baomidou.com');
1.2.2引入依赖
创建Maven项目并引入依赖:
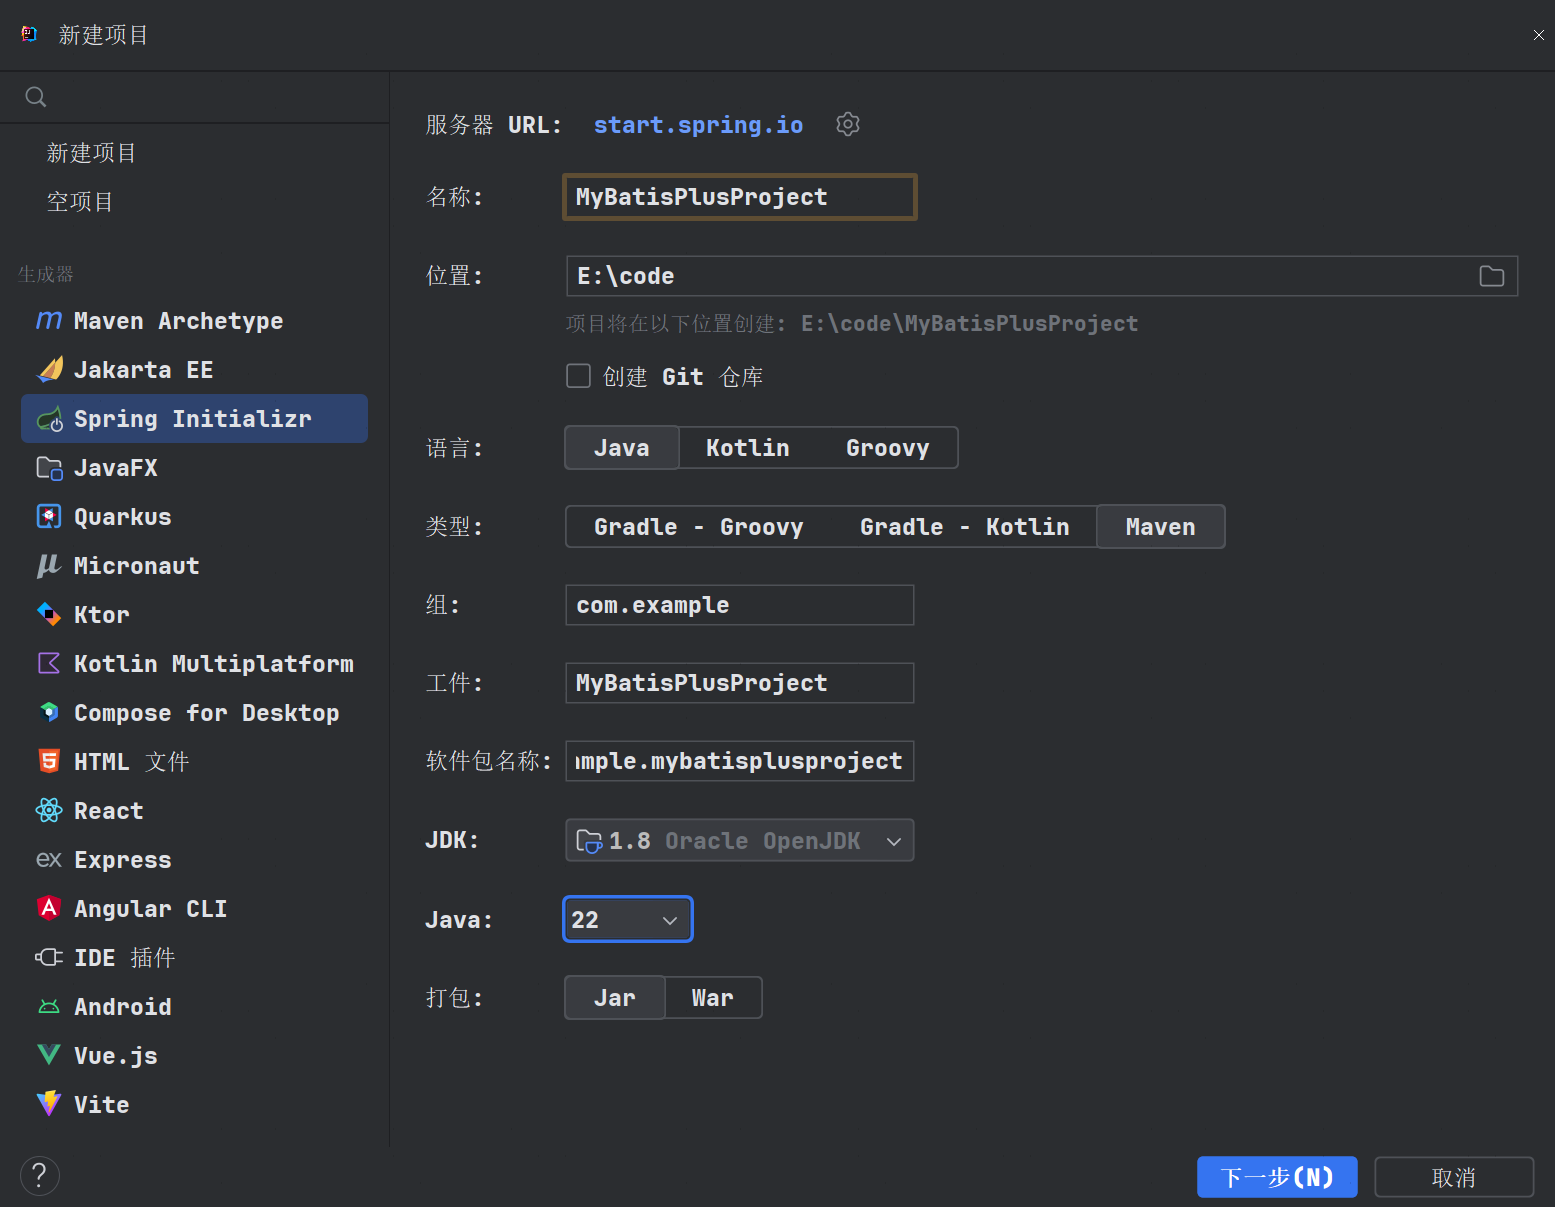
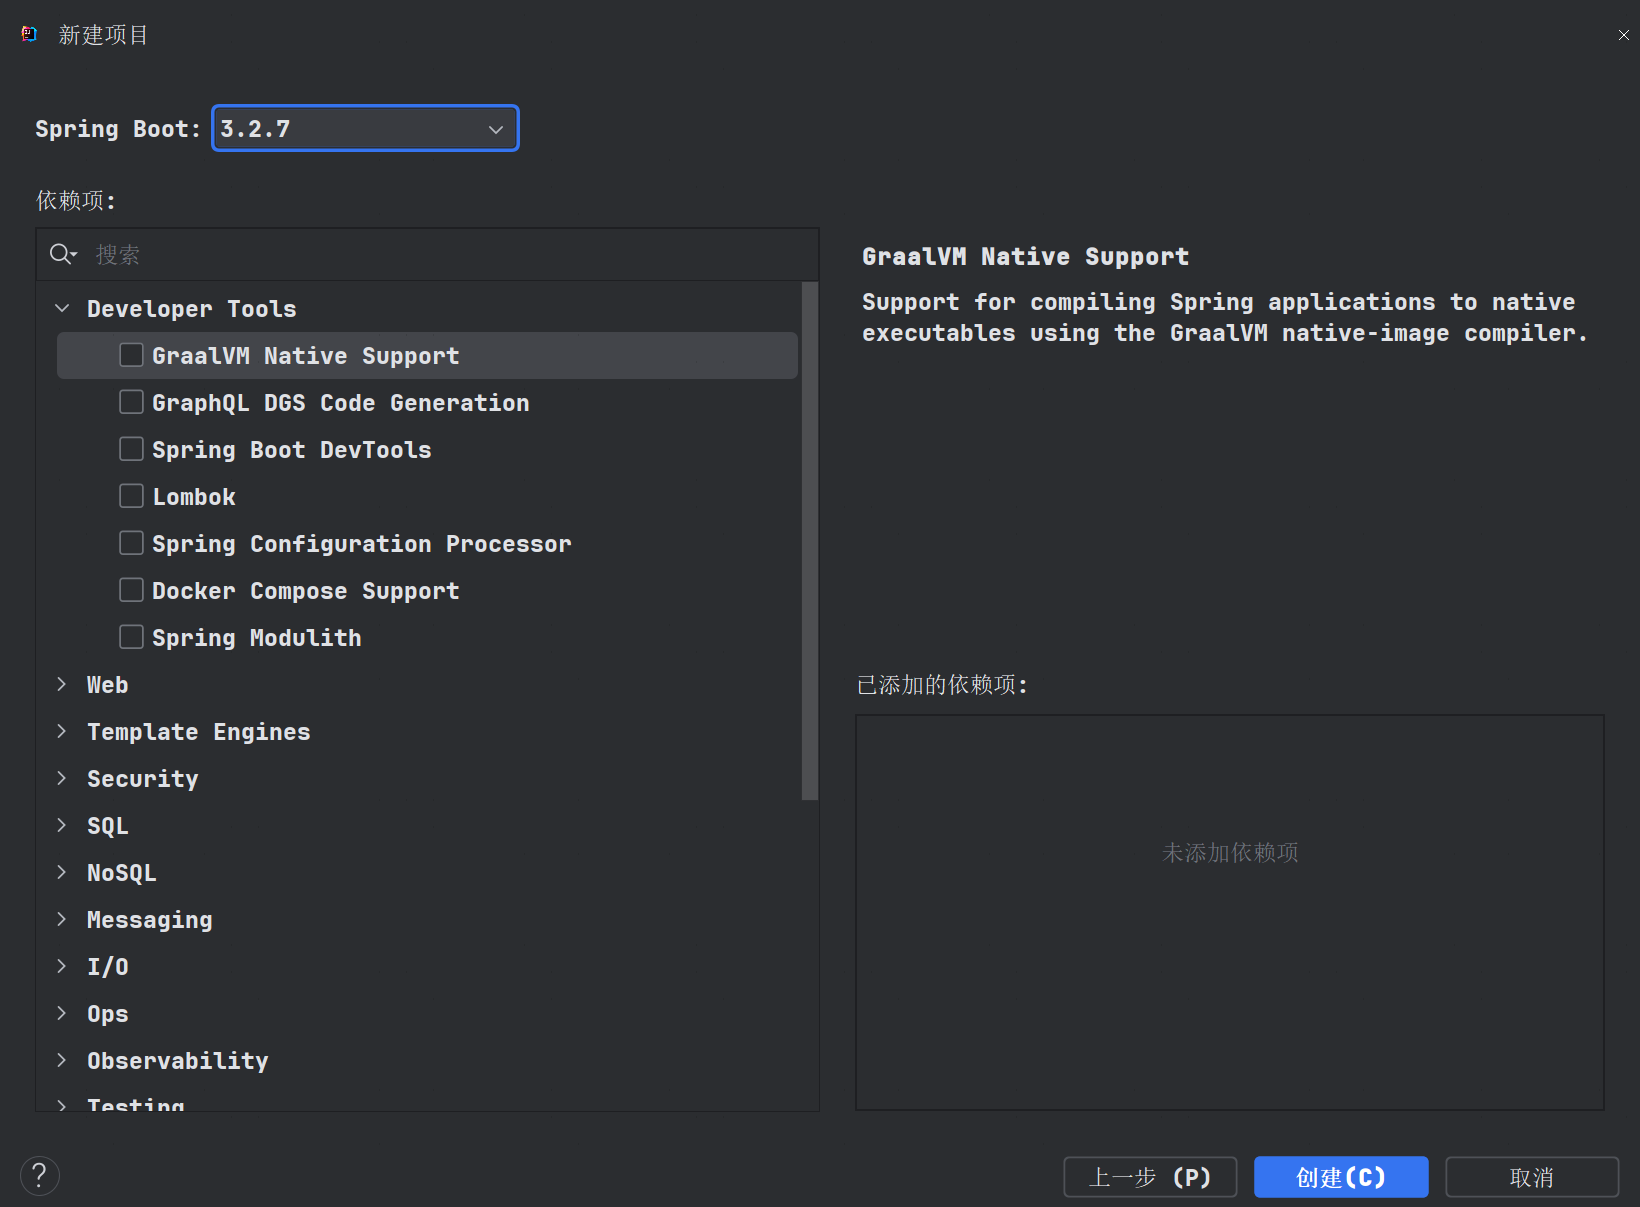
引入依赖(在依赖中修改了SpringBoot的版本):
<?xml version="1.0" encoding="UTF-8"?>
<project xmlns="http://maven.apache.org/POM/4.0.0" xmlns:xsi="http://www.w3.org/2001/XMLSchema-instance"
	xsi:schemaLocation="http://maven.apache.org/POM/4.0.0 https://maven.apache.org/xsd/maven-4.0.0.xsd">
	<modelVersion>4.0.0</modelVersion>
	<parent>
		<groupId>org.springframework.boot</groupId>
		<artifactId>spring-boot-starter-parent</artifactId>
		<version>2.6.5</version>
		<relativePath/> <!-- lookup parent from repository -->
	</parent>
	<groupId>com.example</groupId>
	<artifactId>MyBatisPlusProject</artifactId>
	<version>0.0.1-SNAPSHOT</version>
	<name>MyBatisPlusProject</name>
	<description>MyBatisPlusProject</description>
	<url/>
	<licenses>
		<license/>
	</licenses>
	<developers>
		<developer/>
	</developers>
	<scm>
		<connection/>
		<developerConnection/>
		<tag/>
		<url/>
	</scm>
	<properties>
		<java.version>18</java.version>
	</properties>
	<dependencies>
		<!--Springboot启动器-->
		<dependency>
			<groupId>org.springframework.boot</groupId>
			<artifactId>spring-boot-starter</artifactId>
		</dependency>
		<!--Springboot测试功能启动器-->
		<dependency>
			<groupId>org.springframework.boot</groupId>
			<artifactId>spring-boot-starter-test</artifactId>
			<scope>test</scope>
		</dependency>
		<!--引入MyBatis-Plus依赖-->
		<dependency>
			<groupId>com.baomidou</groupId>
			<artifactId>mybatis-plus-boot-starter</artifactId>
			<version>3.5.1</version>
		</dependency>
		<!--引入lombok依赖,简化实体类开发-->
		<dependency>
			<groupId>org.projectlombok</groupId>
			<artifactId>lombok</artifactId>
			<version>1.18.30</version>
			<optional>true</optional>
		</dependency>
		<!--引入MySQL驱动依赖-->
		<dependency>
			<groupId>mysql</groupId>
			<artifactId>mysql-connector-java</artifactId>
			<scope>runtime</scope>
		</dependency>
	</dependencies>

	<build>
		<plugins>
			<plugin>
				<groupId>org.springframework.boot</groupId>
				<artifactId>spring-boot-maven-plugin</artifactId>
			</plugin>
		</plugins>
	</build>

</project>
下载lombok相关插件:

1.2.3配置application.properties文件
application.properties是SpringBoot的默认配置文件,通常可使用properties与yaml两种文件格式作配置文件。前者使用.进行配置,后者则使用:
(1)使用properties进行配置:
spring.application.name=MyBatisPlusProject
# 设置数据源类型
spring.datasource.type=com.zaxxer.hikari.HikariDataSource
# 设置驱动类
spring.datasource.driver-class-name=com.mysql.cj.jdbc.Driver
# 设置连接数据库的信息
spring.datasource.url=jdbc:mysql://localhost:3306/mybatis_plus?serverTimezone=GMT%2B8&characterEncoding=utf-8&userSSL=false
# 设置用户名
spring.datasource.username=root
# 设置密码
spring.datasource.password=123456
(2)使用yml进行配置:
spring:
  # 设置数据源
  datasource:
    # 设置数据源类型
    type: com.zaxxer.hikari.HikariDataSource
    # 配置数据库各个信息
    driver-class-name: com.mysql.cj.jdbc.Driver
    # 设置url(mysql8以上的版本需加上时区信息)
    url: jdbc:mysql://localhost:3306/mybatis_plus?serverTimezone=GMT%2B8&characterEncoding=utf-8&userSSL=false
    # 设置用户名
    username: root
    # 设置密码
    password: 123456
1.2.4创建实体类
package com.example.mybatisplusproject.pojo;

import lombok.*;

@Data//不会生成有参构造
@AllArgsConstructor
public class User {
    //表中使用bigint,故需使用Long
    private Long id;
    private String name;
    private Integer age;
    private String email;
}
1.2.5创建mapper接口并开启扫描
创建mapper接口:
package com.example.mybatisplusproject.mapper;

import com.baomidou.mybatisplus.core.mapper.BaseMapper;
import com.example.mybatisplusproject.pojo.User;
@Repository//标记为持久层组件
public interface UserMapper extends BaseMapper<User> {//MyBatis-Plus提供了通用mapper,其中包含了大量SQL方法
	//所有的CRUD操作均已实现
}
在启动类中设置注解,以扫描mapper接口所在的包:
package com.example.mybatisplusproject;

import org.mybatis.spring.annotation.MapperScan;
import org.springframework.boot.SpringApplication;
import org.springframework.boot.autoconfigure.SpringBootApplication;

@SpringBootApplication
@MapperScan("com.example.mybatisplusproject.mapper")
public class MyBatisPlusProjectApplication {
	public static void main(String[] args) {
		SpringApplication.run(MyBatisPlusProjectApplication.class, args);
	}
}
创建测试类测试功能:
package com.example.mybatisplusproject;
import com.example.mybatisplusproject.mapper.UserMapper;
import com.example.mybatisplusproject.pojo.User;
import org.junit.jupiter.api.Test;
import org.springframework.beans.factory.annotation.Autowired;
import org.springframework.boot.test.context.SpringBootTest;

import java.util.List;

@SpringBootTest
public class MyBatisPlusTest {
    @Autowired
    private UserMapper userMapper;
    @Test
    public void testSelectList(){
        //通过条件构造器查询List集合,若无条件,则可设置null为参数
        List<User> userList=userMapper.selectList(null);
        for(int i=0;i<userList.size();i++){
            System.out.println(userList.get(i));
        }
    }
}
1.2.6加入日志功能
在application.yml下进行配置:
spring:
  # 设置数据源
  datasource:
    # 设置数据源类型
    type: com.zaxxer.hikari.HikariDataSource
    # 配置数据库各个信息
    driver-class-name: com.mysql.cj.jdbc.Driver
    # 设置url(mysql8以上的版本需加上时区信息)
    url: jdbc:mysql://localhost:3306/mybatis_plus?serverTimezone=GMT%2B8&characterEncoding=utf-8&userSSL=false
    # 设置用户名
    username: root
    # 设置密码
    password: 123456
mybatis-plus:
  configuration:
    log-impl: org.apache.ibatis.logging.stdout.StdOutImpl
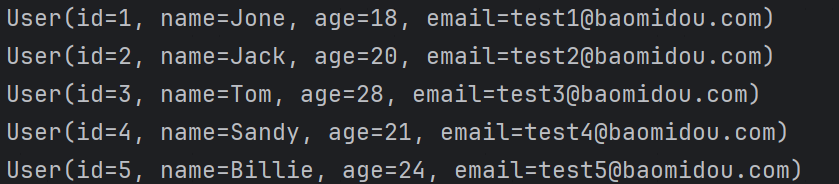
此时即可看到生成的SQL语句:
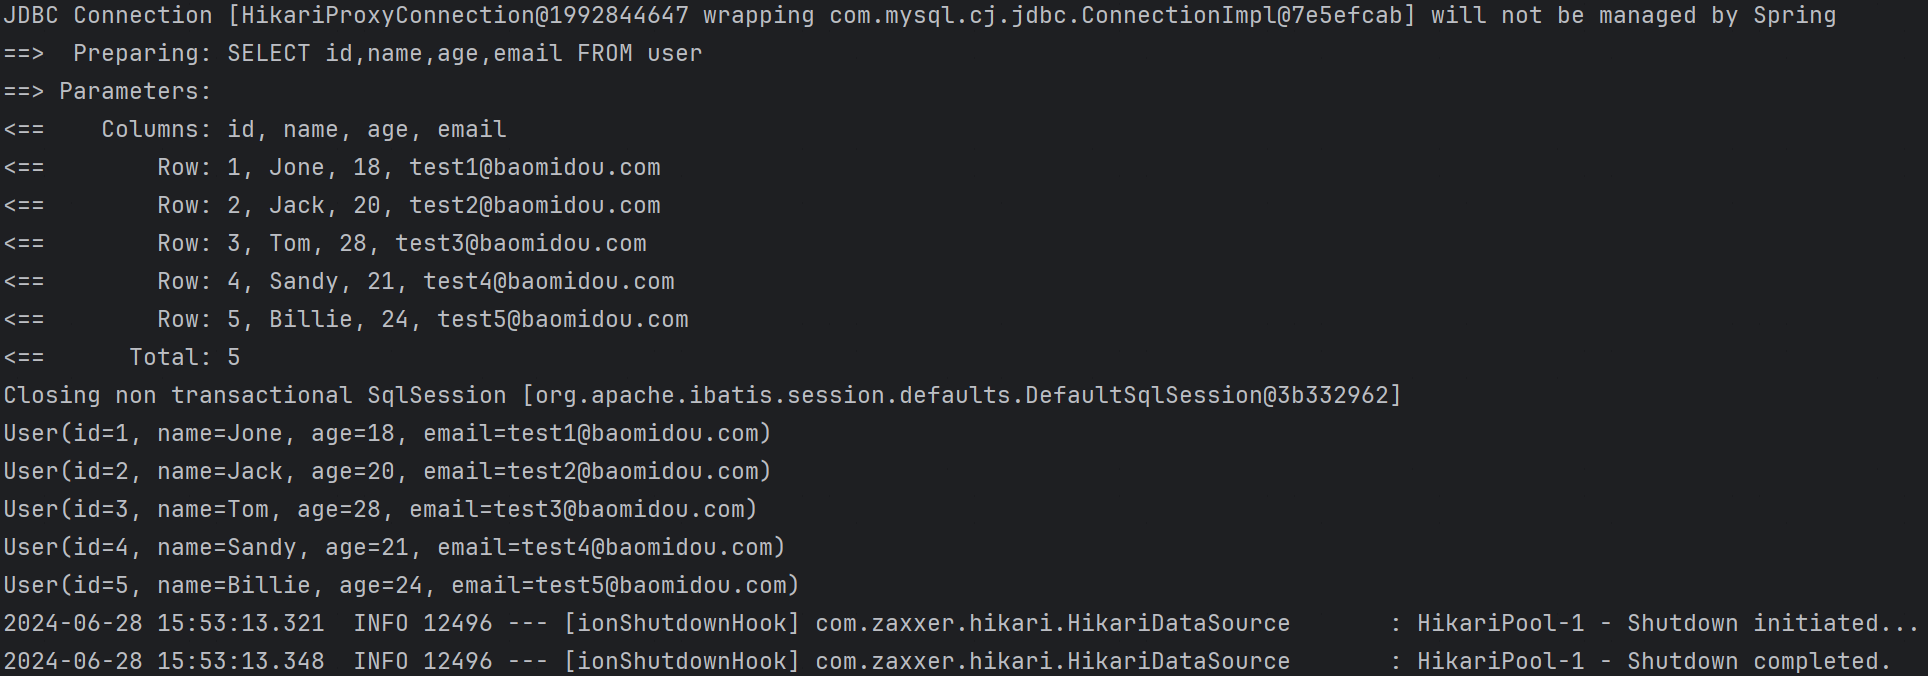
整个过程中均未指定所要操作的表,以及实体类对应的字段,事实上,MyBatis-Plus会先扫描实体类并通过反射方式抽取出实体类的属性,根据相关信息分析操作的表以及对应的字段名,最后根据要操作的SQL语句完成字段注入。
二、BaseMapper
2.1BaseMapper相关函数
package com.baomidou.mybatisplus.core.mapper;

import com.baomidou.mybatisplus.core.conditions.Wrapper;
import com.baomidou.mybatisplus.core.metadata.IPage;
import com.baomidou.mybatisplus.core.toolkit.CollectionUtils;
import com.baomidou.mybatisplus.core.toolkit.ExceptionUtils;
import java.io.Serializable;
import java.util.Collection;
import java.util.List;
import java.util.Map;
import org.apache.ibatis.annotations.Param;

public interface BaseMapper<T> extends Mapper<T> {
    int insert(T entity);	//插入实体类对象,返回受影响的行数

    int deleteById(Serializable id);	//根据id删除数据,参数为id,返回受影响的行数

    int deleteById(T entity);			//根据id删除数据,参数为实体类对象,返回受影响的行数

    int deleteByMap(@Param("cm") Map<String, Object> columnMap);	//根据Map集合删除数据,Map集合中保存条件参数,返回受影响的行数

    int delete(@Param("ew") Wrapper<T> queryWrapper);	//根据条件构造器删除数据,返回受影响的行数

    int deleteBatchIds(@Param("coll") Collection<?> idList);	//idList为主键列表或实体类列表(不能为null及empty())

    int updateById(@Param("et") T entity);	//根据id进行修改

    int update(@Param("et") T entity, @Param("ew") Wrapper<T> updateWrapper);	//根据条件构造器进行修改

    T selectById(Serializable id);		//根据id进行查询

    List<T> selectBatchIds(@Param("coll") Collection<? extends Serializable> idList);	//根据id列表查询多条数据

    List<T> selectByMap(@Param("cm") Map<String, Object> columnMap);	//根据map集合进行查询

    default T selectOne(@Param("ew") Wrapper<T> queryWrapper) {	//根据条件构造器查询单个数据
        List<T> ts = this.selectList(queryWrapper);
        if (CollectionUtils.isNotEmpty(ts)) {
            if (ts.size() != 1) {
                throw ExceptionUtils.mpe("One record is expected, but the query result is multiple records", new Object[0]);
            } else {
                return ts.get(0);
            }
        } else {
            return null;
        }
    }

    default boolean exists(Wrapper<T> queryWrapper) {	//根据条件构造器判断条件是否存在
        Long count = this.selectCount(queryWrapper);
        return null != count && count > 0L;
    }

    Long selectCount(@Param("ew") Wrapper<T> queryWrapper);	//查询符合条件的数据数量

    List<T> selectList(@Param("ew") Wrapper<T> queryWrapper);	//根据条件构造器查询List集合

    List<Map<String, Object>> selectMaps(@Param("ew") Wrapper<T> queryWrapper);	//将结果封装为Map集合列表返回

    List<Object> selectObjs(@Param("ew") Wrapper<T> queryWrapper);	//根据条件构造器查询全部记录,只返回第一个字段的值

    <P extends IPage<T>> P selectPage(P page, @Param("ew") Wrapper<T> queryWrapper);	//page是分页条件,queryWrapper是实体对象封装操作类

    <P extends IPage<Map<String, Object>>> P selectMapsPage(P page, @Param("ew") Wrapper<T> queryWrapper);	//page是分页查询条件,queryWrapper是实体对象封装操作类
}
2.2BaseMapper添加功能
package com.example.mybatisplusproject;
import com.example.mybatisplusproject.mapper.UserMapper;
import com.example.mybatisplusproject.pojo.User;
import org.junit.jupiter.api.Test;
import org.springframework.beans.factory.annotation.Autowired;
import org.springframework.boot.test.context.SpringBootTest;

import java.util.List;

@SpringBootTest
public class MyBatisPlusTest {
    @Autowired
    private UserMapper userMapper;
    @Test
    public void testInsert(){
        User user=new User(null,"张三",23,"zhangsan@qq.com");
        System.out.println("result="+userMapper.insert(user));
        System.out.println("id="+user.getId());//使用雪花算法算出id
    }
}

2.3BaseMapper删除功能
1.int deleteById(Serializable id);
@Test
public void testDeleteList(){
    System.out.println("result="+userMapper.deleteById(1806604340006510593L));
}

2.int deleteByMap(@Param(“cm”) Map<String, Object> columnMap);
@Test
public void testDeleteList(){
    Map<String,Object> map=new HashMap<>();
    map.put("name","张三");
    map.put("age",23);
    System.out.println(userMapper.deleteByMap(map));
}

3.int deleteBatchIds(@Param(“coll”) Collection<?> idList);
@Test
public void testDeleteList(){
    List<Long>list=Arrays.asList(1L,2L,3L);    //id是Long类型
    System.out.println(userMapper.deleteBatchIds(list));
}

2.4BaseMapper测试功能
1.int updateById(@Param(“et”) T entity);
@Test
public void testUpdate(){
    User user=new User(4L,"李四",22,"lisi@qq.com");
    System.out.println(userMapper.updateById(user));
}

2.5BaseMapper查询功能
1.T selectById(Serializable id);
@Test
public void testSelect(){
    User user=userMapper.selectById(4L);
    System.out.println(user);
}

2.List selectBatchIds(@Param(“coll”) Collection<? extends Serializable> idList);
@Test
public void testSelect(){
    List<Long>list=Arrays.asList(4L,5L);
    List<User>userList=userMapper.selectBatchIds(list);
    System.out.println(userList);
}

3.List selectByMap(@Param(“cm”) Map<String, Object> columnMap);
@Test
public void testSelect(){
    Map<String,Object> map=new HashMap<>();
    map.put("name","李四");
    map.put("age",22);
    List<User>userList=userMapper.selectByMap(map); //符合条件的数据可能有多条
    System.out.println(userList);
}

4.List selectList(@Param(“ew”) Wrapper queryWrapper);
将null作为条件构造器传入,则会返回所有数据:
@Test
public void testSelect(){
    List<User>userList=userMapper.selectList(null);
    System.out.println(userList);
}

2.6测试自定义功能
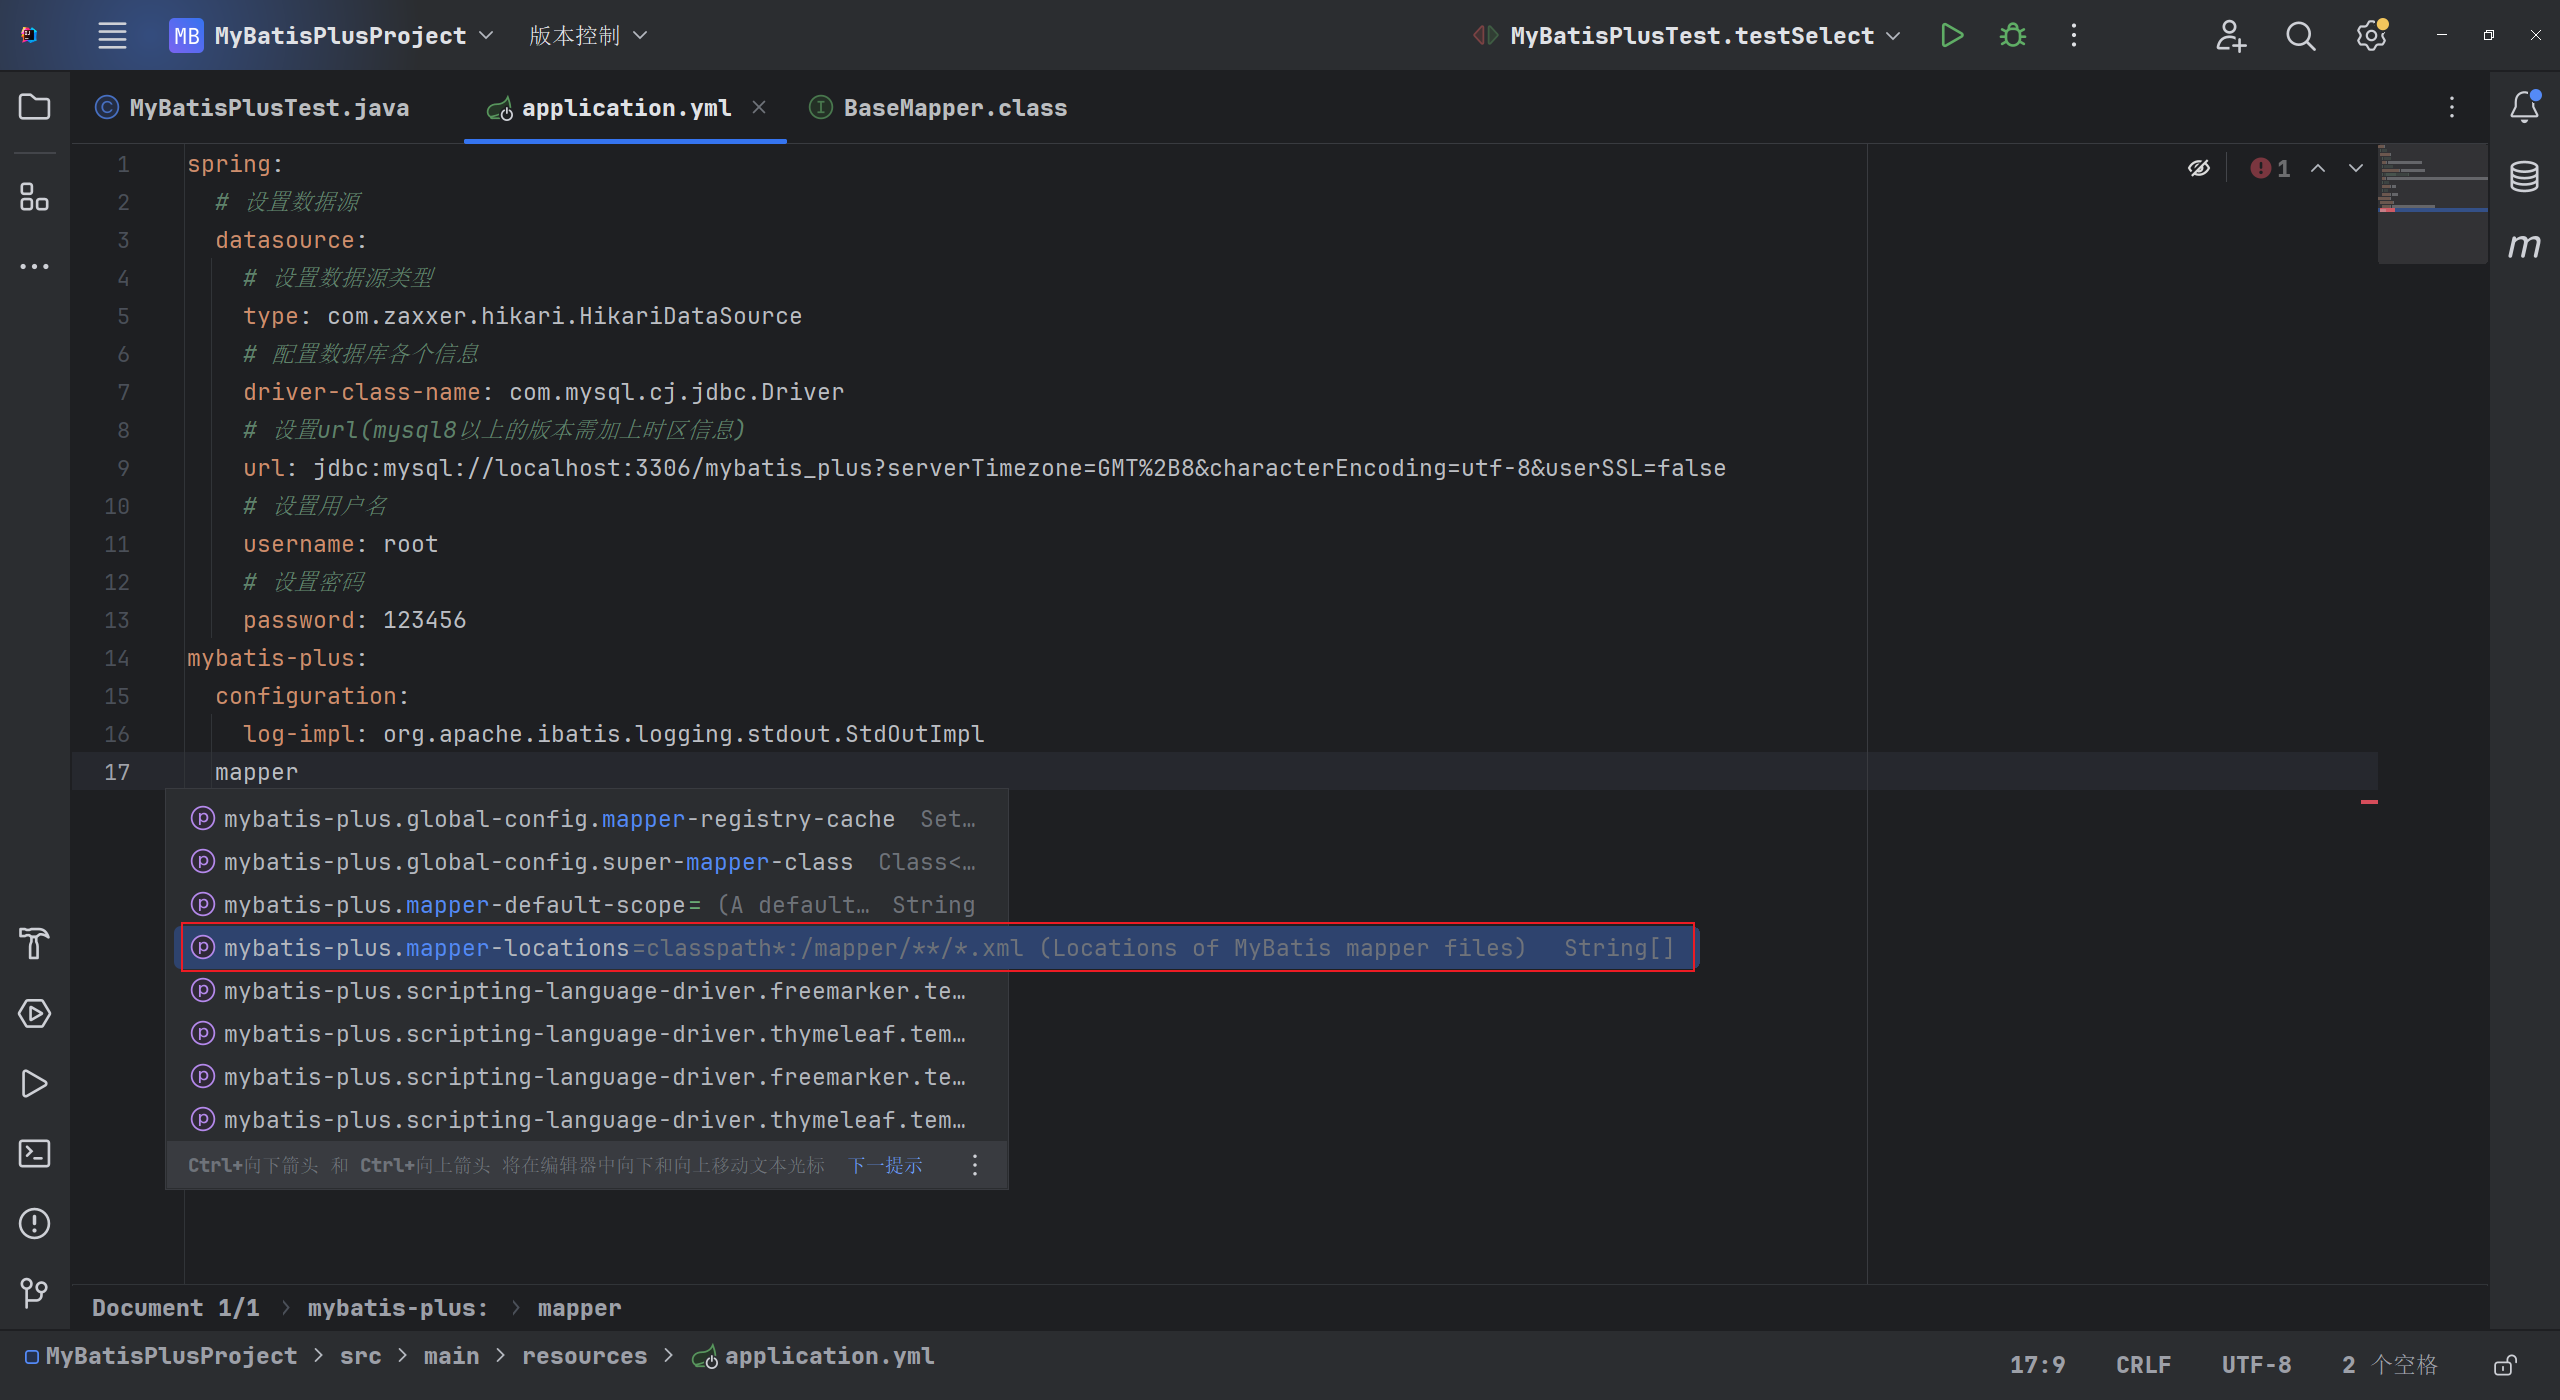
在application.yml中配置mapper文件的存放路径时,其对应属性mybatis-plus.mapper-location已有默认值,即会自动扫描mapper目录下所有的/**/*.xml文件作为mapper映射文件。在resources目录下创建mapper目录,并创建映射文件UserMapper.xml:
<?xml version="1.0" encoding="UTF-8" ?>
<!DOCTYPE mapper
        PUBLIC "-//mybatis.org//DTD Mapper 3.0//EN"
        "https://mybatis.org/dtd/mybatis-3-mapper.dtd">
<mapper namespace="com.example.mybatisplusproject.mapper.UserMapper">
    <!--Map<String,Object>selectMapById(Long id);-->
    <select id="selectMapById" resultType="map">
        select * from user where id = #{id}
    </select>
</mapper>
修改接口:
package com.example.mybatisplusproject.mapper;

import com.baomidou.mybatisplus.core.mapper.BaseMapper;
import com.example.mybatisplusproject.pojo.User;
import org.springframework.stereotype.Repository;

import java.util.Map;

@Repository//标记为持久层组件
public interface UserMapper extends BaseMapper<User> {
    //根据id查询用户信息为map集合
    Map<String,Object>selectMapById(Long id);
}
进行测试:
@Test
public void testSelect(){
    Map<String, Object>map=userMapper.selectMapById(4L);
    System.out.println(map);
}

三、IService
MyBatis-Plus封装了Service接口,进一步增强了CRUD功能。与之相关的有IService<T>接口、ServiceImpl<M extends BaseMapper<T>, T>类。
3.1IService使用规范
创建自定义类UserService.java:
package com.example.mybatisplusproject.service;
import com.baomidou.mybatisplus.extension.service.IService;
import com.example.mybatisplusproject.pojo.User;

public interface UserService extends IService<User> {
}
在目录service下创建目录Impl保存实现类UserServiceImpl.java:
package com.example.mybatisplusproject.service.Impl;

import com.baomidou.mybatisplus.extension.service.impl.ServiceImpl;
import com.example.mybatisplusproject.mapper.UserMapper;
import com.example.mybatisplusproject.pojo.User;
import com.example.mybatisplusproject.service.UserService;

@Service //标识为组件,使得测试类可扫描到
public class UserServiceImpl extends ServiceImpl<UserMapper, User> implements UserService {
}
此时既可使用通用Service功能,也可自定义Service功能。
3.2查询总记录数
package com.example.mybatisplusproject;
import com.example.mybatisplusproject.service.UserService;
import org.junit.jupiter.api.Test;
import org.springframework.beans.factory.annotation.Autowired;
import org.springframework.boot.test.context.SpringBootTest;

@SpringBootTest
public class MyBatisPlusTest {
    @Autowired
    private UserService userService;
    @Test
    public void testGetCount(){
        long count= userService.count();
        System.out.println("总记录数为:"+count);
    }
}

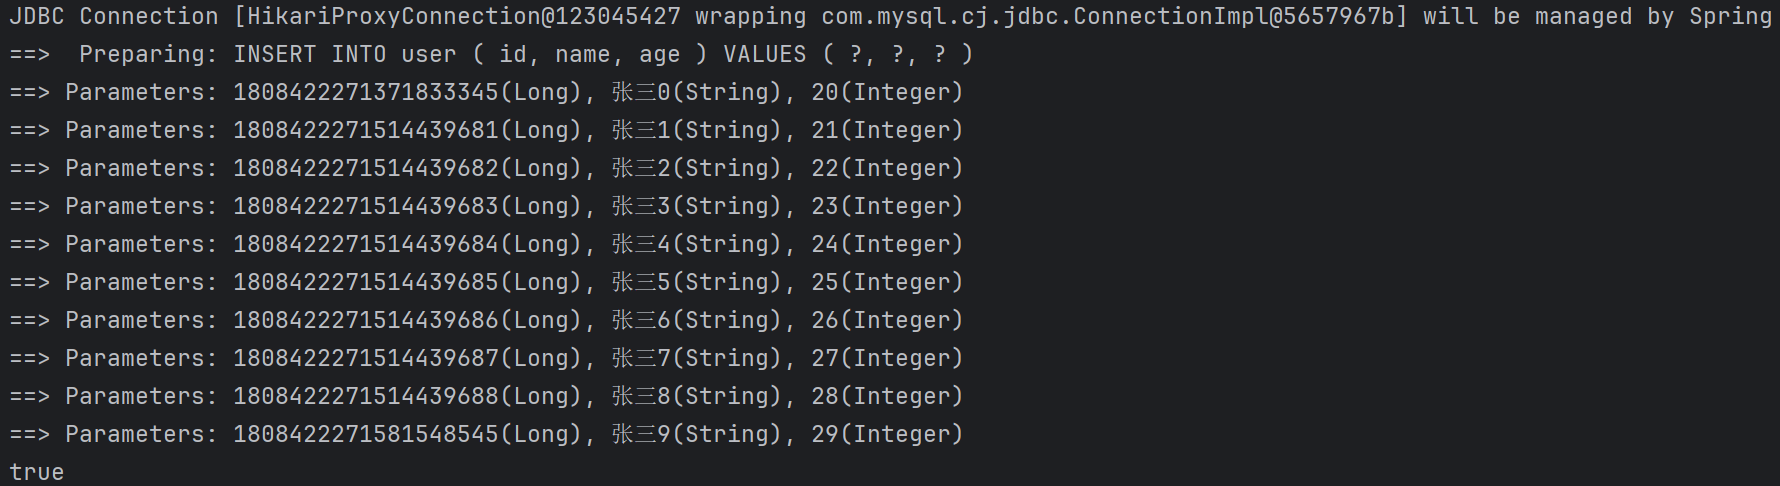
3.3批量添加
@Test
public void testInsertMore(){
    List<User>list=new ArrayList<>();
    for(int i=0;i<10;i++){
        User user=new User();
        user.setName("张三"+i);
        user.setAge(20+i);
        list.add(user);
    }
    System.out.println(userService.saveBatch(list));
}
四、常用注解
4.1@TableName
在实体类上使用注解可设置实体类所对应的表名。
package com.example.mybatisplusproject.pojo;
import com.baomidou.mybatisplus.annotation.TableName;
import lombok.*;

@Data
@AllArgsConstructor
@NoArgsConstructor
@TableName("user")//指定对应表名
public class User {
    //表中使用bigint,故需使用Long
    private Long id;
    private String name;
    private Integer age;
    private String email;
}
可能出现所有Java类对应的表名均为t_实体类名的情况,此时可进行全局配置,设置所有实体类对应的表名。在application.yml文件中进行配置:
mybatis-plus:
  configuration:
    log-impl: org.apache.ibatis.logging.stdout.StdOutImpl
  # 设置mybatis-plus的全局配置
  global-config:
    db-config:
      table-prefix: t_
4.2@TableId
@TableId主要用于设置主键映射关系、主键生成策略。在执行插入操作时,当数据库表主键名为id,且对应实体类属性名也是id时,mybatis-plus会自动完成二者的映射:
package com.example.mybatisplusproject;
import com.example.mybatisplusproject.pojo.User;
import com.example.mybatisplusproject.service.UserService;
import org.junit.jupiter.api.Test;
import org.springframework.beans.factory.annotation.Autowired;
import org.springframework.boot.test.context.SpringBootTest;

@SpringBootTest
public class MyBatisPlusTest {
    @Autowired
    private UserService userService;
    @Test
    public void testInsertMore(){
        userService.save(new User(null,"李四",23,"123456@qq.com"));
    }
}

而当数据库中的主键字段名和实体中的属性名相同但不是id时,就无法完成自动映射:

此时可在该属性上使用@TableId注解,表示设置当前属性作为数据表的主键。例:

@TableId有如下属性:
package com.baomidou.mybatisplus.annotation;
import java.lang.annotation.Documented;
import java.lang.annotation.ElementType;
import java.lang.annotation.Retention;
import java.lang.annotation.RetentionPolicy;
import java.lang.annotation.Target;

@Documented
@Retention(RetentionPolicy.RUNTIME)
@Target({ElementType.FIELD, ElementType.ANNOTATION_TYPE})
public @interface TableId {
    String value() default "";

    IdType type() default IdType.NONE;
}
4.2.1value属性
当实体类主键属性名与数据库表主键字段名不一致时,可使用value设置属性映射的主键字段名。如,数据库表中主键字段为uid,而实体类属性名为id,则可配置:
@TableId(value="uid")
private Long id;
4.2.2type属性
可用于设置主键类型、主键的生成策略。
| 值 | 描述 |
|---|---|
| IdType.NONE | 默认值,当属性为null时,使用雪花算法生成数据。 |
| IdType.AUTO | 当属性为null时,在原有数据基础上自增。 |
| IdType.ASSIGN_UUID | 当属性为null时,生成长32位的UUID作为主键。 |
| IdType.INPUT | 传入实体类对象时,主键不能为空。 |
| IdType.ASSIGN_UID | 自动分配id,适用于主键类型是Long、Integer、String,系统使用雪花算法通过调用IdentifierGenerator.nextId()实现。 |
1.IdType.NONE
type属性的默认值,当主键数据输入为null时,使用雪花算法自动生成数据。
package com.example.mybatisplusproject.pojo;
import com.baomidou.mybatisplus.annotation.TableId;
import com.baomidou.mybatisplus.annotation.TableName;
import lombok.*;

@Data
@AllArgsConstructor
@NoArgsConstructor
@TableName("user")
public class User {
    @TableId(value = "id")
    private Long uid;
    private String name;
    private Integer age;
    private String email;
}
进行测试:
package com.example.mybatisplusproject;
import com.example.mybatisplusproject.pojo.User;
import com.example.mybatisplusproject.service.UserService;
import org.junit.jupiter.api.Test;
import org.springframework.beans.factory.annotation.Autowired;
import org.springframework.boot.test.context.SpringBootTest;

@SpringBootTest
public class MyBatisPlusTest {
    @Autowired
    private UserService userService;
    @Test
    public void testInsertMore(){
        userService.save(new User(null,"李四",23,"123456@qq.com"));
    }
}

2.IdType.AUTO
即使在创建数据库时指定主键自动递增(auto_increment),但在执行插入语句时仍会根据雪花算法生成主键值并在SQL语句中插入(mybaits-plus的默认策略),例如:

此时可使用@TableId注解进行设置,且有两个实现条件:
- 1.创建数据库时应指定该字段为自动递增。
- 2.设置
@TableId注解type属性为IdType.AUTO(此时当传入主键属性为null时,mybatis-plus只会执行不带有主键值的SQL语句,由数据库自动生成主键)。
将数据库表截断后进行测试:
package com.example.mybatisplusproject.pojo;
import com.baomidou.mybatisplus.annotation.IdType;
import com.baomidou.mybatisplus.annotation.TableId;
import com.baomidou.mybatisplus.annotation.TableName;
import lombok.*;

@Data
@AllArgsConstructor
@NoArgsConstructor
@TableName("user")
public class User {
    @TableId(value = "id",type = IdType.AUTO)
    private Long uid;
    private String name;
    private Integer age;
    private String email;
}


3.IdType.ASSIGN_UUID
自动生成通用唯一标识符(UUID)作为主键,该标识符可视为唯一值,生成相同值的概率几乎为0。在使用IdType.ASSIGN_UUID时,要求属性必须是String类型,对应字段必须是varchar(32)(长度小于32时会溢出)。
@TableId(value = "id", type = IdType.ASSIGN_UUID)
private String uid;

4.IdType.INPUT
要求传入数据时,其主键属性不能为null。
package com.example.mybatisplusproject;
import com.example.mybatisplusproject.pojo.User;
import com.example.mybatisplusproject.service.UserService;
import org.junit.jupiter.api.Test;
import org.springframework.beans.factory.annotation.Autowired;
import org.springframework.boot.test.context.SpringBootTest;

@SpringBootTest
public class MyBatisPlusTest {
    @Autowired
    private UserService userService;
    @Test
    public void testInsertMore(){
        userService.save(new User(null,"李四",23,"123456@qq.com"));
    }
}

IdType.ASSIGN_ID
自动分配id,适用于主键类型是Long、Integer、String,系统使用雪花算法通过调用IdentifierGenerator.nextId()实现。
4.2.3全局配置设置所有实体类主键的生成策略
可在配置文件application.yml中设置统一的主键生成策略:

4.2.4雪花算法


4.3@TableField
@TableField用于标记实体类中的非主键字段,指定如何映射实体类字段到数据库表字段。而若实体类属性名遵循驼峰命名规则,而数据库表中字段名使用下划线隔开,或是实体类属性名与数据库表字段名一致,则可省略该注解。例如:
package com.example.mybatisplusproject;
import com.example.mybatisplusproject.pojo.User;
import com.example.mybatisplusproject.service.UserService;
import org.junit.jupiter.api.Test;
import org.springframework.beans.factory.annotation.Autowired;
import org.springframework.boot.test.context.SpringBootTest;

@SpringBootTest
public class MyBatisPlusTest {
    @Autowired
    private UserService userService;
    @Test
    public void testInsertMore(){
        userService.save(new User(null,"李四",23,"123456@qq.com"));
    }
}

@TableField注解有如下属性:
//
// Source code recreated from a .class file by IntelliJ IDEA
// (powered by FernFlower decompiler)
//

package com.baomidou.mybatisplus.annotation;

import java.lang.annotation.Documented;
import java.lang.annotation.ElementType;
import java.lang.annotation.Retention;
import java.lang.annotation.RetentionPolicy;
import java.lang.annotation.Target;
import org.apache.ibatis.type.JdbcType;
import org.apache.ibatis.type.TypeHandler;
import org.apache.ibatis.type.UnknownTypeHandler;

@Documented
@Retention(RetentionPolicy.RUNTIME)
@Target({ElementType.FIELD, ElementType.ANNOTATION_TYPE})
public @interface TableField {
    String value() default "";

    boolean exist() default true;

    String condition() default "";

    String update() default "";

    FieldStrategy insertStrategy() default FieldStrategy.DEFAULT;

    FieldStrategy updateStrategy() default FieldStrategy.DEFAULT;

    FieldStrategy whereStrategy() default FieldStrategy.DEFAULT;

    FieldFill fill() default FieldFill.DEFAULT;

    boolean select() default true;

    boolean keepGlobalFormat() default false;

    String property() default "";

    JdbcType jdbcType() default JdbcType.UNDEFINED;

    Class<? extends TypeHandler> typeHandler() default UnknownTypeHandler.class;

    boolean javaType() default false;

    String numericScale() default "";
}
4.3.1value
当实体类属性名与数据库字段名不一致时,使用value属性可指定正确的数据库字段名。

package com.example.mybatisplusproject;
import com.example.mybatisplusproject.pojo.User;
import com.example.mybatisplusproject.service.UserService;
import org.junit.jupiter.api.Test;
import org.springframework.beans.factory.annotation.Autowired;
import org.springframework.boot.test.context.SpringBootTest;

@SpringBootTest
public class MyBatisPlusTest {
    @Autowired
    private UserService userService;
    @Test
    public void testInsertMore(){
        userService.save(new User(null,"李四",23,"123456@qq.com"));
    }
}
4.3.2exist
布尔类型,默认值为true。用于指定当前实体类属性是否存在于数据库表中。若设置为false,则MyBatis-Plus在生成 SQL 时会忽略这个字段。常用于一对多、多对多关系模型。
4.4@TableLogic
实体类属性上加上@TableLogic注解后,表示该字段是逻辑删除字段。
4.4.1逻辑删除的概念
- 物理删除:真实删除,将对应数据从数据库中删除,之后查询不到此条被删除的数据。
- 逻辑删除:假删除,将对应数据加上已被删除的标记,之后在数据库中仍就能看到此条数据。
使用场景:可以进行数据恢复。
4.4.2逻辑删除的实现
1.数据库中创建逻辑删除状态序列,设置默认值为0
添加is_deleted字段,类型为int,默认值为0:
alter table user add is_delete int default 0 null;
在实体类中添加对应属性:
package com.example.mybatisplusproject.pojo;
import com.baomidou.mybatisplus.annotation.*;
import lombok.*;
@Data
@AllArgsConstructor
@NoArgsConstructor
@TableName("user")
public class User {
    @TableId(value = "uid",type = IdType.AUTO)
    private Long uid;
    @TableField("user_name")
    private String name;
    @TableField("user_age")
    private Integer age;
    @TableField("user_email")
    private String email;
    @TableField("is_delete")
    @TableLogic
    private Integer isDelete;
}
2.执行删除操作BaseMapper的deleteById(id)或者IService的removeById(id)
package com.example.mybatisplusproject;
import com.example.mybatisplusproject.service.UserService;
import org.junit.jupiter.api.Test;
import org.springframework.beans.factory.annotation.Autowired;
import org.springframework.boot.test.context.SpringBootTest;

@SpringBootTest
public class MyBatisPlusTest {
    @Autowired
    private UserService userService;
    @Test
    public void testInsertMore(){
        userService.removeById(1);
    }
}


3.执行查询操作
@Test
public void testSelect(){
    System.out.println(userService.getById(1L));
}

五、条件构造器
在BaseMapper接口提供的相关方法中,除了以id作为where条件,还支持通过构造条件构造器Wrapper来实现更复杂的where条件。
5.1wrapper


package java.sql;
public interface Wrapper {
	<T> T unwrap(java.lang.Class<T> iface) throws java.sql.SQLException;
    boolean isWrapperFor(java.lang.Class<?> iface) throws java.sql.SQLException;
}


 5万+
5万+


 被折叠的 条评论
为什么被折叠?
被折叠的 条评论
为什么被折叠?
 到【灌水乐园】发言


