


1. tabbar学习
1.1 tabbar-基本结构的搭建
-
如果在下方有一个单独的TabBar组件,如何封装?
- 自定义TabBar组件,在APP中使用
- 让TabBar出于底部,并且设置相关的样式
-
TabBar中显示的内容由外界决定
- 定义插槽
- flex布局平分TabBar
-
自定义TabBarItem,可以传入图片和文字
- 定义TabBarItem,并且定义两个插槽:图片、文字
- 给两个插槽外层包装div,用于设置样式
- 填充插槽,实现底部TabBar的效果
-
搭建实例
-
新建一个项目,项目信息如下

-
新建src/assets/css/base.css文件
body{ padding: 0; margin: 0; } -
修改App.vue文件
<template>
  <div id="app">
    <div id="tab-bar">
      <div class="tab-bar-item">首页</div>
      <div class="tab-bar-item">分类</div>
      <div class="tab-bar-item">购物车</div>
      <div class="tab-bar-item">我的</div>
    </div>
  </div>
</template>

<script>
export default {
  name: 'App',
  components: {
  }
}
</script>

<style>
  @import "./assets/css/base.css";

  #tab-bar{
    display: flex;
    background-color: #f6f6f6;
    /*让整个tabbar处于底部*/
    position: fixed;
    left: 0;
    right: 0;
    bottom: 0;
    /*分界处有阴影*/
    box-shadow: 0 -1px 1px rgb(100,100,100,.2);
  }
  .tab-bar-item{
    flex: 1;
    text-align: center;
    height: 49px;   /* tabbar的高度一般都是49px */
  }
</style>
-
1.2 tabbar-TabBar和TabBarItem组件封装
-
修改App.vue文件
<template> <div id="app"> <tab-bar> <tab-bar-item> <img slot="item-icon" src="./assets/img/tabbar/home.svg" alt=""> <div slot="item-text">首页</div> </tab-bar-item> <tab-bar-item> <img slot="item-icon" src="./assets/img/tabbar/category.svg" alt=""> <div slot="item-text">分类</div> </tab-bar-item> <tab-bar-item> <img slot="item-icon" src="./assets/img/tabbar/shopcart.svg" alt=""> <div slot="item-text">购物车</div> </tab-bar-item> <tab-bar-item> <img slot="item-icon" src="./assets/img/tabbar/profile.svg" alt=""> <div slot="item-text">我的</div> </tab-bar-item> </tab-bar> </div> </template> <script> import TabBar from "./components/tabbar/TabBar"; import TabBarItem from "./components/tabbar/TabBarItem"; export default { name: 'App', components: { TabBar, TabBarItem } } </script> <style> @import "./assets/css/base.css"; </style> -
新建TabBar.vue文件:使用插槽
<template> <div id="tab-bar"> <slot> </slot> </div> </template> <script> export default { name: "TabBar" } </script> <style scoped> #tab-bar{ display: flex; background-color: #f6f6f6; /*让整个tabbar处于底部*/ position: fixed; left: 0; right: 0; bottom: 0; /*分界处有阴影*/ box-shadow: 0 -1px 1px rgb(100,100,100,.2); } </style> -
新建TabBarItem.vue文件:插槽设置
<template>
  <div class="tab-bar-item">
    <slot name="item-icon"></slot>
    <slot name="item-text"></slot>
<!--    <img src="../../assets/img/tabbar/home.svg" alt="">-->
<!--    <div>分类</div>-->
  </div>
</template>

<script>
export default {
  name: "TabBarItem"
}
</script>

<style scoped>
.tab-bar-item{
  flex: 1;
  text-align: center;
  height: 49px;   /* tabbar的高度一般都是49px */
  font-size: 14px;
}
.tab-bar-item img{
  width: 24px;
  height: 24px;
  margin-top: 3px;
  vertical-align: middle;  /* 去掉图片自带的3px */
  margin-bottom: 2px;  /* 使图片下面自带2px */
}
</style>
1.3 tabbar-给TabBarItem传入active图片
-
修改App.vue文件
<tab-bar> <tab-bar-item> <img slot="item-icon" src="./assets/img/tabbar/home.svg" alt=""> <img slot="item-icon-active" src="./assets/img/tabbar/home_active.svg" alt=""> <div slot="item-text">首页</div> </tab-bar-item> <tab-bar-item> <img slot="item-icon" src="./assets/img/tabbar/category.svg" alt=""> <img slot="item-icon-active" src="./assets/img/tabbar/category_active.svg" alt=""> <div slot="item-text">分类</div> </tab-bar-item> <tab-bar-item> <img slot="item-icon" src="./assets/img/tabbar/shopcart.svg" alt=""> <img slot="item-icon-active" src="./assets/img/tabbar/shopcart_active.svg" alt=""> <div slot="item-text">购物车</div> </tab-bar-item> <tab-bar-item> <img slot="item-icon" src="./assets/img/tabbar/profile.svg" alt=""> <img slot="item-icon-active" src="./assets/img/tabbar/profile_active.svg" alt=""> <div slot="item-text">我的</div> </tab-bar-item> </tab-bar> -
修改TAbBarItem.vue文件
<template>
  <div class="tab-bar-item">
    <div v-if="!isActive">
      <slot name="item-icon"></slot>
    </div>
    <div v-else>
      <slot name="item-icon-active"></slot>
    </div>
    <div :class="{active:isActive}">
      <slot name="item-text"></slot>
    </div>
  </div>
</template>

<script>
export default {
  name: "TabBarItem",
  data(){
    return {
      isActive:false
    }
  }
}
</script>

<style scoped>
....
.active{
  color:red;
}
</style>
1.4 tabbar-TabBarItem的颜色动态控制
-
修改TabBarItem.vue文件
<template> <div class="tab-bar-item" @click="itemClick"> <div v-if="!isActive"> <slot name="item-icon"></slot> </div> <div v-else> <slot name="item-icon-active"></slot> </div> <div :style="activeStyle"> <slot name="item-text"></slot> </div> </div> </template> <script> export default { name: "TabBarItem", props:{ path:String, activeColor:{ type:String, default:'red' } }, computed:{ isActive(){ // /home -> item1(home)= true return this.$route.path.indexOf(this.path)!==-1 }, activeStyle(){ return this.isActive?{color:this.activeColor}:{} } }, methods:{ itemClick(){ if(this.$route.path===this.path){ return ; } this.$router.push(this.path); } } } </script> <style scoped> .tab-bar-item{ flex: 1; text-align: center; height: 49px; /* tabbar的高度一般都是49px */ font-size: 14px; } .tab-bar-item img{ width: 24px; height: 24px; margin-top: 3px; vertical-align: middle; /* 去掉图片自带的3px */ margin-bottom: 2px; /* 使图片下面自带2px */ } </style> -
修改App.vue文件
<template>
  <div id="app">
    <router-view></router-view>
    <tab-bar>
      <!-- activeColor="blue" 写入自己想要修改的文字颜色,如果不写就是默认颜色red -->
      <tab-bar-item path="/home" activeColor="blue">
        <img slot="item-icon" src="./assets/img/tabbar/home.svg" alt="">
        <img slot="item-icon-active" src="./assets/img/tabbar/home_active.svg" alt="">
        <div slot="item-text">首页</div>
      </tab-bar-item >
      <tab-bar-item path="/category" activeColor="">
        <img slot="item-icon" src="./assets/img/tabbar/category.svg" alt="">
        <img slot="item-icon-active" src="./assets/img/tabbar/category_active.svg" alt="">
        <div slot="item-text">分类</div>
      </tab-bar-item>
      <tab-bar-item path="/shopcart" activeColor="">
        <img slot="item-icon" src="./assets/img/tabbar/shopcart.svg" alt="">
        <img slot="item-icon-active" src="./assets/img/tabbar/shopcart_active.svg" alt="">
        <div slot="item-text">购物车</div>
      </tab-bar-item>
      <tab-bar-item path="profile" activeColor="">
        <img slot="item-icon" src="./assets/img/tabbar/profile.svg" alt="">
        <img slot="item-icon-active" src="./assets/img/tabbar/profile_active.svg" alt="">
        <div slot="item-text">我的</div>
      </tab-bar-item>
    </tab-bar>
  </div>
</template>
1.5 tabbar-文件路径的引用问题
-
设置别名

-
使用

项目代码:
链接:https://pan.baidu.com/s/1q4wxVOei1DGYbaV3MQwCBA
提取码:4l59
2. Promise学习
2.1 Promise的介绍和使用
Promise是异步编程的一种解决方案
<script>
  // 1. 使用setTimeout
  // setTimeout(()=>{
  //   console.log('hello world')
  // },1000)

  // 参数 -> 函数(resolve,reject)    resolve,reject本身就是函数  链式编程
  // new -> 构造函数(1.保存了一些状态信息 2.执行传入的函数)
  new Promise((resolve,reject)=>{
    // 第一次网络请求的代码
    setTimeout(()=>{
      resolve()
    },1000)
  }).then(()=>{
    // 第一次拿到结果的处理代码
    console.log('hello world')
    console.log('hello world')
    console.log('hello world')
    // 第二次网络请求的代码
    return new Promise((resolve,reject)=>{
      setTimeout(()=>{
        resolve()
      },1000)
    })
  }).then(()=>{
    // 第二次拿到结果的处理代码
    console.log("hello vuejs");
    console.log("hello vuejs");
    console.log("hello vuejs");
    // 第三次网络请求的代码
    return new Promise((resolve,reject)=>{
      setTimeout(()=>{
        resolve()
      },1000)
    })
  }).then(()=>{
    // 第三次拿到结果的处理代码
    console.log("hello python");
    console.log("hello python");
    console.log("hello python");
  })

  new Promise((resolve,reject)=>{
    setTimeout(()=>{
      // 成功的时候调用resolve
      // resolve('hello world')

      // 失败的时候调用reject
      reject('error message')
    },1000)
  }).then((data)=>{
    console.log(data)
  }).catch((err)=>{
    console.log(err);
  })
</script>
使用Promise的情况:一般情况下是有异步操作时,使用Promise对这个异步操作进行封装
2.2 Promise的三种状态和另外处理方式
- pending:等待状态,比如正在进行网络请求,或者定时器没有到时间
- fulfill:满足状态,当我们主动回调了resolve时,就处于该状态,并且会回调then()
- reject:拒绝状态,当我们会回调了reject时,就处于该状态,并且会回调.catch()状态
new Promise((resolve,reject)=>{
  setTimeout(()=>{
    // 成功的时候调用resolve
    // resolve('hello world')

    // 失败的时候调用reject
    reject('error message')
  },1000)
}).then(data=>{
  console.log(data)
}),error => {
  console.log(error);
}
2.3 Promise的链式调用
- Promise.resolve():将数据包装成Promise对象,并且在内部回调resolve()函数
- Promise.reject():将数据包装成Promise对象,并且在内部回调reject()函数
// 网络请求:aaa
  // 处理:aaa111
  new Promise((resolve,reject)=>{
    setTimeout(()=>{
      resolve('aaa')
    },1000)
  }).then(res =>{
    // 1.自己处理
    console.log(res,'第一层的10行处理代码');
    // 2.处理
    // return Promise.resolve(res+'111')

    // return new Promise((resolve)=>{
    //   setTimeout(()=>{
    //     resolve(res+'111')
    //   },1000)
    // })

    return res+'111'
  }).then(res=>{
    console.log(res,'第二层的10行处理代码')
  })
2.4 Promise的all方法使用
Promise.all([
    // new Promise((resolve,reject)=>{
    //   $ajax({
    //       url:'url1',
    //       success:function(data){
    //         resolve(data)
    //       }
    //   })
    // }),
    // new Promise((resolve,reject)=>{
    //   $ajax({
    //     url:'url2',
    //     success:function(data){
    //       resolve(data)
    //     }
    //   })
    // })

  new Promise((resolve,reject)=>{
    setTimeout(()=>{
      resolve({name:'zhiyu',age:18})
    },2000)
  }),
  new Promise((resolve,reject)=>{
    setTimeout(()=>{
      resolve('resolve2')
    },1000)
  })
]).then(results=>{
  console.log(results);
})
3. Vuex学习
3.1 Vuex概念和作用解析
Vuex:是一个转为Vue.js应用程序开发的状态管理模式
- 他采用集中式存储应用的所有组件的状态,并以相应的规则保证状态以一种可预测的方式发生变化
- Vuex也集成到Vue的官方调试工具,提供了诸如零配置的time-travel调试,状态快照导入导出等高级调试
3.2 Vuex-单界面到多界面状态管理切换
-
新建文件夹 src/store/index.js 共享文件
import Vue from 'vue' import Vuex from 'vuex' // 1.安装插件 Vue.use(Vuex) // 2.创建对象 const store=new Vuex.Store({ state:{ counter:1000 }, mutations:{ }, actions:{ }, getters:{ }, modules:{ } }) // 3.导出store对象 export default store -
新建文件 src/components/HelloVuex.vue
<template> <div id="app"> <h2>{{ message }}</h2> <h2>{{$store.state.counter}}</h2> <button @click="$store.state.counter--">-</button> <button @click="$store.state.counter++">+</button> <hello-vuex></hello-vuex> </div> </template> <script> import HelloVuex from "./components/HelloVuex"; export default { name: 'App', data(){ return { message:'我是App组件' } }, components:{ HelloVuex } } </script> <style> </style> -
修改App.vue文件
<template>
  <div id="app">
    <h2>{{ message }}</h2>
    <h2>{{$store.state.counter}}</h2>
    <button @click="$store.state.counter--">-</button>
    <button @click="$store.state.counter++">+</button>
    <hello-vuex></hello-vuex>
  </div>
</template>

<script>
import HelloVuex from "./components/HelloVuex";
export default {
  name: 'App',
  data(){
    return {
      message:'我是App组件'
    }
  },
  components:{
    HelloVuex
  }
}
</script>

<style>
</style>
3.3 Vuex-devtools和mutations
-
修改index.js的mutations方法
mutations:{ // 方法 increment(state){ state.counter++; }, decrement(state){ state.counter--; } }, -
修改App.vue文件
<template>
  <div id="app">
    <h2>{{ message }}</h2>
    <h2>{{$store.state.counter}}</h2>
    <button @click="addition">-</button>
    <button @click="subtraction">+</button>
    <hello-vuex></hello-vuex>
  </div>
</template>

<script>
import HelloVuex from "./components/HelloVuex";
export default {
  name: 'App',
  data(){
    return {
      message:'我是App组件'
    }
  },
  methods:{
    addition(){
      this.$store.commit('increment')
    },
    subtraction(){
      this.$store.commit('decrement')
    }
  },
  components:{
    HelloVuex
  }
}
</script>
3.4 Vuex-state单一状态树的理解
- State 保存共享状态信息的地方。
- Getters 类似我们单个组件中的计算属性computed,只是它定义在Vuex中。
- Mutations 修改状态的地方。
- Actions 做异步操作的地方。
- Modules 用来专门划分模块的地方,针对不同的模块作数据保存。
-
Vuex使用了单一状态树来管理应用层级的全部状态,单一状态树又叫单一数据源(即Single Source of Truth),也就是将所有的数据信息统一放到store对象进行管理,即使有更多的信息需要划分和管理,store对象有且只有一个,因为只有1个store的时候,能够让我们以最直接的方式找到某个状态的片对,方便我们之后的管理、维护和调试。
-
如果你的状态信息是保存到多个Store对象中的(也就是说创建了多个store对象分散保留信息),那么之后的管理和维护变得十分艰难,所以说只有1个store对象就好。
3.5 Vuex-getters的使用详解
3.5.1 getters的基本使用(类似于计算属性)
-
计算属性使用

-
getters基本使用


// index.js
state:{
  counter:1000,
  students:[
    {id:110,name:'zhiyu',age:18},
    {id:111,name:'lili',age:12},
    {id:112,name:'hua',age:38},
    {id:113,name:'Tom',age:28},
  ]
},
mutations:{
  // 方法
  increment(state){
    state.counter++;
  },
  decrement(state){
    state.counter--;
  }
},
getters:{
  powerCounter(state){
    return state.counter*state.counter
  },
  more20stu(state){
    return state.students.filter(s=>s.age>=20)
  }
},
3.5.2 getters作为参数使用
// index.js
getters:{
  more20stu(state){
    return state.students.filter(s=>s.age>=20)
  },
  more20stuLength(state,getters){
    return getters.more20stu.length
  }
},

// App.vue
    <h2>{{$store.getters.more20stuLength}}</h2>
3.5.3 getters传递参数
getters默认是不能传递参数的,如果希望传递参数,那么只能让getters本身返回一个函数
// App.vue
<h2>----------App内容:getters相关信息----------</h2>
<!--    <h2>{{$store.state.counter*$store.state.counter}}</h2>-->
<h2>counter的平方:{{$store.getters.powerCounter}}</h2>
<h2>computed年龄大于20:{{more20stu}}</h2>
<h2>getters年龄大于20:{{$store.getters.more20stu}}</h2>
<h2>getters年龄大于20的长度:{{$store.getters.more20stuLength}}</h2>
<h2>getters传递参数:{{$store.getters.moreAgeStu(30)}}</h2>

// index.js
getters:{
    moreAgeStu(state){
      return age=>{
        return state.students.filter(s=>s.age>age)
      }
    }
  },
3.6 Vuex-mutations的携带参数
3.6.1 mutations携带参数
-
提交(commit)Mutation是Vuex的store状态中的唯一更新方式。
-
Mutation主要包括两部分:
- 字符串的事件类型(type)
- 一个回调函数(handler),该回调函数的第一个参数就是state
-
Mutation的定义方式:

-
通过mutation进行状态更新
拿到我们的store对象,调用我们的commit方法,传入一个事件类型

-
携带单个参数
// App.vue  template
<h2>----------App内容:mutations相关信息----------</h2>
<button @click="addCount(5)">+5</button>
<button @click="addCount(10)">+10</button>

// App.vue methods
addCount(count){
  this.$store.commit('incrementCount',count)
}

// index.js
mutations:{
  // 方法
  incrementCount(state,count){
    state.counter+=count
  }
},
-
携带多个参数
在通过mutation更新数据状态的时候,是可以携带一些的而外的参数的,这些参数被称为mutation的载荷(Payload)
// App.vue  template
<button @click="addStudent">添加学生</button>

// App.vue methods
addStudent(){
    const stu={id:114,name:'alan',age:21}
    this.$store.commit('addStudent',stu)
}

// index.js
mutations:{
	addStudent(state,stu){
    	state.students.push(stu)
    }
},
3.6.2 mutations提交风格
-
普通提交方式:通过commit进行提交。
-
另一种特殊的提交风格:通过一个包含type属性的对象进行提交。


-
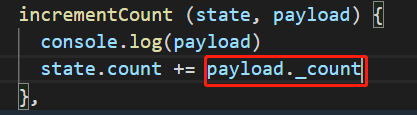
当我们点击按钮的时候,可以看到我们在Mutation中接收的参数_count不再是一个简单的变量属性,而是一个对象了,所以这里使用_count来接收不再合适,而应该用payload来统一代替。
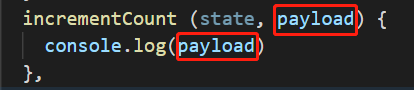
所以我们可以直接从payload对象里面取出我们的参数_count进行累加
3.6.3 mutation的响应规则
- Vuex的store对象中的state状态是响应式的,当state中的数据发生改变时,Vue组件会自动更新我们的界面视图。
- 在state中定义的属性都会被加入到Vue响应式系统中,而响应式系统通过观察者模式会动态监听state中每个属性的变化,当state中某个属性发生变化时,响应式系统会通知所有界面中用到该属性的地方(组件),让界面发生刷新,(比如我们这里的state中有3个定义的属性:count,students,info,如果他们当中有某个属性发生变化,都会自动刷新视图)。
- 简单的理解就是一种数据的联动,你变我也要跟着变,某个数据发生变化就会产生的一种连锁反应。
// App.vue  template
<h2>{{$store.state.info}}</h2>
<button @click="updateInfo">修改信息</button>

// App.vue methods
updateInfo(){
    this.$store.commit('updateInfo')
}

// index.js
state:{
    info:{
      name:'kobe',
      age:40,
      height:1.98
    }
},
mutations:{
    updateInfo(state){
      state.info.name='zhiyu'
    }
}
-
想要让state中的属性被加入到Vue响应式系统,必须遵守的Vuex响应式规则,规则如下:
-
提前在store对象中进行初始化好我们需要的属性。如果没有提前在store对象中初始化我们需要的属性,则state中的属性不会被加入到Vue响应式系统。

通过数组的索引值修改数组的元素本身就是不支持的,也不会加入响应式系统中,倘若真的要向state对象中赠添某个新属性时,可以使用.splice()方法或Vue.set()方法,或者用新对象给旧对象重新赋值
-
Vue.set(传入三个参数)方法使用:Vue.set(第一个参数要改哪个对象?第二个参数传入的是对象或者数组、对象用key键(字符串)、数组用number下标?第三个参数,你要传入的值)

-
Vue.delete()方法可以实现响应式删除。

-
3.6.4 mutation类型常量–搬砖转换
-
在mutation中,如果我们定义了很多事件类型(也就是其中的方法名称太多了)就很容易混淆写错)
就像这个样子:
-
当我们的项目在不断增大时,同时Vuex管理的状态也会变得越来越多,那么意味着Mutation中的方法也会越来越多,这也意味着使用者需要花费大量的精力去记住这些方法,甚至在多个文件之间来回切换,查看方法名称,甚至如果不是复制,自己手动敲代码还会写错事件类型。
当我们的事件类型名称是一致时,就可以使用类型常量进行转换了,避免纠错。

Mutation类型常量转换的具体步骤(以事件类型:increment为例子作为展示)
- 在src/store目录下创建一个mutation.type.js文件。

-
在App.vue文件中导入已经定义好的INCREMENT常量。
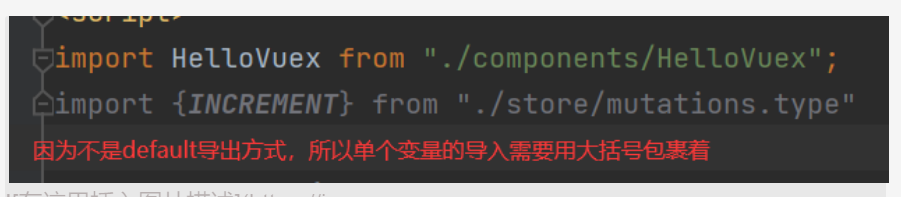
-
在App.vue函数methods定义中我们就可以这样来提交Mutation了,用定义好的常量INCREMENT替换我们的事件类型’increment’。

3.7 Vuex-actions的使用详解
actions 放置异步操作,它的功能和mutations类似。在mutation中不能有异步操作,只能有同步方法,如有异步操作,必须放到actions里面。
-
actions有个类似mutation中传入的state参数,actions它也有个自己的参数叫context(上下文),这个参数context可以理解为整个store对象,也可以理解为指向this.store对象。

-
那是不是意味着我们可以直接绕过mutations,执行actions操作呢?

-
答案是可以的,但不推荐这么做,为什么呢?我们可以看下官方的图。

-
我们看到上面的图执行actions操作的时候有个提交commit方法,因为actions中的参数context相当于一个store对象,所以我们可以直接使用context.commit( )方法。


-
小结:我们可以看下官方的思维图,理清思路.

-
拓展:我们的mutations是可以传递参数的,actions是否能传递参数payload呢?答案是可以的。

-
既然组件定义的methods里面可以传递一个参数?那能否传递过去一个箭头函数呢?其实也是可以的。

-
如果组件中的methods能传递一个参数,还可以传递一个箭头函数作为参数,那能否同时传递一个参数和一个箭头函数过去呢?也是可以的,只是这时候的携带参数要写成一个对象的形式。

-
但这种方式不够优雅,因为我们携带的参数和我们携带的回调函数混在一起了,我们要做的就是分离。

3.8 Vuex-modules的使用详解
- modules是模块的意思,为什么需要在Vuex中使用模块化开发思想呢?
- Vue使用了单一状态数的核心概念,至始至终都只能有且只有一个store对象,那么也就意味着很多状态都要交给Vuex大管家来进行管理。
- 如果我们的应用变得非常复杂的时候,store对象中的代码量就有可能变得相当的庞大和臃肿,不利于后期的维护查看。
- 为了解决这个问题,Vuex允许我们开发者使用模块化的开发思想,将一个非常庞大的store大对象分割成一个个小模块(modules)进行管理,而每一个小模块又可以单独抽离出来组成一个单文件,从而进行组织管理。
- 这种单文件组织的模块化开发使每个独立的模块都拥有了自己的state、mutations、actions、getters。
modules模块是Vuex针对state单一状态树核心,而提出来的一种将代码块抽离成一个个单文件进行管理开发和维护,让开发者具备模块化开发思想,简单点就是是为了避免Vuex代码篇幅过大,避免代码过于臃肿而提出的一种解决方案思路,方便开发者后期的维护。
我们在modules里面定义a、b、c模块都可以拥有和store对象一样的对象属性 。

简单的模块抽离组织思路

如何使用modules属性对象中细分出来的单独模块下的state、mutations、actions?
1.模块中使用state案例

2.模块中使用mutations案例

3.模块中使用getters案例

-
getters作为参数传递,拿到上层的getters使用

-
getters的第三个参数rootState获取store大对象中的state数据


4.模块中使用actions案例
-
注意:模块这里actions访问的是属于模块内部自己的mutations,而不是store大对象里面的mutations,模块中actions区别于state,不会自动添加进store大对象中去.


-
打印模块中的actions里面的context看看有什么?

// index.js const moduleA={ state:{ name:'zhiyu', age:18, height:1.88 }, mutations:{ updateName(state,payload){ state.name=payload } }, actions:{ aUpdateName(context){ setTimeout(()=>{ context.commit('updateName','wangwu') },1000) } }, getters:{ fullName(state){ return state.name+'1111' }, fullName2(state,getters){ return getters.fullName+'2222' }, fullName3(state,getters,rootState){ return getters.fullName2+rootState.counter } } } const store=new Vuex.Store({ modules:{ a:moduleA, } }) // App.vue template 与 methods <h2>{{$store.state.a.name}}</h2> <button @click="updateName">修改名字</button> <h2>{{$store.getters.fullName}}</h2> <h2>{{$store.getters.fullName2}}</h2> <h2>{{$store.getters.fullName3}}</h2> <button @click="asyncUpdateName">异步修改名字</button> updateName(){ this.$store.commit('updateName','lisi') }, asyncUpdateName(){ this.$store.dispatch('aUpdateName') } -
模块actions中传多个参数的另外写法:对象的结构赋值
关于对象的结构赋值上手概念理解:
项目结构拆分:将store大对象中的state、getters、mutations、actions、modules分别抽离成单个文件放置。

按照这种模块化的开发思想,所以我们要好好组织一下,重构我们之前的臃肿代码(将state、getters、mutations、actions、modules都写在一个文件里面是不推荐的)。
操作state

操作mutations(官方不推荐我们在store对象保留mutations,而state是推荐保留的,因此我们要将mutations抽离成单文件)

然后来到index.js进行导入,接着在store对象中使用即可。

getters、actions抽离成单文件,操作同上。
moudules抽离成单文件,因为模块可能有多个,官方推荐我们建一个文件夹放置模块。

项目代码:
链接:https://pan.baidu.com/s/1boOFJLP3lPdjvNPBjrEg5Q
提取码:07tv
4. axios学习
4.1 网络请求模块的选择-axios
axios功能特点:
- 在浏览器中发送XMLHttpRequests请求
- 在node.js中发送http请求
- 支持Promise API
- 拦截请求和响应
- 转换请求和响应数据
4.2 axios框架的基本使用
// 默认是get请求
axios({
  url:'http://123.207.32.32:8000/home/multidata',
  method:'get'
}).then(res=>{
  console.log(res)
})

axios({
  url:'http://123.207.32.32:8000/home/data',
  // 专门针对get请求的参数拼接
  params:{
    type:'pop',
    page:1
  }
}).then(res=>{
  console.log(res)
})
4.3 axios发送并发请求
axios.all([axios({
  url:'http://123.207.32.32:8000/home/multidata'
}),axios({
  url:'http://123.207.32.32:8000/home/data',
  // 专门针对get请求的参数拼接
  params:{
    type:'pop',
    page:1
  }
})])
  // .then(results=>{
  // console.log(results);
  //   console.log(results[0]);
  //   console.log(results[1]);
  // })

  .then(axios.spread((res1,res2)=>{
  console.log(res1);
  console.log(res2);
}))
4.4 axios的配置信息相关
// axios的全局配置
axios.defaults.baseURL='http://123.207.32.32:8000'
axios.defaults.timeout=5000

axios({
  url:'/home/data',
  // 专门针对get请求的参数拼接
  params:{
    type:'pop',
    page:1
  }
})
常见配置选项:

4.5 axios的实例和模块封装
// 创建对应的axios实例
const instance1=axios.create({
  baseURL:'http://123.207.32.32:8000',
  timeout:5000
})

instance1({
  url:'/home/multidata'
}).then(res=>{
  console.log(res)
})

instance1({
  url:'/home/data',
  params:{
    type:'pop',
    page:1
  }
}).then(res=>{
  console.log(res);
})
- 封装方法一:
HelloWorld.vue的修改
<script>
import axios from "axios";

export default {
  name: "HelloWorld",
  data(){
    return {
      category: ''
    }
  },
  created() {
    axios({
      url:'http://123.207.32.32:8000/category'
    }).then(res=>{
      this.category=res
    })
  }
}
</script>
App.vue的修改
<template>
  <div id="app">
    <div>{{result}}</div>
    <h2>------------------</h2>
    <hello-world></hello-world>
  </div>
</template>

<script>
import HelloWorld from "./components/HelloWorld";
import axios from "axios";

export default {
  name: 'App',
  components: {
    HelloWorld
  },
  data(){
    return {
      result:''
    }
  },
  created() {
    axios({
      url:'http://123.207.32.32:8000/home/multidata'
    }).then(res=>{
      console.log(res);
      this.result=res
    })
  }
}
</script>
但该方法对axios框架的依赖太重,不适合开发项目
- 封装方法二:
新建src/network/request.js文件,将axios模块分离出来
// 方法一:
import axios from "axios";
export function request(config,success,failure){
  // 1. 创建axios的实例
  const instance=axios.create({
    baseURL:'http://123.207.32.32:8000',
    timeout:5000
  })

  // 2. axios拦截器

  // 3. 发送真正的网络请求
  instance(config)
    .then(res=>{
      console.log(res);
      success(res)
    })
    .catch(err=>{
      console.log(err);
      failure(err)
    })
}

// 方法二:
export function request(config){
  return new Promise((resolve,reject)=>{
    // 1. 创建axios的实例
    const instance=axios.create({
      baseURL:'http://123.207.32.32:8000',
      timeout:5000
    })
    // 2. 发送真正的网络请求
    instance(config)
      .then(res=>{
        resolve(res)
      })
      .catch(err=>{
        reject(err)
      })
  })
}

// 方法三:
export function request(config){
  // 1. 创建axios的实例
  const instance=axios.create({
    baseURL:'http://123.207.32.32:8000',
    timeout:5000
  })
  // 2. 发送真正的网络请求
  return instance(config)
}
在main.js中导出
// 方法一导出
// 5. 封装request模块
import {request} from "./network/request"

request({
  url:'/home/multidata',
},res=>{
  console.log(res);
},err=>{
  console.log(err);
})

// 方法二三导出
request({
  url:'/home/multidata',
}).then(res=>{
  console.log(res);
}).catch(err=>{
  console.log(err);
})
4.6 axios的拦截器的使用
// 2. axios的拦截器
instance.interceptors.request.use(config=>{
  console.log(config);
  // 2.1 请求拦截的作用
  // 比如config的一些信息不符合服务器的要求
  // 比如每次发送网络请求时,都希望在界面中显示一个请求的图标
  // 某些网络请求(比如登录token),必须携带一些特殊的信息

  return config;  // 拦截之后必须把config返回出去
},err=>{
  console.log(err)
});
// 2.2 响应拦截
instance.interceptors.response.use(res=>{
  console.log(res);
  return res.data;
},err=>{
  console.log(err);
});


 31万+
31万+


 被折叠的 条评论
为什么被折叠?
被折叠的 条评论
为什么被折叠?
 到【灌水乐园】发言


