


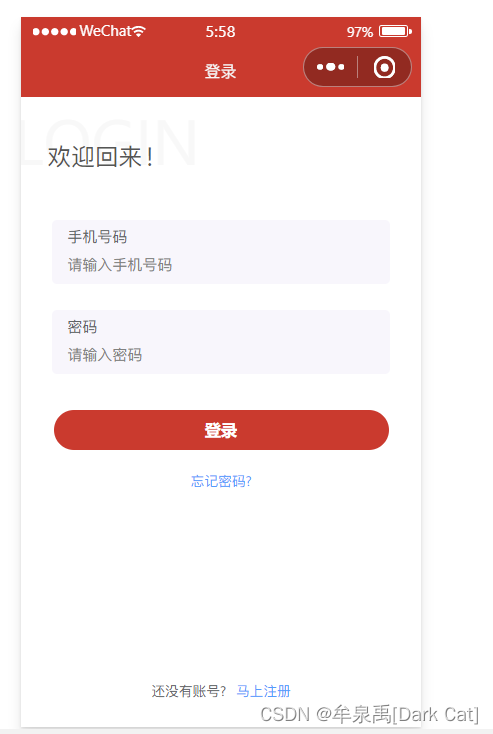
16.1 登录界面
html
<view class="container">
<view class="wrapper">
<view class="left-top-sign">LOGIN</view>
<view class="welcome">
欢迎回来!
</view>
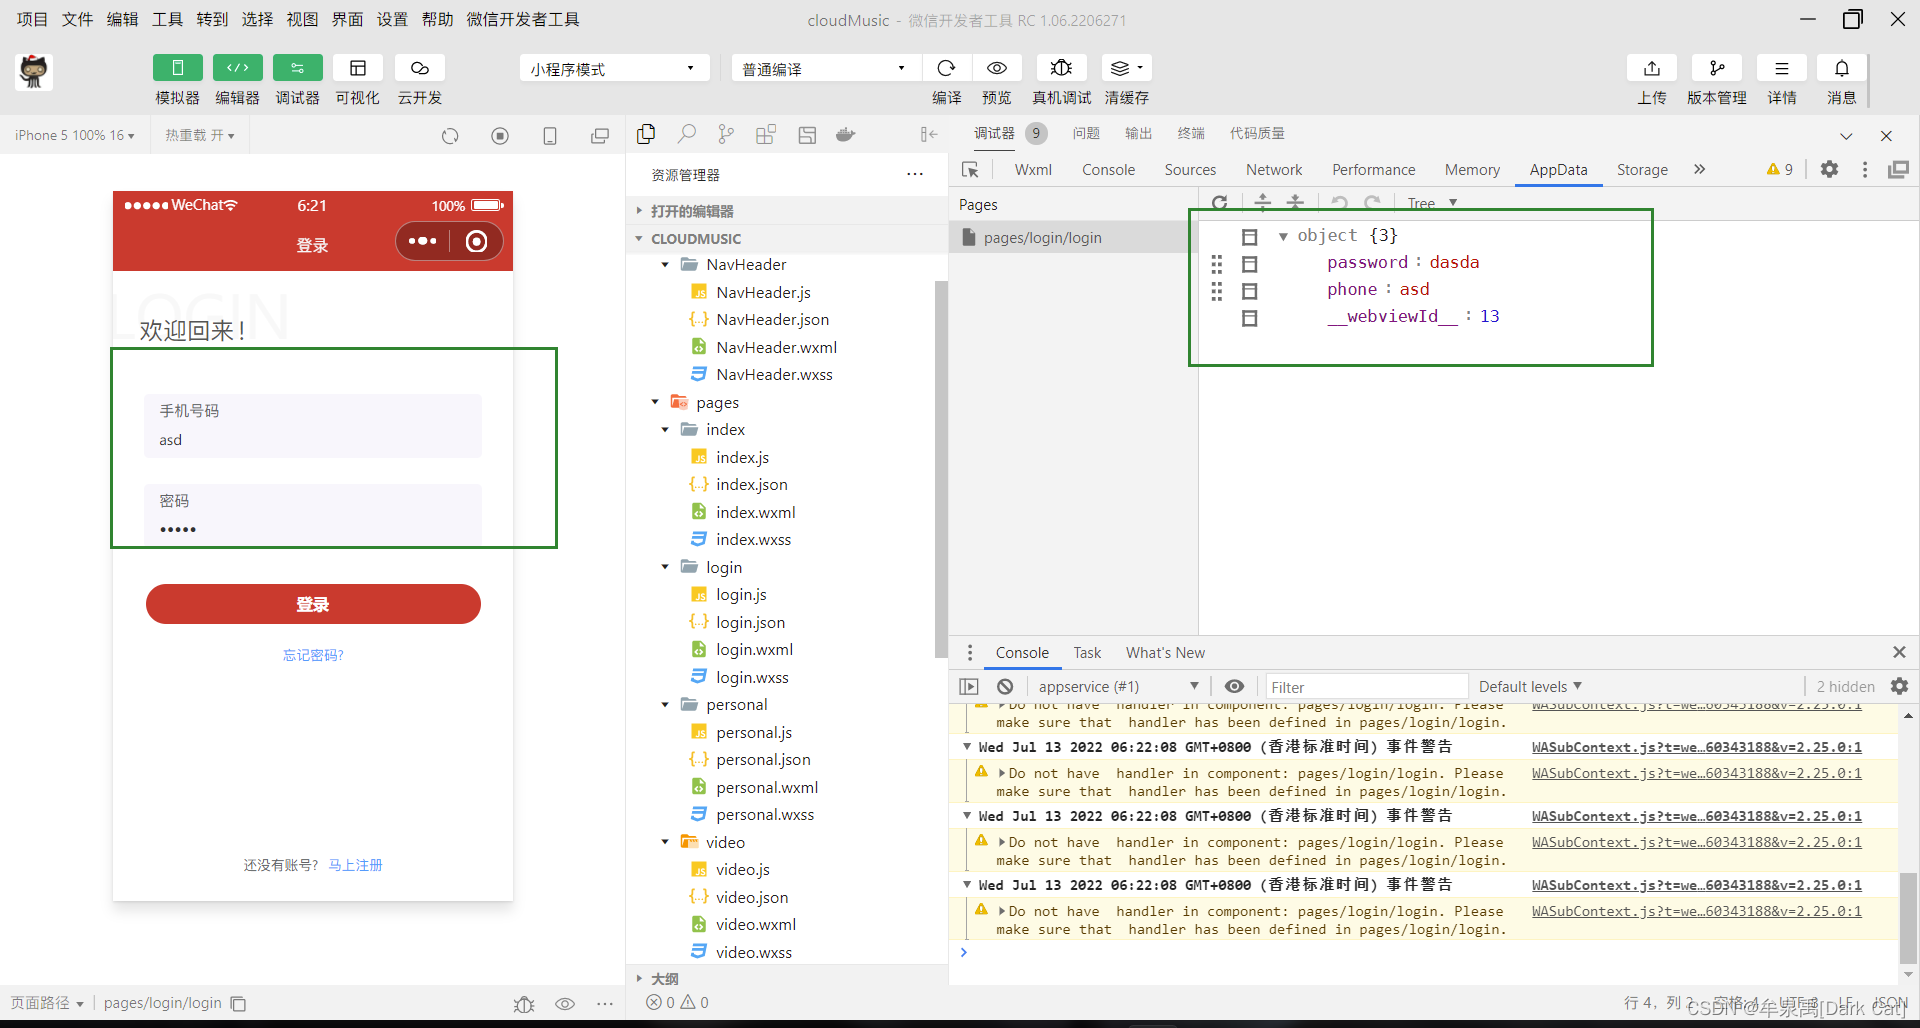
<view class="input-content">
<view class="input-item">
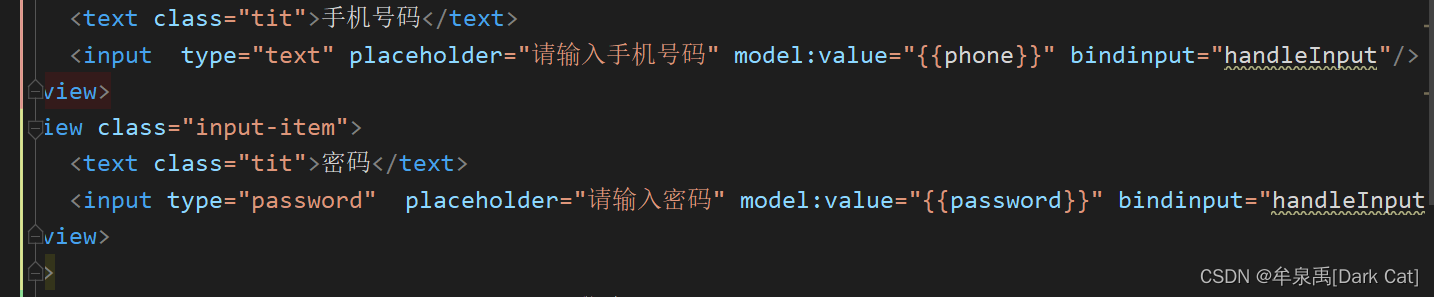
<text class="tit">手机号码</text>
<input type="text" placeholder="请输入手机号码" model:value="{{phone}}"/>
</view>
<view class="input-item">
<text class="tit">密码</text>
<input type="password" placeholder="请输入密码" model:value="{{password}}"/>
</view>
</view>
<button class="confirm-btn" bindtap="login">登录</button>
<view class="forget-section">
忘记密码?
</view>
</view>
<view class="register-section">
还没有账号?
<text >马上注册</text>
</view>
</view>
css
/* pages/login/login.wxss */.wrapper{
    position:relative;
    z-index: 90;
    padding-bottom: 40rpx;
}

.left-top-sign{
    font-size: 120rpx;
    color: #f8f8f8;
    position:relative;
    left: -16rpx;
}

.welcome{
    position:relative;
    left: 50rpx;
    top: -90rpx;
    font-size: 46rpx;
    color: #555;
}


.input-content{
    padding: 0 60rpx;
}
.input-item{
    display:flex;
    flex-direction: column;
    align-items:flex-start;
    justify-content: center;
    padding: 0 30rpx;
    background:#f8f6fc;
    height: 120rpx;
    border-radius: 4px;
    margin-bottom: 50rpx;

}

.input-item:last-child{
    margin-bottom: 0;
}
.input-item .tit{
    height: 50rpx;
    line-height: 56rpx;
    font-size: 30rpx;
    color: #606266;
}
.input-item input{
    height: 60rpx;
    font-size: 30rpx;
    color: #303133;
    width: 100%;
}
.confirm-btn{
    width: 630rpx!important;
    height: 76rpx;
    line-height: 76rpx;
    border-radius: 50rpx;
    margin-top: 70rpx;
    background: #d43c33;
    color: #fff;
    font-size: 32rpx;
    padding: 0;
}
.confirm-btn2:after{
    border-radius: 100px;
}

.forget-section{
    font-size: 28rpx;
    color: #4399fc;
    text-align: center;
    margin-top: 40rpx;
}

.register-section{
    position:absolute;
    left: 0;
    bottom: 50rpx;
    width: 100%;
    font-size: 28rpx;
    color: #606266;
    text-align: center;

}
.register-section text{
    color: #4399fc;
    margin-left: 10rpx;
}
16.2 简单的了解事件委托
在 2022 年之前,如果 我们想在小程序里,做到 双向数据绑定。并且 用一个事件绑定多个元素的话。可能会用到 事件委托 和 事件函数里 event 对象传过来的值。
所以我们也趁此机会 了解一下 事件委托是什么。
事件委托也叫事件代理,“事件代理”即是把原本需要绑定在子元素的响应事件(click、keydown…)委托给父元素,让父元素担当事件监听的职务。事件代理的原理是DOM元素的事件冒泡。
事件冒泡:即一个元素的事件触发后,会依次一级一级往上调用父级元素的同名事件,直到 window(浏览器窗口)。这个其实也很好理解,子元素被父元素包裹着,当你触发了子元素的事件,那可不就是也相当于触发了 父元素的事件嘛。但是浏览器也没那么傻,它还是能知道源头是谁的。并且把这个源头 保存到了 event.target 里面了。
那么有意思的操作就来了:
当我们 只给 父元素绑定事件的时候,点击里面的 子元素时,这个绑定在父元素的事件也会被触发,因为 子元素也是父元素的一部分。就相当于触发了 父元素的事件。那么 此时此刻 event.target 拿到的 源头 肯定 还是 这个子元素。所以我们说 这个时候,我们只需要判断 这个 源头是谁,然后进行特殊的判断附加其功能 即可。
<button id="btn">添加列表项目</button>
<ul id="list">
    <li>列表项目1</li>
    <li>列表项目2</li>
    <li>列表项目3</li>
</ul>
<script>
    var ul = document.getElementById("list");
    var lis = ul.getElementsByTagName("li");
    for (var i = 0; i < lis.length; i ++) {
        lis[i].addEventListener('cluick', function (e) {
            var e = e || window.event;
            var target = e.target || e.srcElement;
            alert(e.target.innerHTML);
        }, false);
    }
    var i = 4;
    var btn = document.getElementById("btn");
    btn.addEventListener("click", function() {
        var li = document.createElement("li");
        li.innerHTML = "项目列表" + i++;
        ul.appendChild(li);
    });
</script>
优点:
- 节约内存
- 能为之后新增的DOM元素也 添加对应的事件
但是 现在的 微信小程序,已经 不支持这种 原生态的玩法。它 设定了 “双向数据绑定” 的 新特性。
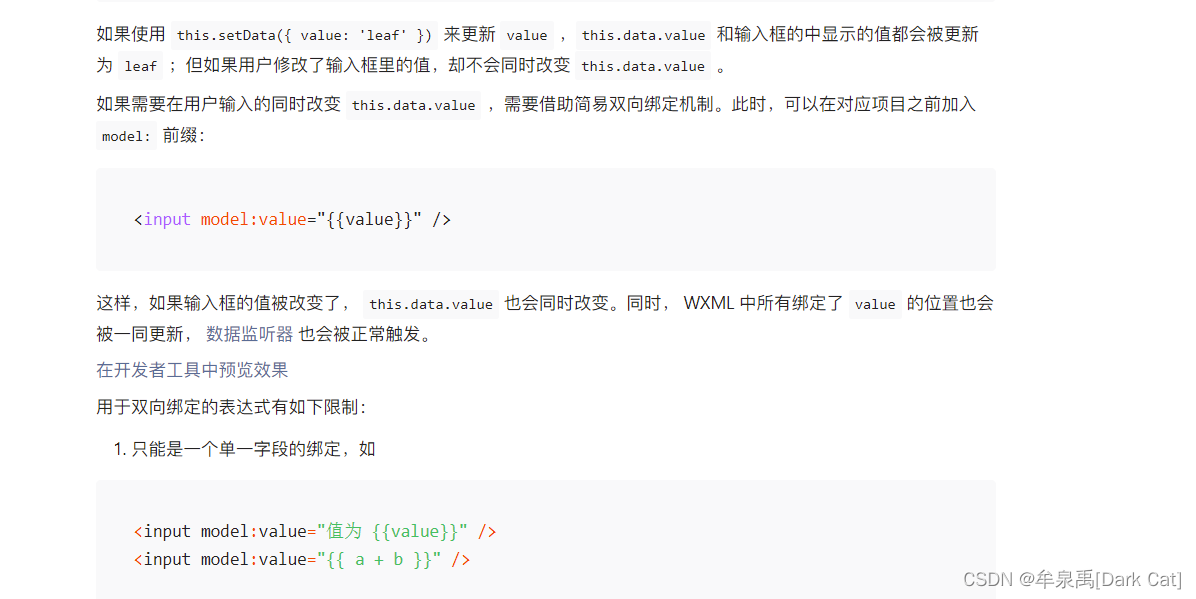
这样我们就可以在 js 那里 动态的拿到这些数据了。
16.3 功能的实现
- 收集表单项数据
- 前端验证
1) 验证用户信息(账号、密码) 是否合法
2) 前端验证不通过 就给予提示即可,也不需要发请求给后端
3) 前端验证通过,发请求(携带账号,密码)给 后端- 后端验证
1) 验证用户是否存在
2) 用户不存在直接返回,告诉前端用户不存在
3) 用户存在的话,还需要验证密码 是否正确
4) 密码不正确 返回给 前端 提示密码不正确
5) 密码正确返回给前端数据,提示用户登录成功(会携带用户的信息)
收集表单数据这里,还有一个 比较 尬的 知识点。就是 从前端可以传递过去一些静态的数据。
data-xxx:可以直接 传递 一些静态的数据 到 event.target 里面。前提是 你得 绑定 事件,得有 事件函数。所以在这里 就不做 演示了。想了解的,可以去 官网查查。
前端验证
login(){
// 前端验证
// 手机号验证
let phoneReg = /^1[3-9]\d{9}/; // 正则表达式 直接写 匹配规则就行
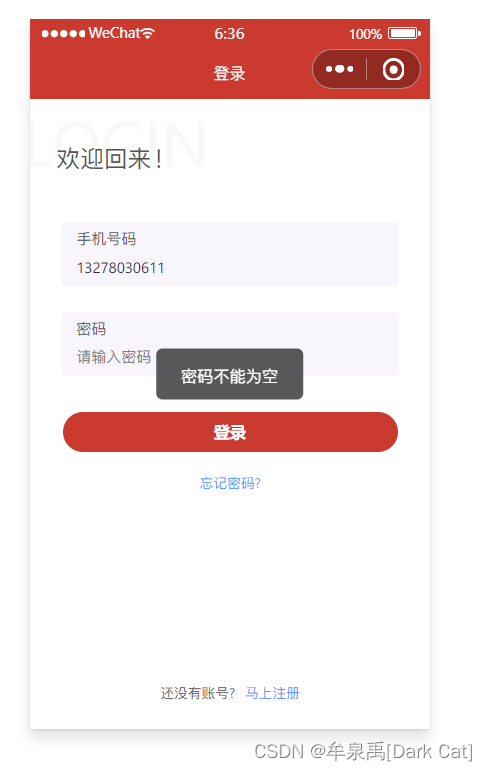
if(!this.data.phone){
wx.showToast({
title: '手机号不能为空',
icon: 'none'
})
return;
}
if(!phoneReg.test(this.data.phone)){
wx.showToast({
title: '手机号格式错误',
icon: 'none'
})
return;
}
// 密码验证
if(!this.data.password){
wx.showToast({
title: '密码不能为空',
icon: 'none'
})
return;
}
// 后端验证
},
后端验证
这里我们先 安装 axios
npm install --save axios
然后 我们要 用 一个 很牛的 云音乐 API。
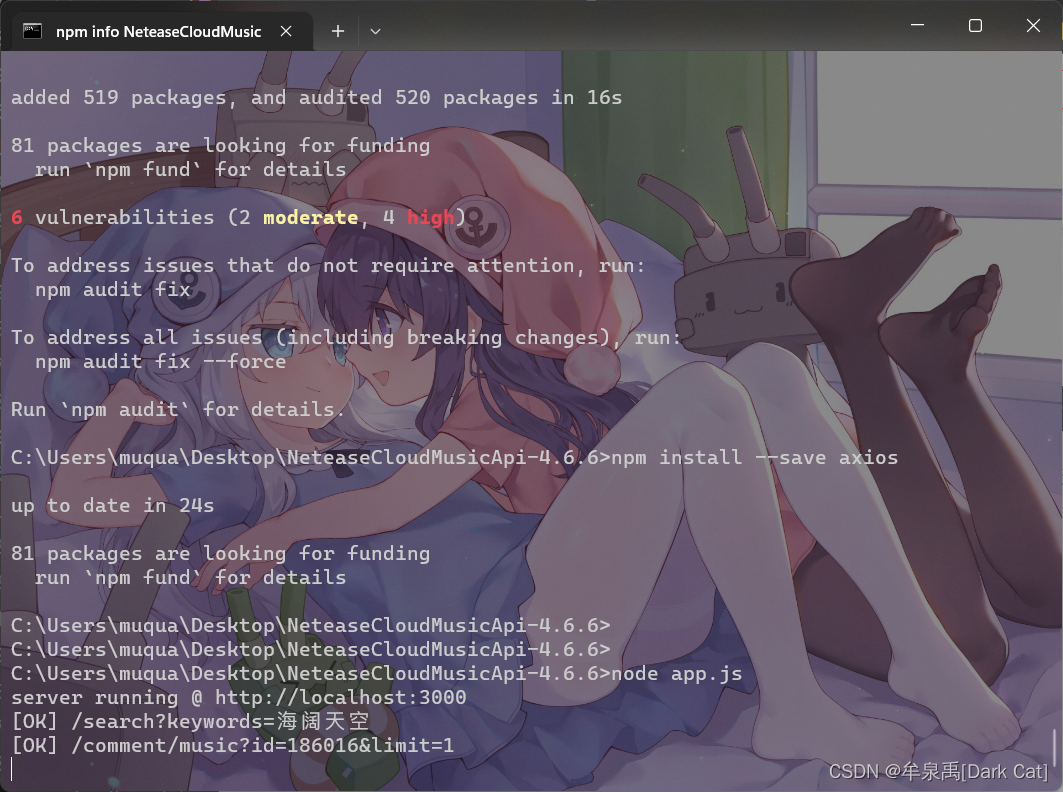
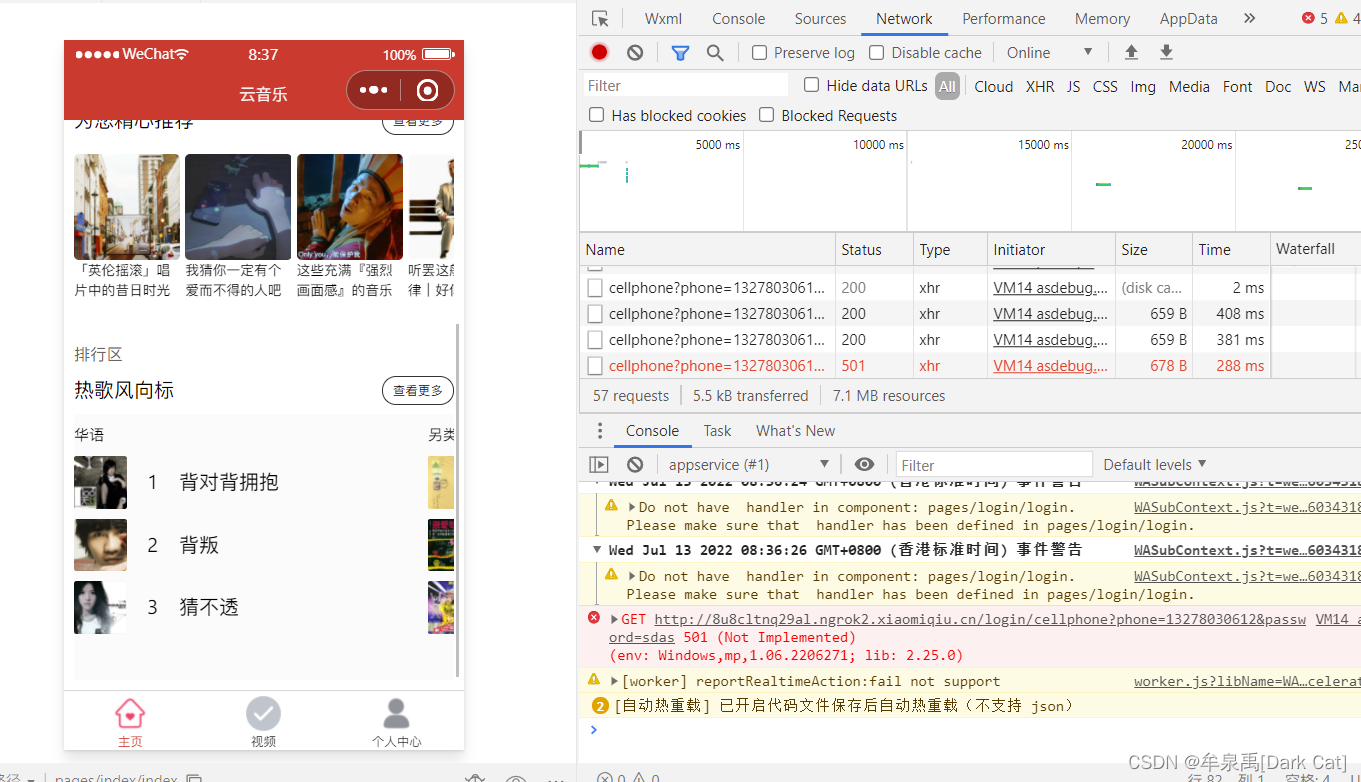
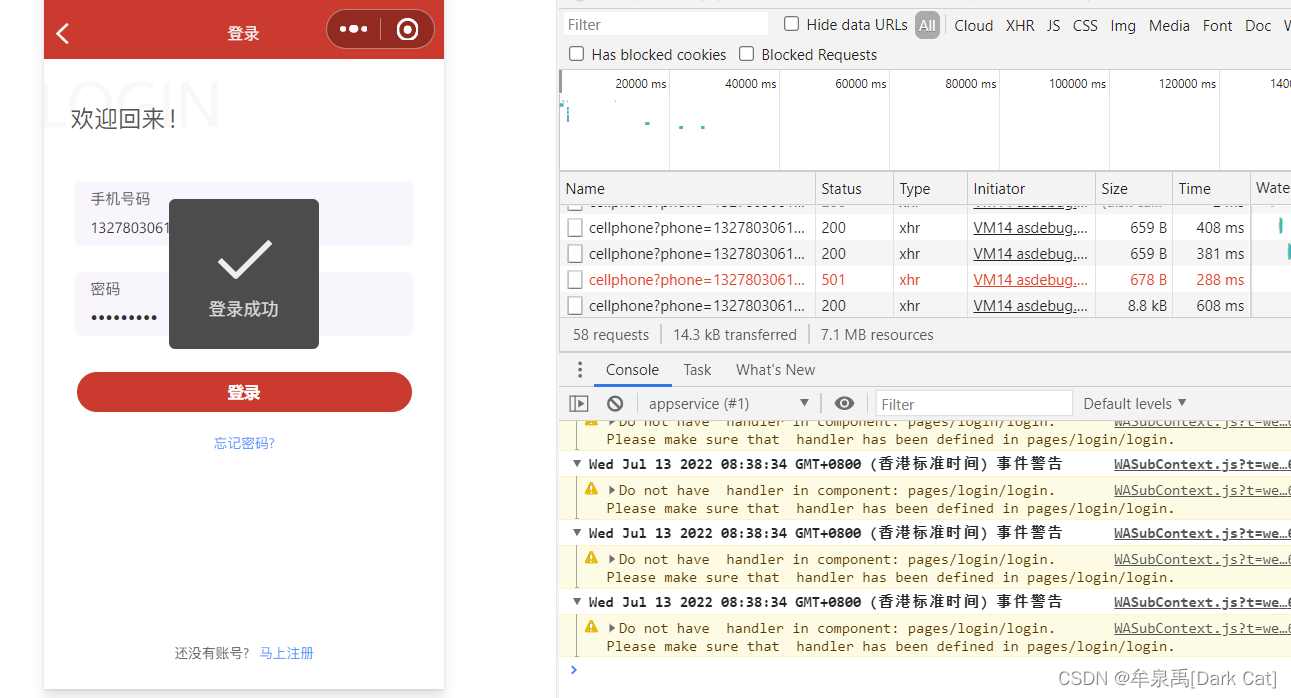
// http://localhost:3000/login/cellphone?phone=13278030611&password=159357asd
        // 后端验证
        let ret = await request("login/cellphone",
            {
                phone: this.data.phone,
                password: this.data.password
            });
        if(ret.code === 200){
            wx.showToast({
                title: "登录成功"
            })
        }else if(ret.code === 400){
            wx.showToast({
                title: "手机号错误",
                icon: "none"
            })
        }else if(ret.code === 502){
            wx.showToast({
                title: "密码错误",
                icon: "none"
            })
        }else{
            wx.showToast({
                title: "登录失败,请重新登录",
                icon: "none"
            })
        }
若 使用 这个 接口,那么 就得 改写一下 index.js
index.js
// pages/index/index.js
import request from "../../utils/request";
Page({
/**
* 页面的初始数据
*/
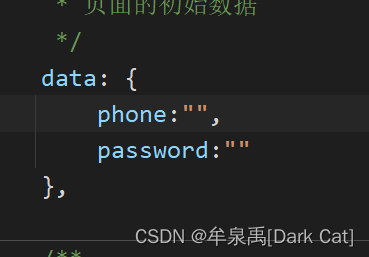
data: {
banners:[], // 轮播图的数据
recommendList: [], // 推荐歌单
topList: [] // 排行榜
},
/**
* 生命周期函数--监听页面加载
*/ async onLoad(options) {
let bannerListData = await request("banner");
let recommendListData = await request("personalized",{limit:10});
let topListHots = await request("playlist/hot",{});
let topListDataArr = [];
///playlist/track/all?id=24381616&limit=10&offset=1
let cnt = 0; //
let i = 0;
while(cnt < 3){
let id = topListHots.tags[i].id;
let name = topListHots.tags[i].name;
let topListData = await request("playlist/track/all",{
id: id,
limit: 3,
offset: 0
});
i++;
if(topListData.message == "登录后才可查看" || topListData.message == "no resource" ||
topListData.songs.length == 0){
continue;
}
topListData = {name: name, data: topListData};
cnt++;
topListDataArr.push(topListData);
}
this.setData({
banners: bannerListData.banners,
recommendList: recommendListData.result,
topList: topListDataArr
})
},
/**
* 生命周期函数--监听页面初次渲染完成
*/
onReady() {
},
/**
* 生命周期函数--监听页面显示
*/
onShow() {
},
/**
* 生命周期函数--监听页面隐藏
*/
onHide() {
},
/**
* 生命周期函数--监听页面卸载
*/
onUnload() {
},
/**
* 页面相关事件处理函数--监听用户下拉动作
*/
onPullDownRefresh() {
},
/**
* 页面上拉触底事件的处理函数
*/
onReachBottom() {
},
/**
* 用户点击右上角分享
*/
onShareAppMessage() {
}
})


 3352
3352


 被折叠的 条评论
为什么被折叠?
被折叠的 条评论
为什么被折叠?
 到【灌水乐园】发言


