


前言:
视频里老师用的是阿里云,那由于阿里云要收费并且申请个人短信服务里的没有证明文件好像申请不了。身为多年白嫖党的我决定另辟蹊径,于是冲了冲浪,发现腾讯云有送100条免费(阿里云也有),tencent主要是可以通过申请个人公众号去申请签名,而不用七七八八证明。
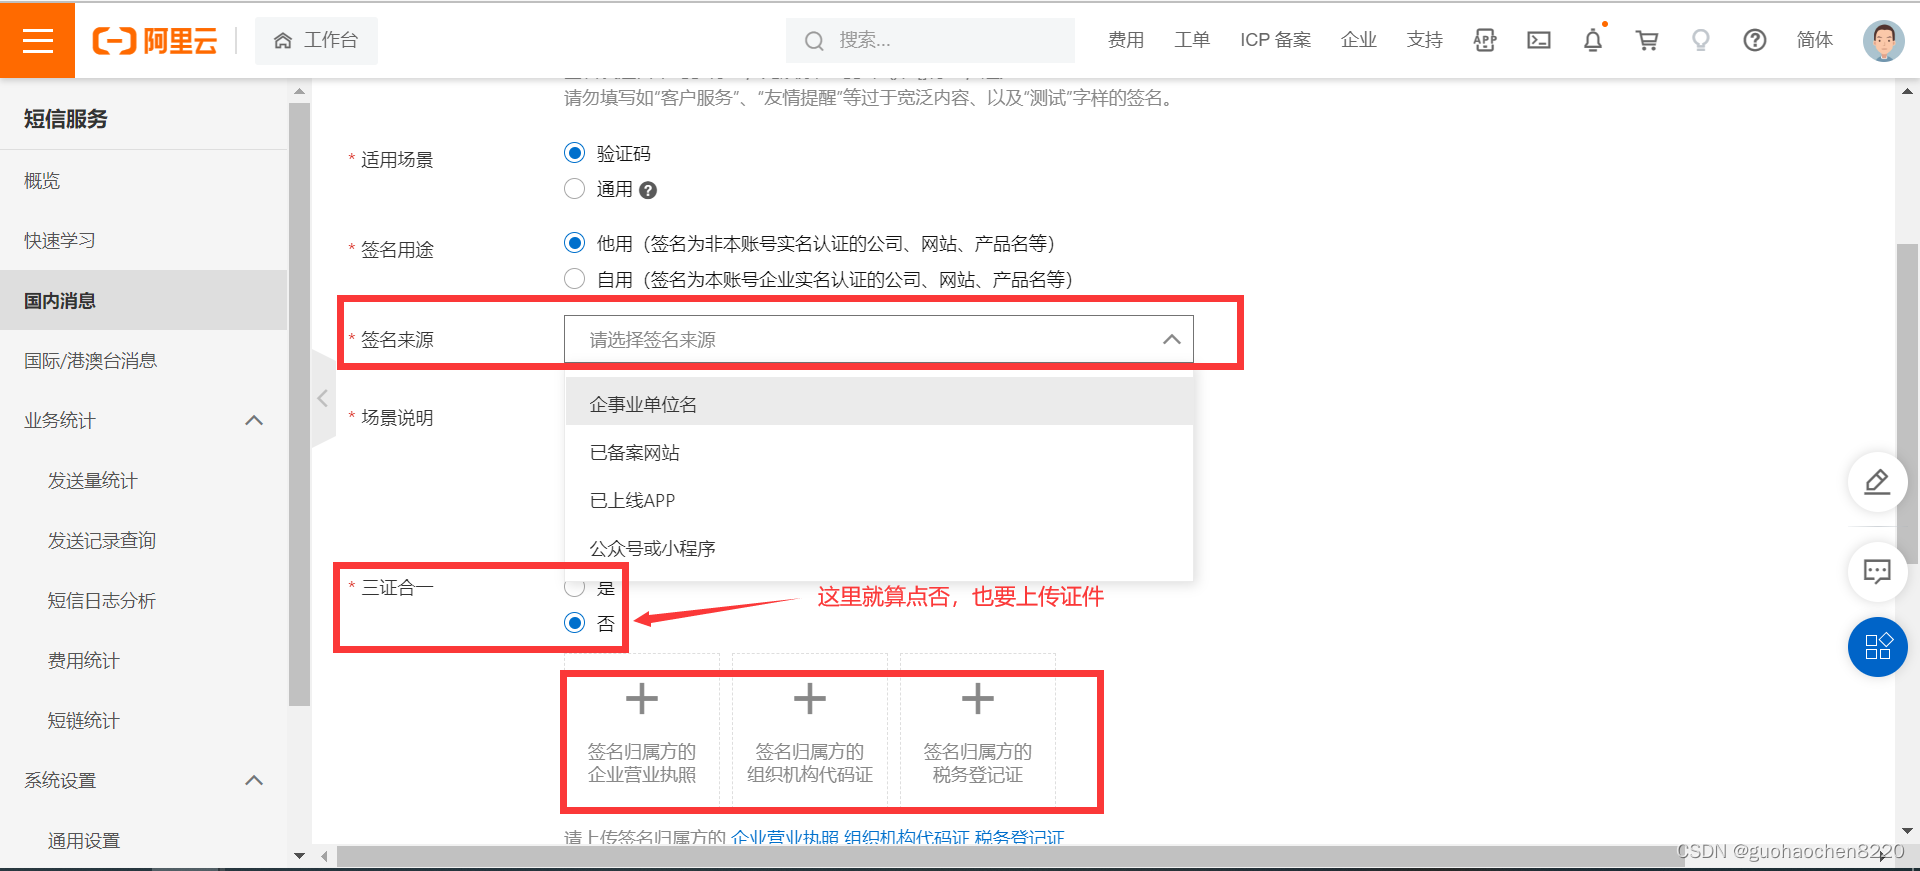
下面是让人劝退的签名管理
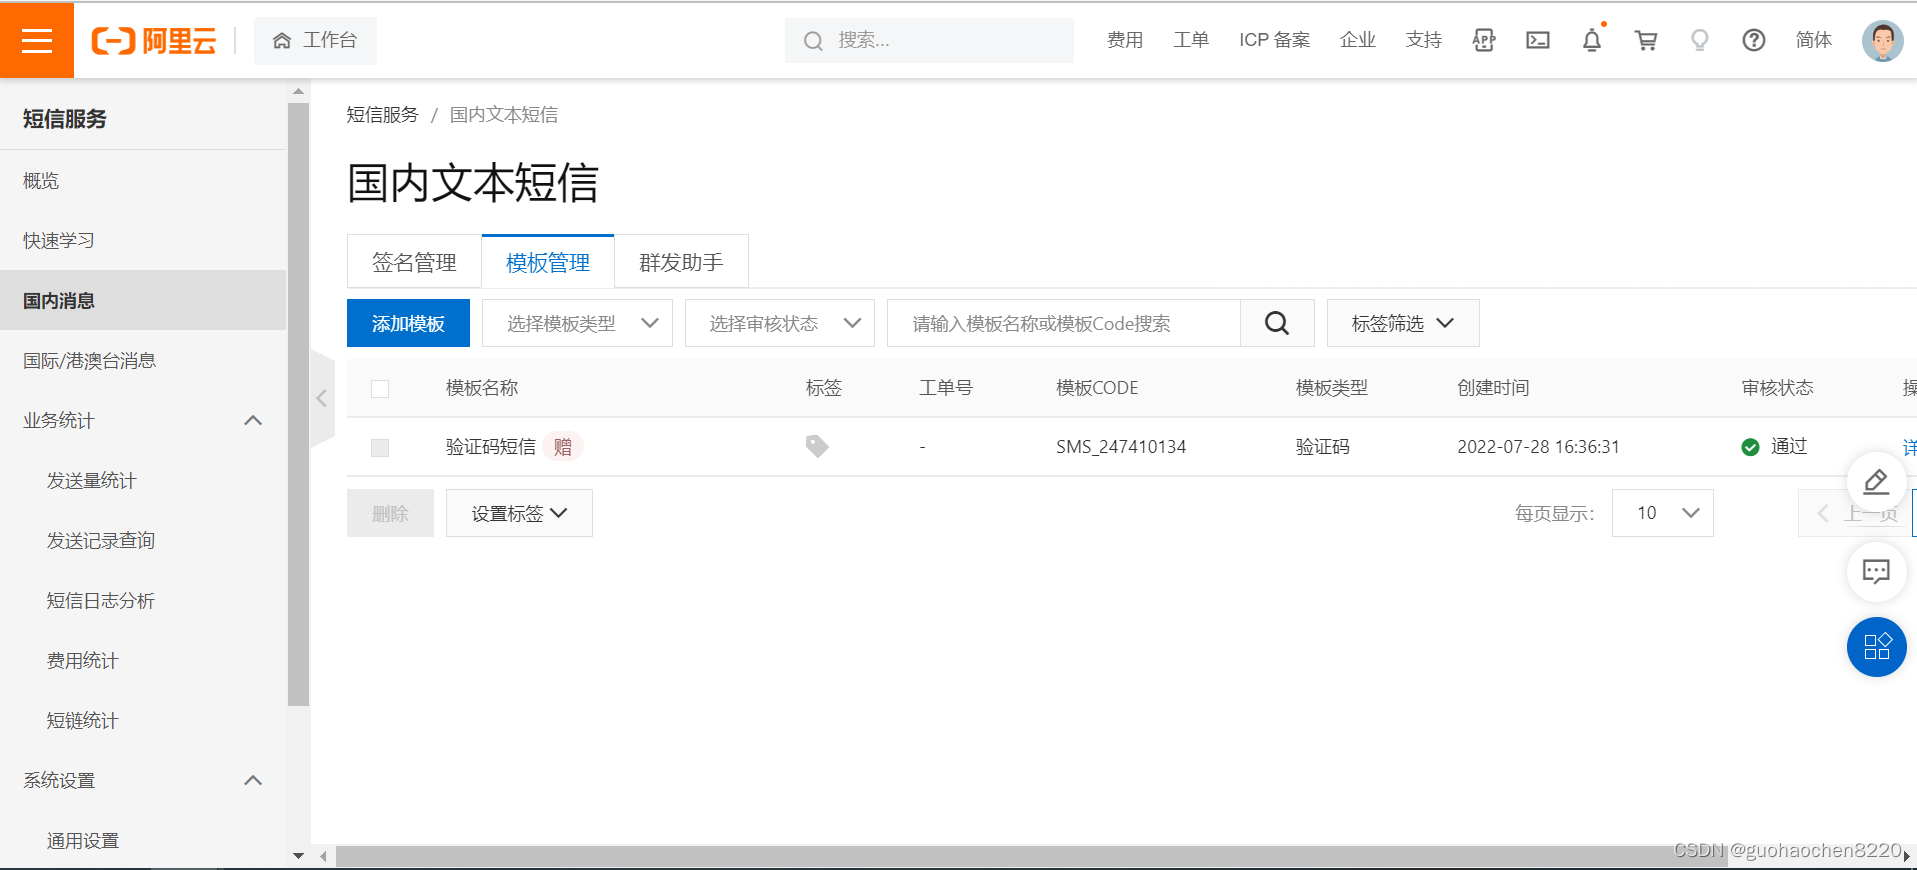
下面是新用户开通都有赠送
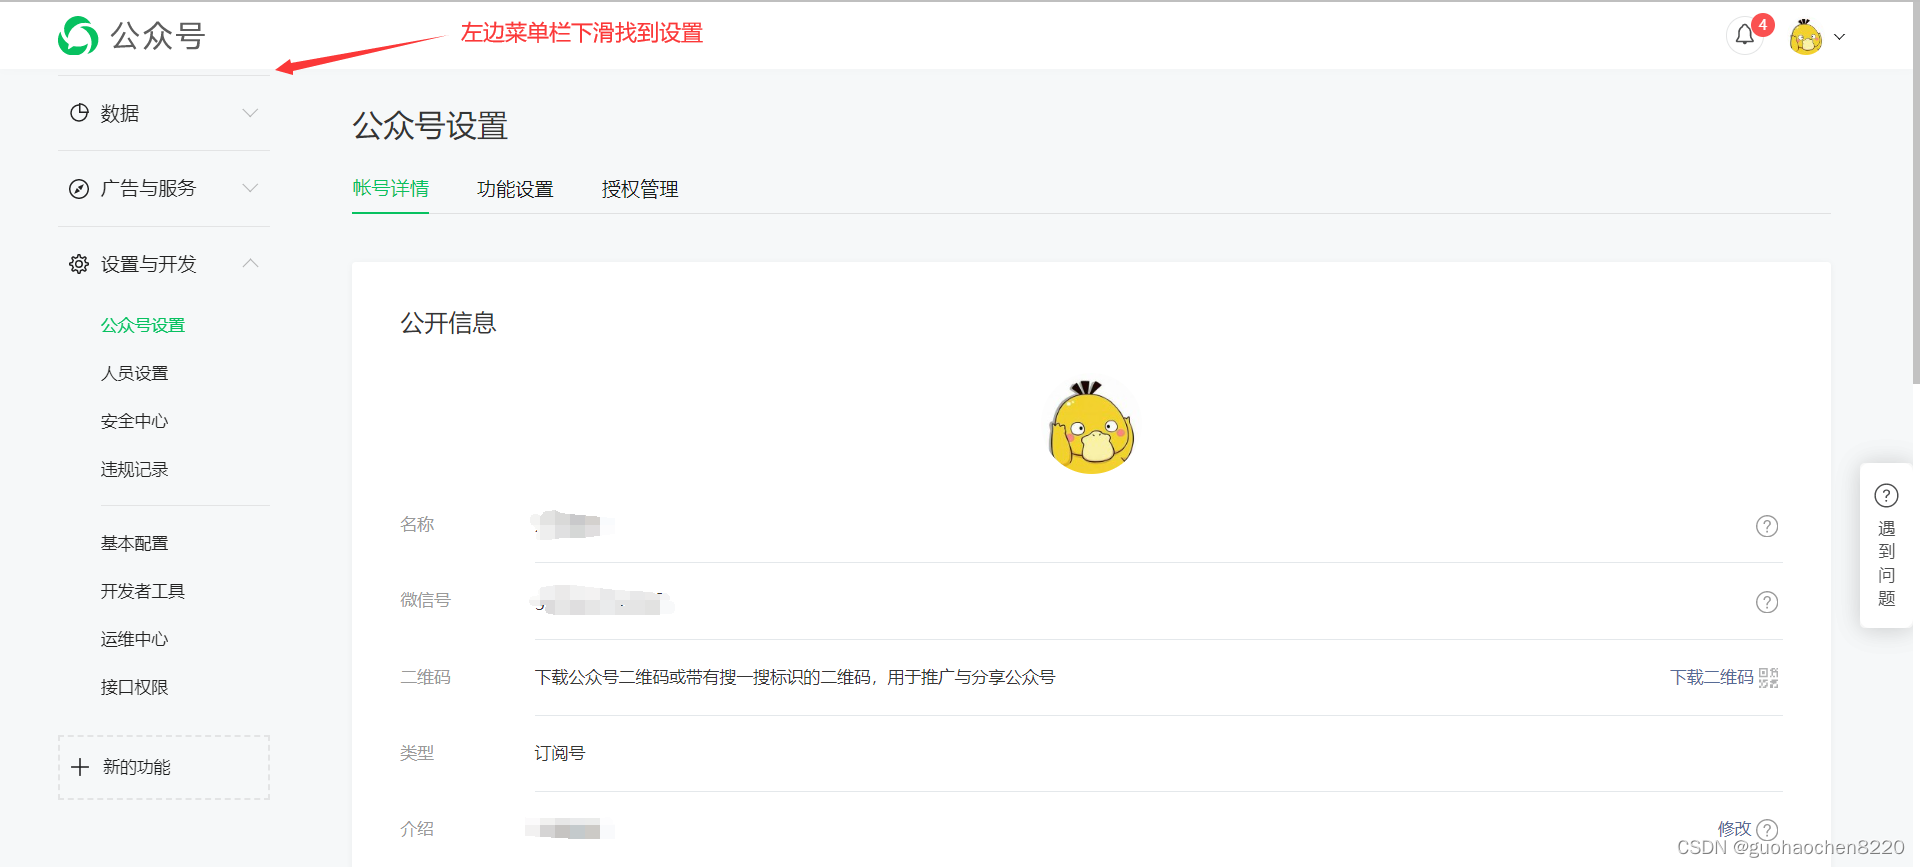
好了,接下来进入正题注册腾讯云并开通短信服务首先你要有一个👉微信公众号注册
注册比较简单就这里就不说了 我这里选的是订阅号
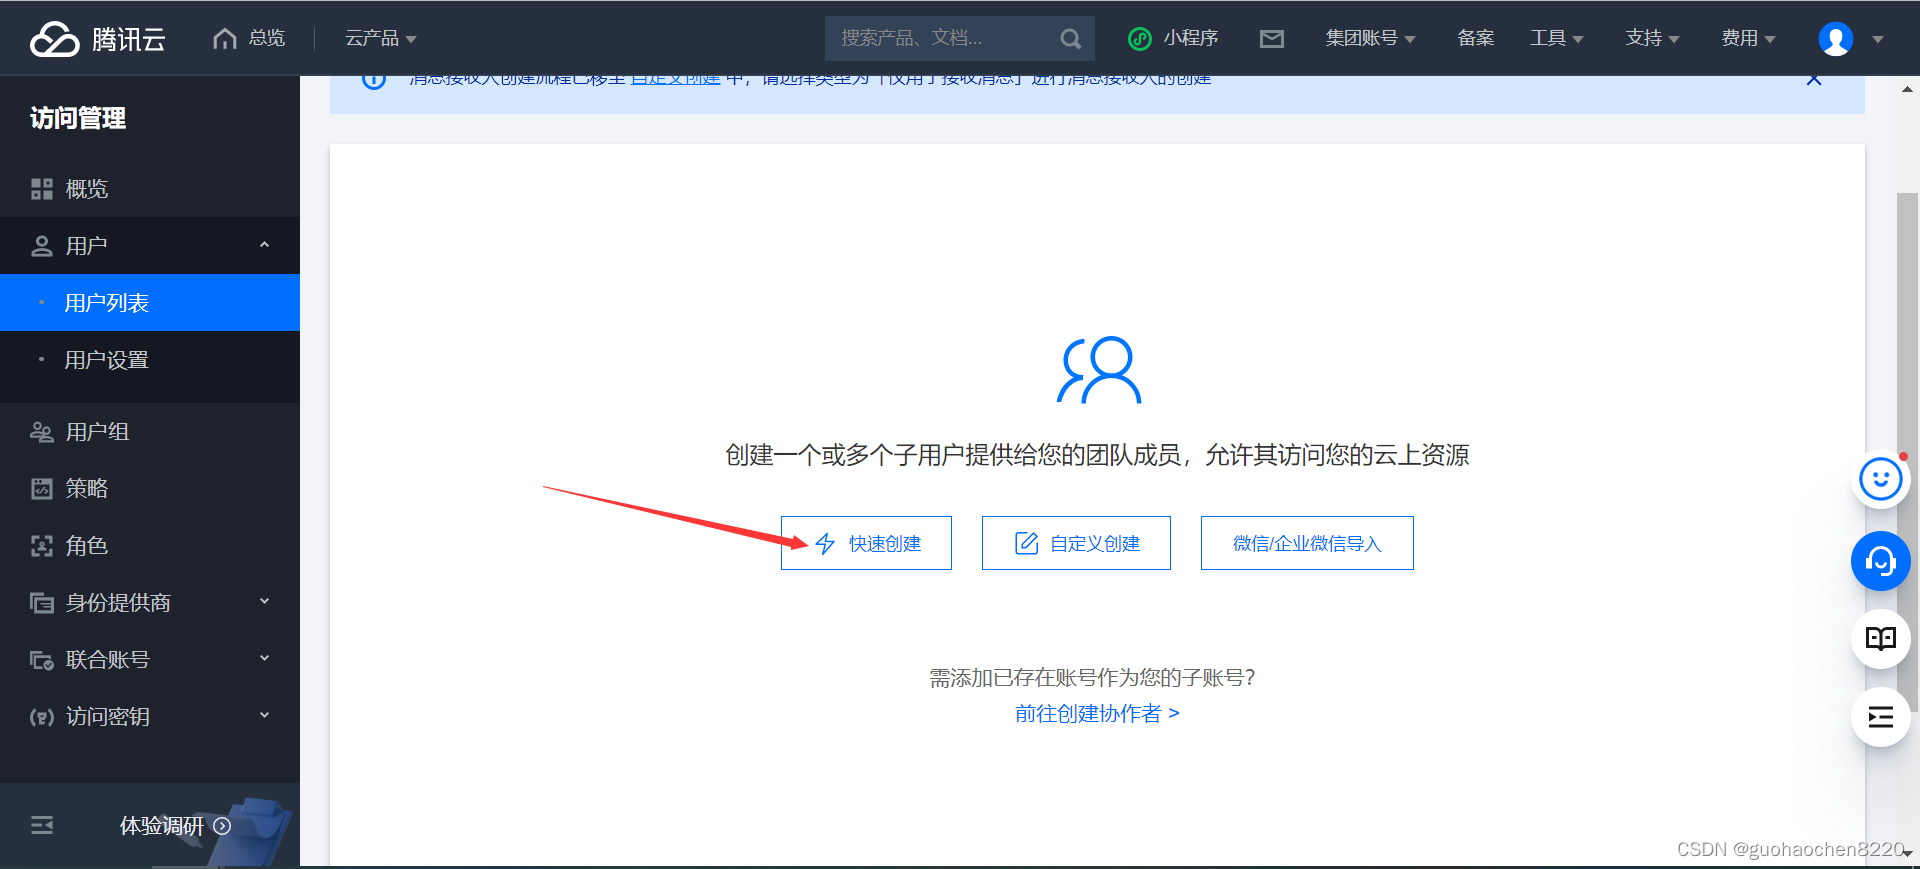
然后注册并登录腾讯云
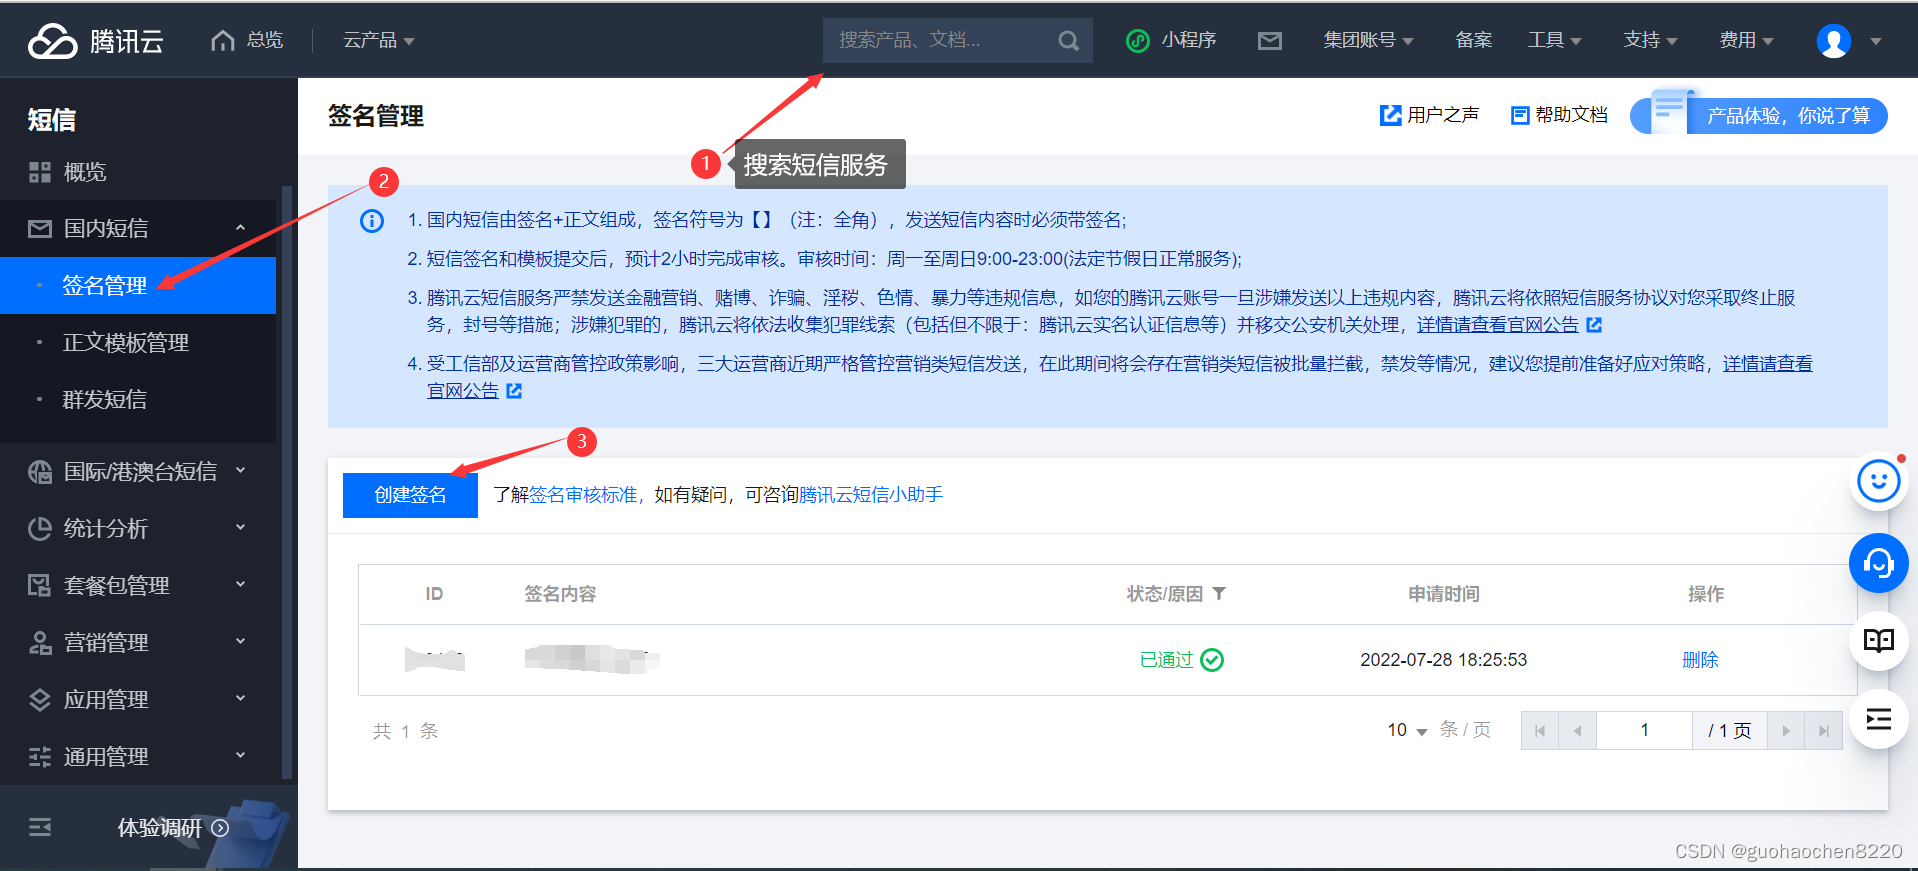
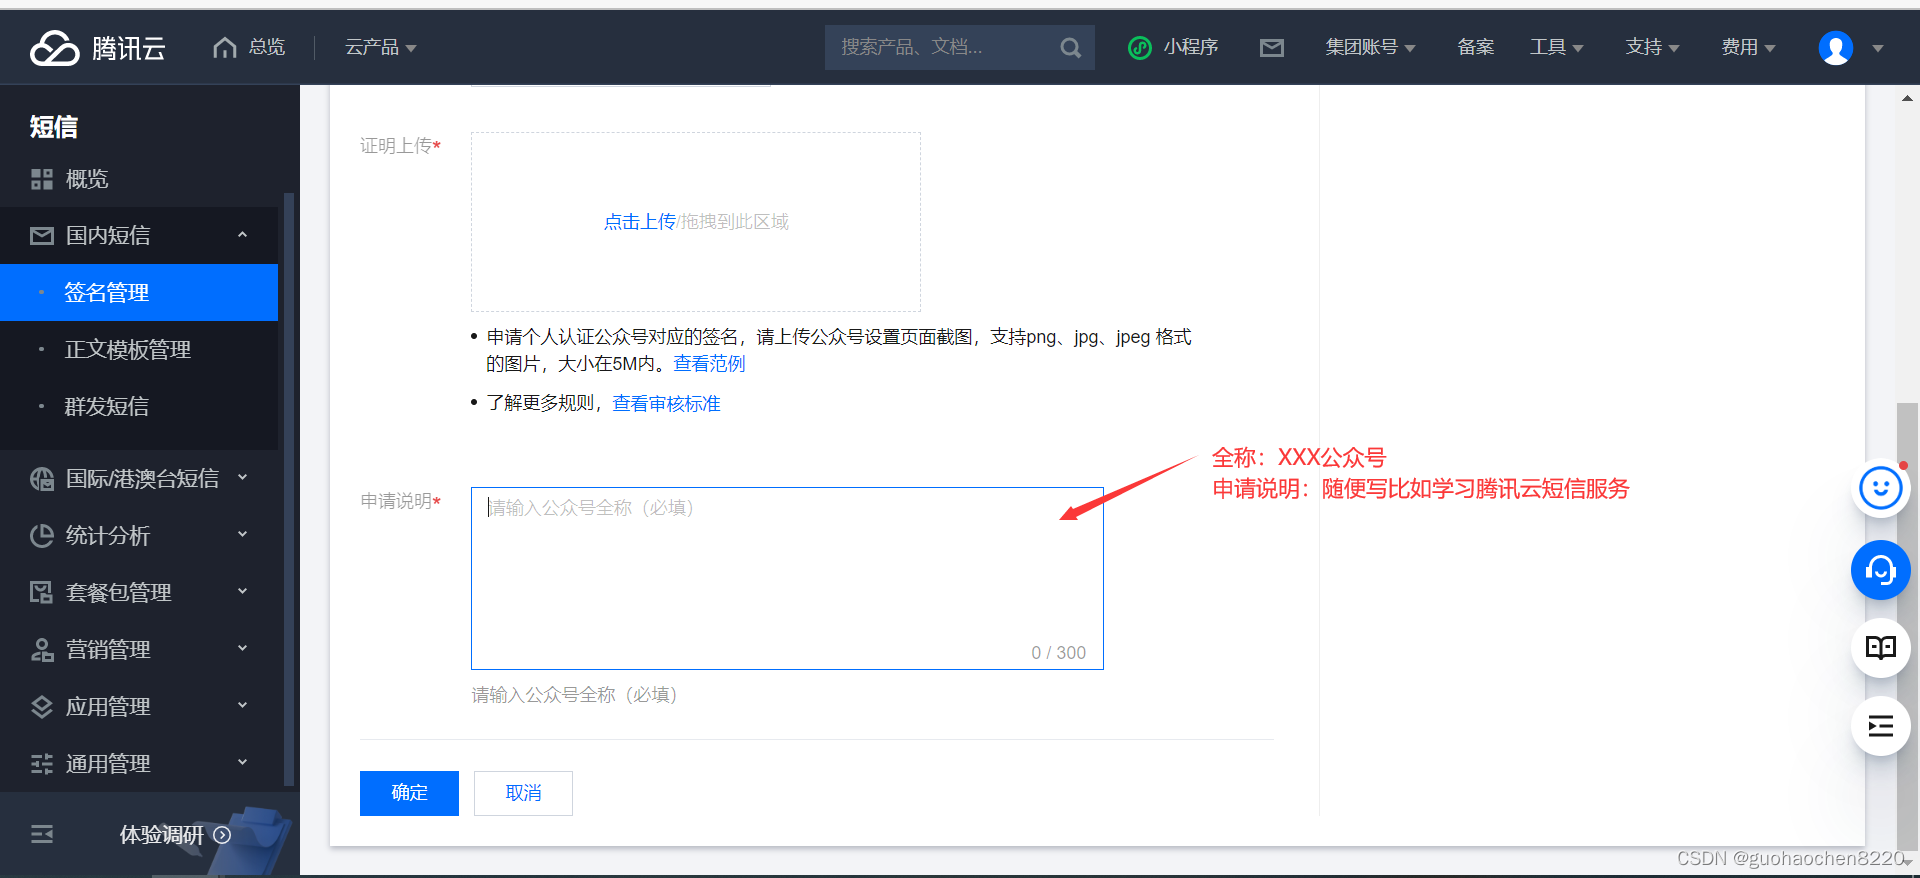
首先就是申请一个签名

下图是公众号后台截图
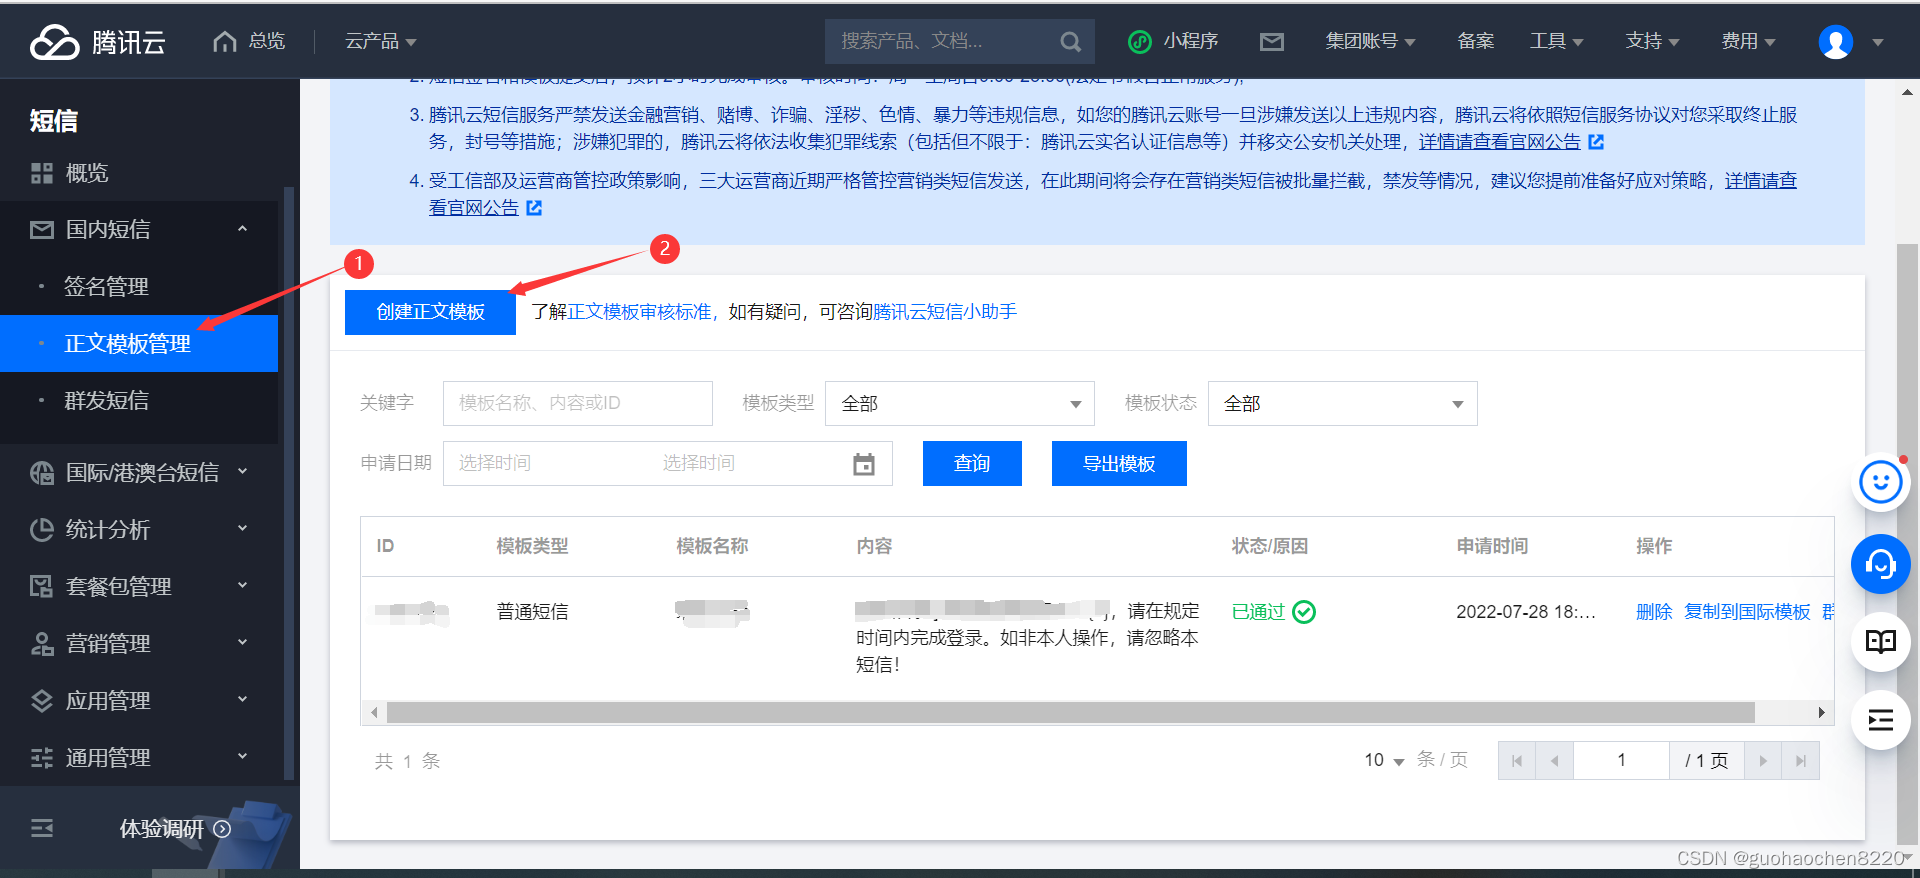
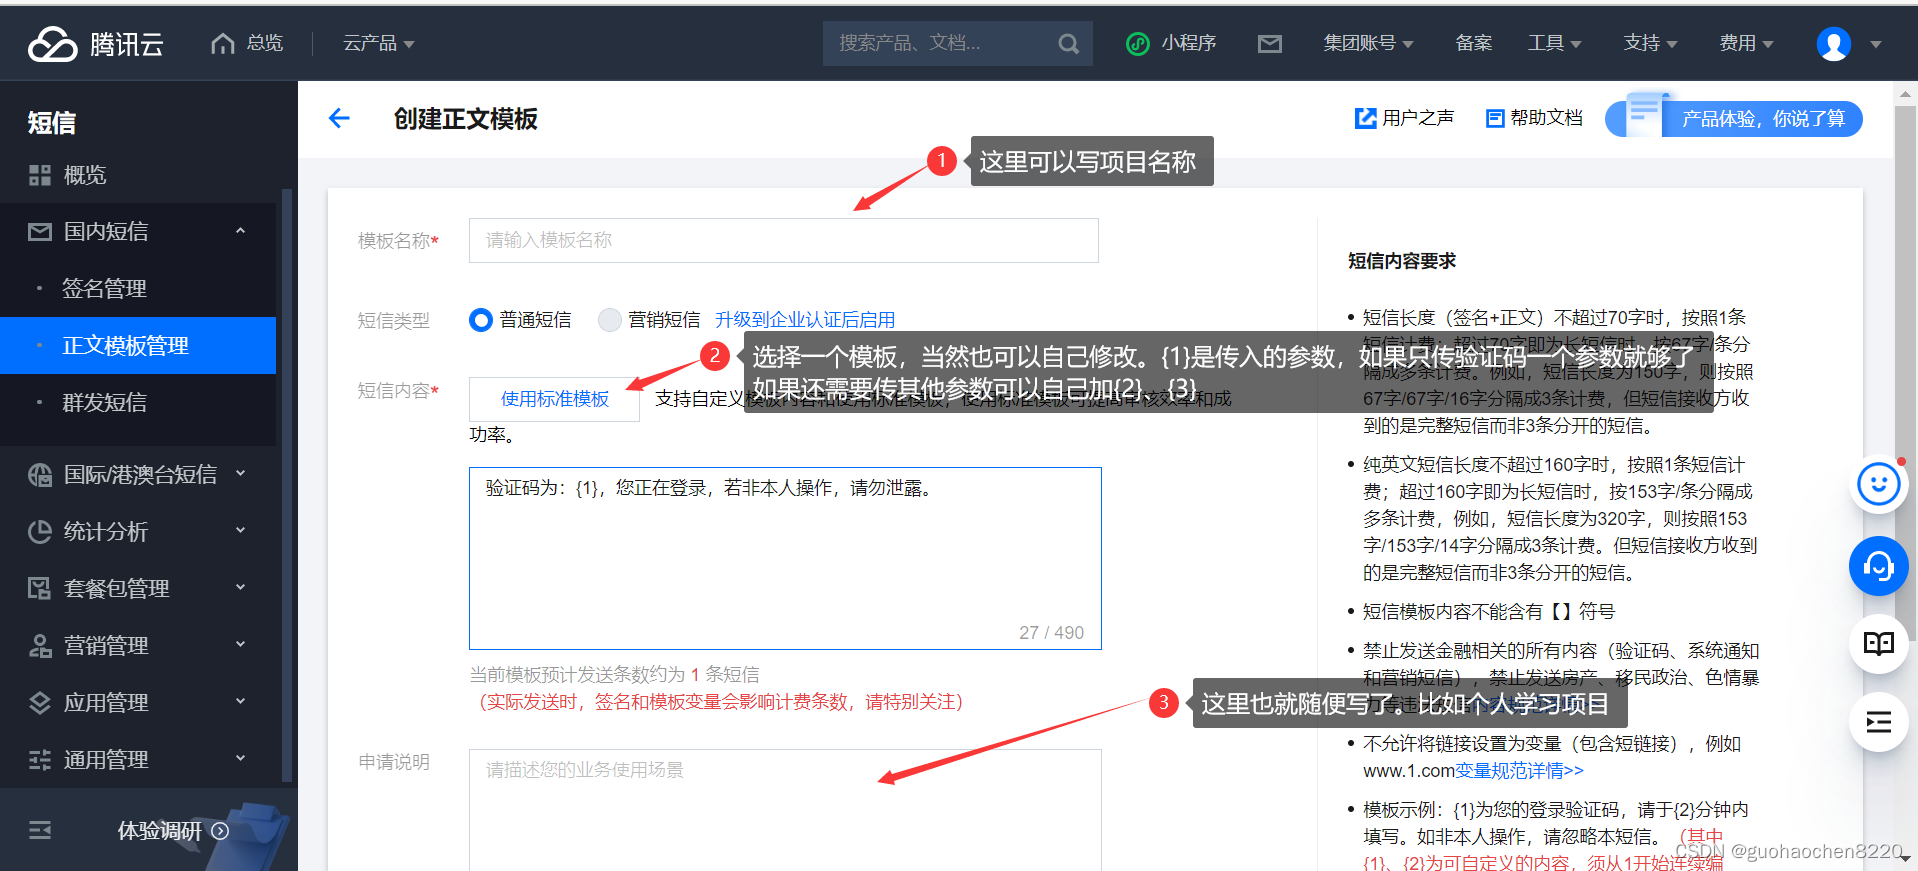
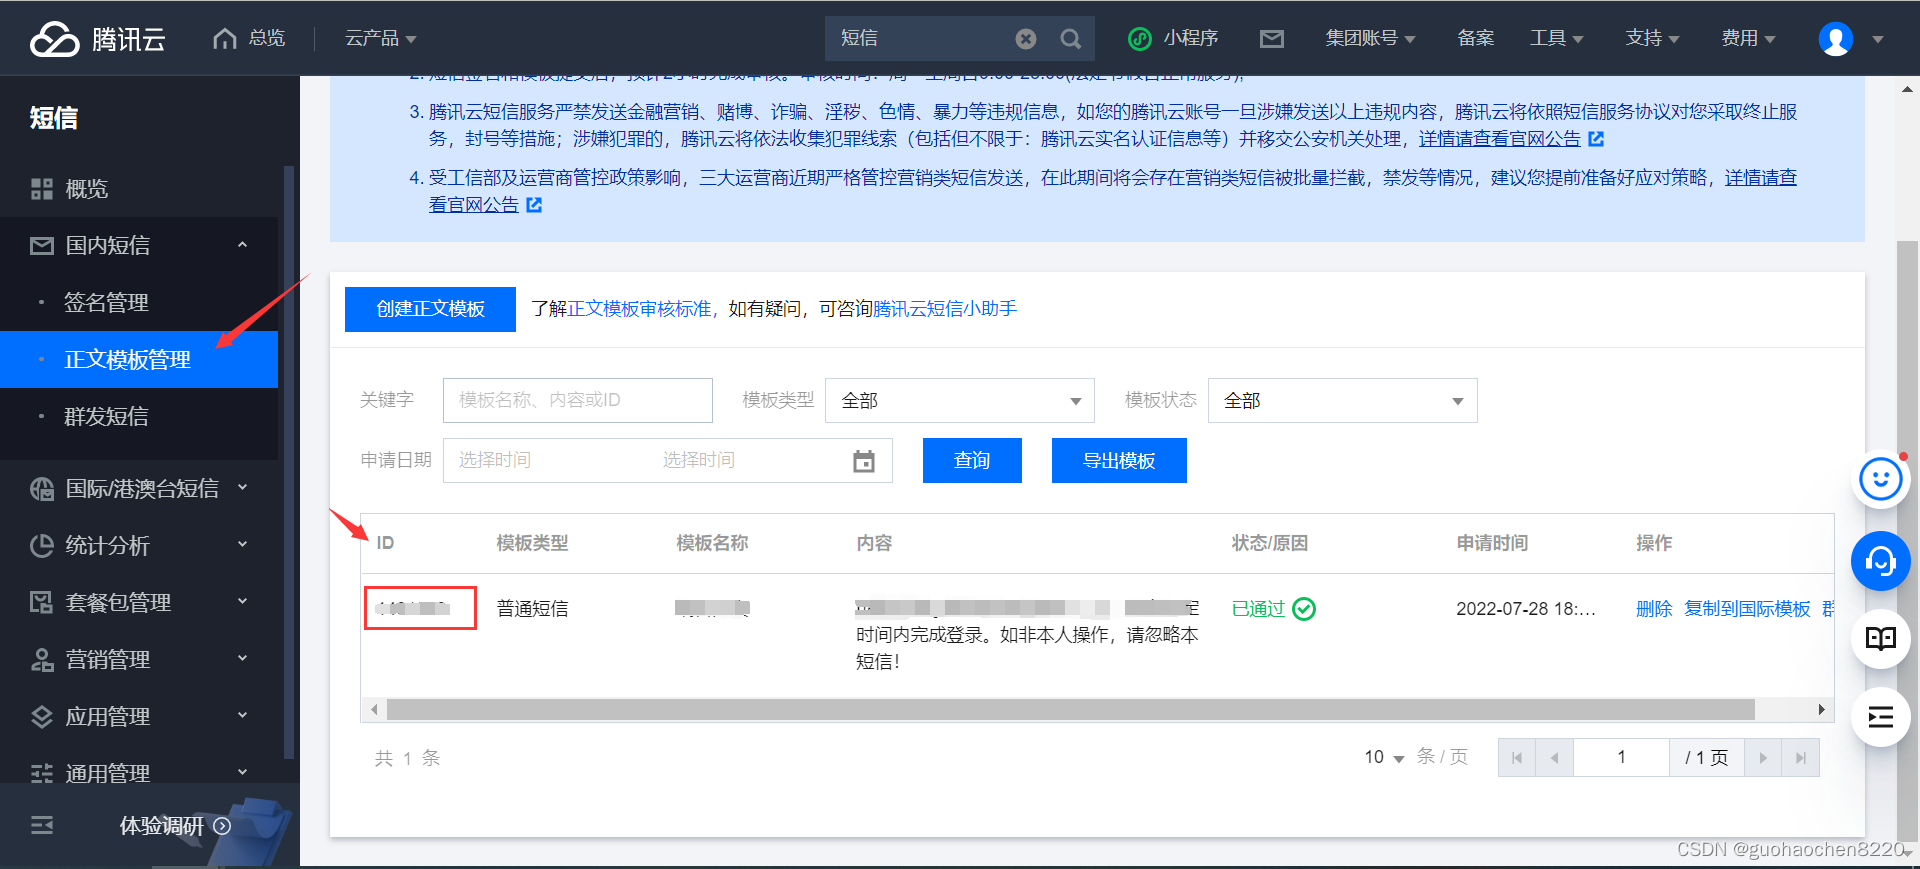
接下来就是申请模板
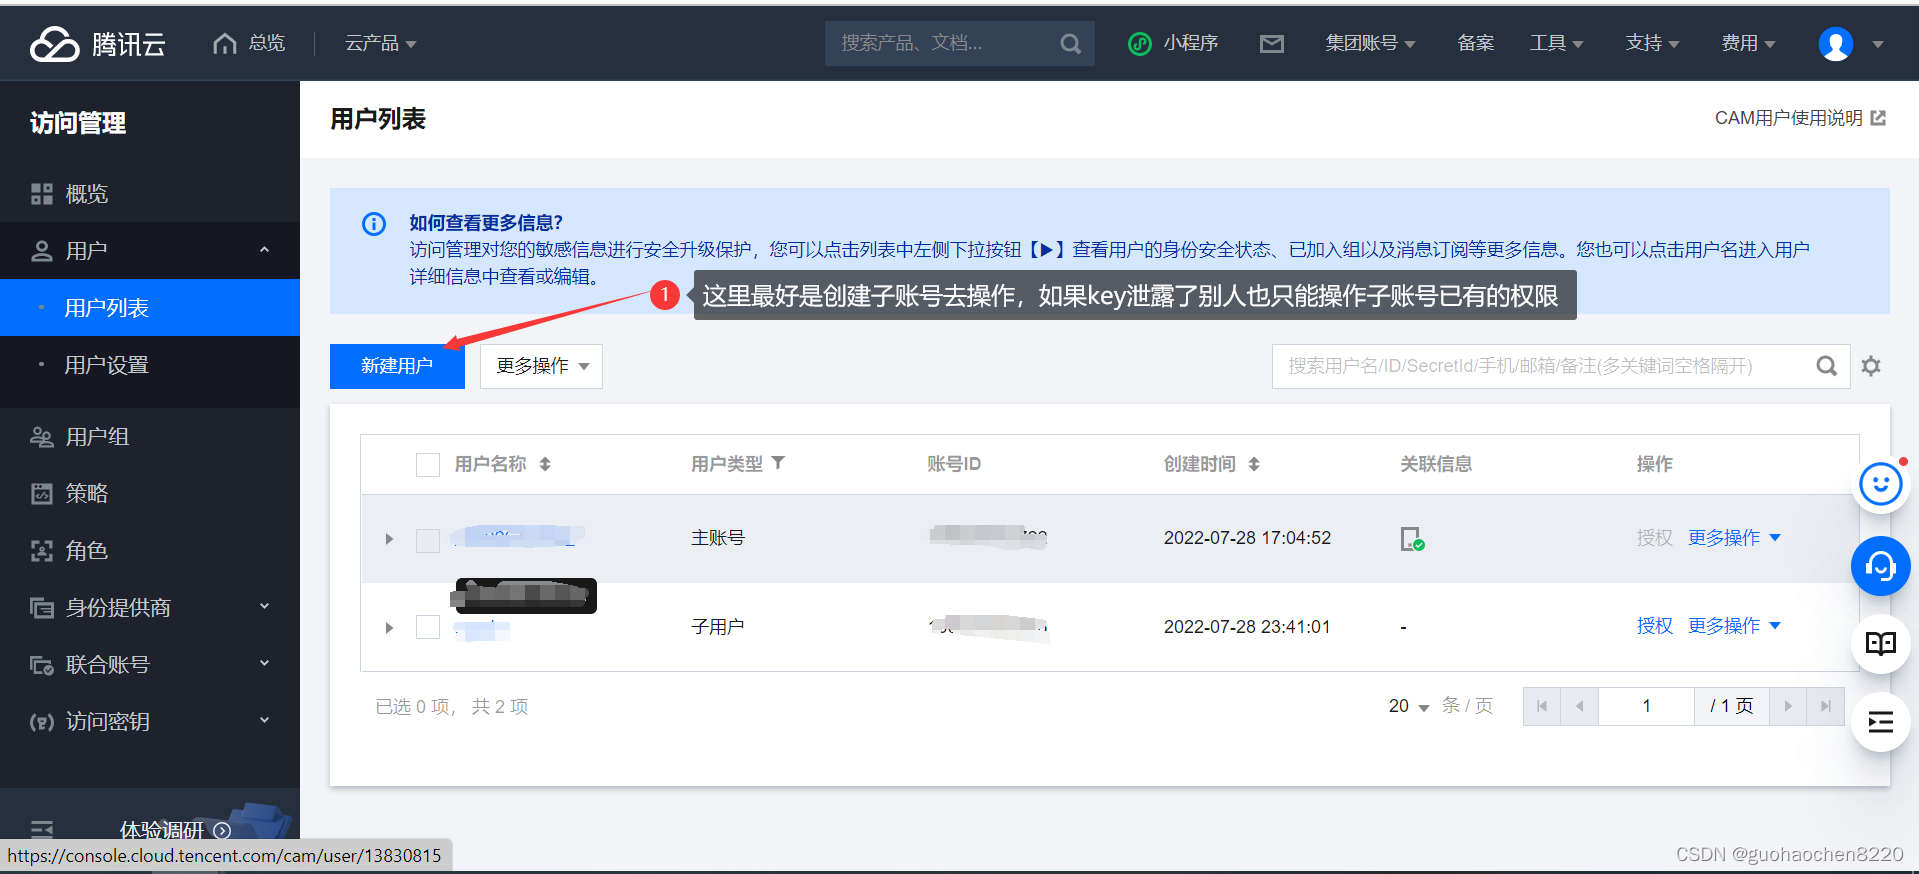
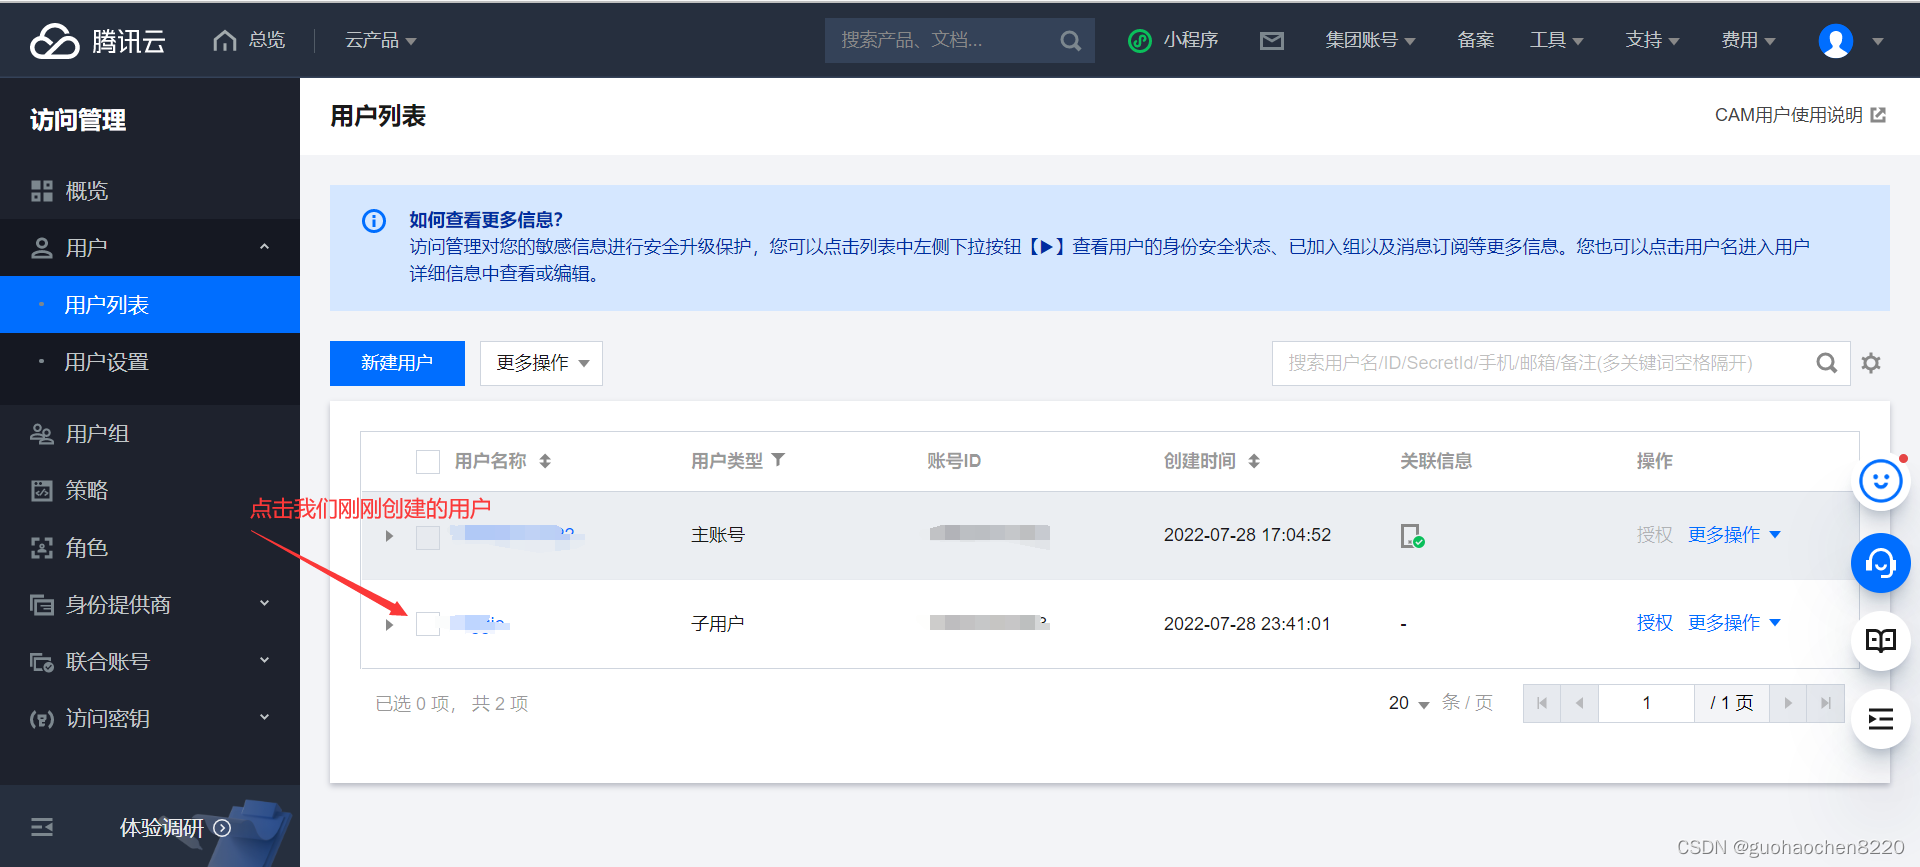
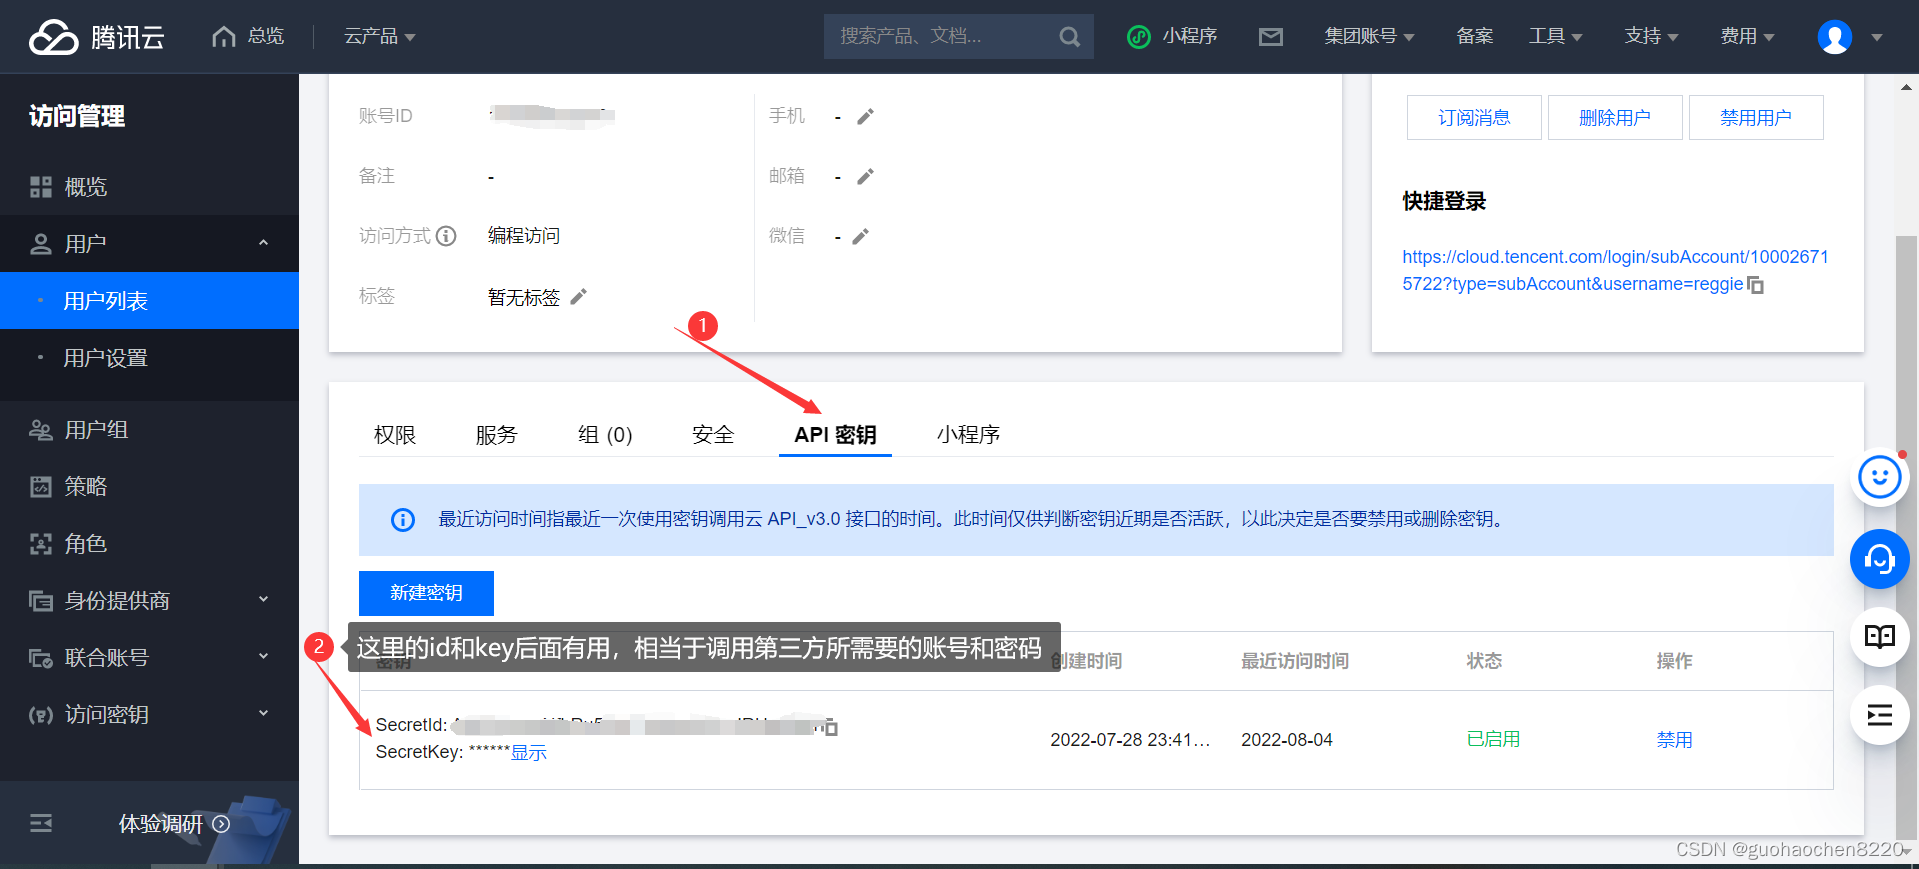
创建accesskey也可以说获取 “secretId” 和 “secretKey”


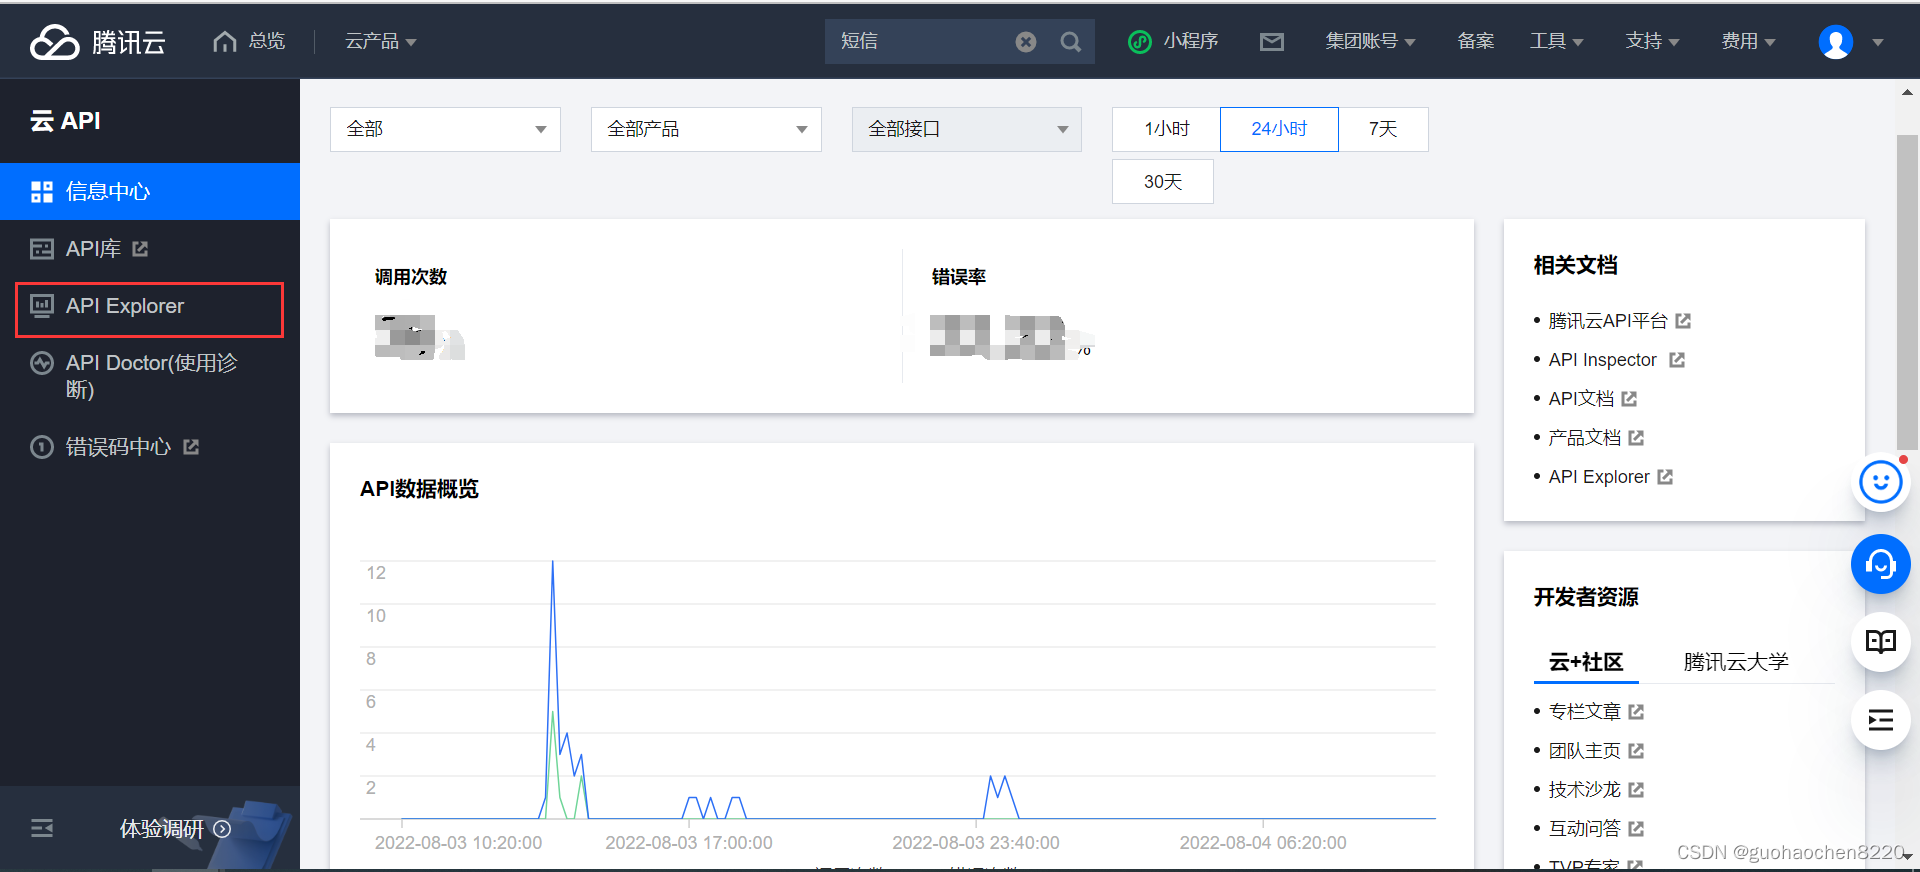
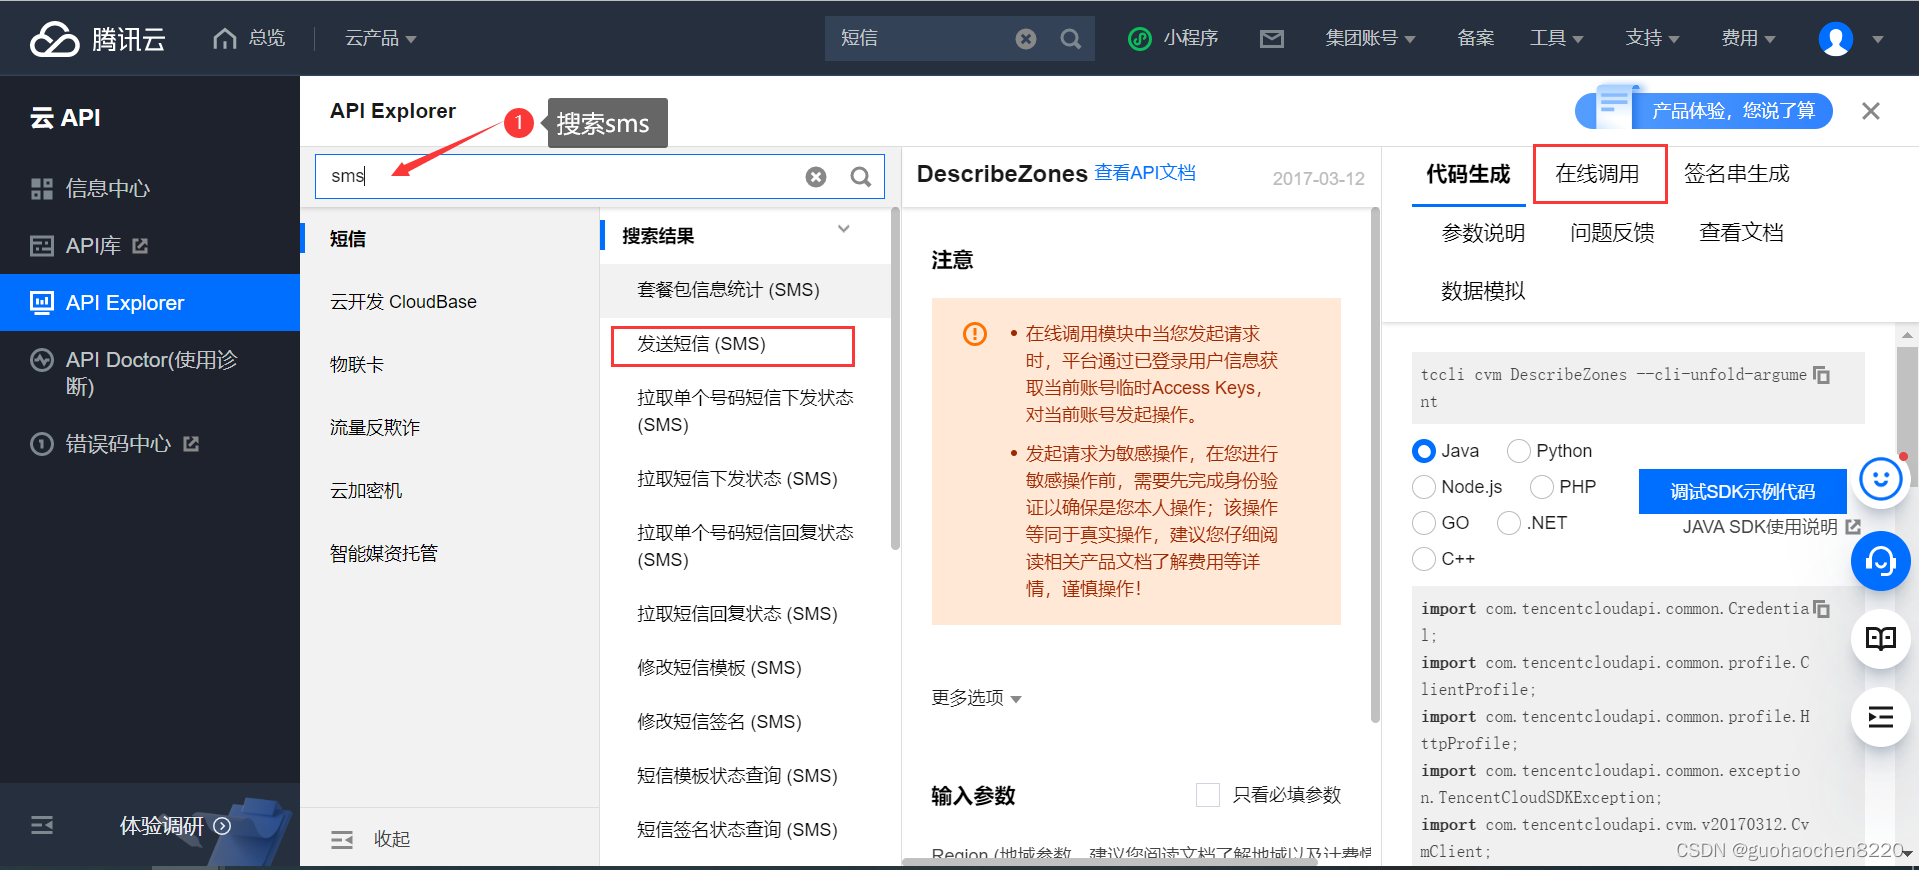
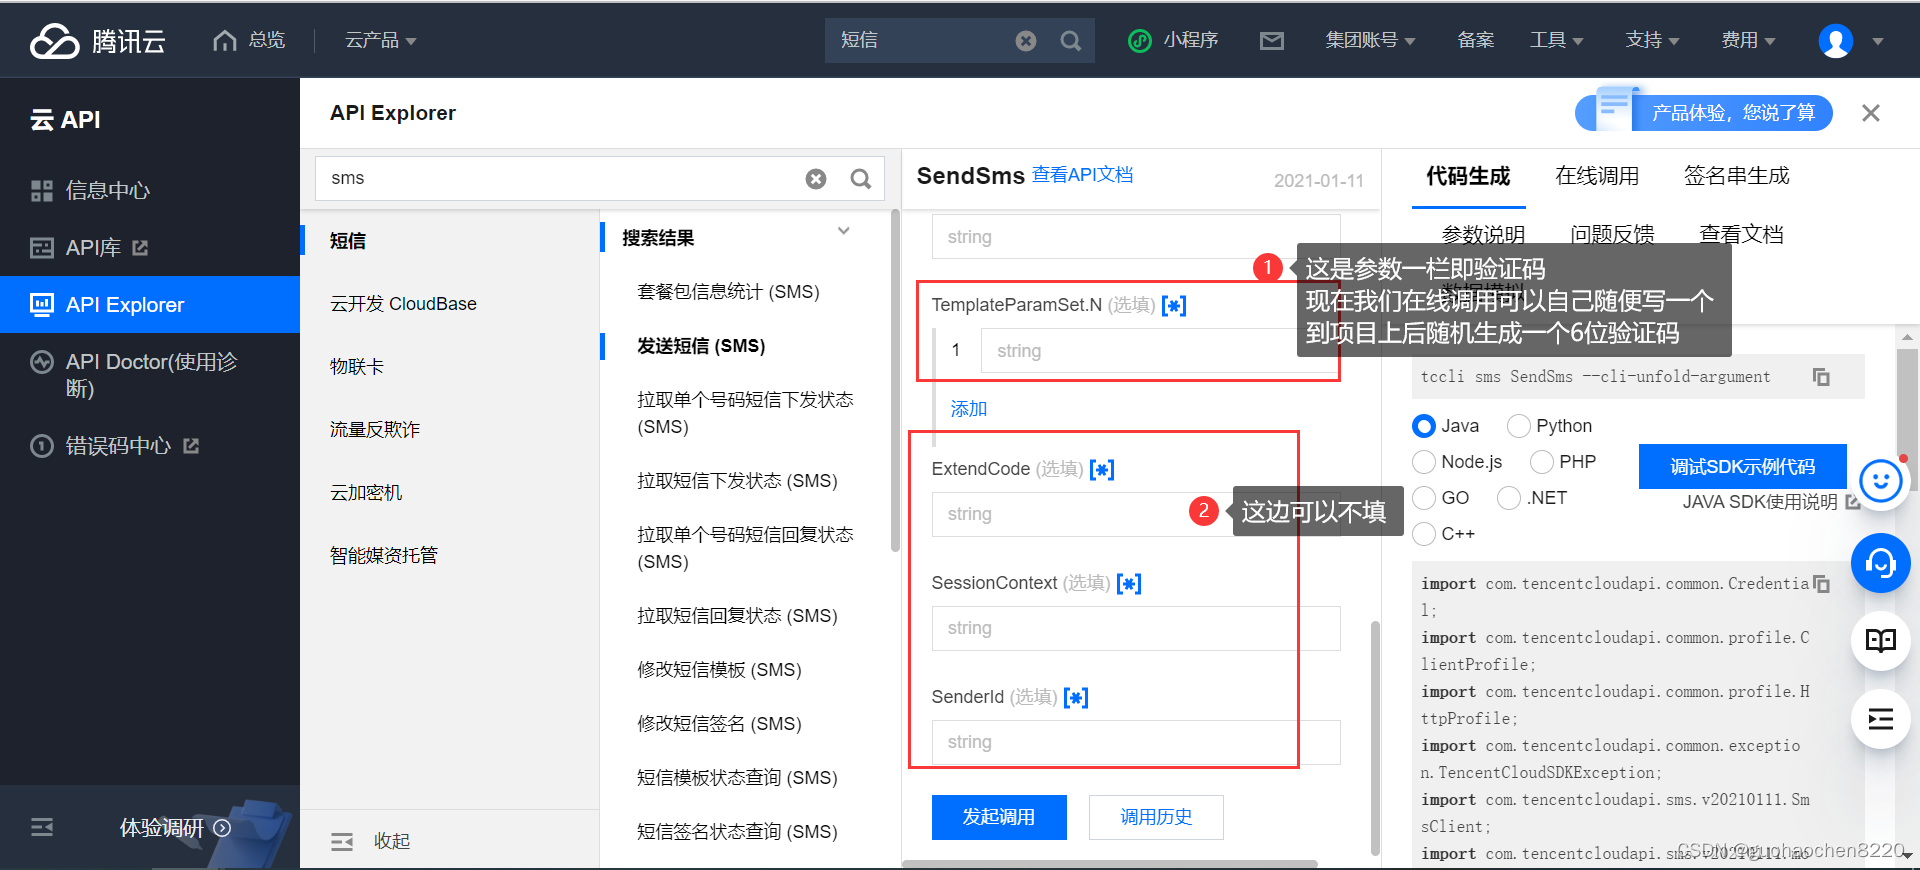
接下来我们试试在线调用是否可以跑通
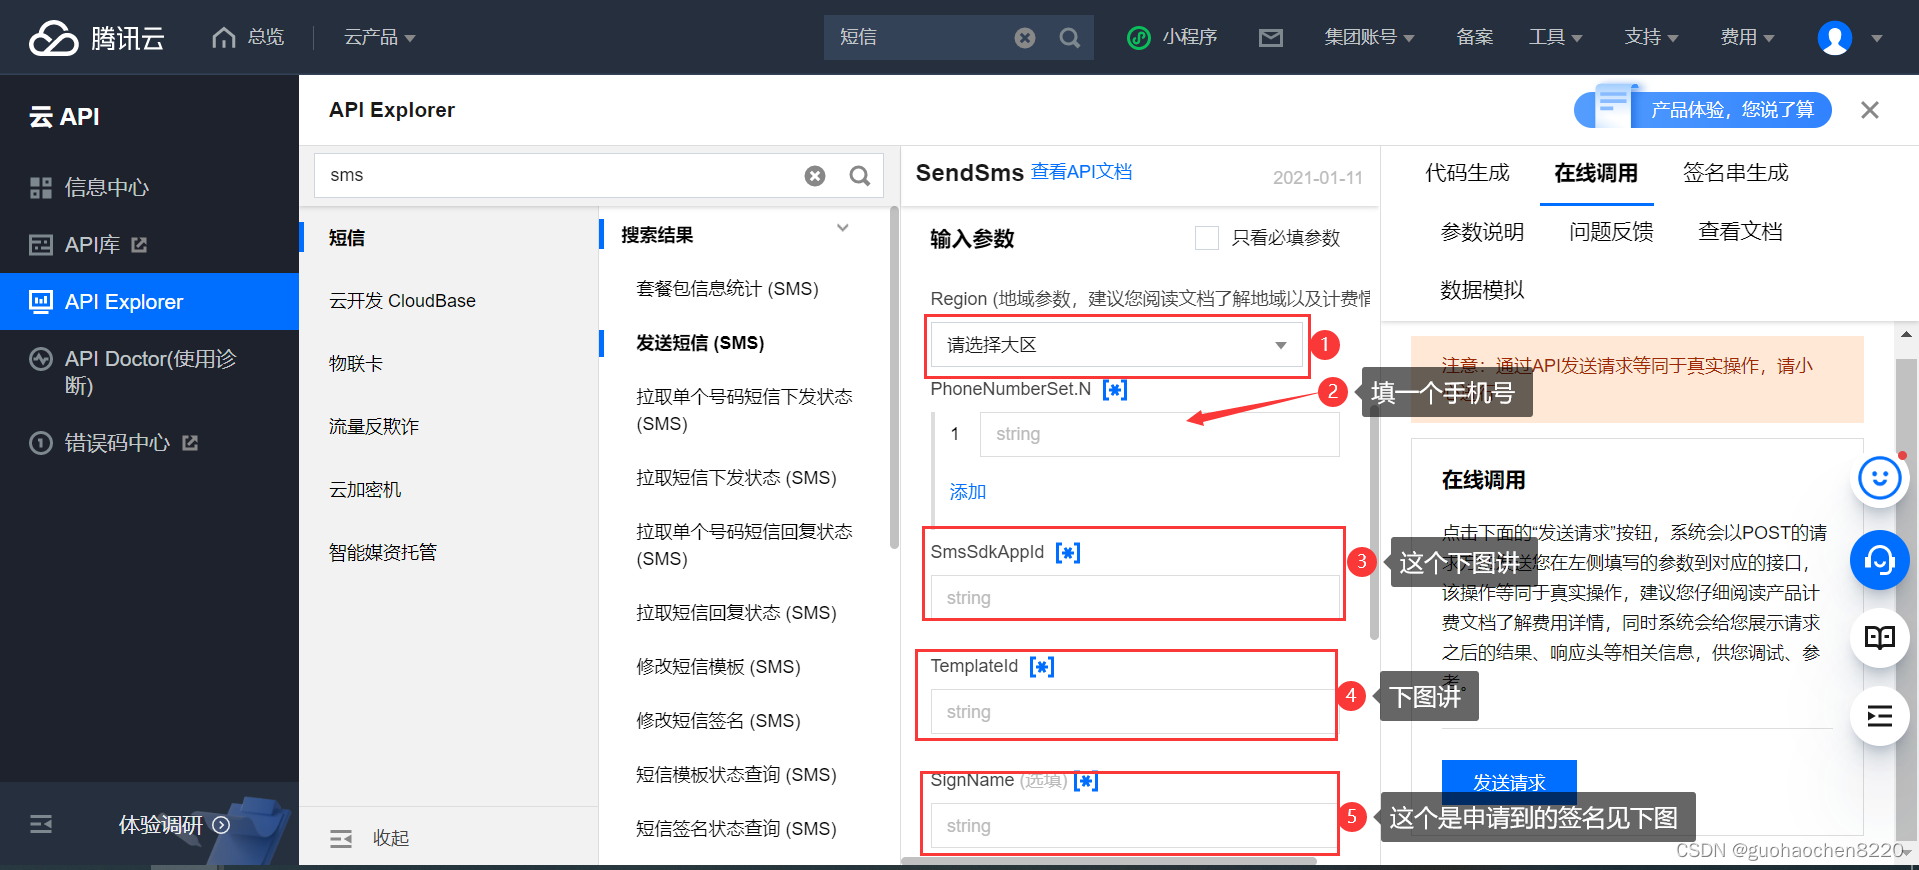
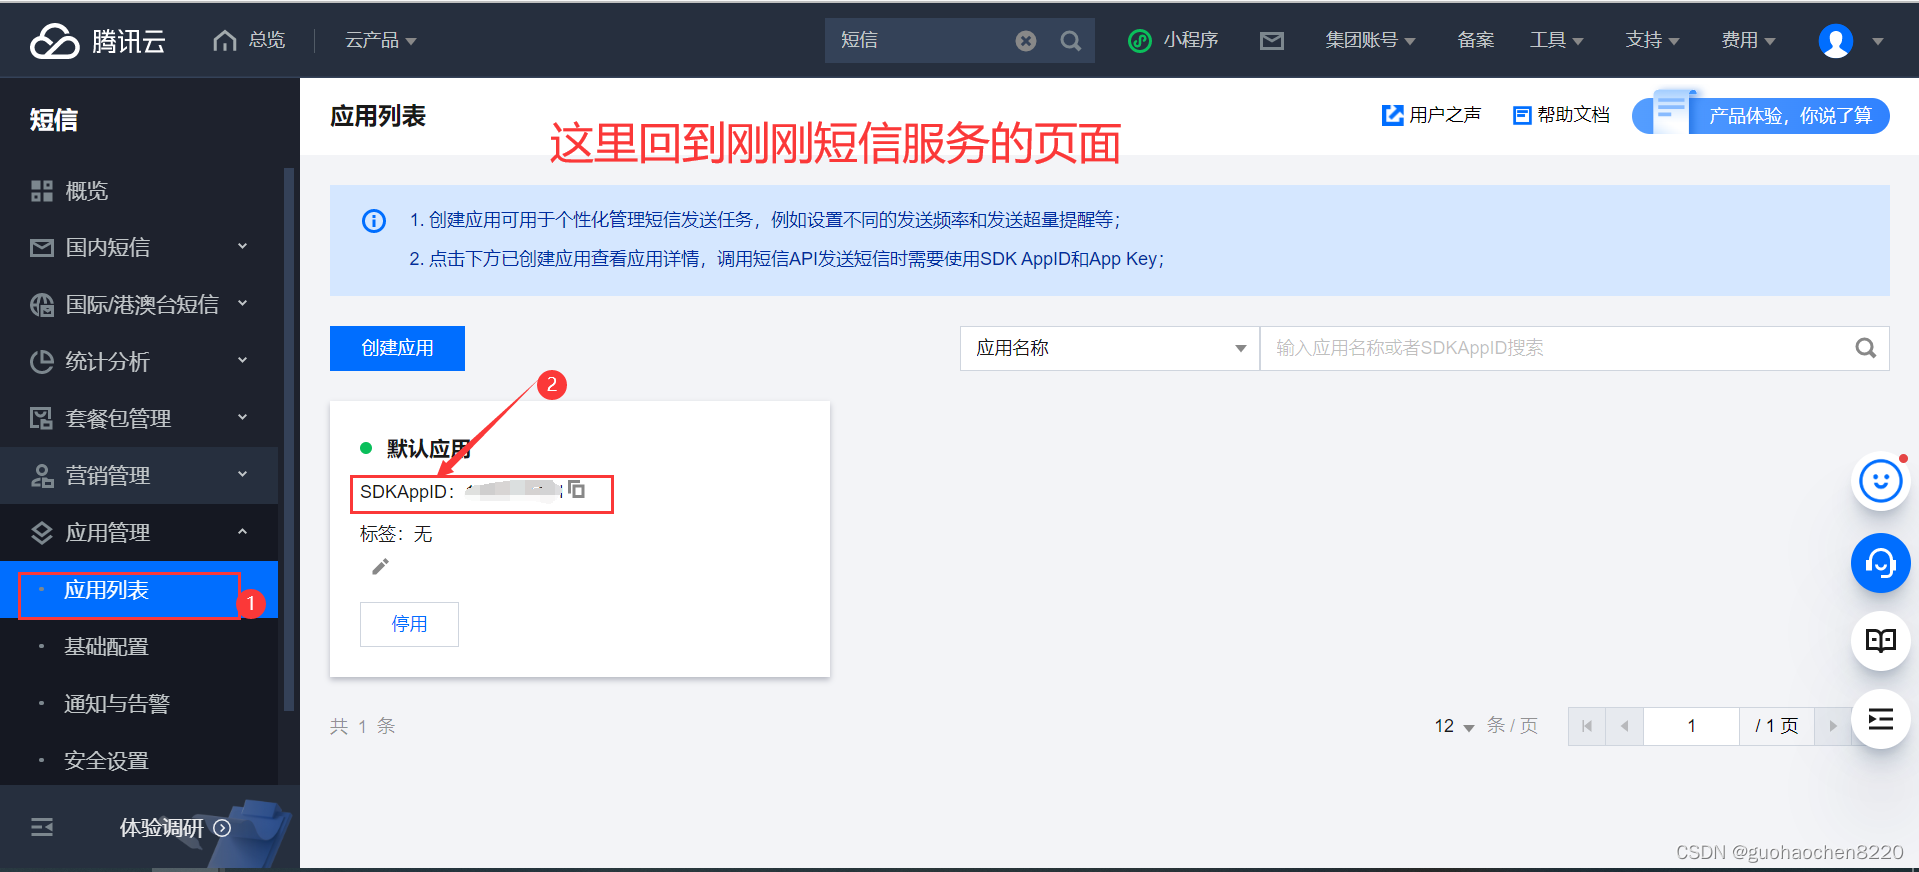
SmsSdkAppId
TemplateId
申请成功的模板id
接下来是我的
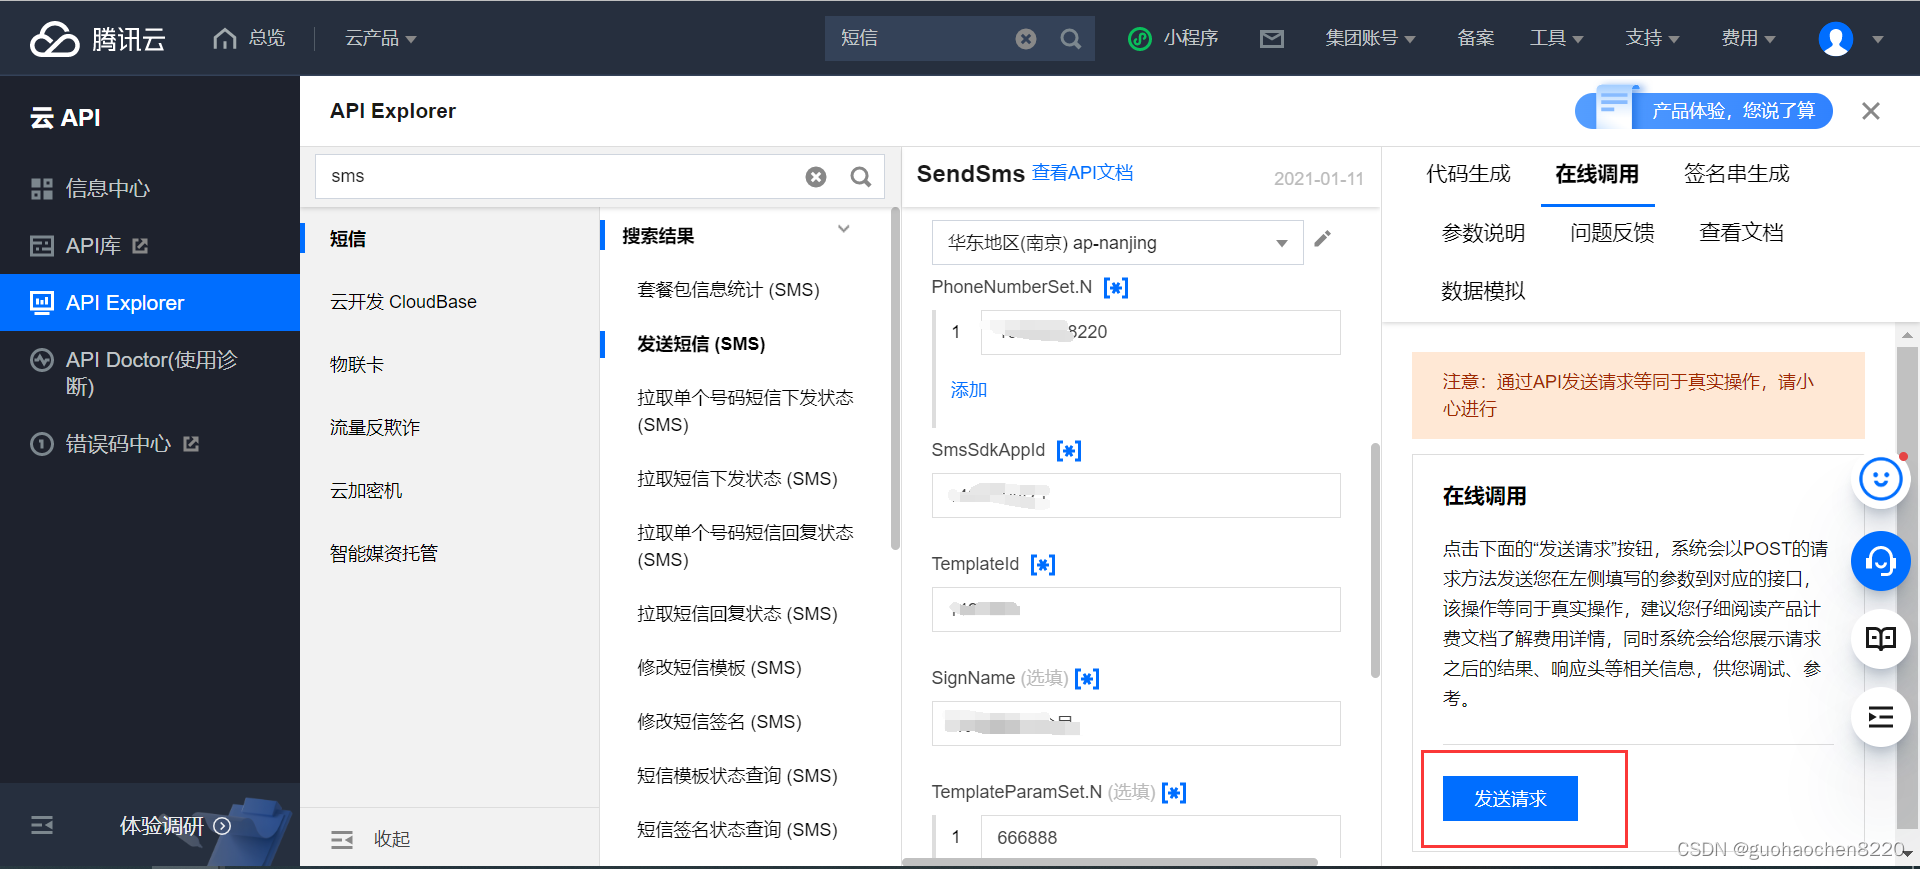
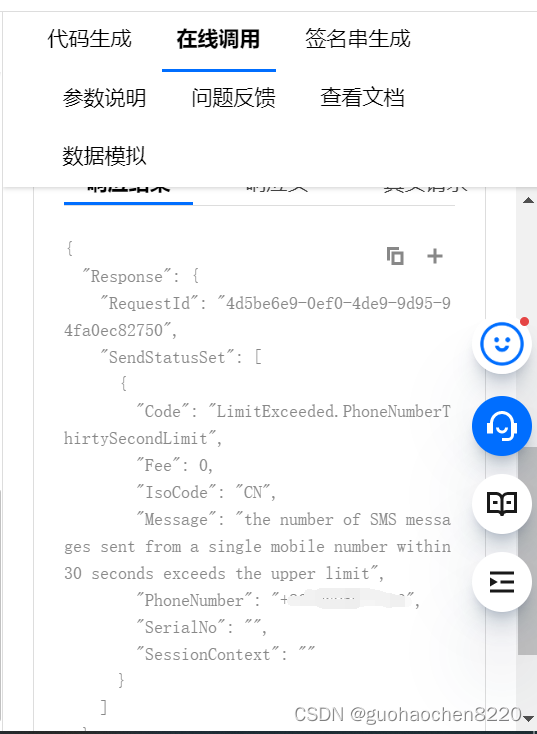
ok调用成功
接下来进入正题放到项目里
首先准备几个工具类
生成验证码
package com.ghc.reggie.tencentSMSUtils; //这里记得导自己的包
import java.text.DecimalFormat;
import java.util.Random;
public class RamdomUtils {

    private static final Random random = new Random();
    //我定义的验证码位数是6位
    private static final DecimalFormat sixdf = new DecimalFormat("000000");

    public static String getSixBitRandom() {
        return sixdf.format(random.nextInt(1000000));
    }
}
封装连接参数,以及调用tencentCloud的属性
package com.ghc.reggie.tencentSMSUtils;
import org.springframework.beans.factory.InitializingBean;
import org.springframework.beans.factory.annotation.Value;
import org.springframework.boot.context.properties.ConfigurationProperties;
import org.springframework.context.annotation.PropertySource;
import org.springframework.stereotype.Component;
包路径自己更改一下
//实现了InitializingBean接口,当spring进行初始化bean时,会执行afterPropertiesSet方法
@Component
@PropertySource("classpath:application.yml")
@ConfigurationProperties(prefix = "tencent.msm")
public class MsmConstantUtils implements InitializingBean {

    @Value("${id}")
    private String secretID ;

    @Value("${secret}")
    private String secretKey ;

    @Value("${endPoint}")
    private String endPoint;

    @Value("${appId}")
    private String appId;

//    @Value("${signName}")
//    private String signName;

    @Value("${templateId}")
    private String templateId;
    //六个相关的参数
    public static String SECRET_ID;
    public static String SECRET_KEY;
    public static String END_POINT;
    public static String APP_ID;
//    public static String SIGN_NAME;
    public static String TEMPLATE_ID;

    @Override
    public void afterPropertiesSet() throws Exception {
        SECRET_ID = secretID;
        SECRET_KEY = secretKey;
        END_POINT = endPoint;
        APP_ID = appId;
//        SIGN_NAME = signName;
        TEMPLATE_ID = templateId;
    }
}
yml配置文件
tencent:
      msm:
      id: secretId     换上自己的id和key
      secret: secretkey
      endPoint: sms.tencentcloudapi.com
      appId: SmsSdkAppId
      signName: 公众号名
      templateId: 模板id
然后把这些属性封装到一个工具类,并将属性注入spring容器中
package com.ghc.reggie.tencentSMSUtils;
import org.springframework.beans.factory.InitializingBean;
import org.springframework.beans.factory.annotation.Value;
import org.springframework.boot.context.properties.ConfigurationProperties;
import org.springframework.context.annotation.PropertySource;
import org.springframework.stereotype.Component;

@Component
@PropertySource("classpath:application.yml")
@ConfigurationProperties(prefix = "tencent.msm")
public class MsmConstantUtils implements InitializingBean {

    @Value("${id}")
    private String secretID ;

    @Value("${secret}")
    private String secretKey ;

    @Value("${endPoint}")
    private String endPoint;

    @Value("${appId}")
    private String appId;

    @Value("${signName}")
    private String signName;

    @Value("${templateId}")
    private String templateId;
    //六个相关的参数
    public static String SECRET_ID;
    public static String SECRET_KEY;
    public static String END_POINT;
    public static String APP_ID;
    public static String SIGN_NAME;
    public static String TEMPLATE_ID;

    @Override
    public void afterPropertiesSet() throws Exception {
        SECRET_ID = secretID;
        SECRET_KEY = secretKey;
        END_POINT = endPoint;
        APP_ID = appId;
        SIGN_NAME = signName;
        TEMPLATE_ID = templateId;
    }
}
接下来是实现类,写发送短信的具体逻辑
@Service
@Slf4j
public class UserServiceImpl extends ServiceImpl<UserMapper, User> implements UserService{
    @Override
    public boolean send(String phone,String code) {
        try {
            //这里是实例化一个Credential,也就是认证对象,参数是密钥对;你要使用肯定要进行认证
            Credential credential = new Credential(MsmConstantUtils.SECRET_ID, MsmConstantUtils.SECRET_KEY);

            //HttpProfile这是http的配置文件操作,比如设置请求类型(post,get)或者设置超时时间了、还有指定域名了
            //最简单的就是实例化该对象即可,它的构造方法已经帮我们设置了一些默认的值
            HttpProfile httpProfile = new HttpProfile();

            httpProfile.setEndpoint(MsmConstantUtils.END_POINT);

            //实例化一个客户端配置对象,这个配置可以进行签名(使用私钥进行加密的过程),对方可以利用公钥进行解密
            ClientProfile clientProfile = new ClientProfile();
            clientProfile.setHttpProfile(httpProfile);

            //实例化要请求产品(以sms为例)的client对象
            SmsClient smsClient = new SmsClient(credential, "ap-nanjing", clientProfile);

            //实例化request封装请求信息
            SendSmsRequest request = new SendSmsRequest();
            String[] phoneNumber = {phone};
            request.setPhoneNumberSet(phoneNumber);     //设置手机号
            request.setSmsSdkAppid(MsmConstantUtils.APP_ID);
            request.setSign(MsmConstantUtils.SIGN_NAME);

            request.setTemplateID(MsmConstantUtils.TEMPLATE_ID);
            //生成随机验证码,我的模板内容的参数只有一个
            String[] templateParamSet = {code};
            request.setTemplateParamSet(templateParamSet);

            //发送短信
            SendSmsResponse response = smsClient.SendSms(request);
            log.info(SendSmsResponse.toJsonString(response));
            return true;
        } catch (Exception e) {
            return false;
        }
    }
}
控制器controller
@RestController
@ResponseBody
@RequestMapping("/user")
@Slf4j
public class UserController {
@PostMapping("/sendMsg")
    public R<String> send(@RequestBody User user, HttpSession Session) {
        //获取手机号
        String phone=user.getPhone();

        //生成随机的六位验证码
        if (StringUtils.isNotEmpty(phone)){
            String code = RamdomUtils.getSixBitRandom().toString();
            log.info("验证码 code{}",code);

            //调用腾讯云的API实现发送短信
            boolean result = userService.send(phone,code);

            if (result){
                //将生成的验证码保存导Session中
                Session.setAttribute(phone,code);
                return R.success("短信发送成功");
            }
            }
        return R.error("短信发送失败");
    }
    }
ok完成了,去前端调用试试
debug模式,在UserServiceImpl的send方法里打个断点

接下来点击获取跳进断点
第一次没仔细看,看了大概最后跳到true就直接放过了,结果等了好一会验证码还没过来,发现不对了。于是细看了一次里面的参数,发现!!!
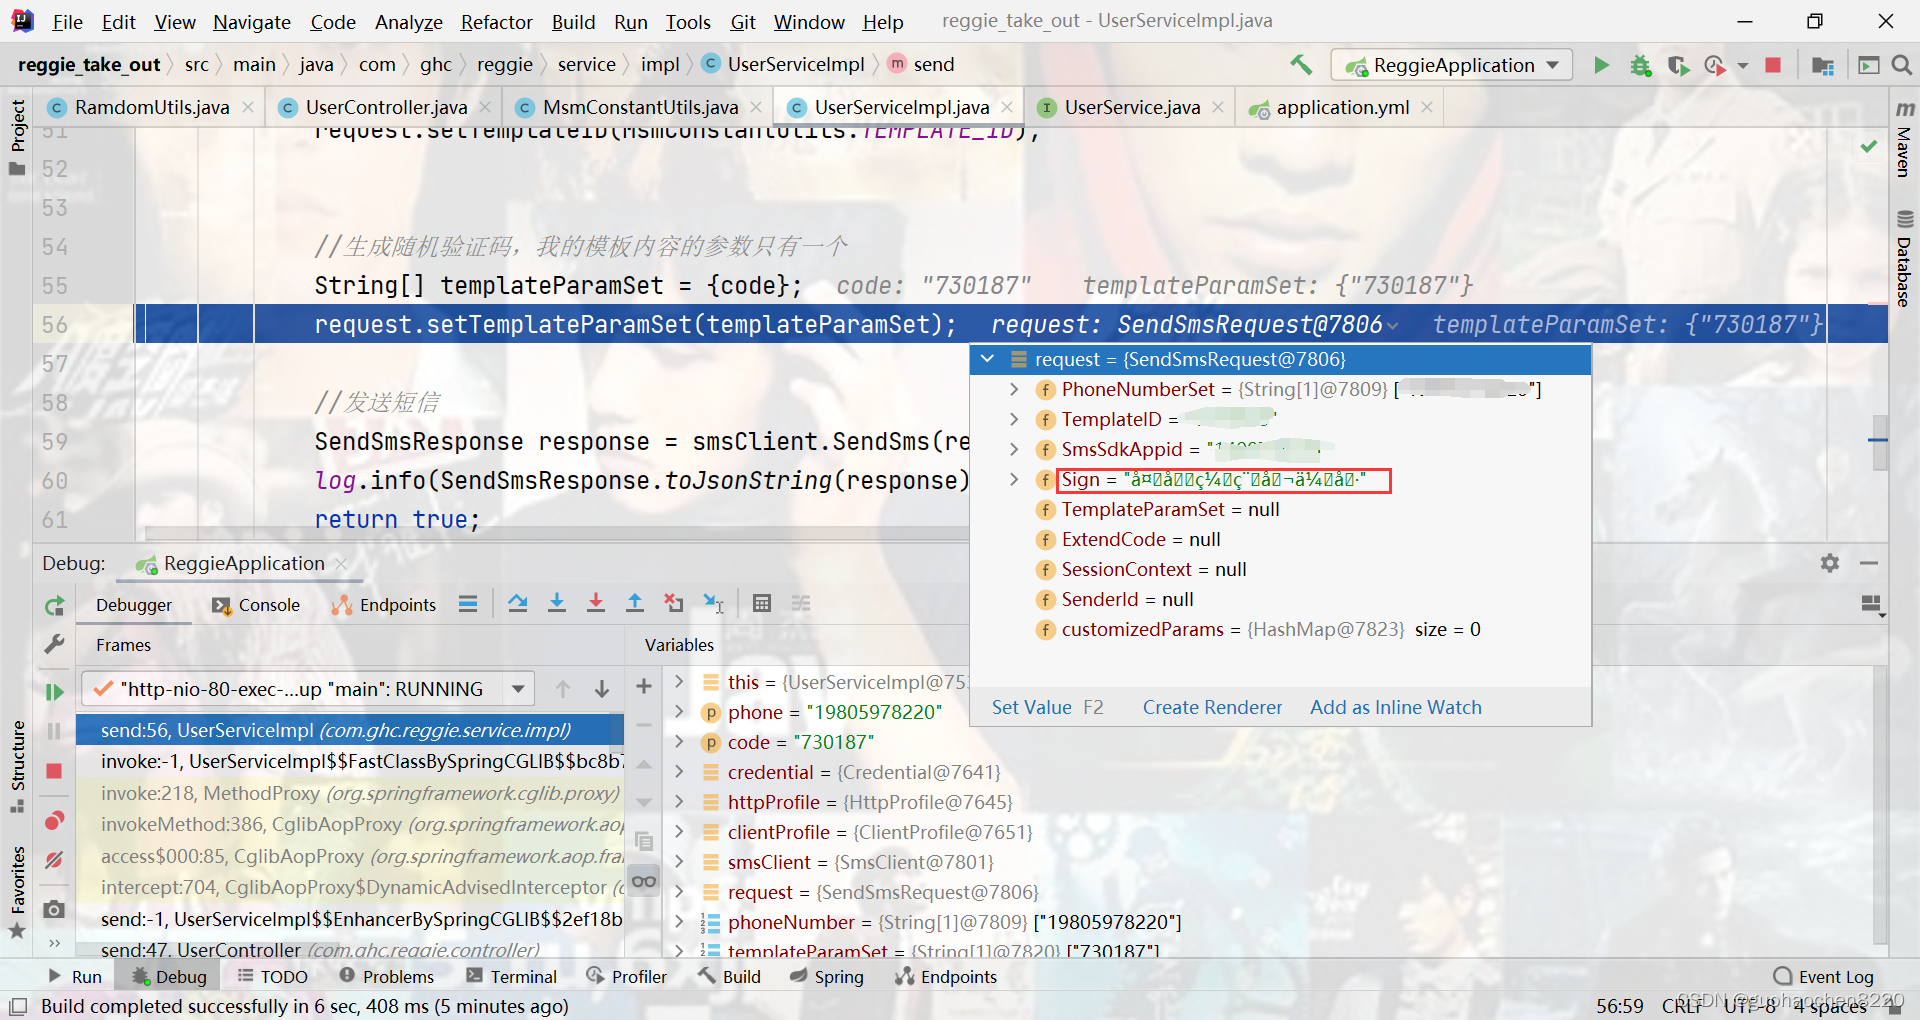
传入的参数签名内容乱码了,因为yml文件编码格式我已经设成utf-8了,所以配置文件没有乱码,但是最为请求参数传入调用第三方时乱码了。后来想了想,这本身申请的签名内容就是个定值,索性在send方法里直接写死,不通过spring注入。
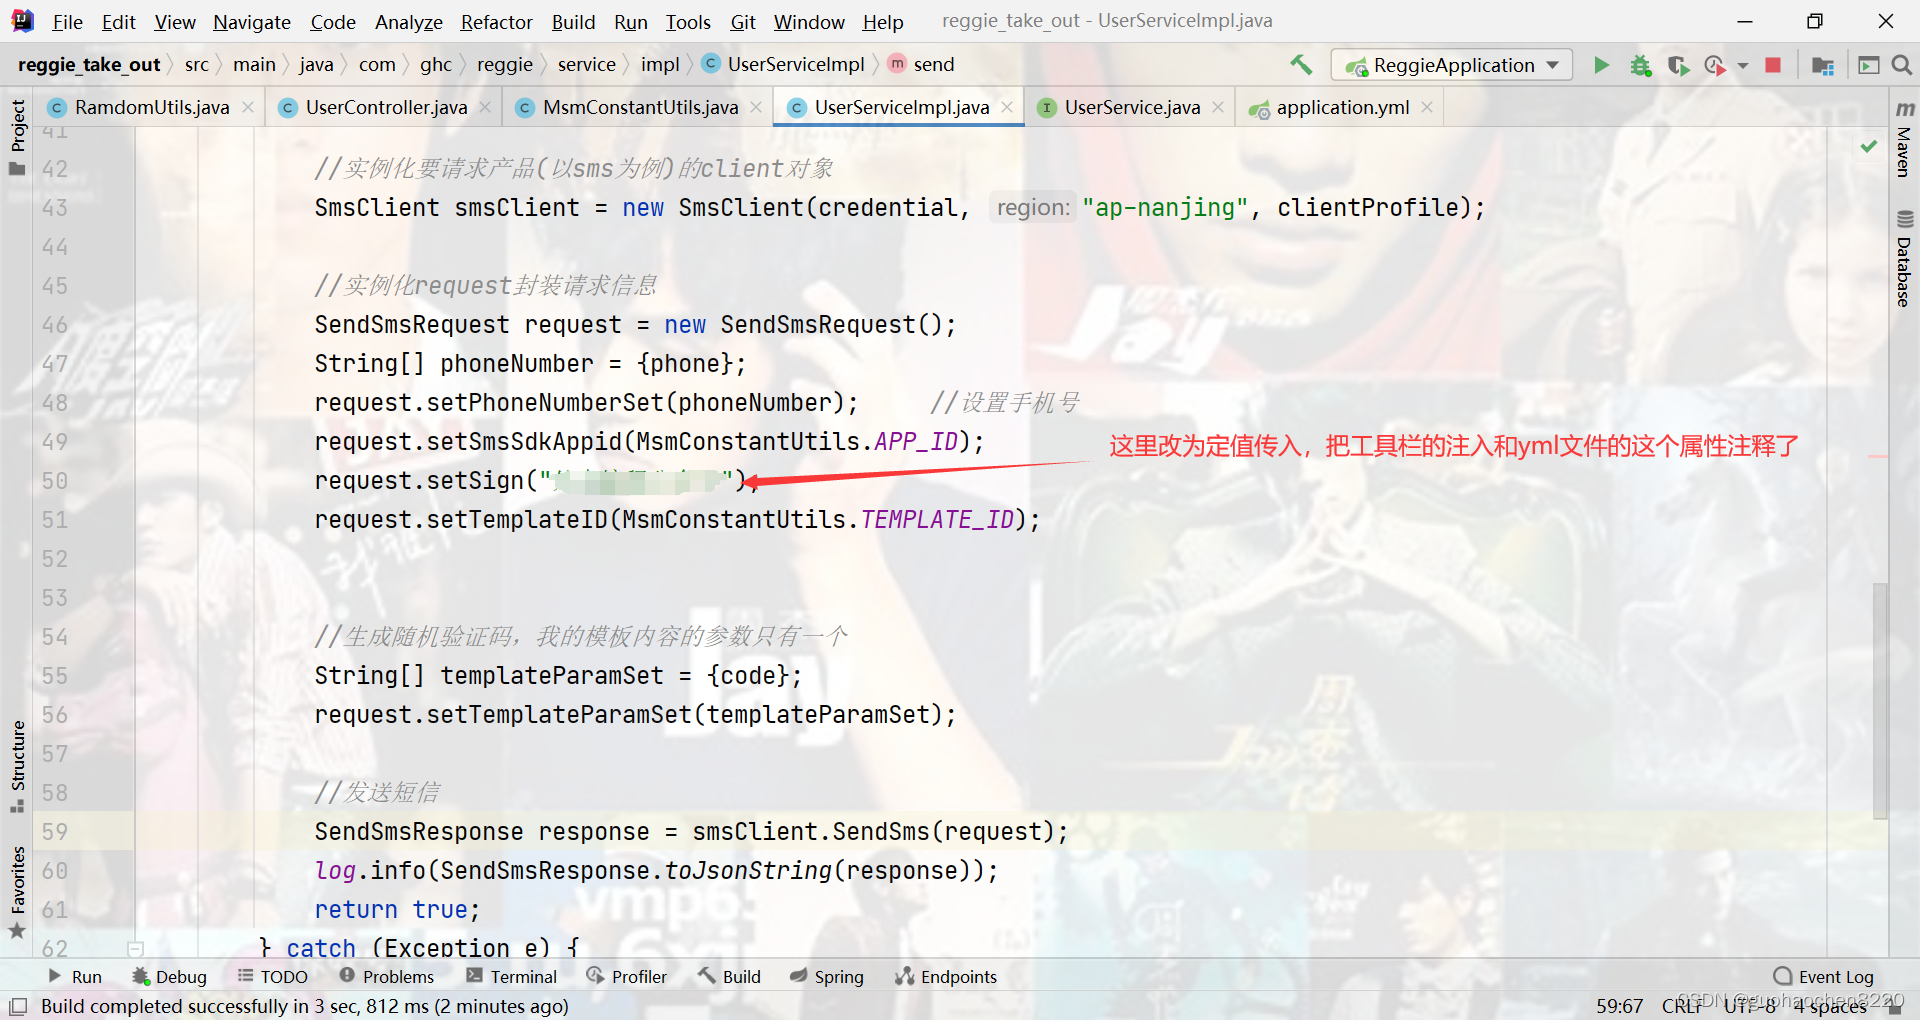
又跑了一遍,好了~~~~又不行。裂开!,这里卡了好久确实找不出哪不对了。
后来回看了在线调用的代码,粘到了文本上反复比对
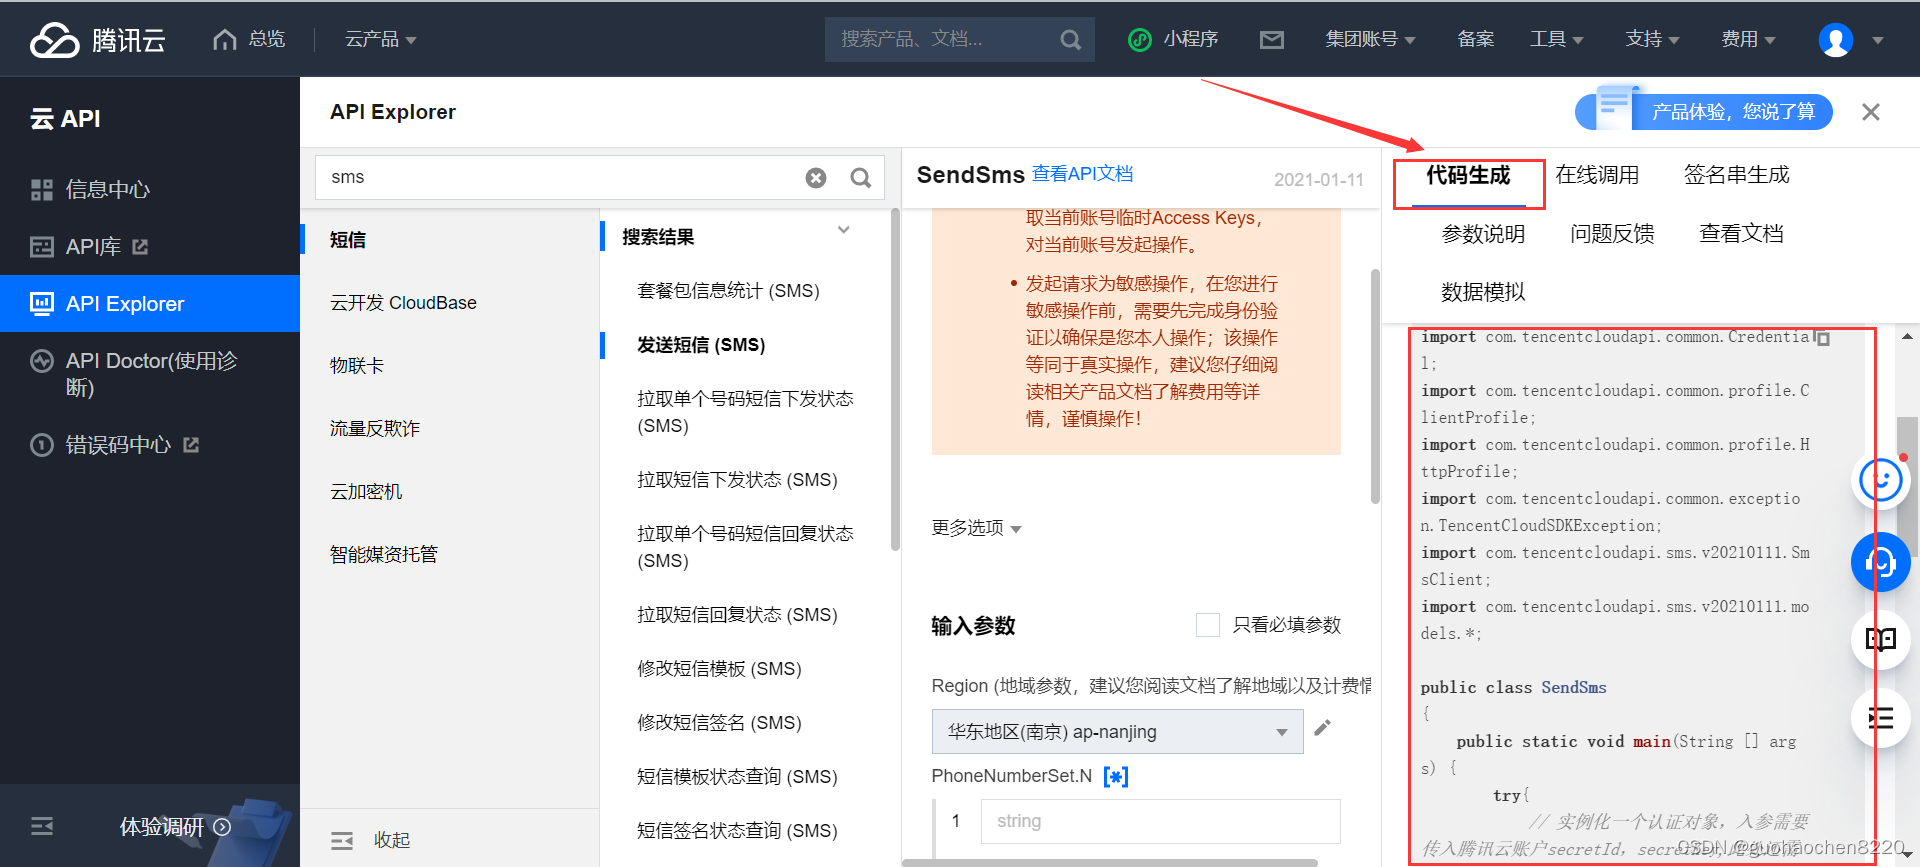
发现api版本不一样
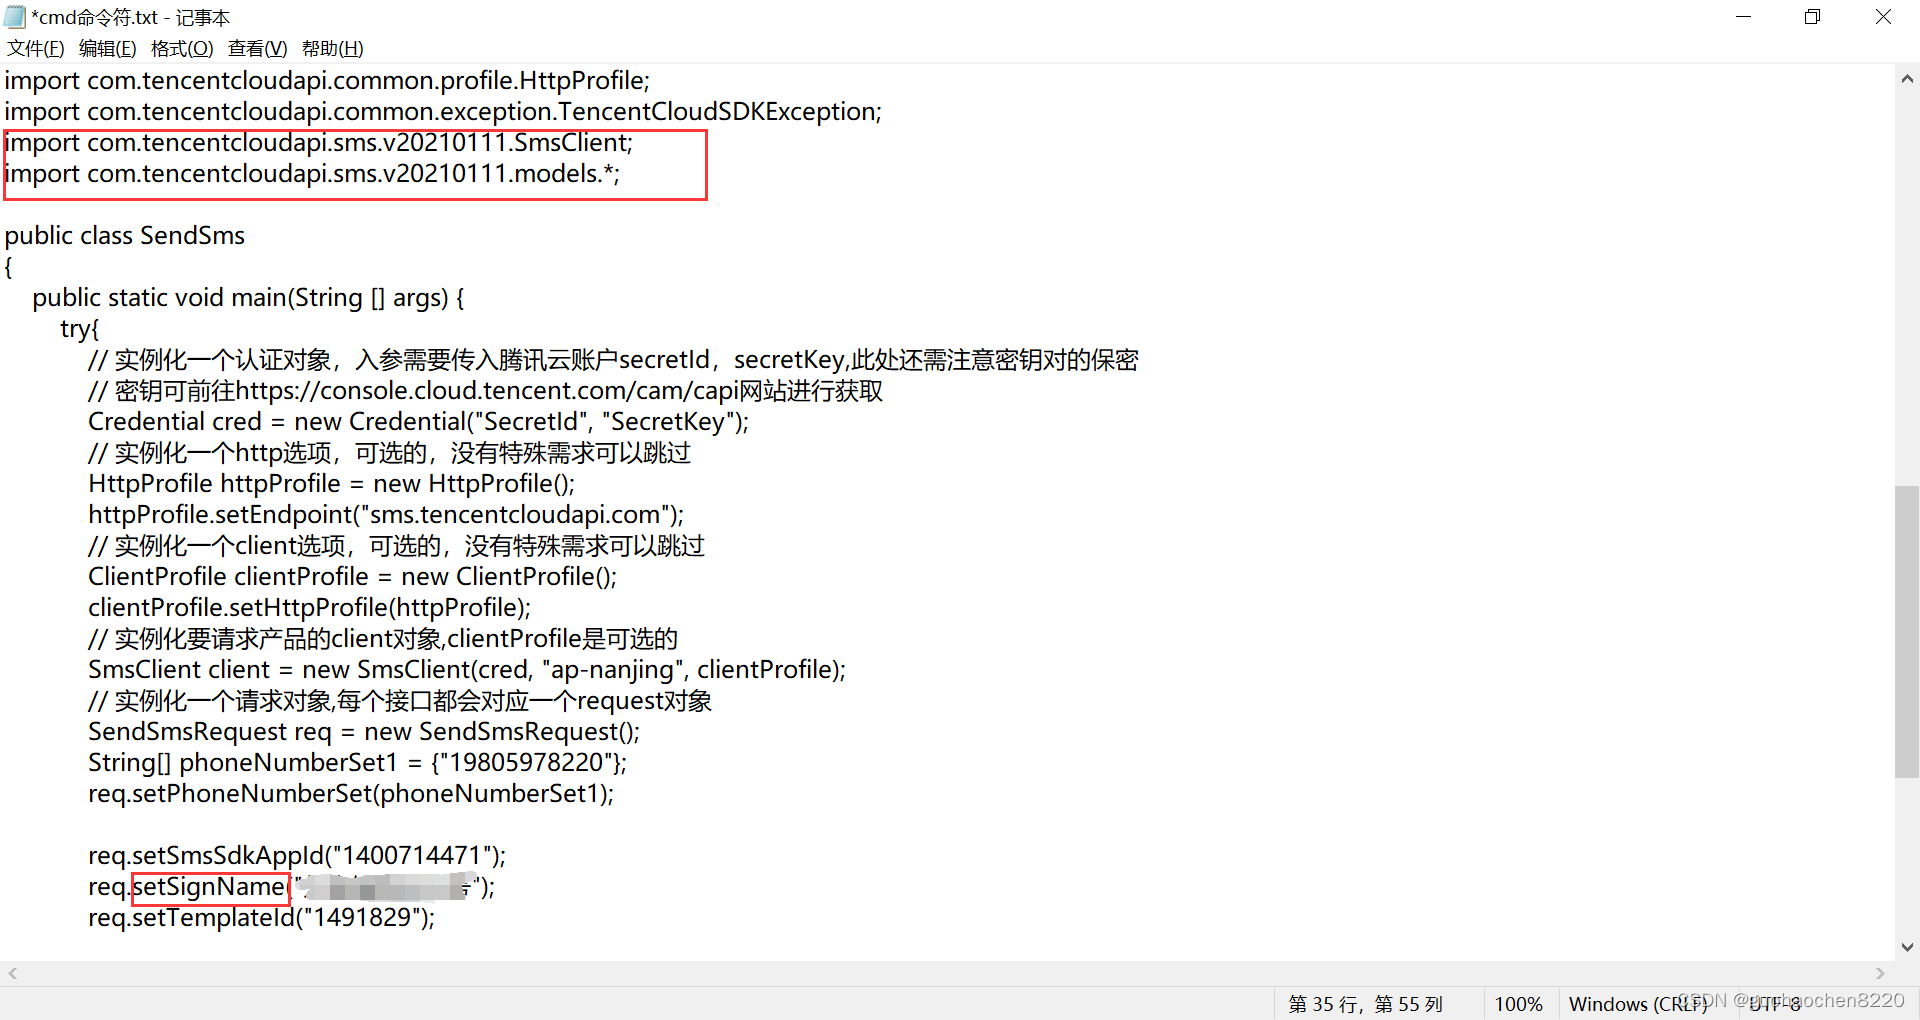
重点是参数名不一样

把上图3个api换成21版本
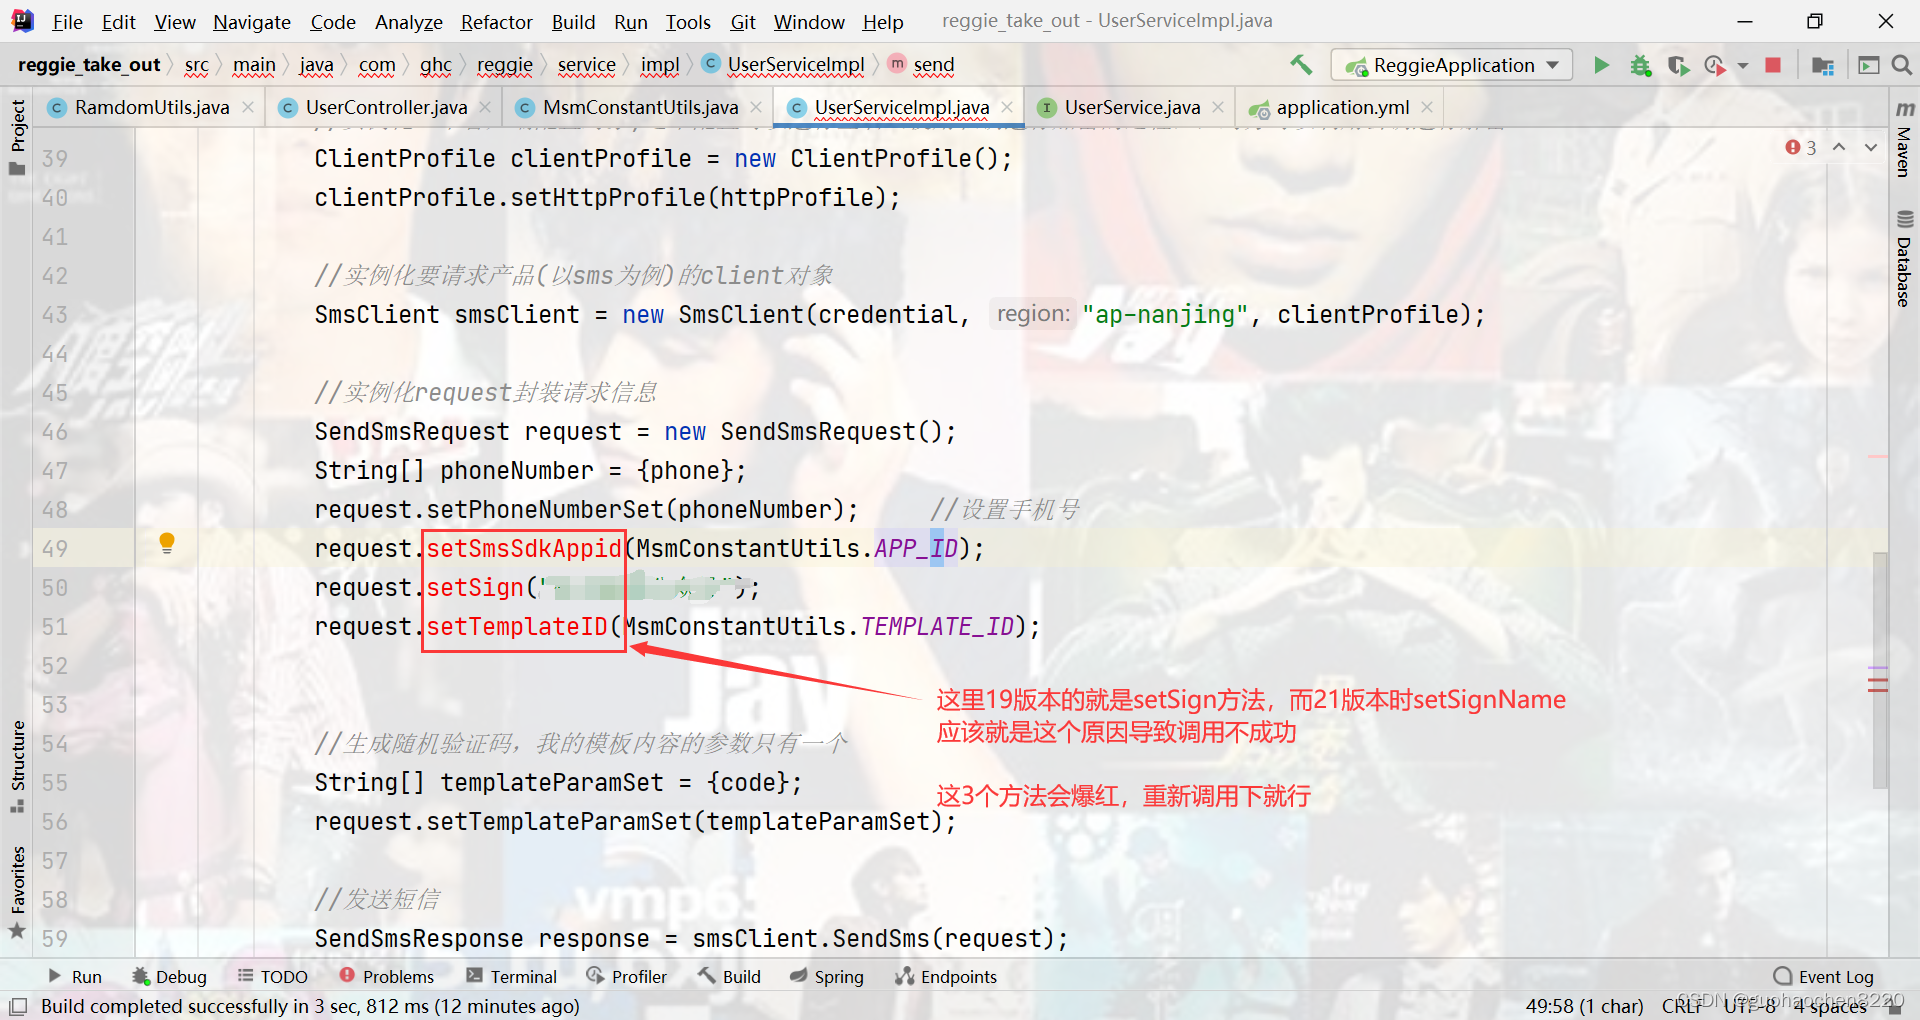
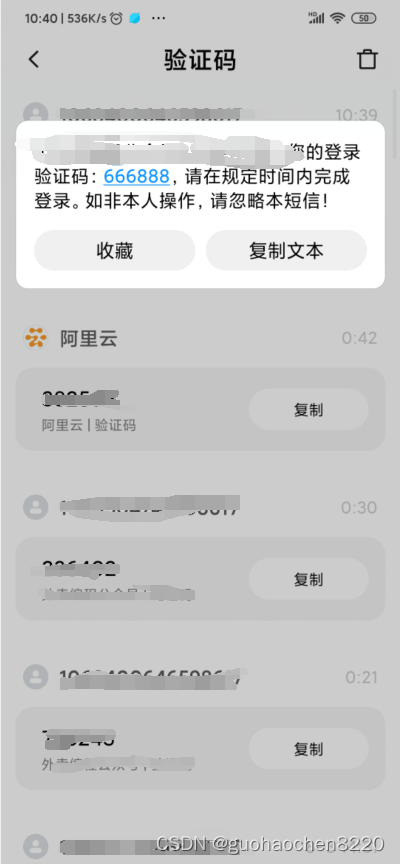
回到页面重新调用下,发现 成了!


 1992
1992


 被折叠的 条评论
为什么被折叠?
被折叠的 条评论
为什么被折叠?
 到【灌水乐园】发言


