


如果没有天赋,那就一直重复。
canvas是什么?
<canvas> 是 HTML5 中引入的一个元素,用于通过 JavaScript 绘制图形。它提供了一种在网页上动态生成图像、动画和图形的方法。<canvas> 本身只是一个容器,所有的绘图操作都需要通过 JavaScript 来实现。
使用场景:
- 动态图形和动画:用于创建游戏、动画和其他动态效果。
- 数据可视化:绘制图表、图形和其他数据可视化内容。
- 图像处理:可以对图像进行像素级的操作。
- 图形编辑器:开发在线绘图工具和图像编辑器。
canvas使用:
引入:
<canvas id="canvas"> 当前浏览器不支持canvas元素,请升级或更换浏览器!</canvas>
内部的内容是不支持canvas的浏览器会显示的内容…(我就不说是啥浏览器了hhh)
获取2D的上下文:
let canvas = document.getElementById('canvas');
let ctx = canvas.getContext("2d");
或者根据以下代码进行判断浏览器的支持性:(对不支持的进行处理)
if (canvas.getContext) {
    // 正常逻辑
} else {
    // 不支持的兼容处理
}
坐标轴:
一般画布根据坐标轴进行判断我们在哪落笔。左上角为原点,向左向右延伸形成x,y轴。
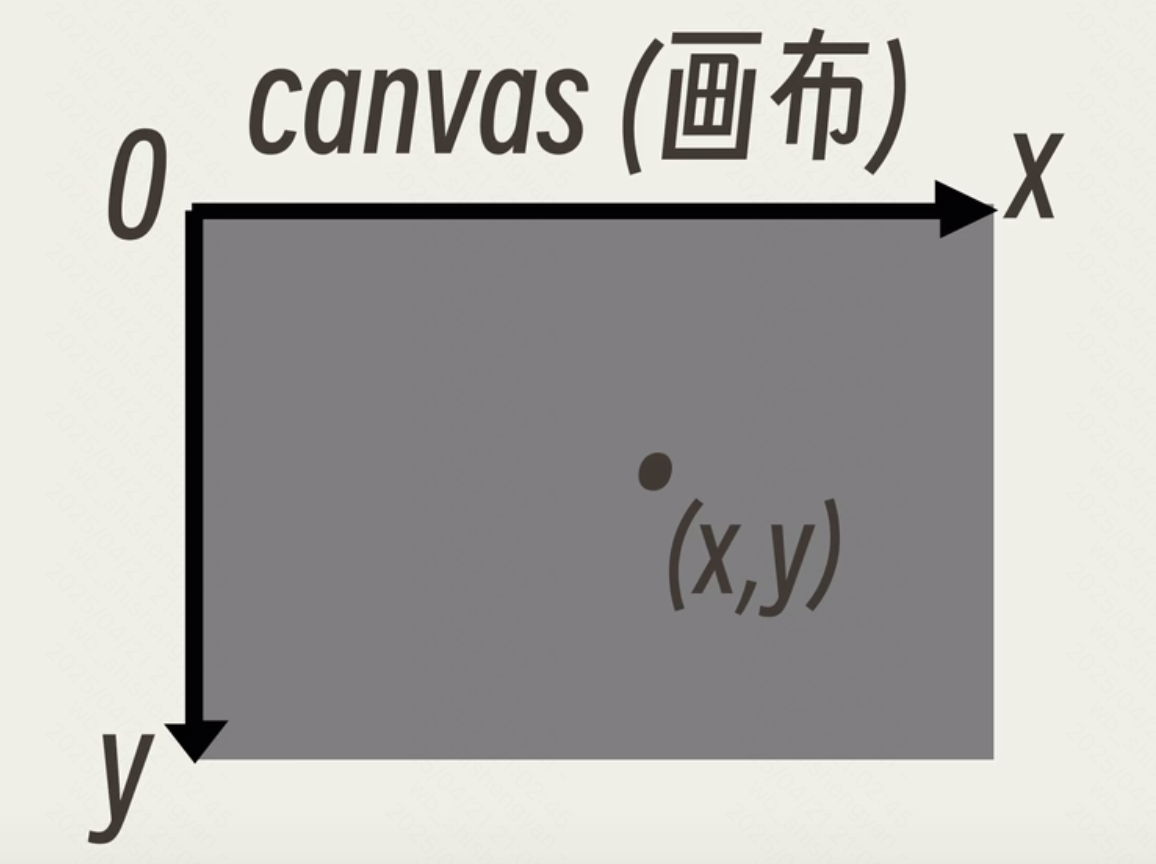
上图在网上截取 侵权联系删除。
绘制:
beginPath() :
Canvas 2D API 的 CanvasRenderingContext2D.beginPath() 方法用于通过清空子路径列表开始一个新路径。当你想创建一个新的路径时,调用此方法。
beginPath() 方法在开始每条线之前调用,就是开始画的时候调用。
moveTo() :
Canvas 2D API 的 CanvasRenderingContext2D.moveTo() 方法用于在给定的 (x,y) 坐标处开始一个新的子路径。
moveTo(x, y)
从这个点开始画的意思。
lineTo():
Canvas 2D API 的 CanvasRenderingContext2D 接口的 lineTo() 方法将当前子路径的最后一个点与指定的 (x, y) 坐标用直线段相连,从而将一个直线段添加到当前子路径中。
lineTo(x, y)
在这个坐标结束绘画的意思。
stroke():
Canvas 2D API 的 CanvasRenderingContext2D.stroke() 方法用于根据当前的描边样式,绘制当前或指定的路径。
stroke()
stroke(path)
让画的东西在画布上有个印子,让我们看到这个东西。
fillRect() :
Canvas 2D API 的 CanvasRenderingContext2D.fillRect() 方法用于绘制一个矩形,并根据当前的 fillStyle 进行填充。
这个方法是直接在画布上绘制填充,并不修改当前路径,所以在这个方法后面调用 fill() 或者 stroke() 方法并不会对这个方法有什么影响。
fillRect(x, y, width, height)
strokeStyle 属性:
Canvas 2D API 的 CanvasRenderingContext2D.strokeStyle 属性指定用于形状描边(轮廓)的颜色、渐变或图案。默认值是 #000(黑色)。
设置绘制的颜色为蓝色:
ctx.strokeStyle = "blue";
fillStyle 属性:
Canvas 2D API 的 CanvasRenderingContext2D.fillStyle 属性指定用于形状内部的颜色、渐变或图案。默认样式为 #000(黑色)。
设置内部为蓝色:
ctx.fillStyle = "blue";
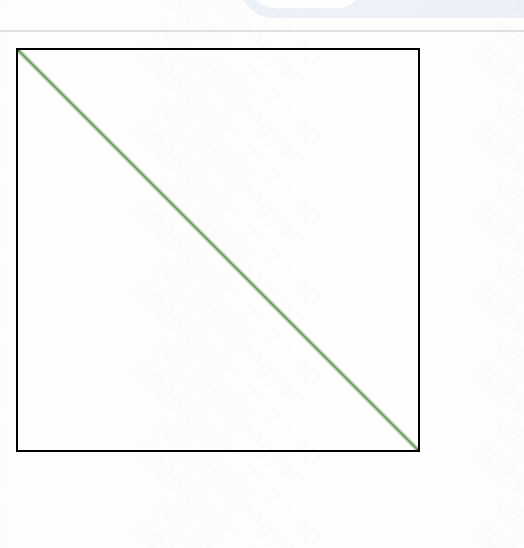
画一条线:
示例:
<!DOCTYPE html>
<html lang="en">
<head>
    <meta charset="UTF-8">
    <meta name="viewport" content="width=device-width, initial-scale=1.0">
    <title>Canvas Line</title>
</head>
<body>
    <canvas id="myCanvas" width="200" height="200" style="border:1px solid #000000;"></canvas>
    <script>
        let canvas = document.getElementById('myCanvas');
        let context = canvas.getContext('2d');

        // 绘制一条线
        context.beginPath();
        context.moveTo(0, 0); // 起点
        context.lineTo(200, 200); // 终点
        context.strokeStyle = 'green';
        context.stroke();
    </script>
</body>
</html>
画一个简单的矩形:
示例:
<!DOCTYPE html>
<html lang="en">
<head>
    <meta charset="UTF-8">
    <meta name="viewport" content="width=device-width, initial-scale=1.0">
    <title>Canvas Example</title>
</head>
<body>
    <canvas id="myCanvas" width="200" height="200" style="border:1px solid #000000;"></canvas>
    <script>
        let canvas = document.getElementById('myCanvas');
        let context = canvas.getContext('2d');

        // 绘制一个填充的矩形
        context.fillStyle = 'red';
        context.fillRect(50, 50, 100, 100);
    </script>
</body>
</html>
带fill()就是让他变成实心的。。。

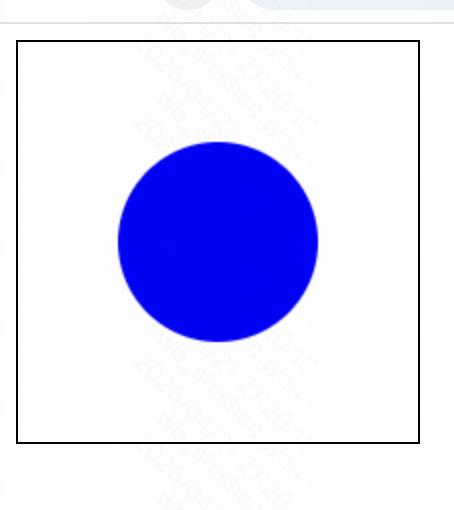
绘制一个圆形:
这里使用的是弧度值。弧度值转角度值: π / 180度 * 角度
示例:
<!DOCTYPE html>
<html lang="en">

<head>
    <meta charset="UTF-8">
    <meta name="viewport" content="width=device-width, initial-scale=1.0">
    <title>Canvas Circle</title>
</head>

<body>
    <canvas id="myCanvas" width="200" height="200" style="border:1px solid #000000;"></canvas>
    <script>
        let canvas = document.getElementById('myCanvas');
        let context = canvas.getContext('2d');

        // 绘制一个圆形
        context.beginPath();
        context.arc(100, 100, 50, 0, 2 * Math.PI); // 圆心(100, 100),半径50
        context.fillStyle = 'blue';
        context.fill();
    </script>
</body>

</html>
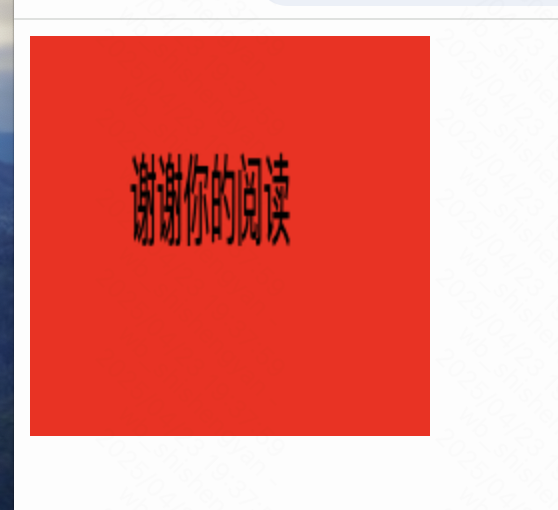
文本:
text 是文字内容。x,y是文字的起点。maxWidth设置文本的最大宽度,如果超过这个宽度文字会被压缩。
ctx.fillText(text,x,y[,maxWidth])
ctx.strokeText(text,x,y[,maxWidth])
fillText() 方法:
Canvas 2D API 的 CanvasRenderingContext2D 对象的方法 fillText() 用于在指定的坐标上绘制文本字符串,并使用当前的 fillStyle 对其进行填充。存在一个可选参数,其指定了渲染文本的最大宽度,用户代理将通过压缩文本或使用较小的字体大小来实现。
fillText(text, x, y)
fillText(text, x, y, maxWidth)
示例:
<!DOCTYPE html>
<html lang="en">

<head>
    <meta charset="UTF-8">
    <meta name="viewport" content="width=device-width, initial-scale=1.0">
    <title>文字</title>
</head>

<body>
    <canvas id="myCanvas" width="200" height="200" style="background-color: red;"></canvas>
    <script>
        let canvas = document.getElementById('myCanvas');
        let ctx = canvas.getContext('2d');
        ctx.font = "50px system-ui";
        ctx.fillText("谢谢你的阅读", 50, 100, 80)
    </script>
</body>

</html>
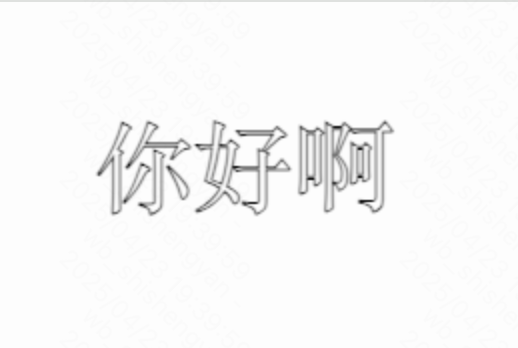
strokeText() 方法:
Canvas 2D API 的 CanvasRenderingContext2D 的 strokeText() 方法用于在指定的坐标处对文本字符串的字符进行描边(即绘制轮廓)。一个可选的参数允许指定渲染文本的最大宽度,用户代理可以通过压缩文本或使用较小的字体大小来实现这一目标。
strokeText(text, x, y)
strokeText(text, x, y, maxWidth)
示例:
<!DOCTYPE html>
<html lang="en">

<head>
    <meta charset="UTF-8">
    <meta name="viewport" content="width=device-width, initial-scale=1.0">
    <title>绘制文本轮廓</title>
</head>

<body>
    <canvas id="canvas" width="500" height="200"></canvas>
    <script>
        const canvas = document.getElementById("canvas");
        const ctx = canvas.getContext("2d");

        ctx.font = "50px serif";
        ctx.strokeText("你好啊", 50, 90);
    </script>
</body>

</html>
font 属性:
Canvas 2D API 的 CanvasRenderingContext2D.font 属性指定绘制文字所使用的当前字体样式。 其实和css的font是一样的。
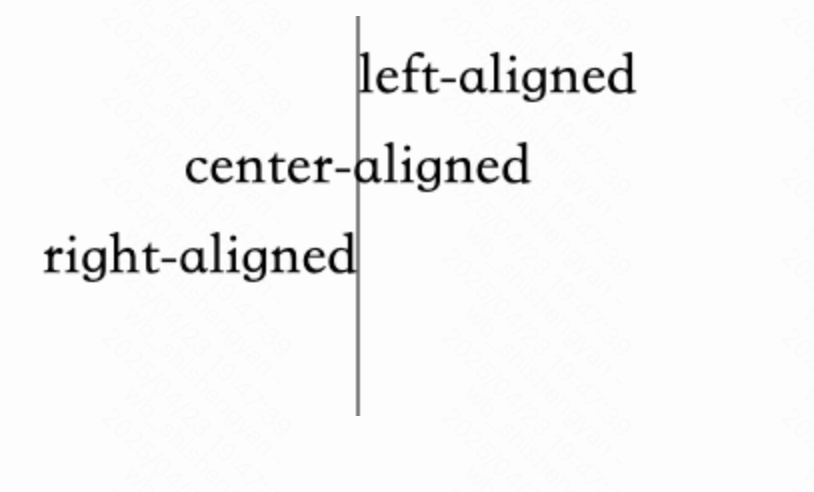
textAlign 属性:
我们可以通过 textAlign 来设置文本对齐。
可选择选项有:“left” “right” “center” “start” “end”
- “left”:文本左对齐。
- “right":文本右对齐。
- “center”:文本居中对齐。
- “start”:文本对齐界线开始的地方(左对齐指本地从左向右,右对齐指本地从右向左)。
- “end”:文本对齐界线结束的地方(左对齐指本地从左向右,右对齐指本地从右向左)。
默认值是 “start”。
示例:
<!DOCTYPE html>
<html lang="en">

<head>
    <meta charset="UTF-8">
    <meta name="viewport" content="width=device-width, initial-scale=1.0">
    <title>对齐方式</title>
</head>

<body>
    <canvas id="canvas" width="500" height="200"></canvas>
    <script>
        const canvas = document.getElementById("canvas");
        canvas.width = 350;
        const ctx = canvas.getContext("2d");
        const x = canvas.width / 2;

        ctx.beginPath();
        ctx.moveTo(x, 0);
        ctx.lineTo(x, canvas.height);
        ctx.stroke();

        ctx.font = "30px serif";

        ctx.textAlign = "left";
        ctx.fillText("left-aligned", x, 40);

        ctx.textAlign = "center";
        ctx.fillText("center-aligned", x, 85);

        ctx.textAlign = "right";
        ctx.fillText("right-aligned", x, 130);

    </script>
</body>

</html>
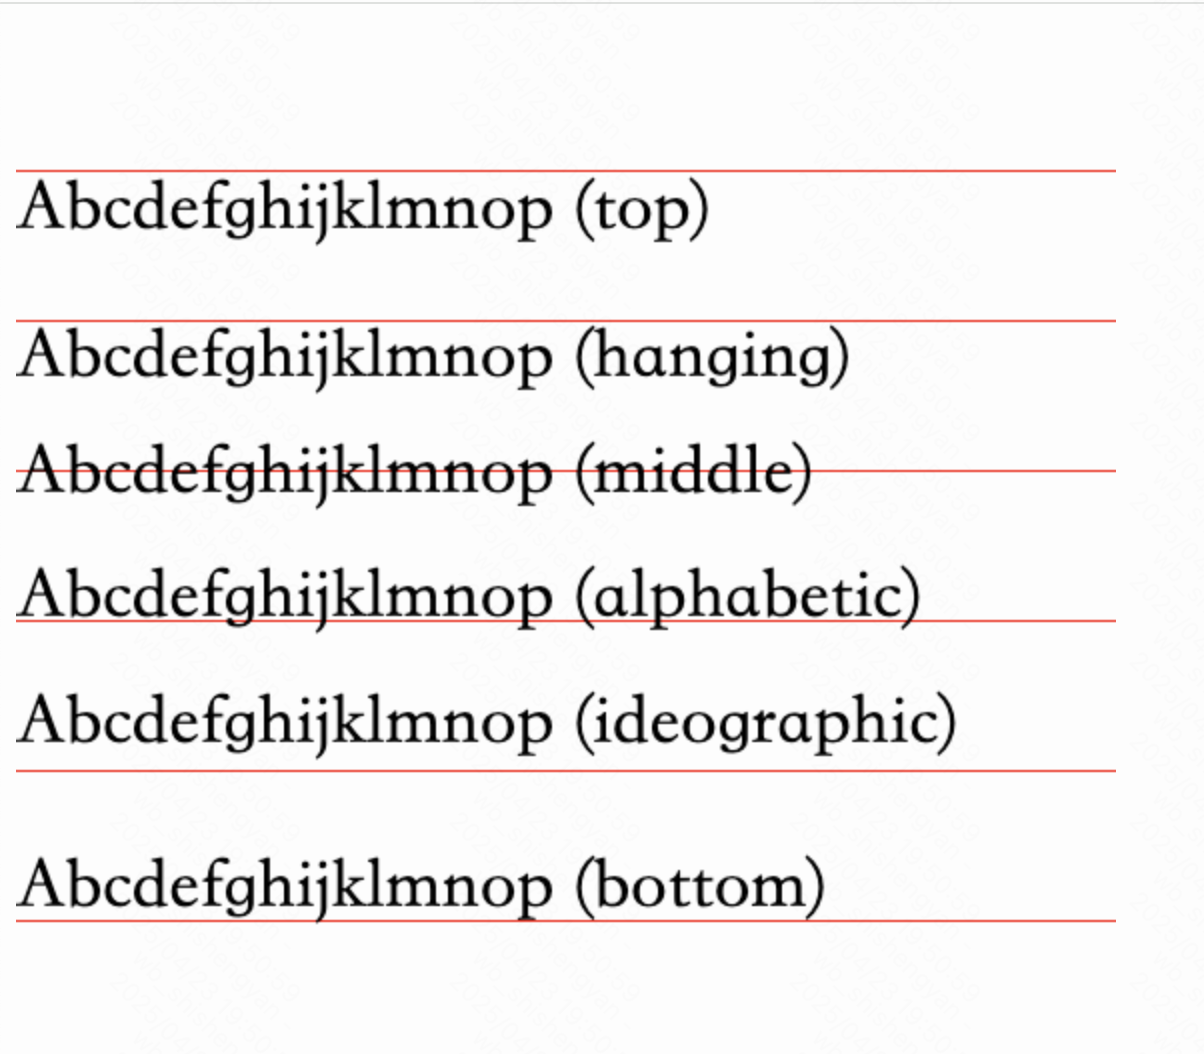
textBaseline 属性:
Canvas 2D API 的 CanvasRenderingContext2D.textBaseline 属性用于描述绘制文本时使用的文本基线。 设置基线对齐
- “top”:文本基线在文本块的顶部。
- “hanging”:文本基线是悬挂基线。(用于藏文和其他印度文字。)
- “middle”:文本基线在文本块的中间。
- “alphabetic”:文本基线是标准的字母基线。默认值。
- “ideographic”:文字基线是表意字基线;如果字符本身超出了 alphabetic 基线,那么 ideograhpic 基线位置在字符本身的底部。(用于中文、日文和韩文。)
- “bottom”:文本基线在文本块的底部。与 ideographic 基线的区别在于 ideographic 基线不需要考虑下行字母。
默认值是 “alphabetic”。
示例:
<!DOCTYPE html>
<html lang="en">

<head>
    <meta charset="UTF-8">
    <meta name="viewport" content="width=device-width, initial-scale=1.0">
    <title>基线对齐方式</title>
</head>

<body>
    <canvas id="canvas" width="550" height="500"></canvas>
    <script>
        const canvas = document.getElementById("canvas");
        const ctx = canvas.getContext("2d");

        const baselines = [
            "top",
            "hanging",
            "middle",
            "alphabetic",
            "ideographic",
            "bottom",
        ];
        ctx.font = "36px serif";
        ctx.strokeStyle = "red";

        baselines.forEach((baseline, index) => {
            ctx.textBaseline = baseline;
            const y = 75 + index * 75;
            ctx.beginPath();
            ctx.moveTo(0, y + 0.5);
            ctx.lineTo(550, y + 0.5);
            ctx.stroke();
            ctx.fillText(`Abcdefghijklmnop (${baseline})`, 0, y);
        });
    </script>
</body>

</html>
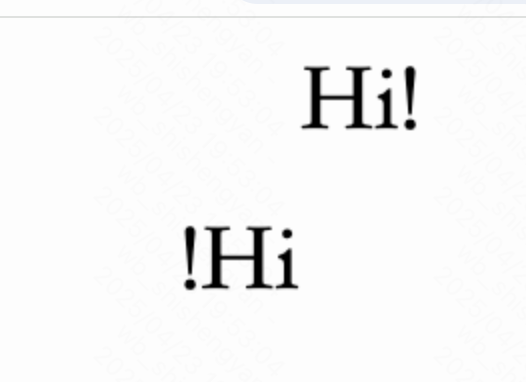
direction 属性:
Canvas 2D API 的 CanvasRenderingContext2D.direction 属性用来在绘制文本时,描述当前文本方向。
- “ltr”:文字方向为从左到右。
- “rtl”:文字方向为从右到左。
- “inherit”:文字方向从相应的 元素或 Document 继承。
默认值为 “inherit”。
示例:
<!DOCTYPE html>
<html lang="en">

<head>
    <meta charset="UTF-8">
    <meta name="viewport" content="width=device-width, initial-scale=1.0">
    <title>改变文字方向</title>
</head>

<body>
    <canvas id="canvas" width="550" height="500"></canvas>
    <script>
        const canvas = document.getElementById("canvas");
        const ctx = canvas.getContext("2d");

        ctx.font = "48px serif";
        ctx.fillText("Hi!", 150, 50);
        ctx.direction = "rtl";
        ctx.fillText("Hi!", 150, 130);
    </script>
</body>

</html>
添加图片:
const img = new Image()
img.src = 'https://img95.699pic.com/element/40181/5073.png_300.png'
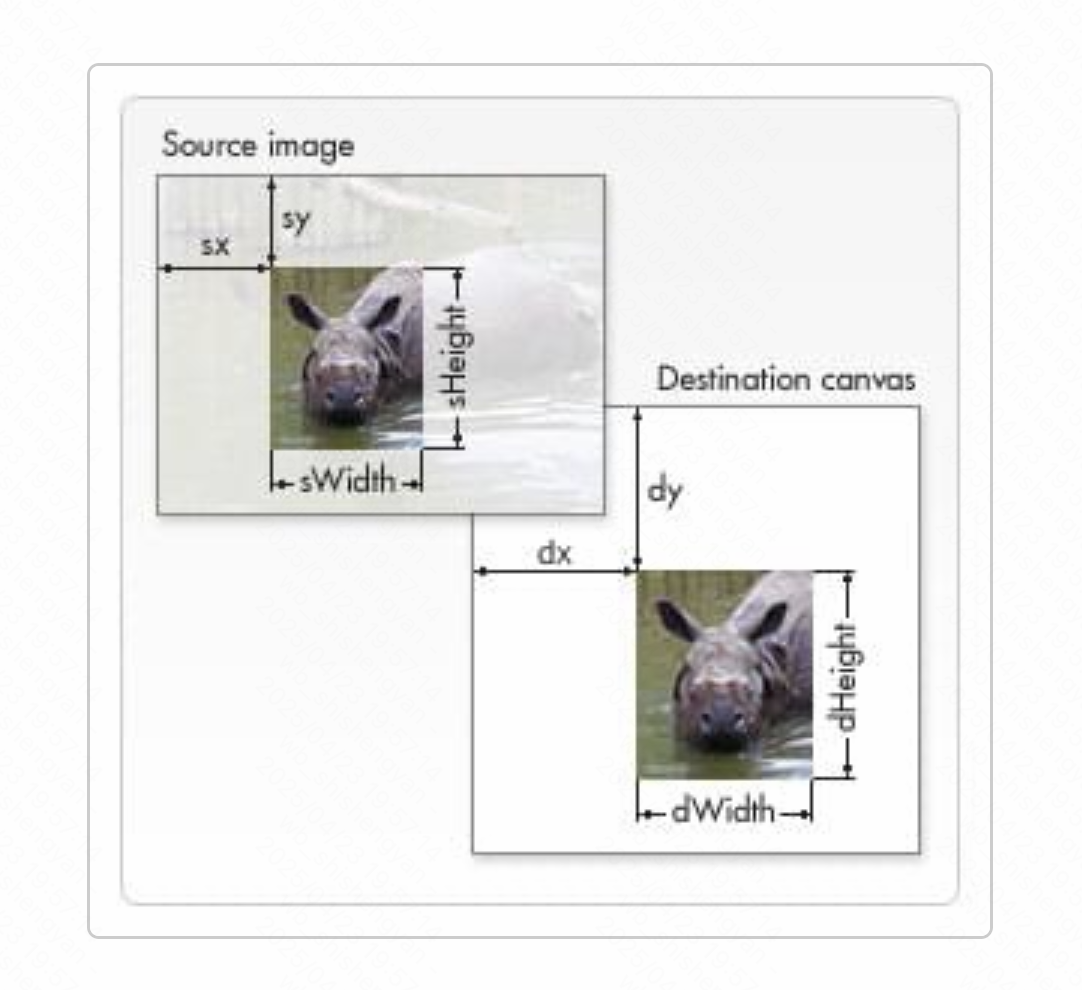
drawImage() 方法:
Canvas 2D API 的 CanvasRenderingContext2D.drawImage() 方法提供了多种在画布(Canvas)上绘制图像的方式。
drawImage(image, dx, dy)
drawImage(image, dx, dy, dWidth, dHeight)
drawImage(image, sx, sy, sWidth, sHeight, dx, dy, dWidth, dHeight)// 只展示一部分
如果图片太大一下子加载不出来的话,我们可以使用img标签的onload这个监听方法绘制我们的drawImage的内容。
const img = new Image()
img.onload = function () {
    ctx.drawImage(img, 0, 0)
}
img.src = 'https://img95.699pic.com/element/40181/5073.png_300.png'
样式:
fillStyle 属性:
Canvas 2D API 的 CanvasRenderingContext2D.fillStyle 属性指定用于形状内部的颜色、渐变或图案。默认样式为 #000(黑色)。
表达方式:
ctx.fillStyle = "orange"
ctx.fillStyle = "#FFA500"
ctx.fillStyle = "rgb(255,265,0)"
ctx.fillStyle = "rgba(255,165,0,0.5)"
示例:
<!DOCTYPE html>
<html lang="en">

<head>
    <meta charset="UTF-8">
    <meta name="viewport" content="width=device-width, initial-scale=1.0">
    <title>fillStyle 属性</title>
</head>

<body>
    <canvas id="canvas" width="550" height="500"></canvas>
    <script>
        const canvas = document.getElementById("canvas");
        const ctx = canvas.getContext("2d");

        ctx.fillStyle = "blue";
        ctx.fillRect(10, 10, 100, 100);

    </script>
</body>

</html>

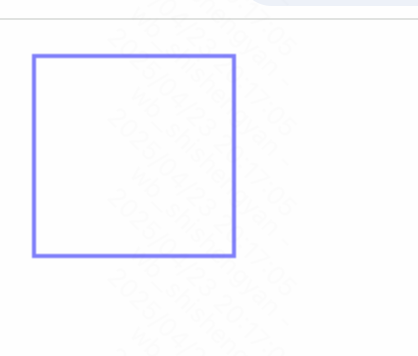
strokeStyle 属性:
Canvas 2D API 的 CanvasRenderingContext2D.strokeStyle 属性指定用于形状描边(轮廓)的颜色、渐变或图案。默认值是 #000(黑色)
值:
- color:解析为 CSS 值的字符串。
- gradient:CanvasGradient 对象(线性或径向渐变)。
- pattern:CanvasPattern 对象(重复图像)。
示例1:
<!DOCTYPE html>
<html lang="en">

<head>
    <meta charset="UTF-8">
    <meta name="viewport" content="width=device-width, initial-scale=1.0">
    <title>strokeStyle 属性</title>
</head>

<body>
    <canvas id="canvas" width="550" height="500"></canvas>
    <script>
        const canvas = document.getElementById("canvas");
        const ctx = canvas.getContext("2d");

        ctx.strokeStyle = "blue";
        ctx.strokeRect(10, 10, 100, 100);
    </script>
</body>

</html>
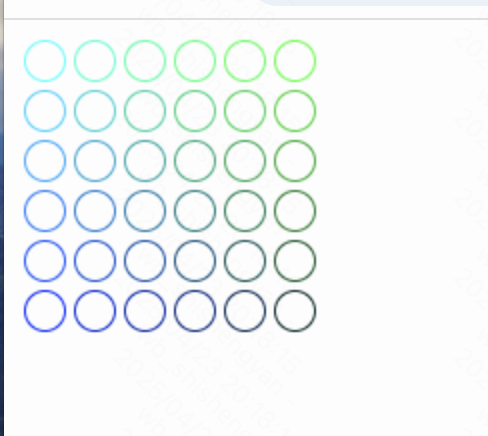
示例2:
<!DOCTYPE html>
<html lang="en">

<head>
    <meta charset="UTF-8">
    <meta name="viewport" content="width=device-width, initial-scale=1.0">
    <title>strokeStyle 属性</title>
</head>

<body>
    <canvas id="canvas" width="550" height="500"></canvas>
    <script>
        const canvas = document.getElementById("canvas");
        const ctx = canvas.getContext("2d");
        for (let i = 0; i < 6; i++) {
            for (let j = 0; j < 6; j++) {
                ctx.strokeStyle = `rgb(
        0
        ${Math.floor(255 - 42.5 * i)}
        ${Math.floor(255 - 42.5 * j)})`;
                ctx.beginPath();
                ctx.arc(12.5 + j * 25, 12.5 + i * 25, 10, 0, Math.PI * 2, true);
                ctx.stroke();
            }
        }
    </script>
</body>

</html>
路径形状:
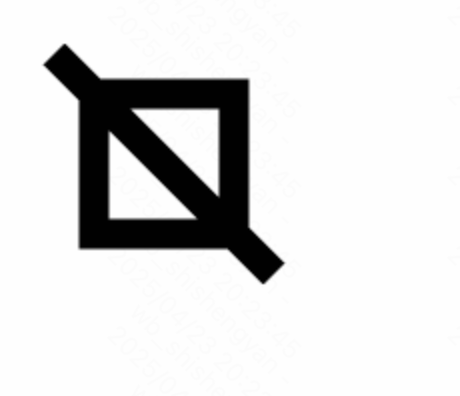
lineWidth 属性:
Canvas 2D API 的 CanvasRenderingContext2D.lineWidth 属性用于设置线宽。值是一个数字,指定线条的宽度(以坐标空间单位表示)。零、负数、Infinity 和 NaN 值将被忽略。默认值为 1.0。
示例:
<!DOCTYPE html>
<html lang="en">

<head>
    <meta charset="UTF-8">
    <meta name="viewport" content="width=device-width, initial-scale=1.0">
    <title>lineWidth 属性</title>
</head>

<body>
    <canvas id="canvas" width="550" height="500"></canvas>
    <script>
        const canvas = document.getElementById("canvas");
        const ctx = canvas.getContext("2d");

        ctx.lineWidth = 15;

        ctx.beginPath();
        ctx.moveTo(20, 20);
        ctx.lineTo(130, 130);
        ctx.rect(40, 40, 70, 70);
        ctx.stroke();

    </script>
</body>

</html>
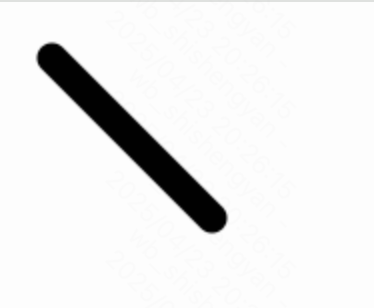
lineCap 属性:
Canvas 2D API 的 CanvasRenderingContext2D.lineCap 属性用于指定如何绘制每一条线段的末端。
值:
- “butt”:线条末端呈正方形。这是默认值。
- “round”:线条末端呈圆形的。
- “square”:线条末端呈方形,通过添加一个宽度与线条粗细相同且高度粗细的一半的盒子来形成。
示例:
<!DOCTYPE html>
<html lang="en">

<head>
    <meta charset="UTF-8">
    <meta name="viewport" content="width=device-width, initial-scale=1.0">
    <title>lineCap 属性</title>
</head>

<body>
    <canvas id="canvas" width="550" height="500"></canvas>
    <script>
        const canvas = document.getElementById("canvas");
        const ctx = canvas.getContext("2d");

        ctx.beginPath();
        ctx.moveTo(20, 20);
        ctx.lineWidth = 15;
        ctx.lineCap = "round";
        ctx.lineTo(100, 100);
        ctx.stroke();
    </script>
</body>

</html>
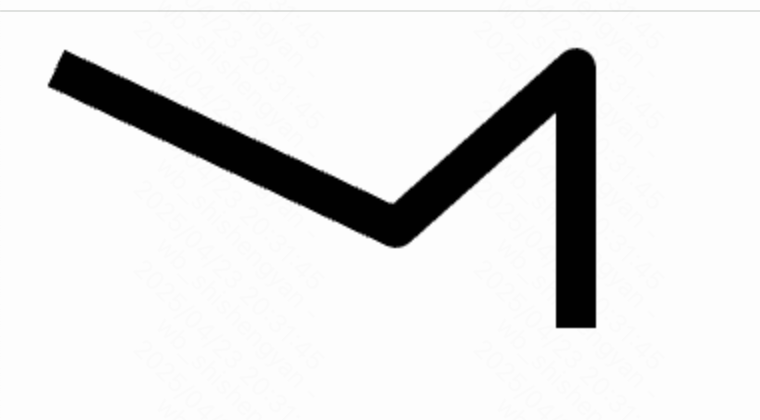
lineJoin 属性:
Canvas 2D API 的 CanvasRenderingContext2D.lineJoin 属性用于设置 2 个线段如何连接在一起。
此属性有 3 个值:“round”、“bevel” 和 “miter”。默认值是 “miter”。
- “round”:通过填充一个额外的,圆心在相连部分末端的扇形,绘制拐角的形状。圆角的半径是线段的宽度。
- “bevel”:在相连部分的末端填充一个额外的以三角形为底的区域,每个部分都有各自独立的矩形拐角。
- “miter”:通过延伸相连部分的外边缘,使其相交于一点,形成一个额外的菱形区域。这个设置受到 miterLimit 属性的影响。默认值。
示例:
<!DOCTYPE html>
<html lang="en">

<head>
    <meta charset="UTF-8">
    <meta name="viewport" content="width=device-width, initial-scale=1.0">
    <title>lineJoin 属性</title>
</head>

<body>
    <canvas id="canvas" width="550" height="500"></canvas>
    <script>
        const canvas = document.getElementById("canvas");
        const ctx = canvas.getContext("2d");

        ctx.lineWidth = 20;
        ctx.lineJoin = "round";
        ctx.beginPath();
        ctx.moveTo(20, 20);
        ctx.lineTo(190, 100);
        ctx.lineTo(280, 20);
        ctx.lineTo(280, 150);
        ctx.stroke();
    </script>
</body>

</html>
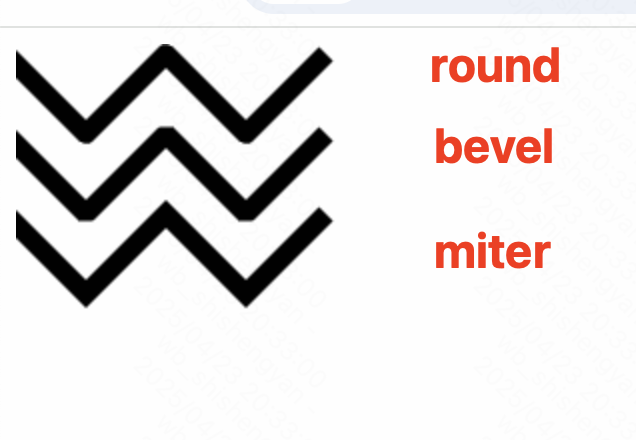
查看三个值的区别–示例:
<!DOCTYPE html>
<html lang="en">

<head>
    <meta charset="UTF-8">
    <meta name="viewport" content="width=device-width, initial-scale=1.0">
    <title>lineJoin 属性</title>
</head>

<body>
    <canvas id="canvas" width="550" height="500"></canvas>
    <script>
        const ctx = document.getElementById("canvas").getContext("2d");
        ctx.lineWidth = 10;

        ["round", "bevel", "miter"].forEach((join, i) => {
            ctx.lineJoin = join;
            ctx.beginPath();
            ctx.moveTo(-5, 5 + i * 40);
            ctx.lineTo(35, 45 + i * 40);
            ctx.lineTo(75, 5 + i * 40);
            ctx.lineTo(115, 45 + i * 40);
            ctx.lineTo(155, 5 + i * 40);
            ctx.stroke();
        });

    </script>
</body>

</html>
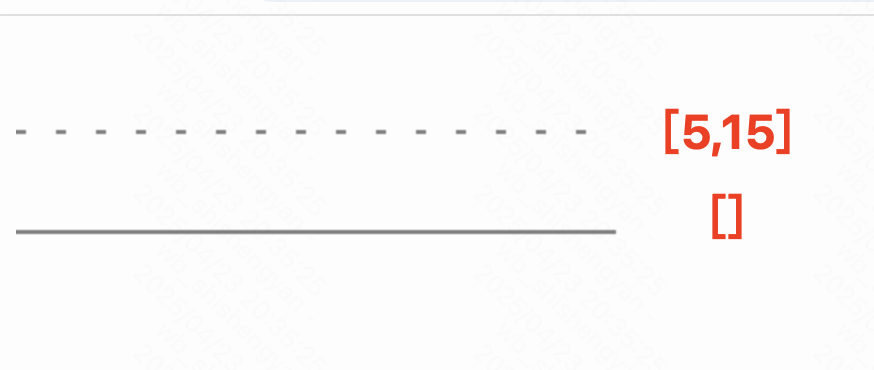
setLineDash() 方法:
Canvas 2D API 的 CanvasRenderingContext2D 接口的 setLineDash() 方法用于在描线时使用虚线模式。
setLineDash(segments)
segments:一个数组,包含一组描述交替绘制线段和间隙(坐标空间单位)长度的数字。如果数组元素的数量是奇数,数组的元素会被复制和拼接。例如,[5, 15, 25] 会变成 [5, 15, 25, 5, 15, 25]。如果数组为空,则虚线列表会被清空,线条描边将恢复为实线。
示例:
<!DOCTYPE html>
<html lang="en">

<head>
    <meta charset="UTF-8">
    <meta name="viewport" content="width=device-width, initial-scale=1.0">
    <title>setLineDash 属性</title>
</head>

<body>
    <canvas id="canvas" width="550" height="500"></canvas>
    <script>
        const canvas = document.getElementById("canvas");
        const ctx = canvas.getContext("2d");

        // 虚线
        ctx.beginPath();
        ctx.setLineDash([5, 15]);
        ctx.moveTo(0, 50);
        ctx.lineTo(300, 50);
        ctx.stroke();

        // 实线
        ctx.beginPath();
        ctx.setLineDash([]);
        ctx.moveTo(0, 100);
        ctx.lineTo(300, 100);
        ctx.stroke();
    </script>
</body>

</html>
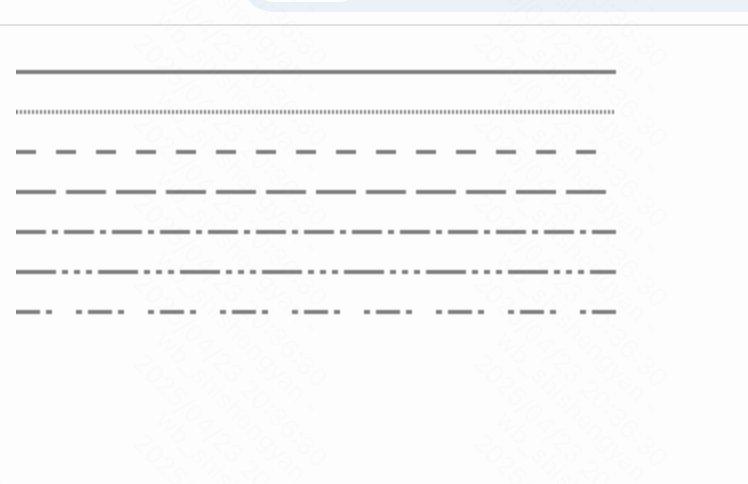
多种虚线形式 示例:
<!DOCTYPE html>
<html lang="en">

<head>
    <meta charset="UTF-8">
    <meta name="viewport" content="width=device-width, initial-scale=1.0">
    <title>setLineDash 属性</title>
</head>

<body>
    <canvas id="canvas" width="550" height="500"></canvas>
    <script>
        function drawDashedLine(pattern) {
            ctx.beginPath();
            ctx.setLineDash(pattern);
            ctx.moveTo(0, y);
            ctx.lineTo(300, y);
            ctx.stroke();
            y += 20;
        }

        const canvas = document.getElementById("canvas");
        const ctx = canvas.getContext("2d");
        let y = 15;

        drawDashedLine([]);
        drawDashedLine([1, 1]);
        drawDashedLine([10, 10]);
        drawDashedLine([20, 5]);
        drawDashedLine([15, 3, 3, 3]);
        drawDashedLine([20, 3, 3, 3, 3, 3, 3, 3]);
        drawDashedLine([12, 3, 3]); // 等于 [12, 3, 3, 12, 3, 3]

    </script>
</body>

</html>
ctx.save():
Canvas 2D API 的 CanvasRenderingContext2D.save() 方法用于通过将当前状态放入栈中,以保存 canvas 的完整状态。
存档 (存上下文状态) (push)
ctx.restore():
Canvas 2D API 的 CanvasRenderingContext2D.restore() 方法用于通过在绘制状态栈中弹出顶部的条目,将 canvas 恢复到最近的保存状态。如果没有保存状态,此方法不做任何改变。
恢复原来的状态 不过每次restore都是最新的save的状态 (pop)
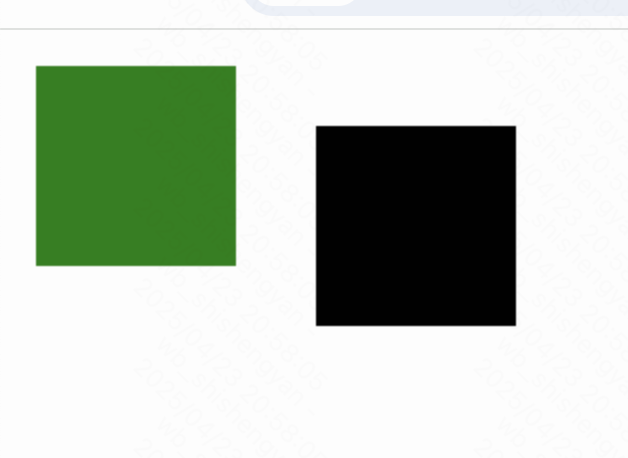
示例使用 save() 方法保存当前状态,并使用 restore() 进行恢复。所以,稍后你可以使用当前状态绘制一个矩形:
<!DOCTYPE html>
<html lang="en">

<head>
    <meta charset="UTF-8">
    <meta name="viewport" content="width=device-width, initial-scale=1.0">
    <title>save & restore 属性</title>
</head>

<body>
    <canvas id="canvas" width="550" height="500"></canvas>
    <script>
        const canvas = document.getElementById("canvas");
        const ctx = canvas.getContext("2d");

        // 保存当前状态
        ctx.save();

        ctx.fillStyle = "green";
        ctx.fillRect(10, 10, 100, 100);

        // 恢复到最近一次调用 save() 保存的状态
        ctx.restore();

        ctx.fillRect(150, 40, 100, 100);

    </script>
</body>

</html>


 被折叠的 条评论
为什么被折叠?
被折叠的 条评论
为什么被折叠?
 到【灌水乐园】发言


