


快速入门
介绍
学习过ssm我们都知道写配置文件的折磨,项目还没开始,就要写许多的配置文件,十分的麻烦,并且如果我们要整合别的框架也是要在配置文件写很多麻烦的配置。而springboot的出现就是解决这个问题,springboot基于spring和springmvc开发,使用“约定大于配置”的理念,简单来说就是,对于各种常见场景的配置springboot已经配置过了,不需要我们在配置各种什么解析器,bean之类的,创建springboot后就可以编写业务代码了。
在学习ssm时,创建web程序需要先创建web.xml、spring的配置文件、springmvc的配置文件、mybatis的配置文件等,然后再整合,将项目打成war包,最后发布到tomcat服务器才算完成。使用springboot,完全不需要这么复杂,整个springboot项目只需要一个配置文件,并且也不需要我们再整合了,也不需要将项目打成war包了,打成jar包就可以。
总而言之,springboot配置快,启动快。
项目结构
创建一个springboot项目,项目结构如下
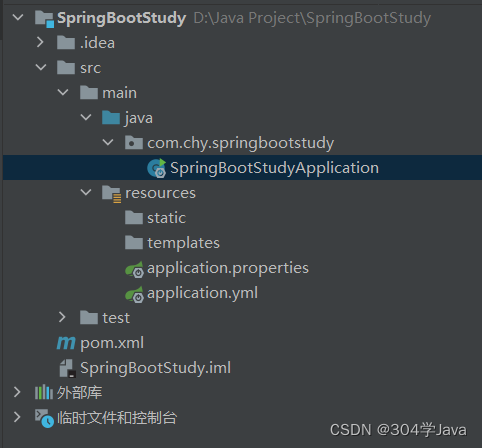
可以看到springboot项目与普通web项目有些不同,并没有webapp目录。
static目录
该目录用来放置web的静态资源,比如一些图片、js文件、css文件等。除了static目录外还有:public、META-INF/resources、resources这些目录都是默认配置,除了static外,其他目录需要自己创建。可以修改这些配置,这个在后面说。
templates目录
该目录用来放视图模板,比如Thymeleaf的视图模板。
application.properties和application.yml
这两个文件都是配置文件,两个只使用一个就行,如果两个都使用,properties的优先生效。
主程序类
每个springboot项目都会有一个主程序类,可以理解为程序的入口。
package com.chy.springbootstudy;

import org.springframework.boot.SpringApplication;
import org.springframework.boot.autoconfigure.SpringBootApplication;

@SpringBootApplication
public class SpringBootStudyApplication {

    public static void main(String[] args) {
        SpringApplication.run(SpringBootStudyApplication.class, args);
    }

}
主程序的类名随便起,但是必须被@SpringBootApplication注解标识,只有个被@SpringBootApplication注解标识了才是一个主程序类。这个类的位置也很重要,默认配置是只有主程序类所在的包及其子包中的注解才能被扫描。在@SpringBootApplication注解中有个scanBasePackages属性,可以额外指定扫描的包路径。
@SpringBootApplication(scanBasePackages = {"com.chy"})
pom.xml
springboot的pom都有哪些配置
<?xml version="1.0" encoding="UTF-8"?>
<project xmlns="http://maven.apache.org/POM/4.0.0" xmlns:xsi="http://www.w3.org/2001/XMLSchema-instance"
         xsi:schemaLocation="http://maven.apache.org/POM/4.0.0 https://maven.apache.org/xsd/maven-4.0.0.xsd">
    <modelVersion>4.0.0</modelVersion>
    <parent>
        <groupId>org.springframework.boot</groupId>
        <artifactId>spring-boot-starter-parent</artifactId>
        <version>2.7.5</version>
        <relativePath/> <!-- lookup parent from repository -->
    </parent>
    <groupId>com.chy</groupId>
    <artifactId>SpringBootStudy</artifactId>
    <version>0.0.1-SNAPSHOT</version>
    <name>SpringBootStudy</name>
    <description>SpringBootStudy</description>
    <properties>
        <java.version>1.8</java.version>
    </properties>
    <dependencies>
        <dependency>
            <groupId>org.springframework.boot</groupId>
            <artifactId>spring-boot-starter-web</artifactId>
        </dependency>

        <dependency>
            <groupId>org.springframework.boot</groupId>
            <artifactId>spring-boot-starter-test</artifactId>
            <scope>test</scope>
        </dependency>
    </dependencies>

    <build>
        <plugins>
            <plugin>
                <groupId>org.springframework.boot</groupId>
                <artifactId>spring-boot-maven-plugin</artifactId>
            </plugin>
        </plugins>
    </build>

</project>
可以看到,pom中有一个父项目,这个父项目的功能是设置jar包的版本号,我们使用springboot几乎不需要再向以前一个导入好多jar包的依赖,只需要导入spring-boot-starter-xxx就会将这个场景的所有jar包导入,并且各个jar包之间版本没有冲突,这都依赖于这个父项目。如果想要修改某个特定的jar包版本时,是可以修改的,比如要修改mysql的版本,首先进入父项目pom观察默认版本
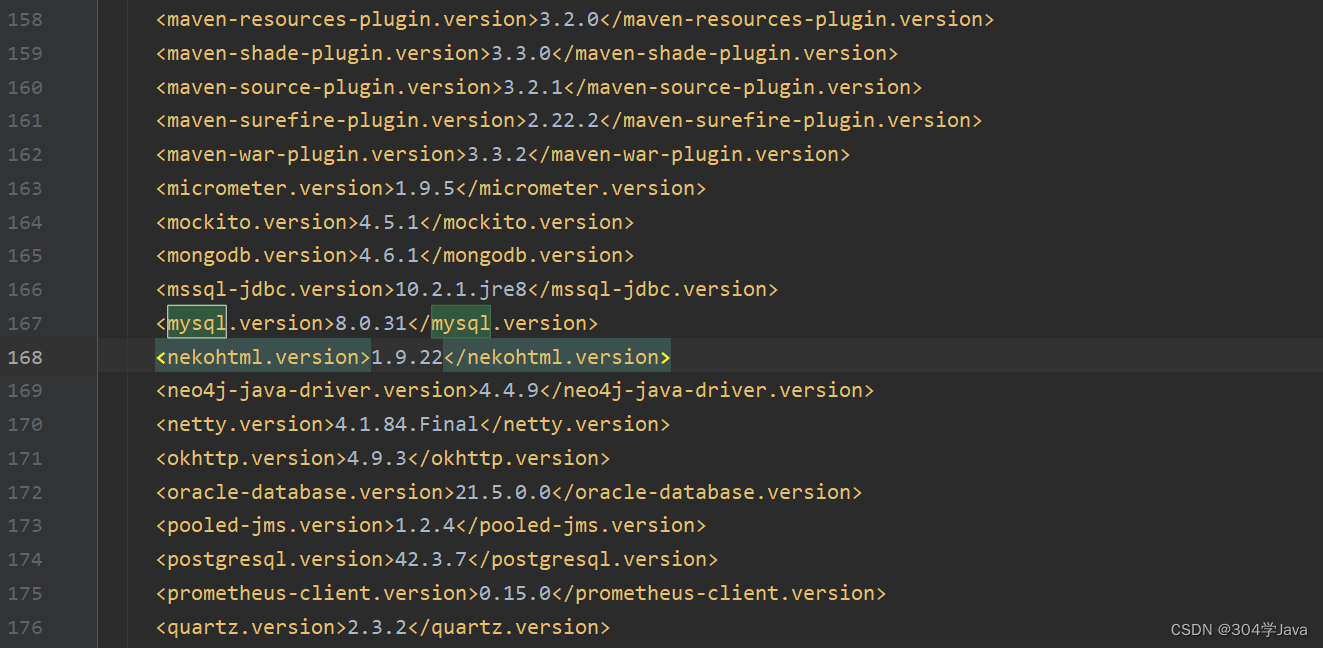
可以看到定义了很多默认的版本号,找到<mysql.version>,然后在我们的pom文件中<properties>标签中添加这个<mysql.version>标签,并写上想要的版本号。

这样就可以完成版本号的修改了。
spring-boot-starter-web是一个web的启动器,导入这个web的启动器就会将平常web开发中使用到的jar包导入进来,并且自动配置好,我们直接使用就行了,往后会见到更多的启动器。
官方的启动器都是spring-boot-starter-xxx命名。
第三方的启动器都是xxx-spring-boot-starter命名。
spring-boot-maven-plugin是pom中的一个插件,这个插件功能是:在我们将springboot项目打成jar包时会将第三方的包和tomcat服务器的运行环境全部打包进去,这样就算是jar包也可以作为web应用程序。只需要在命令行执行java -jar xxx就可以启动web服务了。
第一个springboot程序
springboot是基于spring和springmvc的,所以springmvc中的功能在springboot中也可以使用。接下来演示一下用springboot创建一个简单的web程序。
1.创建一个HelloController
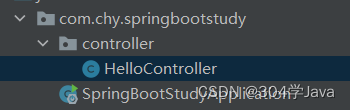
@RestController
public class HelloController {
    @RequestMapping("/hello")
    public String hello(){
        return "Hello World!";
    }
}
@RestController是@Controller和@ResponseBody的合成注解。
2.直接运行主程序类的main方法。
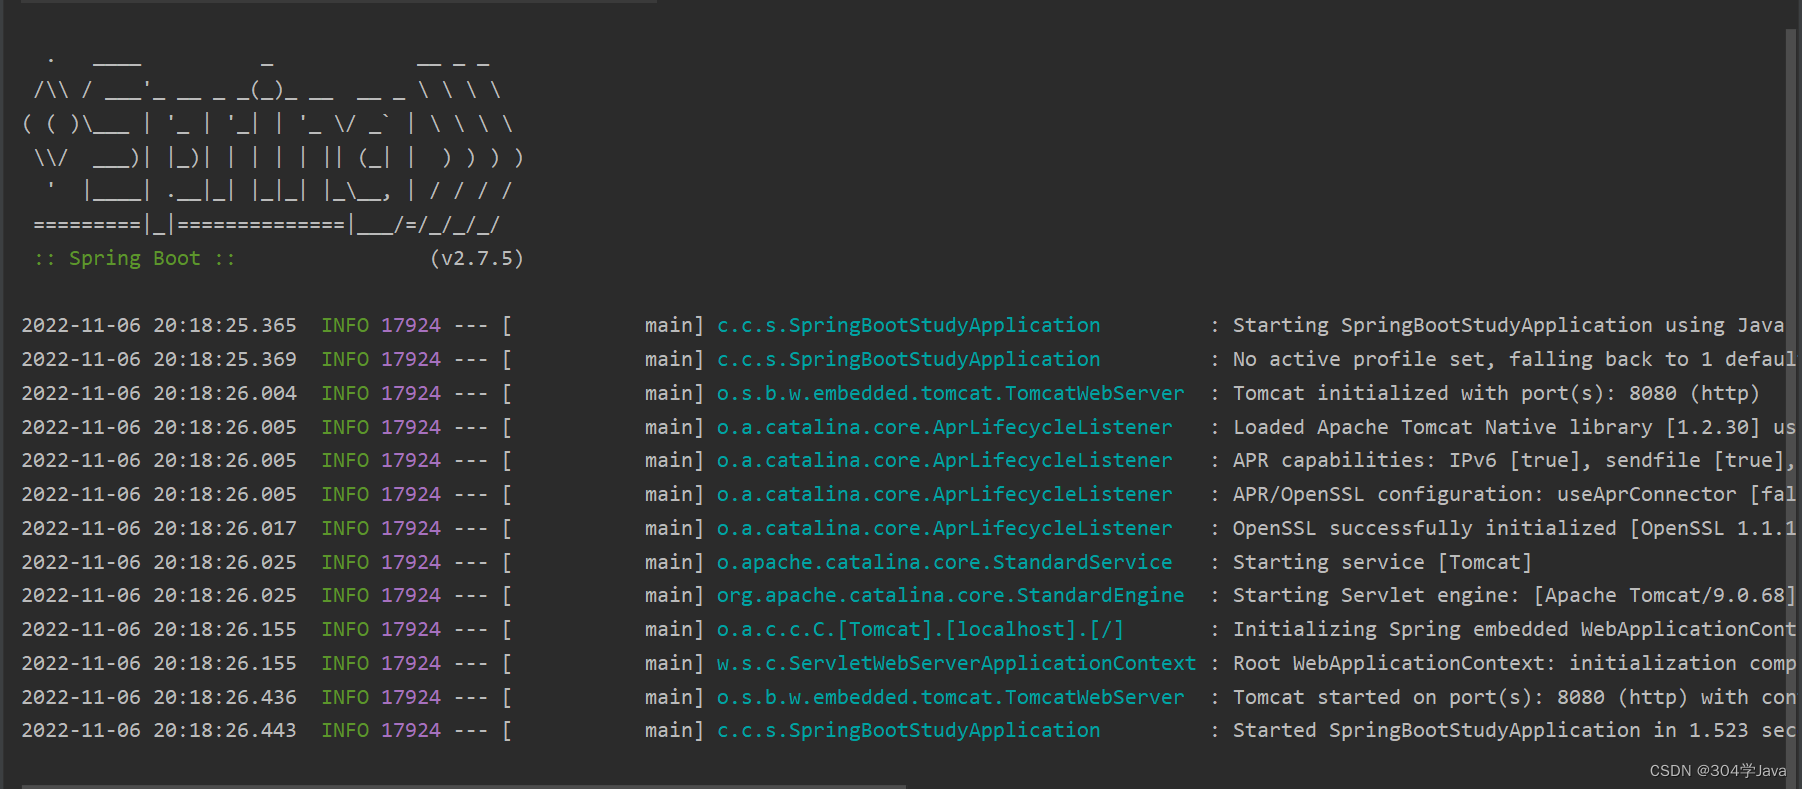
出现如上图所示的界面就证明启动成功了。
3.在浏览器输入http://localhost:8080/hello
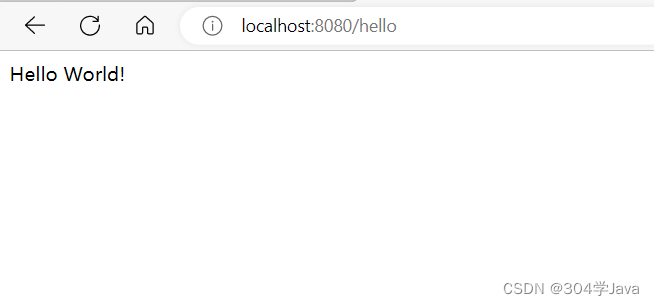
默认的端口是8080,通过配置文件可以修改,下节讲。
默认配置
几乎所有的默认配置都可以通过配置文件更改。
静态资源位置
默认的静态资源位置在/static/、/public/、/META-INF/resources/、/resources/等路径下,如果要修改路径,可以在application.properties中修改
spring.web.resources.static-locations=classpath:/myStatic/
这样就把静态资源路径修改到/myStatic目录下了。
静态资源访问路径
在默认访问静态资源时,默认的静态资源访问路径是/**,只需要在浏览器输入"/静态资源名"就可以访问。通过配置文件修改访问路径,在下次访问静态资源时就需要增加这个访问路径才能访问。
如下,修改访问路径为“/aaa/**”
spring.mvc.static-path-pattern=/aaa/**
再次访问静态资源时就需要加上/aaa/前缀了,如:http://localhost:8080/aaa/1.jpg
服务器端口号
默认的服务器端口号是8080,要修改端口号只需要添加如下配置:
server.port=8888
这样端口号就改为8888了
项目访问路径
默认是“/”,如果要修改,在配置文件添加如下配置:
server.servlet.context-path=/SpringBootStudy
这样在访问项目时就要加上“/SpringBootStudy”才能访问。
常用注解
@Configuration
这个注解用来标识一个配置类,在ssm的注解学习中已经了解过了,接下来主要讲这个注解的一个属性proxyMethodBean,默认是false,表示不代理配置类中的方法。
观察如下配置类
public class Person {
    private String name;

    public Person(String name) {
        this.name = name;
    }

    public String getName() {
        return name;
    }

    public void setName(String name) {
        this.name = name;
    }
}
@Configuration(proxyBeanMethods = false)
public class MyConfig {
    @Bean
    public Person getPerson(){
        return new Person("张三");
    }
}
在上面的配置类中我们注入一个Person对象,接下来看测试
@SpringBootApplication
public class SpringBootStudyApplication {

    public static void main(String[] args) {
        //获取IOC容器
        ConfigurableApplicationContext run = SpringApplication.run(SpringBootStudyApplication.class, args);

        //获得配置类对象
        MyConfig myConfig = run.getBean(MyConfig.class);

        //从容器中取出注入的Person对象
        Person iocPerson = run.getBean(Person.class);
        //再调用配置类中的方法获得一个Person类对象
        Person person = myConfig.getPerson();

        //比较两个Person是否是同一个实例
        System.out.println(iocPerson==person);
    }

}
打印结果如下:
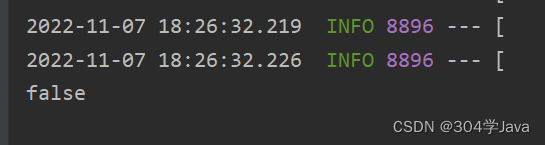
可以看到两个Person对象不是同一个实例。
接下来修改配置类为true
@Configuration(proxyBeanMethods = true)
public class MyConfig {
    @Bean
    public Person getPerson(){
        return new Person("张三");
    }
}
再次运行测试,打印结果如下:
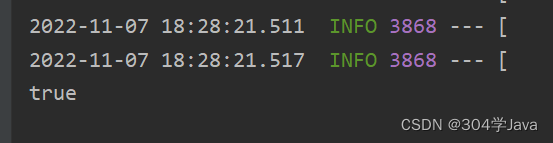
可以看到结果为true,证明两个对象是同一个实例。
从这就可以看出proxyMethodBean是什么作用了,当proxyMethodBean等于true时,我们调用配置类中的方法时,会首先在ioc容器中寻找是否有和配置类方法返回类型相同的对象,如果有就返回容器中的对象。而flase就表示单单的调用方法又new了一个对象。
@Import
这个注解用来导入一个类到容器中,可以放在配置类或组件类上,格式如下:
@Import(Person.class)
@Configuration
public class MyConfig {
}
参数为类的class对象。
@Impor还有更高级的用法需要了解ImportSelector接口和ImportBeanDefinitionRegistrar接口,可以批量和选择性的导入类到容器中。
@ImportResource
这个注解是用来导入spring的xml配置文件的,虽然springboot基本都是注解了,但是为了防止有些配置已经写在xml上了,要是在转换成配置类也是相当麻烦,所以可以直接使用这个注解加载以前的配置文件。
@Conditional
在springboot中有很多@Conditional的扩展注解
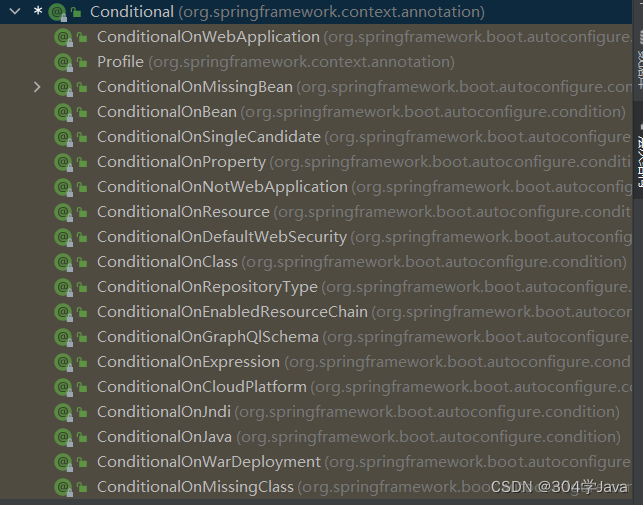
这些注解功能类似,用来标注在配置类上,或配置类的方法上,表示当达到某个条件时配置类或配置类中的某个方法才会生效。
比如:@ConditionalOnBean(Person.class),表示当容器中存在Person对象时才会生效。@ConditionalOnMissingBean(Person.class),表示当容器中不存在Person对象时才会生效。其他也都类似。
配置绑定
@ConfigurationProperties
@ConfigurationProperties可以标到类或方法上,如果标注到类上就会从配置文件读取相应前缀的配置赋值给成员变量。如果标注到方法上会为方法的返回值类型自动赋值(也是从配置文件中找)。
@Component
@ConfigurationProperties(prefix = "person")
public class Person {
    private String name;

    public Person() {
    }
    public Person(String name) {
        this.name = name;
    }

    public String getName() {
        return name;
    }

    public void setName(String name) {
        this.name = name;
    }
}
绑定前缀为person,接下来在配置文件中写配置是需要加上person前缀,键名要和类中的属性名一致。
application.yml配置如下:
person:
  name: 你好
application.properties配置如下:
person.name=张三
效果是一样的,只是配置文件的语法不同。
**注意:**要自动配置属性的类必须被注册到容器中,除了使用@Component外,还可以在配置类上使用@EnableConfigurationProperties注解开启某个类的自动配置,如下:
@Configuration
@EnableConfigurationProperties(Person.class)
public class MyConfig {
}
配置注解处理器:
我们在配置文件中为自定义的类写属性配置时是没有提示的,配置注解处理器可以有智能提示,非常方便,在pom中加如下依赖:
<dependency>
    <groupId>org.springframework.boot</groupId>
    <artifactId>spring-boot-configuration-processor</artifactId>
    <optional>true</optional>
</dependency>
这个依赖只在我们写代码时有用,打包时可以不将它打包,在pom打包插件可以将它排除
<build>
        <plugins>
            <plugin>
                <groupId>org.springframework.boot</groupId>
                <artifactId>spring-boot-maven-plugin</artifactId>
                <configuration>
                    <excludes>
                        <exclude>
                            <groupId>org.springframework.boot</groupId>
                            <artifactId>spring-boot-configuration-processor</artifactId>
                        </exclude>
                    </excludes>
                </configuration>
            </plugin>
        </plugins>
    </build>
yml语法
YML文件是YAML(YAML Aint Markup Language)编写的文件,与properties文件和json格式文件三者都是配置属性文件;yaml是专门用来写配置属性文件的语言,非常简洁和强大。
语法:
- 键值对表示方式:k:(空格)v (空格必须有)
- 属性和值都是大小写敏感
- 通过空格缩进来控制层级关系 (不可以使用tab键)
- 只要是左对齐的数据,都是同一个层级
- 松散表示,Java中对于驼峰命名法,可以用原名或使用“-”代替。比如Java中lastName在yml也可以用last-name表示。
下面演示各种类型的写法:
普通属性
基本数据类型或string类型直接使用“键: 值”
name: 张三
日期
日期类型使用“/”隔开
date: 2022/11/7
对象、map集合
对象类型和map集合是相同的格式,map是“键:值”,对象是“属性:值”
  myPet:
    name: 小狗
    age: 2
行内写法
myPet: {name: 小狗,age: 2}
数组、list集合、set集合
hobby:
    - 唱
    - 跳
    - rap
    - 篮球
行内写法:
hobby: [唱,跳,rap,篮球]
数组对象、list集合对象、set集合对象
  myPets:
    - name: 小狗1
      age: 2
    - name: 小狗2
      age: 2
行内写法
myPets: [{name: 小狗1,age: 2},{name: 小狗2,age: 2}]
测试
下面测试为Person类赋值
public class Pet {
    private String name;
    private int age;

    public String getName() {
        return name;
    }

    public void setName(String name) {
        this.name = name;
    }

    public int getAge() {
        return age;
    }

    public void setAge(int age) {
        this.age = age;
    }

    @Override
    public String toString() {
        return name+" "+age;
    }
}
@Component
@ConfigurationProperties(prefix = "person")
public class Person {
    private String name;
    private Date date;
    private Pet myPet;
    private List<String> hobby;
    private List<Pet> myPets;

    public List<String> getHobby() {
        return hobby;
    }

    public void setHobby(List<String> hobby) {
        this.hobby = hobby;
    }

    public List<Pet> getMyPets() {
        return myPets;
    }

    public void setMyPets(List<Pet> myPets) {
        this.myPets = myPets;
    }

    public Pet getMyPet() {
        return myPet;
    }

    public void setMyPet(Pet myPet) {
        this.myPet = myPet;
    }

    public String getName() {
        return name;
    }

    public void setName(String name) {
        this.name = name;
    }

    public Date getDate() {
        return date;
    }

    public void setDate(Date date) {
        this.date = date;
    }
}
配置文件application.yml
person:
  name: 张三
  date: 2022/11/7
#  myPet: {name: 小狗,age: 2}
  myPet:
    name: 小狗子
    age: 2
#  hobby: [唱,跳,rap,篮球]
  hobby:
    - 唱
    - 跳
    - rap
    - 篮球
#  myPets: [{name: 小狗1,age: 2},{name: 小狗2,age: 2}]
  myPets:
    - name: 小狗1
      age: 2
    - name: 小狗2
      age: 2
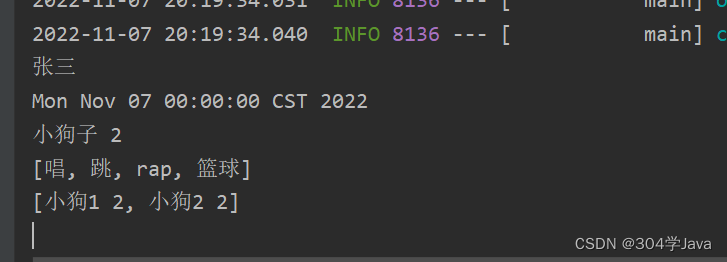
打印测试:
@SpringBootApplication
public class SpringBootStudyApplication {

    public static void main(String[] args) {
        ConfigurableApplicationContext run = SpringApplication.run(SpringBootStudyApplication.class, args);
        Person p = run.getBean(Person.class);

        System.out.println(p.getName());
        System.out.println(p.getDate());
        System.out.println(p.getMyPet());
        System.out.println(p.getHobby());
        System.out.println(p.getMyPets());
    }

}
双引号和单引号的作用
双引号会将字符串中的转义字符当成转义字符处理,如下:
person:
  name: "张\n三"

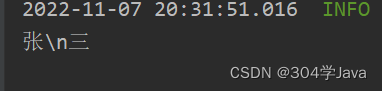
单引号会将转义字符也当成字符输出,如下:
person:
  name: '张\n三'
web开发
欢迎页
如果在静态目录下有index.html,会将这个页面作为欢迎页。
获取请求中的参数
常用注解回忆
在SpringMVC学习的很多注解在SpringBoot中也是可以使用的:
- @RequestParam:获取url请求中携带的参数。
- @RequestHeader:获取请求头中的信息。
- @CookieValue:获取Cookie携带的信息。
- @RequestAttribute:获取请求域中的属性。
- @SessionAttribute:获取Session域中的属性。
- @PathVariable:获取url请求路径中的参数。
- @RequestBody:将请求体信息封装到指定对象中。
- @ModelAttribute:获取模型(Model,ModelAndView…)中的数据。
- @RequestPart:获取文件上传表单中的文件。
…
@MatrixVariable
@MatrixVariable矩阵变量。@MatrixVariable可以像@PathVariable那样将某个路径中矩阵变量获取到。
在一般的URL请求中携带参数,我们需要用“&”连接,而矩阵变量使用“;”分号连接,如:http://localhost:8080/index;id=1;name=zhangsan
除了在路径末尾,还可以在路径的任何地方携带矩阵变量,如:http://localhost:8080/path1;id=1;name=zhangsan/path2;id=2;age=18
一个键有多个值时可以用“,”逗号隔开或者多个键值对的键相同。
springboot默认是不开启矩阵变量的,需要在配置类重新配置一个UrlPathHelper将它的属性removeSemicolonContent设置为false这样就可以使用@MatrixVariable注解获得矩阵变量了。配置如下:
@Configuration
public class MyConfig implements WebMvcConfigurer {
    @Override
    public void configurePathMatch(PathMatchConfigurer configurer) {
        UrlPathHelper urlPathHelper = new UrlPathHelper();
        urlPathHelper.setRemoveSemicolonContent(false);
        configurer.setUrlPathHelper(urlPathHelper);
    }
}
配置类需要实现WebMvcConfigurer接口,重写其中的方法。
注意:使用@MatrixVariable也需要像@PathVariable那样在@RequestMapping上加占位符。
测试:
1创建index.html
<!DOCTYPE html>
<html lang="en">
<head>
<meta charset="UTF-8">
<title>首页</title>
</head>
<body>
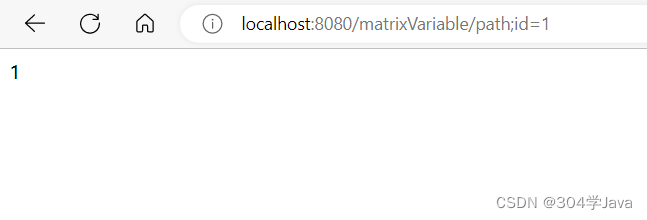
<a href="http://localhost:8080/matrixVariable/path;id=1">测试矩阵变量</a>
</body>
</html>
2创建控制器方法
  @RequestMapping("/matrixVariable/{path}")
    public String matrixVariable(@MatrixVariable("id") String sessionId){
        return sessionId;
    }
3浏览器访问

@MatrixVariable有一个属性pathVar,是用来区分不同路径中的矩阵变量的。
比如:访问http://localhost:8080/matrixVariable/path1;id=1/path2;id=2
控制器方法
  @RequestMapping("/matrixVariable/{path}/{path2}")
    public String matrixVariable(@MatrixVariable(value = "id",pathVar = "path") String sessionId){
        return sessionId;
    }
这样写可以获取path对应路径中的id变量,即id=1,而pathVar = "path2"可以获取path2路径下的变量id,即id=2。所以pathVar的值就是路径占位符的值。
内容协商
“内容协商”见名知意就是商量返回给客户端内容的类型,观察浏览器发送请求有个Accept请求头,这个请求头表示客户端可接收的类型。

内容协商就是将被@ResponseBody注解标注的控制器方法的返回值转为最合适的类型返回给客户端,可以是text/html或者application/json或者application/xml等类型,而这种转换功能需要实现HttpMessageConverter接口,这个接口在springmvc也了解了,就是将请求消息转为java对象将java对象转为响应消息。
开启根据参数的内容协商
springboot默认有一个基于请求头的内容协商,就是根据Accept请求头的信息返回最合适的类型,如果还想在浏览器手动设定返回的内容类型可以开启基于参数的内容协商,就是在请求路径中加上一个参数指定返回的类型。(注:开启后原来的基于请求头的也可以使用)
在application.yml中开启基于参数的内容协商
spring:
  mvc:
    contentnegotiation:
      favor-parameter: true
再访问时就可以加上format参数指定返回类型
如:http://localhost:8080/index?format=json
format=json返回json类型数据;format=xml返回xml数据,要返回xml需要导入xml的依赖包。
自定义HttpMessageConverter
除了返回json、xml等类型的数据,我们还可以自定义HttpMessageConverter返回给客户端我们自定义的类型格式。
需要实现HttpMessageConverter接口,接口定义如下:
public interface HttpMessageConverter<T> {
    boolean canRead(Class<?> clazz, @Nullable MediaType mediaType);

    boolean canWrite(Class<?> clazz, @Nullable MediaType mediaType);

    List<MediaType> getSupportedMediaTypes();

    default List<MediaType> getSupportedMediaTypes(Class<?> clazz) {
        return !this.canRead(clazz, (MediaType)null) && !this.canWrite(clazz, (MediaType)null) ? Collections.emptyList() : this.getSupportedMediaTypes();
    }

    T read(Class<? extends T> clazz, HttpInputMessage inputMessage) throws IOException, HttpMessageNotReadableException;

    void write(T t, @Nullable MediaType contentType, HttpOutputMessage outputMessage) throws IOException, HttpMessageNotWritableException;
}
接口有五个方法
- canRead:是否能读(从请求消息中读)。
- canWrite:是否能写(写入到响应消息)。
- getSupportedMediaTypes:返回所支持的类型集合。
- read:从请求消息中写出数据到clazz类型的对象中。
- write:将t对象写入相应消息中。
创建自定义HttpMessageConverter
public class MyHttpMessageConverter implements HttpMessageConverter<Pet> {
@Override//只处理返回值所以忽略这个方法和read方法
public boolean canRead(Class<?> clazz, MediaType mediaType) {
return false;
}
@Override//如果是Pet对象就可以写
public boolean canWrite(Class<?> clazz, MediaType mediaType) {
return clazz.isAssignableFrom(Pet.class);
}
@Override
public List<MediaType> getSupportedMediaTypes() {
return MediaType.parseMediaTypes("application/pet");//自定义一个类型
}
@Override
public Pet read(Class<? extends Pet> clazz, HttpInputMessage inputMessage) throws IOException, HttpMessageNotReadableException {
return null;
}
@Override//将返回结果写入响应信息
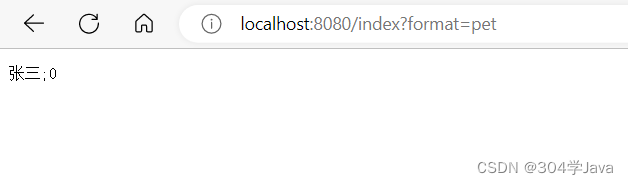
public void write(Pet pet, MediaType contentType, HttpOutputMessage outputMessage) throws IOException, HttpMessageNotWritableException {
String data = pet.getName()+";"+pet.getAge();//自定义数据格式(使用分号隔开值)
OutputStream body = outputMessage.getBody();
body.write(data.getBytes(StandardCharsets.UTF_8));
}
}
配置自定义HttpMessageConverter
在webmvc配置类(实现WebMvcConfigurer接口)将自定义的扩展到配置中
@Override//配置HttpMessageConverter
    public void extendMessageConverters(List<HttpMessageConverter<?>> converters) {
        MyHttpMessageConverter my = new MyHttpMessageConverter();
        converters.add(my);
    }
配置自定义内容协商策略
做这一步是为了支持基于参数的策略
在配置类中加入如下配置
 @Override//配置自定义内容协商配置(这个配置会替换springboot的默认配置)
    public void configureContentNegotiation(ContentNegotiationConfigurer configurer) {
        //基于参数的内容协商
        Map<String, MediaType> mediaTypes = new HashMap<>();
        mediaTypes.put("json",MediaType.APPLICATION_JSON);
        mediaTypes.put("xml",MediaType.APPLICATION_XML);
        mediaTypes.put("pet",new MediaType("application","pet"));//浏览器携带的参数就是第一个参数的值
        ParameterContentNegotiationStrategy param = new ParameterContentNegotiationStrategy(mediaTypes);
        //基于请求头的内容协商
        HeaderContentNegotiationStrategy header = new HeaderContentNegotiationStrategy();

        configurer.strategies(Arrays.asList(param,header));
    }
注:配置自定义的内容协商后默认的内容协商配置都不生效了,所以我们要配置基于请求头和参数的。
测试
创建一个控制器方法返回pet对象
@RequestMapping(value = "index")
    public Pet index(){
        Pet pet = new Pet();
        pet.setName("张三");
        return pet;
    }
1启动程序
2在浏览器输入http://localhost:8080/index?format=pet
3结果如下
整合Thymeleaf
在pom.xml中加入Thymeleaf的启动器即可自动完成Thymeleaf和springboot的整合,十分简单方便。
        <dependency>
            <groupId>org.springframework.boot</groupId>
            <artifactId>spring-boot-starter-thymeleaf</artifactId>
        </dependency>
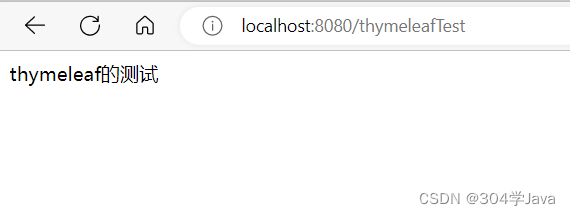
测试
创建一个controller响应请求
@Controller
public class ThymeleafController {
    @RequestMapping("/thymeleafTest")
    public String thymeleafTest(Model m){
        m.addAttribute("message","thymeleaf的测试");
        return "showData";
    }
}
在templates目录下创建视图(默认是在/templates目录下,可以在配置文件修改视图目录的位置)。
showData.html
<!DOCTYPE html>
<html lang="cn" xmlns:th="http://www.thymeleaf.org">
<head>
    <meta charset="UTF-8">
    <title>Title</title>
</head>
<body>
    <span th:text="${message}"></span>
</body>
</html>
浏览器访问http://localhost:8080/thymeleafTest
错误处理
在处理器出现异常时会被捕获,然后由异常解析器处理,异常解析器需要实现HandlerExceptionResolver接口。springboot默认配置的有一些异常解析器,这些异常解析器有一些默认规则供我们处理异常。
@ControllerAdvice+ @ExceptionHandler
使用这个注解组合可以自定义跳转到错误页面。
1创建自定义的处理方法
@ControllerAdvice
public class MyExceptionResolver{
    @ExceptionHandler(ArithmeticException.class)
    public String exceptionResolver(Exception e, Model m){
        m.addAttribute("errorMessage",e.getMessage());
        return "myerror";
    }
}
2创建一个用来展示错误信息的视图myerror.html
<!DOCTYPE html>
<html lang="cn" xmlns:th="http://www.thymeleaf.org">
<head>
    <meta charset="UTF-8">
    <title>Title</title>
</head>
<body>
    <p>出错了</p>
    <p th:text="${errorMessage}"></p>
</body>
</html>
3创建一个控制器方法(产生异常)
    @RequestMapping(value = "index")
    public String index(){
        int i = 5/0;
        return "showData";
    }
4浏览器访问http://localhost:8080/index
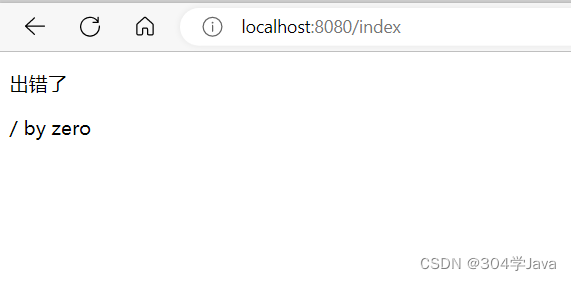
异常已经被我们定义的方法处理了。
自定义错误页
springboot默认提供了一套处理机制。一旦程序出现异常,springboot就会向/error的url发送请求。在springboot中提供了一个叫BasicErrorController来处理/error请求,然后跳转到默认显示异常的页面。
创建error.html
我们只需要在templats目录下加一个error.html视图,出现错误后就会跳转到此。请求域中会放一些异常相关的消息(status:错误码;message:错误消息提示;timestamp:时间戳;path:出现错误的URI)
创建错误码视图
在templats目录下创建一个error目录,然后在error目录中创建以错误码命名的视图,比如404.html,500.html等出现指定的错误码后就会跳转到这些视图。或者创建4xx.html或5xx.html,会响应所有以4或5开头的错误码。
@ResponseStatus
将这个注解加在我们自定义的异常上
@ResponseStatus(value = HttpStatus.BAD_REQUEST,reason = "客户端请求有问题")
public class MyException extends Exception{
    public MyException() {
    }

    public MyException(String message) {
        super(message);
    }
}
然后我们就可以在controller手动抛出自定义的异常。然后根据自定义异常中@ResponseStatus注解中指定的 HttpStatus状态码去templats/error/目录下去找那些4xx.html和5xx.html等。
自定义异常解析器
自定义的异常解析器需要实现HandlerExceptionResolver接口
@Order(Ordered.HIGHEST_PRECEDENCE)
@Component
public class MyExceptionResolver implements HandlerExceptionResolver {
    @Override
    public ModelAndView resolveException(HttpServletRequest request, HttpServletResponse response, Object handler, Exception ex) {
        ModelAndView mv = new ModelAndView();
        mv.setViewName("myerror");//要跳转的视图名
        mv.addObject("errorMessage",ex.getMessage());//可以将一些异常信息放到域中
        return mv;
    }
}
其中@Order是设置我们自定义异常解析器的优先级,因为默认我们自定义的优先级是比springboot默认的要低的,也就是先执行完默认的解析器后才会执行我们的,提高优先级可以先执行我们自定义的。
原生组件注入
在springboot中如何注册tomcat原生的组件(servlet、filter、listener)
@ServletComponentScan+(@WebServlet、@WebFilter、@WebListener)
首先在配置类使用@ServletComponentScan开启扫描
@ServletComponentScan("com.chy.springbootstudy.tomcat")
@SpringBootApplication
public class SpringBootStudyApplication {

    public static void main(String[] args) {
        SpringApplication.run(SpringBootStudyApplication.class, args);
    }

}
然后在自定义的servlet、filter、listener分别标注注解即可注册tomcat原生组件
@WebServlet(name = "myServlet",urlPatterns = "/my")
public class MyServlet extends HttpServlet {
}
@WebFilter(servletNames = "myServlet")
public class MyFilter implements Filter {
    @Override
    public void doFilter(ServletRequest servletRequest, ServletResponse servletResponse, FilterChain filterChain) throws IOException, ServletException {

    }

    @Override
    public void init(FilterConfig filterConfig) throws ServletException {
        Filter.super.init(filterConfig);
    }

    @Override
    public void destroy() {
        Filter.super.destroy();
    }
}
@WebListener
public class MyListener implements ServletContextListener {
    @Override
    public void contextInitialized(ServletContextEvent sce) {
        ServletContextListener.super.contextInitialized(sce);
    }

    @Override
    public void contextDestroyed(ServletContextEvent sce) {
        ServletContextListener.super.contextDestroyed(sce);
    }
}
RegistrationBean
第二种方式使用RegistrationBean在配置类中注册
创建一个配置类
@Configuration
public class MyConfig{
    /**
     * 注册servlet
     */
    @Bean
    public ServletRegistrationBean myServlet(){
        ServletRegistrationBean<Servlet> s = new ServletRegistrationBean<>(new MyServlet(),"/my");
        return s;
    }
    /**
     * 注册filter
     */
    @Bean
    public FilterRegistrationBean myFilter(){
        FilterRegistrationBean<MyFilter> f = new FilterRegistrationBean<>(new MyFilter(),myServlet());
        return f;
    }
    /**
     * 注册listener
     */
    @Bean
    public ServletListenerRegistrationBean myListener(){
        ServletListenerRegistrationBean<MyListener> l = new ServletListenerRegistrationBean<>(new MyListener());
        return l;
    }
}
数据访问
配置数据源和数据库驱动
该节讲springboot连接数据库,首先在pom中导入如下依赖
<!--        springboot jdbc的启动器-->
        <dependency>
            <groupId>org.springframework.boot</groupId>
            <artifactId>spring-boot-starter-jdbc</artifactId>
        </dependency>
<!--        mysql数据驱动-->
        <dependency>
            <groupId>mysql</groupId>
            <artifactId>mysql-connector-java</artifactId>
        </dependency>
spring-boot-starter-jdbc会有如下依赖:
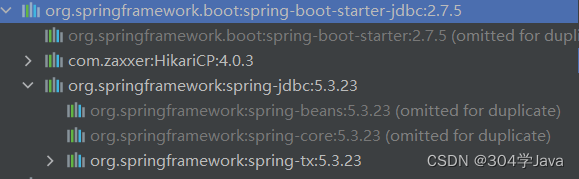
其中HiKari是一个优秀的数据源,如果想替换别的数据源,比如Druid也是可以的,后面会说到。
然后就是在配置文件配置数据库连接的属性就行了
spring:
  datasource:
#    数据源的基本信息,所有数据源都有的
    driver-class-name: com.mysql.cj.jdbc.Driver
    url: jdbc:mysql://localhost:3306/offcnpe
    username: root
    password: 123456
#    使用的数据源类型
    type: com.zaxxer.hikari.HikariDataSource
#    具体数据源的配置,比如超时间、最大连接数等,不同数据源属性不同,这里是hikari
    hikari:
      maximum-pool-size: 10
这样配置后,springboot的自动配置就会往容器中注入一个DataSource了。
测试一下从容器中取出这个数据源
在主程序中
@SpringBootApplication
public class SpringBootStudyApplication {

    public static void main(String[] args) throws SQLException {
        ConfigurableApplicationContext run = SpringApplication.run(SpringBootStudyApplication.class, args);
//        获取数据源
        DataSource dataSource = run.getBean(DataSource.class);
//        测试数据源是否可以正常获取connection
        System.out.println(dataSource.getConnection());
    }

}

可以看到DataSource正常获取,这证明数据源配置成功了。
使用第三方数据源
直接引入Druid的启动器,引入后自动配置完成
        <dependency>
            <groupId>com.alibaba</groupId>
            <artifactId>druid-spring-boot-starter</artifactId>
            <version>1.1.17</version>
        </dependency>
配置文件可以修改配置
spring:
  datasource:
#    数据源的基本信息,所有数据源都有的
    driver-class-name: com.mysql.cj.jdbc.Driver
    url: jdbc:mysql://localhost:3306/offcnpe
    username: root
    password: 123456
#    使用的数据源类型
    type: com.alibaba.druid.pool.DruidDataSource
#    druid的一些配置
    druid:
      max-active: 10
这样即可完成数据源的替换,测试一下
@SpringBootApplication
public class SpringBootStudyApplication {

    public static void main(String[] args) throws SQLException {
        ConfigurableApplicationContext run = SpringApplication.run(SpringBootStudyApplication.class, args);
        //        获取数据源
        DataSource dataSource = run.getBean(DataSource.class);
//        测试数据源是否可以正常获取connection
        System.out.println(dataSource.getClass());
        System.out.println(dataSource.getConnection());
    }

}

是Druid没错了
注:如果不引入druid的启动器,只引入druid的数据源,然后自己手写配置类也是可以的。不过springboot这么方便不使用自动配置实在可惜。
整合MyBatis
基本配置
添加依赖
pom中导入MyBatis的启动器
        <dependency>
            <groupId>org.mybatis.spring.boot</groupId>
            <artifactId>mybatis-spring-boot-starter</artifactId>
            <version>2.1.4</version>
        </dependency>
导入启动器后即完成自动配置,如果需要修改配置可以在全局配置文件修改
mybatis的配置
#mybatis的配置
mybatis:
#  mapper文件的路径
  mapper-locations: classpath:mapper/*.xml
#  全局配置
  configuration:
    map-underscore-to-camel-case: true
其他配置也都类似,所有配置都可在yml文件配置,不必再为mybatis创建一个xml的配置文件了。
如果还是想使用xml配置文件可以使用config-location指定配置文件的位置。
注:config-location和configuration两个配置属性只能选择一个,否则会有冲突。
编写sql
(1)创建一个mapper接口
@Mapper
public interface RoleMapper {
    public Integer getCount();
}
注:mapper接口要使用@mapper注解标识才能扫描到
(2)在配置的路径下创建一个mapper文件。
<?xml version="1.0" encoding="UTF-8" ?>
<!DOCTYPE mapper
        PUBLIC "-//mybatis.org//DTD Mapper 3.0//EN"
        "http://mybatis.org/dtd/mybatis-3-mapper.dtd">
<mapper namespace="com.chy.springbootstudy.mapper.RoleMapper">
<!--    public Integer getCount();-->
    <select id="getCount" resultType="int">
        select count(id) from t_role
    </select>
</mapper>
这个方法会统计表中的数量。
(2)测试
service层
public interface RoleService {
    Integer getCount();
}
@Service
public class RoleServiceImpl implements RoleService {
    @Autowired
    private RoleMapper rm;
    @Override
    public Integer getCount() {
        return rm.getCount();
    }
}
controller层
@RestController
public class RoleController {
@Autowired
private RoleService rs;
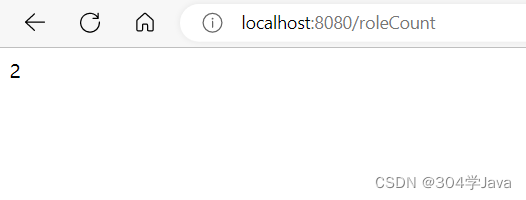
@RequestMapping("/roleCount")
public String roleCount(){
return rs.getCount().toString();
}
}
启动服务器,浏览器访问http://localhost:8080/roleCount
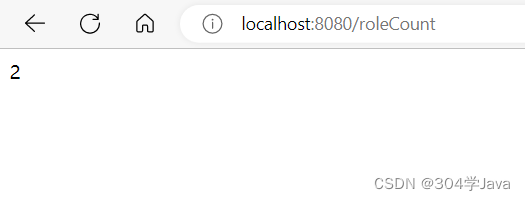
两条数据,看一下表中有几条数据

简化
对于比较简单的sql,可以不必创建mapper文件,可以直接在mapper接口使用如下注解:
- @Insert:类似mapper文件中的insert标签
- @Delete:类似mapper文件中的delete标签
- @Update:类似mapper文件中的update标签
- @Select:类似mapper文件中的select标签
将上节的mapper文件删除,直接在mapper接口中使用注解
@Mapper
public interface RoleMapper {
    @Select("select count(id) from t_role")
    public Integer getCount();

    @Select("select id,name,keyword,description from t_role where id=#{id}")
    public Role selectById(int id);
}
浏览器再次访问
也是可以查到,其他注解也是类似的用法。
@MapperScan
如果Mapper接口很多,都写@Mapper注解会很麻烦。
使用@MapperScan注解可以扫描指定路径下的mapper接口,这样就不必写@Mapper注解了。
@SpringBootApplication
@MapperScan("com.chy.springbootstudy.mapper")
public class SpringBootStudyApplication {

    public static void main(String[] args) throws SQLException {
        SpringApplication.run(SpringBootStudyApplication.class, args);
    }

}
配置分页插件
直接引入Pagehelper的启动器即可自动配置
 <dependency>
            <groupId>com.github.pagehelper</groupId>
            <artifactId>pagehelper-spring-boot-starter</artifactId>
            <version>1.4.5</version>
        </dependency>
要修改分页插件的配置可以在yml中修改
#分页插件的配置
pagehelper:
  helper-dialect: mysql
单元测试
JUnit5介绍
Spring Boot 2.2.0版本开始引入JUint5作为单元测试默认库。
        <dependency>
            <groupId>org.springframework.boot</groupId>
            <artifactId>spring-boot-starter-test</artifactId>
            <scope>test</scope>
        </dependency>
从JUnit5开始与之前的JUnit版本有很大不同,由三部分组成:
JUnit5 = JUnit Platform + JUnit Jupiter + JUnit Vintage
- JUnit Platform:在JVM启动测试框架的基础,不仅支持JUnit自制的测试引擎,其他测试引擎也都可以接入
- JUnit Jupiter:提供JUnit5的新编程模型,是JUnit5新特性的核心。内部包含了一个测试引擎,用于在JUnit Platform上运行
- JUnit Vintage:用于兼容JUnit4和3的测试引擎
注:在SpringBoot2.4以上版本移除了默认对Vintage的依赖,如果需要兼容以前的JUnit版本需要自行引入如下依赖:
<!--        兼容JUnit5之前的版本-->
        <dependency>
            <groupId>org.junit.vintage</groupId>
            <artifactId>junit-vintage-engine</artifactId>
            <scope>test</scope>
            <exclusions>
                <exclusion>
                    <groupId>org.hamcrest</groupId>
                    <artifactId>hamcrest-core</artifactId>
                </exclusion>
            </exclusions>
        </dependency>
JUnit5常用注解
- @Test:表示方法是测试方法
- @DisplayName:为测试类或测试方法设置展示名称
- @BeforeEach:在每个测试方法之前执行
- @AfterEach:在每个测试方法之后执行
- @BeforeAll:在所有测试方法之前执行,只执行一次
- @AfterAll:在所有测试方法之后执行,只执行一次
- @Tag:表示单元测试类别
- @Disabled:表示测试方法或测试类不执行
- @Timeout:表示测试方法运行如果超过指定时间将会返回错误
- @RepeatedTest:重复测试标注的测试方法。如@RepeatedTest(4)测试四次。
- @ExtendWith:为测试类或测试方法提供扩展类引用
测试:
@DisplayName("JUnit5Test测试模块")
public class JUnit5Test {

    /*
    被@BeforeAll和@AfterAll标注的方法必须是静态方法
     */
    @BeforeAll
    public static void beforeAll(){
        System.out.println("---测试要开始了---");
    }
    @AfterAll
    public static void afterAll(){
        System.out.println("---测试结束了---");
    }


    @BeforeEach
    public void beforeEach(){
        System.out.println("-方法要开始了-");
    }
    @AfterEach
    public void afterEach(){
        System.out.println("-方法结束了-");
    }


    @DisplayName("one方法")
    @Test
    public void one(){
        System.out.println("第一个测试方法");
    }
    @DisplayName("two方法")
    @Test
    public void two(){
        System.out.println("第二个测试方法");
    }

}

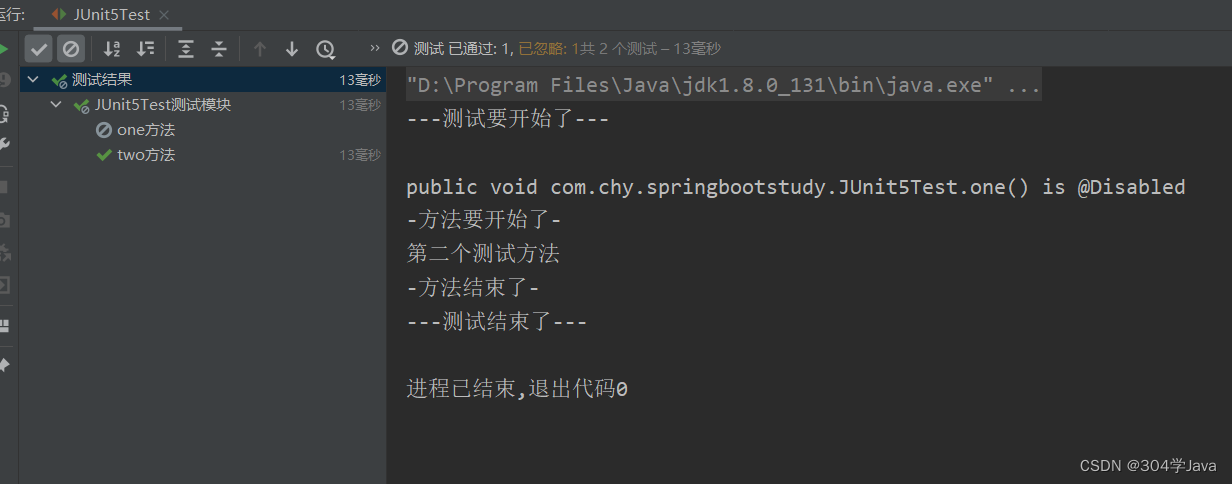
注:在被@Test注解标注的方法上标注@Disabled则该方法不会启动测试,如下
@DisplayName("JUnit5Test测试模块")
public class JUnit5Test {

    /*
    被@BeforeAll和@AfterAll标注的方法必须是静态方法
     */
    @BeforeAll
    public static void beforeAll(){
        System.out.println("---测试要开始了---");
    }
    @AfterAll
    public static void afterAll(){
        System.out.println("---测试结束了---");
    }


    @BeforeEach
    public void beforeEach(){
        System.out.println("-方法要开始了-");
    }
    @AfterEach
    public void afterEach(){
        System.out.println("-方法结束了-");
    }


    @Disabled
    @DisplayName("one方法")
    @Test
    public void one(){
        System.out.println("第一个测试方法");
    }
    @DisplayName("two方法")
    @Test
    public void two(){
        System.out.println("第二个测试方法");
    }

}
@Timeout可以设定一个时间,如果测试方法超时会抛出TimeoutException异常
@DisplayName("JUnit5Test测试模块")
public class JUnit5Test {

    @Timeout(value = 500,unit = TimeUnit.MILLISECONDS)
    @Test
    public void timeout() throws InterruptedException {
        Thread.sleep(501);
    }
}
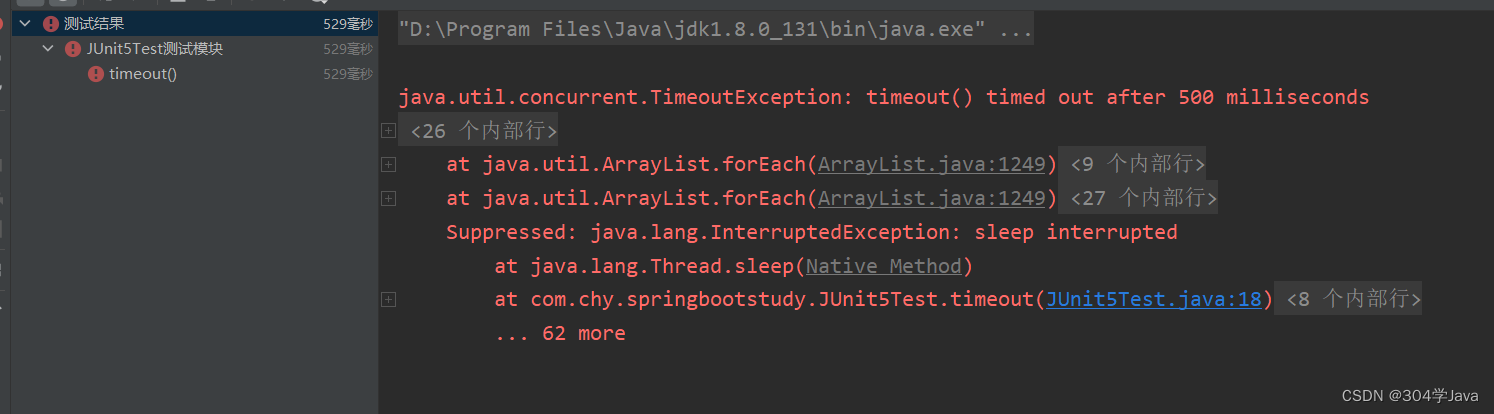
unit属性设置单位时间,可以设置毫秒、秒、分、时等
@ExtendWith解析
@ExtendWith类似JUnit之前版本的@RunWith,是用来整合框架和测试框架使用的,要想整合springboot和junit5只需要在测试类上标注@SpringBootTest,@SpringBootTest是一个复合注解,其中就包含@ExtendWith。
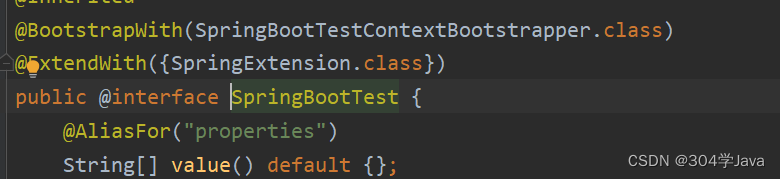
整合后就可以在测试类中使用@Autowired自动注入容器中的bean了。
@SpringBootTest
@DisplayName("JUnit5Test测试模块")
public class JUnit5Test {
@Autowired
private Person person;
@Test
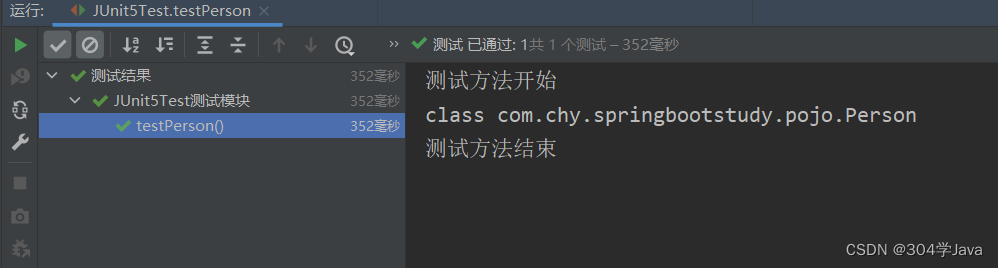
public void testPerson(){
System.out.println("测试方法开始");
System.out.println(person.getClass());
System.out.println("测试方法结束");
}
}
断言
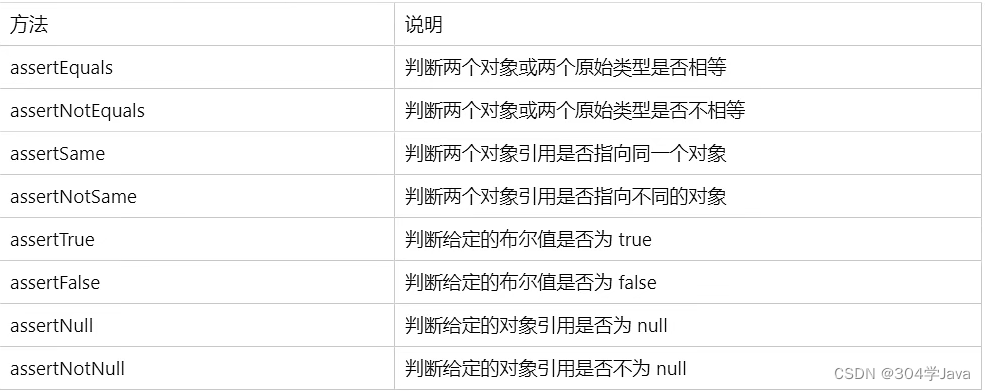
断言是测试方法中的核心部分,用来对测试需要满足的条件进行验证。这些断言方法都是org.junit.jupiter.api.Assertions的静态方法。
简单断言
测试:
@DisplayName("JUnit5Test测试模块")
public class JUnit5Test {

   @Test
    public void testAssertFalse(){
       boolean b = true;
       Assertions.assertFalse(b);
   }

}
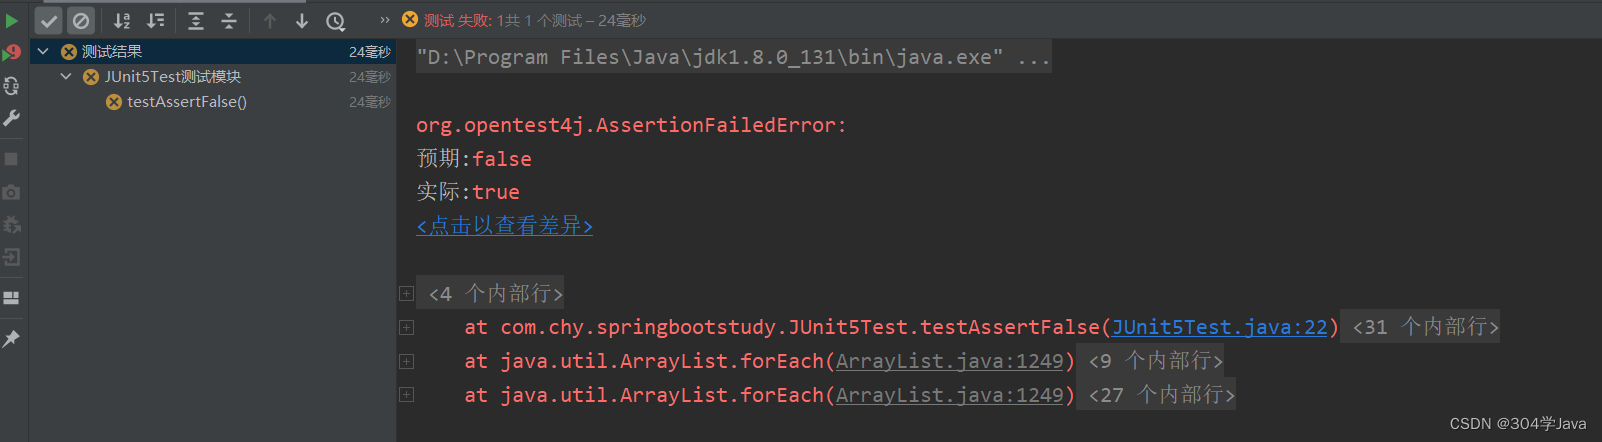
断言失败后会给出错误信息,断言失败后,后面的方法也不会再执行了。
组合断言
组合断言可以使用Assertions.assertAll()方法将前面多个简单断言组合起来,如下:
@DisplayName("JUnit5Test测试模块")
public class JUnit5Test {

   @Test
    public void testAssertFalse(){
       Assertions.assertAll("组合断言",
               ()->Assertions.assertFalse(false),
               ()->Assertions.assertTrue(false)
       );
   }

}
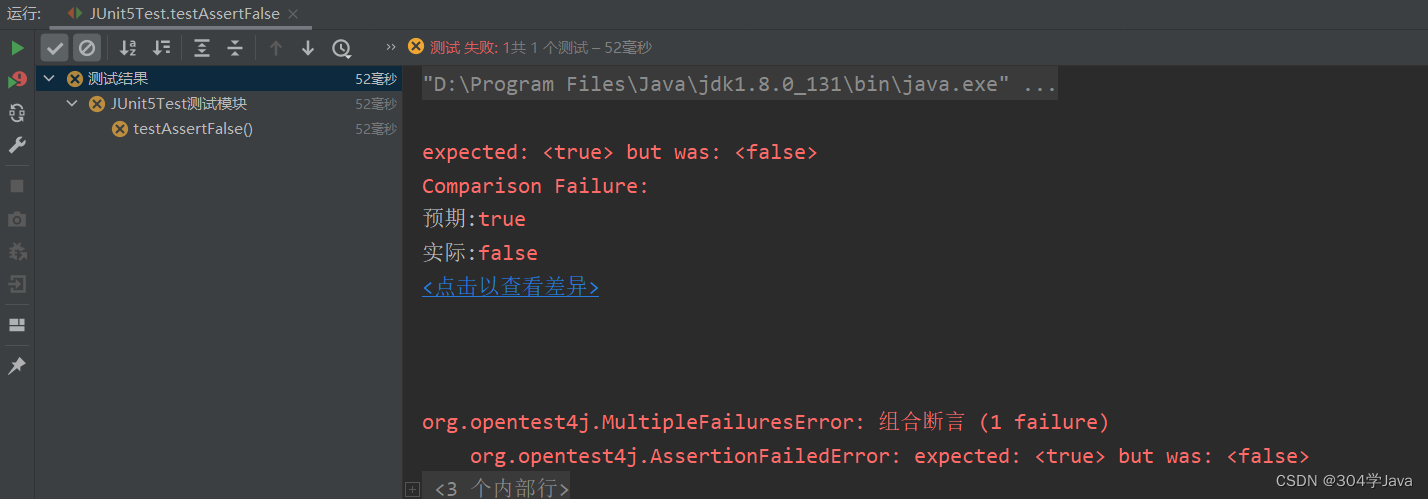
组合断言中的方法有一个失败就整个失败。
异常断言
使用Assertions.assertThrows方法
@DisplayName("JUnit5Test测试模块")
public class JUnit5Test {

   @Test
    public void testAssertFalse(){
       Assertions.assertThrows(ArithmeticException.class,
           ()->{
            int i = 5;
           });
   }

}
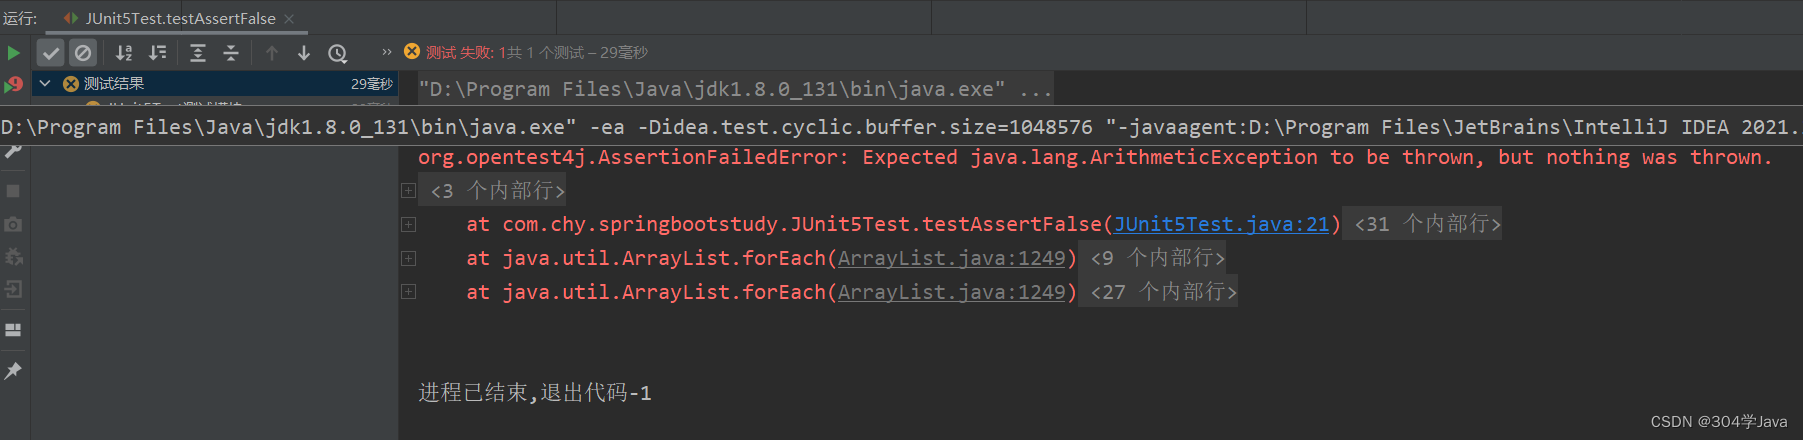
方法一定要出现指定的异常,如果不出现异常就会断言失败。
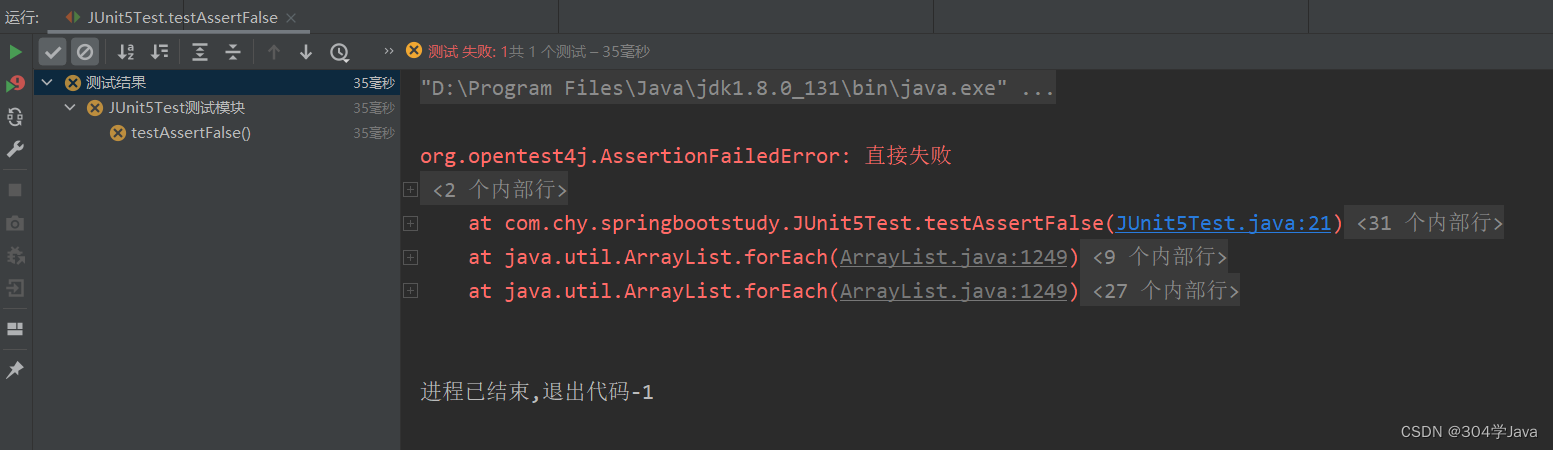
快速失败
fail方法,调用这个方法会直接让方法测试失败
@DisplayName("JUnit5Test测试模块")
public class JUnit5Test {

   @Test
    public void testAssertFalse(){
       Assertions.fail("直接失败");
   }

}
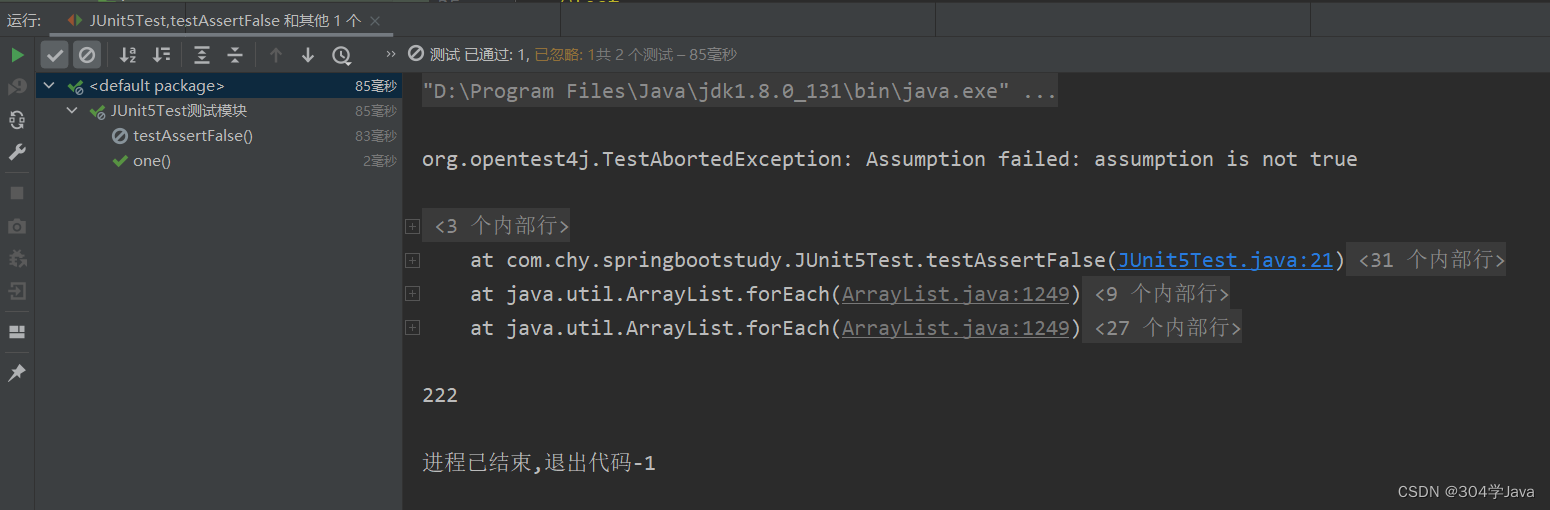
前置条件
前置类似于断言,也是使用静态方法判定是否满足条件。与断言不同的是,前置中如果不满足条件会打印出错信息并跳过该测试方法然后执行下一个测试方法,而断言出错就不再会执行后面的测试方法了。
前置条件使用的静态方法定义在 Assumptions类中。
测试
@DisplayName("JUnit5Test测试模块")
public class JUnit5Test {

   @Test
    public void testAssertFalse(){
       Assumptions.assumeTrue(false);
       System.out.println("1111");
   }

   @Test
   public void one(){
       System.out.println("222");
   }

}
嵌套测试
嵌套测试适用于有很多层的测试类,比如测试类中还有一个测试类,就可以使用“@Nested”注解标注到内部的类上。
注:内部类中被@BeforeAll标注的方法不会在外部类的所有测试方法前执行,只会在内部类的所有测试方法前执行。
参数化测试
使用不同的参数多次运行测试方法。我们可以用注解指定入参给测试方法,测试方法会将每一个入参都测试一遍。常用注解如下:
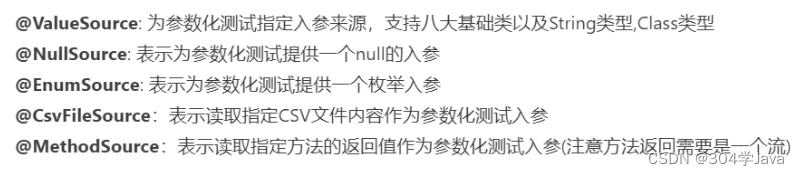
注:参数化测试需要在方法上标注@ParameterizedTest注解替换@Test。表示这是一个参数化测试方法
测试:
@DisplayName("JUnit5Test测试模块")
public class JUnit5Test {

    @ParameterizedTest
    @ValueSource(strings = {"hello","world","!"})
    public void test(String s){
        System.out.println(s);
    }

}

高级特性
Profile功能
profile功能简单来说就是切换配置文件的。在实际生产中,可能会有许多配置文件,比如生产时有一个配置文件,测试时有一个配置文件,如何切换不同的配置文件就是profile功能。
在默认配置文件切换
(1)首先创建一个类用来测试
@Component
@ConfigurationProperties("person")
public class Person {
    private String name;

    public String getName() {
        return name;
    }

    public void setName(String name) {
        this.name = name;
    }
}
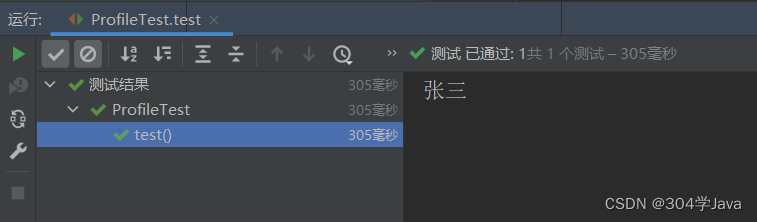
(2)创建一个生产环境的配置文件application-prod.yml
person:
  name: 张三
注:配置文件命名需要以"application-*.yml"格式命名
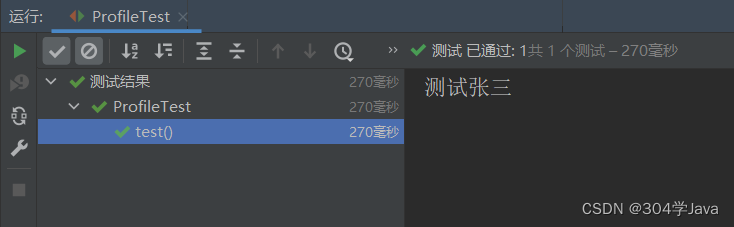
(3)创建一个测试环境的配置文件application-test.yml
person:
  name: 测试张三
(4)在默认的配置人间application.yml中设置哪个配置文件生效
spring:
  profiles:
    active: test
这个是指定application-test.yml文件生效
(5)测试一下name的值
@SpringBootTest
public class ProfileTest {
    @Autowired
    private Person person;

    @Test
    public void test(){
        System.out.println(person.getName());
    }
}
(6)修改配置文件,让application-prod.yml生效
spring:
  profiles:
    active: prod
**注:**默认配置文件和指定的文件都会生效,如果有相同的配置,依指定的文件优先。
命令行切换
除了在配置文件切换,还可以在运行时在命令行指定,如下:
java -jar xxx.jar --spring.profiles.active=prod
除了可以指定配置文件还可以指定配置文件中的属性配置,如下:
java -jar xxx.jar --spring.profiles.active=prod --person.name=Tom
注:命令行的优先级高于配置文件
@Profile注解
@Profile注解使用比较灵活,可以标注到类或方法上。表示只有处于指定的环境下类或方法(配置类方法)才能装配成功。
@Component
@Profile("test")
@ConfigurationProperties("person")
public class Person {
    private String name;

    public String getName() {
        return name;
    }

    public void setName(String name) {
        this.name = name;
    }
}
只有环境为application-test.yml时才能注入容器中。
profile分组
每一种环境可以有多个配置文件,然后将它们分为一个组。如下:
这是默认配置文件中的配置
spring:
  profiles:
    active: mytest
    group:
      myprod: [p1,p2,p3]
      mytest: [t1,t2,t3]
解析:创建了两个组myprod和mytest(组名可以自己取),他们各自有三个文件(application-p1.yml、application-p2.yml、application-p3.yml …)。active指定要激活的组,该组下的所有配置文件都生效。
外部化配置
在编写代码时,将一些经常变动的值提取出来,放到一个配置文件中。
配置信息可以放在properties文件、YAML文件、命令行参数、系统环境变量。这些配置信息读取后都会保存在springboot的ConfigurableEnvironment环境中保存。
(1)@PropertySource注解可以加载一个properties配置文件
(2)@Value注解可以从ConfigurableEnvironment环境读取指定的一个配置信息。
注:@Value可以取到所有生效的配置文件中的配置信息。除此之外@Value还可以获得环境变量的信息,比如@Value(“${JAVA_HOME}”)会获取配置在环境变量中JAVA_HOME的值。
(3)@ConfigurationProperties也是从ConfigurableEnvironment环境中获取指定前缀的配置信息。
加载配置文件的查找路径
- classpath根路径
- classpath根路径下config目录
- jar包当前目录
- jar包当前目录的config目录
- /config子目录的直接子目录(Linux下)
注:如果有相同的配置,下面的配置文件会覆盖上面的配置文件的配置。
配置文件的加载顺序
命令行的优先级最高,然后是指定环境的配置文件,最后是默认的配置文件。
自定义starter
加载自定义starter的流程
在项目启动后,springboot会读取/META-INF/spring.factories文件中“org.springframeword.boot.autoconfigure.EnableAutoConfiguration”的值,这个值一般是我们自动配置类的全类名。
然后springboot根据这个全类名去加载指定的配置类。
自定义启动器
需求:假如我们要定义一个启动器,引入该启动器就会往容器中注入一个Person对象。
(1)创建新项目
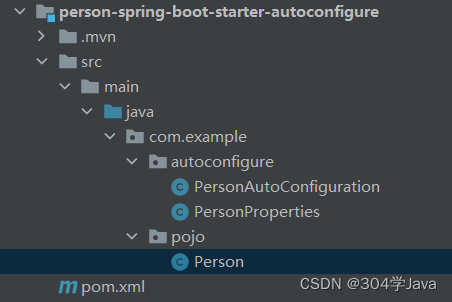
自定义starter一般需要创建两个项目,一个项目叫xxx-spring-boot-starter不写任何代码,只引用另一个我们要创建的项目,另一个项目一般叫xxx-spring-boot-starter-autoconfigure,在这个项目中写具体的配置。
创建一个maven项目person-spring-boot-starter,项目中不写任何代码,在pom.xm文件中加入如下依赖
<?xml version="1.0" encoding="UTF-8"?>
<project xmlns="http://maven.apache.org/POM/4.0.0" xmlns:xsi="http://www.w3.org/2001/XMLSchema-instance"
         xsi:schemaLocation="http://maven.apache.org/POM/4.0.0 https://maven.apache.org/xsd/maven-4.0.0.xsd">
    <modelVersion>4.0.0</modelVersion>
    <groupId>com.example</groupId>
    <artifactId>person-spring-boot-starter</artifactId>
    <version>0.0.1-SNAPSHOT</version>

    <properties>
        <java.version>1.8</java.version>
    </properties>
    <dependencies>
        <dependency>
            <groupId>com.example</groupId>
            <artifactId>person-spring-boot-starter-autoconfigure</artifactId>
            <version>0.0.1-SNAPSHOT</version>
        </dependency>
    </dependencies>
</project>
这个依赖就是我们马上要创建的另一个项目,项目如下:
pom.xml文件如下
<?xml version="1.0" encoding="UTF-8"?>
<project xmlns="http://maven.apache.org/POM/4.0.0" xmlns:xsi="http://www.w3.org/2001/XMLSchema-instance"
         xsi:schemaLocation="http://maven.apache.org/POM/4.0.0 https://maven.apache.org/xsd/maven-4.0.0.xsd">
    <modelVersion>4.0.0</modelVersion>
    <groupId>com.example</groupId>
    <artifactId>person-spring-boot-starter-autoconfigure</artifactId>
    <version>0.0.1-SNAPSHOT</version>
    <parent>
        <groupId>org.springframework.boot</groupId>
        <artifactId>spring-boot-starter-parent</artifactId>
        <version>2.7.5</version>
        <relativePath/> <!-- lookup parent from repository -->
    </parent>

    <properties>
        <java.version>1.8</java.version>
    </properties>
    <dependencies>

        <dependency>
            <groupId>org.springframework.boot</groupId>
            <artifactId>spring-boot-starter</artifactId>
        </dependency>

    </dependencies>


</project>
项目中具体类的内容如下:
public class Person {
    private String prefix ;
    private String suffix ;

    public Person(String prefix, String suffix) {
        this.prefix = prefix;
        this.suffix = suffix;
    }

    public Person() {
    }

    public String getPrefix() {
        return prefix;
    }

    public void setPrefix(String prefix) {
        this.prefix = prefix;
    }

    public String getSuffix() {
        return suffix;
    }

    public void setSuffix(String suffix) {
        this.suffix = suffix;
    }

    /**
     * 根据前后缀打招呼
     */
    public void say(){
        System.out.println(prefix+" "+suffix);
    }
}
@ConfigurationProperties("person")
public class PersonProperties {
   	private String prefix = "你好";
    private String suffix = "老六";

    public String getPrefix() {
        return prefix;
    }

    public void setPrefix(String prefix) {
        this.prefix = prefix;
    }

    public String getSuffix() {
        return suffix;
    }

    public void setSuffix(String suffix) {
        this.suffix = suffix;
    }
}
核心的自动配置的类如下:
@Configuration
@ConditionalOnClass(Person.class)
@EnableConfigurationProperties(PersonProperties.class)
public class PersonAutoConfiguration {

    @ConditionalOnMissingBean(Person.class)
    @Bean
    public Person getPerson(PersonProperties pp){
        return new Person(pp.getPrefix(),pp.getSuffix());
    }
}
一连串配置下来就是往容器中放一个Person类,会自动从配置文件获取suffix和prefix的值为person对象赋值,如果没有配也没事,类中写的有默认值。
最后一步,在person-spring-boot-starter-autoconfigure的resources下创建META-INF目录,然后在该目录下创建一个spring.factories文件,将我们的自动配置类写上去,如下:
#自动配置
org.springframework.boot.autoconfigure.EnableAutoConfiguration=\
com.example.autoconfigure.PersonAutoConfiguration
(2)打包安装到本地仓库
(3)然后就可以用别的项目引入我们创建的starter了。
自定义事件监听器
在springboot启动过程的每个阶段,会有不同的事件,如果我们想在springboot启动过程做一些事情的话,可以实现如下一些接口,在启动的每个不同阶段会调用指定接口的方法。
(1)ApplicationContextInitializer
@FunctionalInterface
public interface ApplicationContextInitializer<C extends ConfigurableApplicationContext> {
    void initialize(C applicationContext);
}
执行时机:刷新容器之前执行。
测试:
实现该接口
public class MyApplicationContextInitializer implements ApplicationContextInitializer {
    @Override
    public void initialize(ConfigurableApplicationContext applicationContext) {
        System.out.println("-----MyApplicationContextInitializer:"+applicationContext.getClass().getSimpleName()+"-----");
    }
}
配置到/META-INF/spring.factories文件中去
org.springframework.context.ApplicationContextInitializer=\
  com.chy.springbootstudy.listener.MyApplicationContextInitializer
启动查看控制台
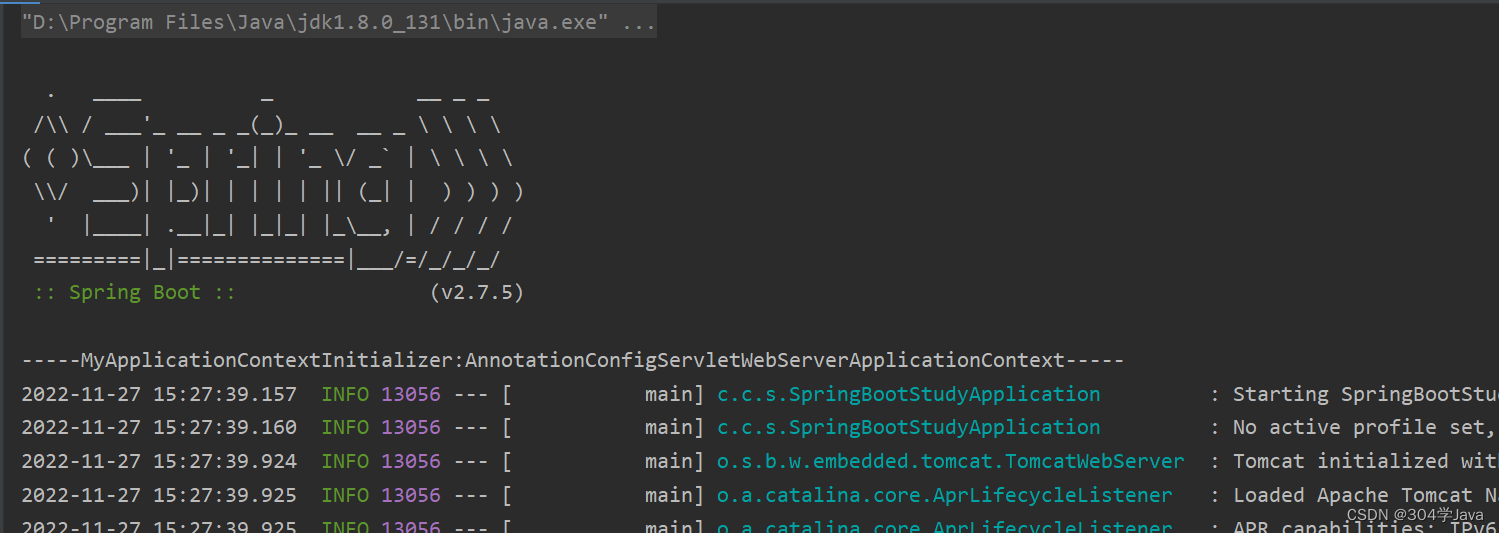
整个启动过程只执行了一次。
(2)ApplicationListener
@FunctionalInterface
public interface ApplicationListener<E extends ApplicationEvent> extends EventListener {
    void onApplicationEvent(E event);

    static <T> ApplicationListener<PayloadApplicationEvent<T>> forPayload(Consumer<T> consumer) {
        return (event) -> {
            consumer.accept(event.getPayload());
        };
    }
}
执行时机:有事件发生时候执行
测试:
实现该接口
public class MyApplicationListener implements ApplicationListener {
    @Override
    public void onApplicationEvent(ApplicationEvent event) {
        System.out.println("-----MyApplicationListener:源="+event.getSource().getClass().getSimpleName()+"事件="+event.getClass().getSimpleName()+"-----");
    }
}
配置到/META-INF/spring.factories文件中去
org.springframework.context.ApplicationListener=\
  com.chy.springbootstudy.listener.MyApplicationListener
启动并查看控制台
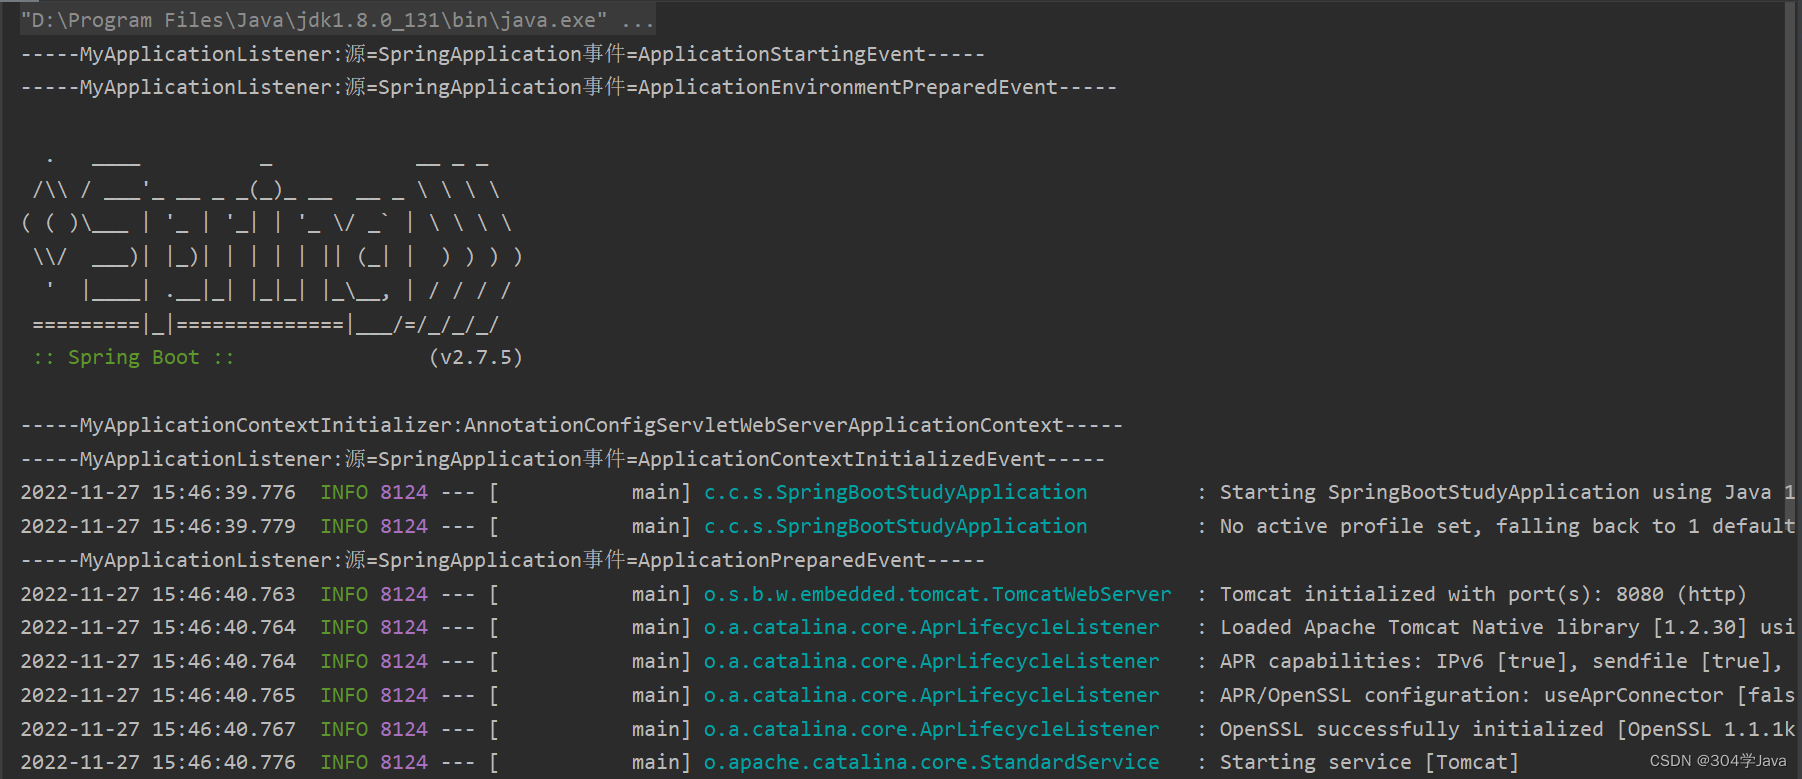
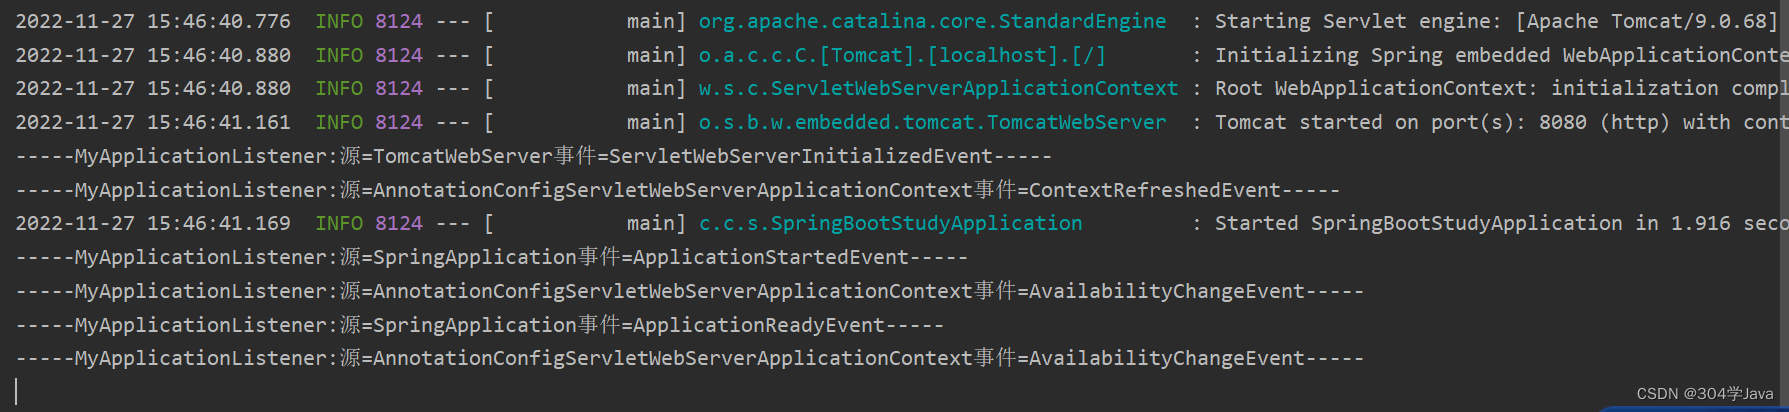
有很多的事件都会触发该接口方法,可以看到ApplicationContextInitializer接口的方法也是在ApplicationContextInitializedEvent事件时触发。
调用了很多次,只要有事件触发时就会调用。
(3)SpringApplicationRunListener
public interface SpringApplicationRunListener {
    default void starting(ConfigurableBootstrapContext bootstrapContext) {
    }

    default void environmentPrepared(ConfigurableBootstrapContext bootstrapContext, ConfigurableEnvironment environment) {
    }

    default void contextPrepared(ConfigurableApplicationContext context) {
    }

    default void contextLoaded(ConfigurableApplicationContext context) {
    }

    default void started(ConfigurableApplicationContext context, Duration timeTaken) {
        this.started(context);
    }

    /** @deprecated */
    @Deprecated
    default void started(ConfigurableApplicationContext context) {
    }

    default void ready(ConfigurableApplicationContext context, Duration timeTaken) {
        this.running(context);
    }

    /** @deprecated */
    @Deprecated
    default void running(ConfigurableApplicationContext context) {
    }

    default void failed(ConfigurableApplicationContext context, Throwable exception) {
    }
}
执行时机:在启动过程中,不同的阶段执行不同的方法
- starting:刚执行run方法时
- environmentPrepared:环境建立好时候
- contextPrepared:上下文建立好的时候
- contextLoaded:上下文载入配置时候
- started:在ApplicationContext刷新并启动后,CommandLineRunners和ApplicationRunner未被调用前,该方法被调用
- ready:springboot成功启动完成后执行
- failed:当运行程序失败时
测试:
实现该接口
public class MySpringApplicationRunListener implements SpringApplicationRunListener {
    /**
     * 必须要有这两个参数的构造方法
     * @param application
     * @param args
     */
    public MySpringApplicationRunListener(SpringApplication application, String[] args) {
        System.out.println("-----创建MySpringApplicationRunListener-----");
    }

    @Override
    public void starting(ConfigurableBootstrapContext bootstrapContext) {
        System.out.println("-----MySpringApplicationRunListener.starting:"+bootstrapContext.getClass().getSimpleName()+"-----");
    }

    @Override
    public void environmentPrepared(ConfigurableBootstrapContext bootstrapContext, ConfigurableEnvironment environment) {
        System.out.println("-----MySpringApplicationRunListener.environmentPrepared:"+bootstrapContext.getClass().getSimpleName()+"-----");
    }

    @Override
    public void contextPrepared(ConfigurableApplicationContext context) {
        System.out.println("-----MySpringApplicationRunListener.contextPrepared:"+context.getClass().getSimpleName()+"-----");
    }

    @Override
    public void contextLoaded(ConfigurableApplicationContext context) {
        System.out.println("-----MySpringApplicationRunListener.contextLoaded:"+context.getClass().getSimpleName()+"-----");
    }

    @Override
    public void started(ConfigurableApplicationContext context, Duration timeTaken) {
        System.out.println("-----MySpringApplicationRunListener.started:"+context.getClass().getSimpleName()+"-----");
    }

    @Override
    public void ready(ConfigurableApplicationContext context, Duration timeTaken) {
        System.out.println("-----MySpringApplicationRunListener.ready:"+context.getClass().getSimpleName()+"-----");
    }


    @Override
    public void failed(ConfigurableApplicationContext context, Throwable exception) {
        System.out.println("-----MySpringApplicationRunListener.failed:"+context.getClass().getSimpleName()+"-----");
    }
}
配置到META-INF/spring.factories文件中
org.springframework.boot.SpringApplicationRunListener=\
  com.chy.springbootstudy.listener.MySpringApplicationRunListener
启动并查看控制台
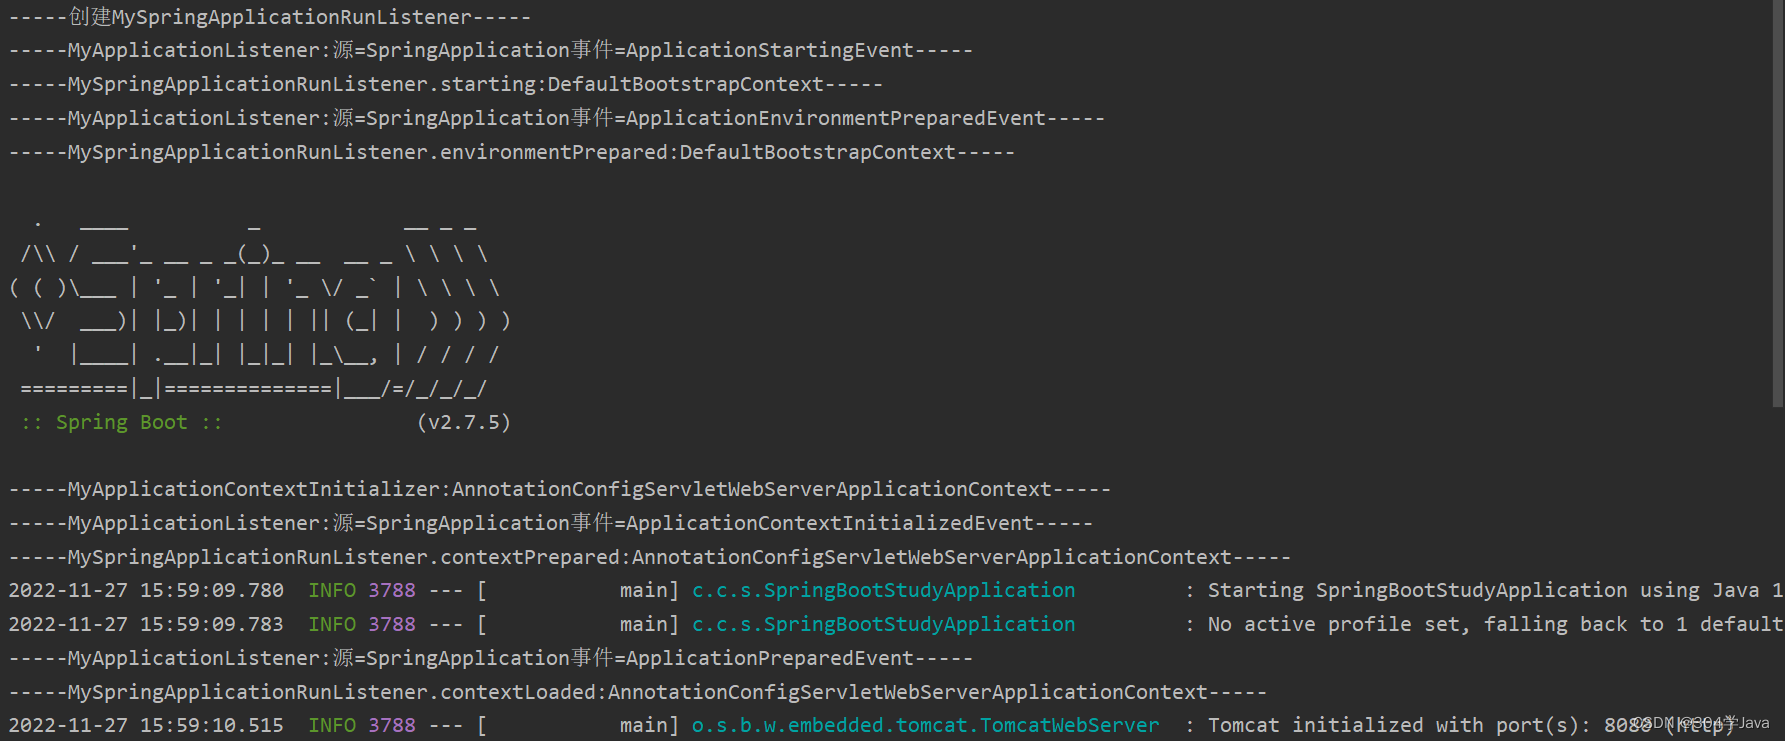

可以看到每个方法都调用到了,并且不同阶段调用的方法不同,可以看到对于某一些事件ApplicationListener和ApplicationListener都有触发。
SpringApplicationRunListener和ApplicationListener的区别
ApplicationListener是spring上下文org.springframework.context中的监听器,作用于整个Spring上下文,范围更广。SpringApplicationRunListener是org.springframework.boot包下的,监听的是SpringBoot程序。
(4)ApplicationRunner
@FunctionalInterface
public interface ApplicationRunner {
    void run(ApplicationArguments args) throws Exception;
}
执行时机:在项目启动完成之后(容器创建成功后)。
方法参数可以接受命令行参数。
测试:
实现该接口,该接口不需要配置到spring.factories中,由于是容器创建成功后才执行,所以可以从容器中取出,只需要当成一个bean注入容器即可。
@Component
public class MyApplicationRunner implements ApplicationRunner {
    @Override
    public void run(ApplicationArguments args) throws Exception {
        System.out.println("*****MyApplicationRunner*****");
    }
}
启动并查看控制台

在项目启动完成后,可以使用该接口执行一些步骤。
(5)CommandLineRunner
@FunctionalInterface
public interface CommandLineRunner {
    void run(String... args) throws Exception;
}
执行时机:在ApplicationRunner执行之后紧接着就是它
方法参数可以接受命令行参数。
测试:
实现该接口
启动并查看控制台
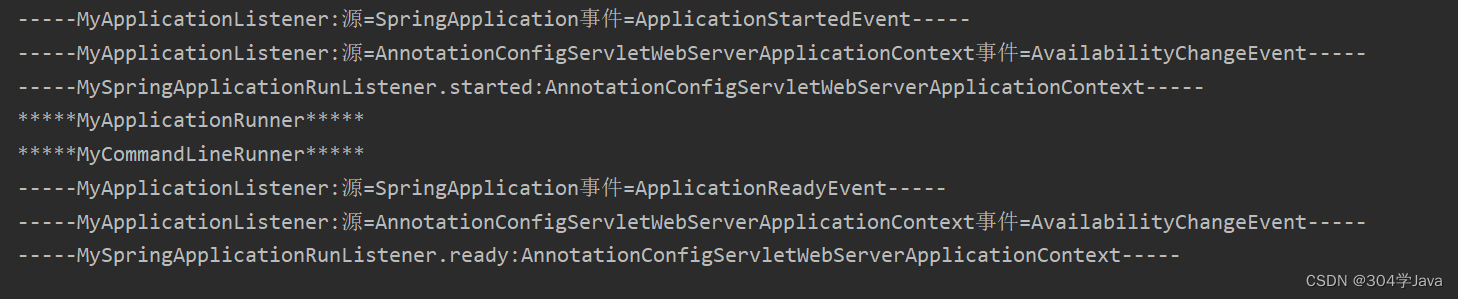
在ApplicationRunner执行之后紧接着CommandLineRunner


 1003
1003


 被折叠的 条评论
为什么被折叠?
被折叠的 条评论
为什么被折叠?
 到【灌水乐园】发言


