


SpringBoot打包
SpringBoot可以打包为war或jar文件,一两种方式发布应用
打包为war包
pom.xml
在pom.xml文件中配置内嵌Tomcat对jsp的解析包,并指定将jsp编译到指定目录
<!--处理jsp的依赖-->
<dependency>
<groupId>org.apache.tomcat.embed</groupId>
<artifactId>tomcat-embed-jasper</artifactId>
</dependency>
<dependency>
<groupId>org.apache.tomcat</groupId>
<artifactId>tomcat-jsp-api</artifactId>
</dependency>
<build>
<!--resources插件,把jsp编译到指定的目录-->
<resources>
<resource>
<directory>src/main/webapp</directory>
<targetPath>META-INF/resources</targetPath>
<includes>
<include>**/*.*</include>
</includes>
</resource>
<!--如果使用了Mybatis,且mapper文件存放在src/main/java目录-->
<resource>
<directory>src/main/java</directory>
<includes>
<include>**/*.xml</include>
</includes>
</resource>
<!--把src/main/resources下面的所有文件,都包含到classes目录-->
<resource>
<directory>src/main/resources</directory>
<includes>
<include>**/*.*</include>
</includes>
</resource>
</resources>
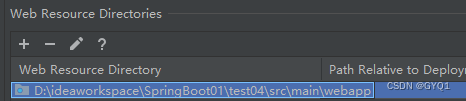
</build>在main文件夹下新建webapp,并在Project Structure中将其设置为web项目的根目录
在webapp下新建index.jsp
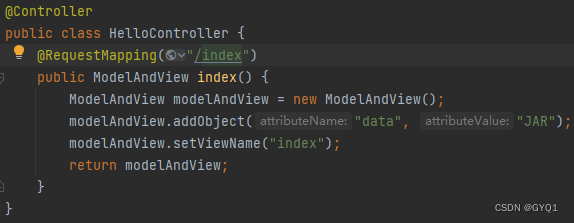
新建Controller

application.properties
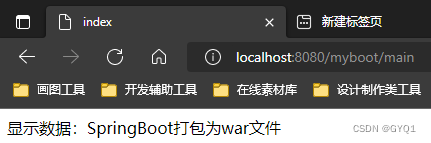
server.port=8080
server.servlet.context-path=/myjsp
spring.mvc.view.prefix=/
spring.mvc.view.suffix=.jsp
在pom.xml的build标签中指定打包后的文件名
        <!--打包后的文件名称-->
        <finalName>myboot</finalName>
发布war到Tomcat
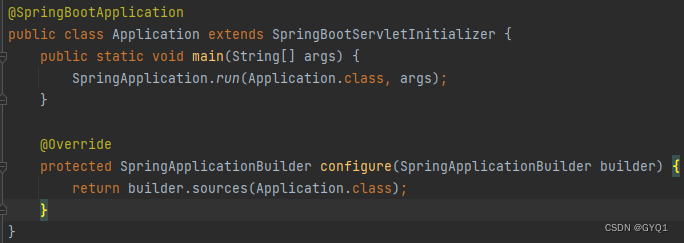
主启动类继承SpringBootServletIniitializer,才可以使用外部的tomcat。重写configure方法
SpringBootServletInitializer就是原有的web.xml文件的替代。使用了嵌入式Servlet,默认不支持jsp
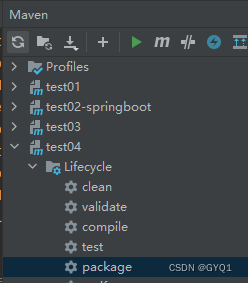
打包
在target目录下
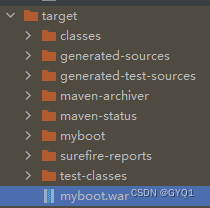
拷贝,放到Tomcat的webapps下,启动Tomcat
打为jar包
创建模块,选择Packaging为jar
pom.xml
     <!--tomcat依赖,处理jsp-->
     <dependency>
        <groupId>org.apache.tomcat.embed</groupId>
        <artifactId>tomcat-embed-jasper</artifactId>
     </dependency>
     <dependency>
         <groupId>org.apache.tomcat</groupId>
         <artifactId>tomcat-jsp-api</artifactId>
     </dependency>

    <build>
        <!--加入resources插件-->
        <!--指定编译jsp到META-INF/resources下-->
        <resources>
            <resource>
                <directory>src/main/webapp</directory>
                <targetPath>META-INF/resources</targetPath>
                <includes>
                    <include>**/*.*</include>
                </includes>
            </resource>
            <!--如果使用了Mybatis,且mapper文件存放在src/main/java目录-->
            <resource>
                <directory>src/main/java</directory>
                <includes>
                    <include>**/*.xml</include>
                </includes>
            </resource>
            <!--把src/main/resources下面的所有文件,都包含到classes目录-->
            <resource>
                <directory>src/main/resources</directory>
                <includes>
                    <include>**/*.*</include>
                </includes>
            </resource>
        </resources>
    </build>
新建webapp,在Project Structure中将其设置为web项目的根目录
新建index.jsp
application.properties
server.port=8081
server.servlet.context-path=/myboot
spring.mvc.view.prefix=/
spring.mvc.view.suffix=.jsp
指定打包后的名字build标签中
<finalName>boot-jar</finalName>打包为jar有jsp文件时需要指定该插件版本为1.4.2RELEASE
        <plugins>
            <plugin>
                <groupId>org.springframework.boot</groupId>
                <artifactId>spring-boot-maven-plugin</artifactId>
                <version>1.4.2.RELEASE</version>
            </plugin>
        </plugins>
打包
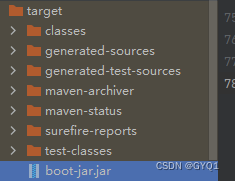
在其所在目录,以命令行的方式执行命令
java -jar xxx.jar
启动项目
当需要在Linux系统上部署项目,可以使用命令java -jar springbooot-xxx.jar
可以将该命令封装到一个Linux的一个shell脚本中(run.sh和myboot.jar在同一个目录中)
#!/bin/sh
java -jar xxx.jar
赋权限 chmod 777 run.sh
启动shell脚本:./run.sh
jar和war的区别
war:占用资源多,可以充分利用服务器
jar:可以独立运行(内嵌Tomcat),部署方便,性能较差
Thymeleaf模板引擎
Thymeleaf是一个流行的模板引擎,改模板引擎采用Java语言开发
Thymeleaf对网络环境不存在严格的要求,既能用于Web环境下,也能用于非Web环境下。在非Web环境下,他能直接显示模板上的静态数据;在Web环境下,它能向Jsp一样从后台接收数据并替换掉模板上的静态数据。它是基于HTML的,以HTML标签为载体。Thymeleaf要寄托在HTML标签下实现。
SpringBoot集成了Thymeleaf模板技术,并且SpringBoot官方也推荐使用Thymeleaf来替代JSP技术,Thymeleaf是另外的一种模板技术,它本身并不属于SpringBoot,SpringBoot只是很好的集成这种模板技术,作为前端页面的数据展示,在过去的Java Web开发中,我们往往会选择使用Jsp去完成页面的动态渲染,但是jsp需要翻译编译执行,效率低
Thymeleaf官方使用手册 https://www.thymeleaf.org/doc/tutorials/3.0/usingthymeleaf.pdf
第一个例子
新建项目,添加Web和Thymeleaf依赖
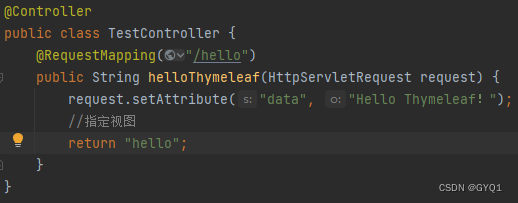
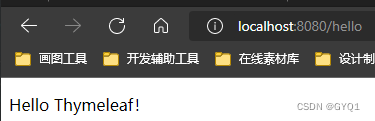
编写Controller
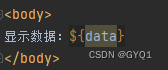
编写hello.html,在templates目录下
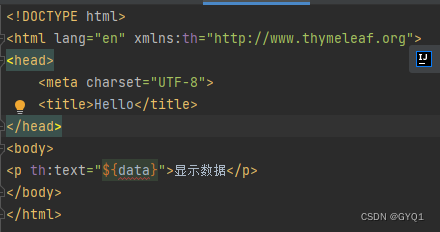
没有向域中放入data时能正常显示p标签中的内容
有时显示如下
常用设置
#禁用缓存(开发阶段使修改立即生效,看效果)
spring.thymeleaf.cache=false
#编码方式
spring.thymeleaf.encoding=utf-8
#模板的类型(默认HTML)
spring.thymeleaf.mode=HTML
#模板的前缀,默认在类路径下的templates下
spring.thymeleaf.prefix=classpath:/templates/
#后缀(默认值)
spring.thymeleaf.suffix=.html
表达式
表达式是在页面获取数据的一种thymeleaf语法,类似${key}
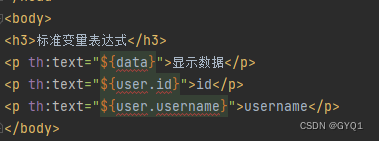
标准变量表达式
注意:th:text=" "是Thymeleaf的一个属性,用于文本显示
语法:${key}
说明:标准表达式用于访问tomcat容器上下文环境中的变量,获取的是request作用域中的数据
没有对应key的值时只是不显示,不报错
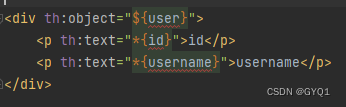
选择变量表达式
语法:*{key}
说明:需要配合th:object一起使用,th:object属性来绑定对象,然后用*来代表这个对象,后面{}中的值是此对象中的属性。
链接表达式
语法:@{url}
说明:主要用于链接,地址的展示

Thymeleaf属性
th:action
属性是放在html元素中的,就是html元素的属性,加入了th前缀,作用不变
定义后台控制器的路径,类似<form>标签的action属性,主要结合URL表达式,获取动态变量
th:method,th:href,th:src,th:text,th:style……
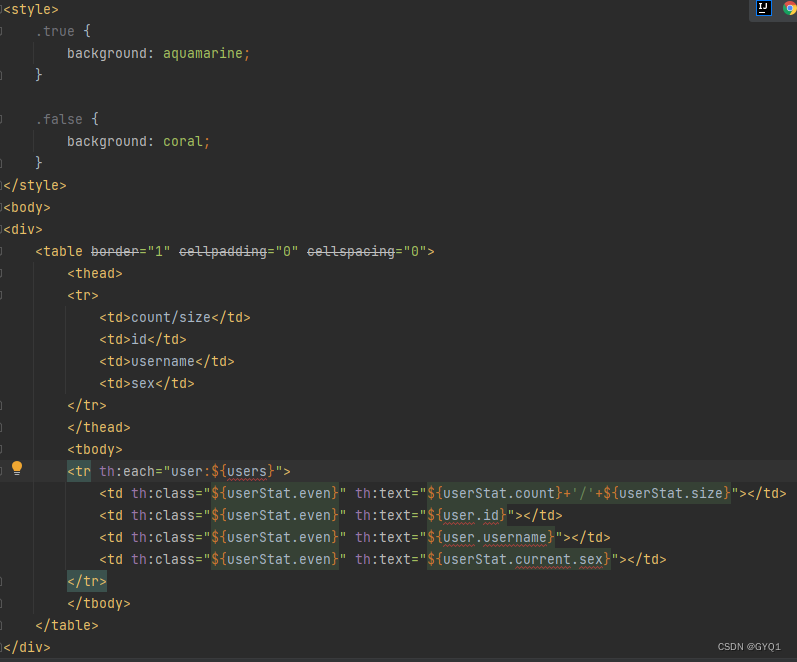
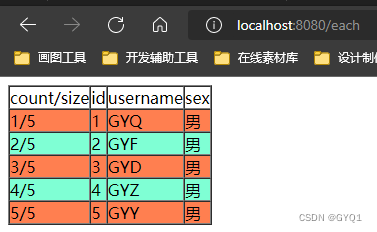
th:each
与jstl中的属性相似
在Controller中向request域中添加一个User数组
格式:
<div th:each="集合循环成员,循环的状态变量:${key}">
    <p th:text="${集合循环成员}"></p>
</div>
集合循环成员和循环的状态变量:两个名称都是自定义的,后者可以不定义,默认为”集合循环成员+Stat“
循环体状态可以用来获取循环体的信息
例子:
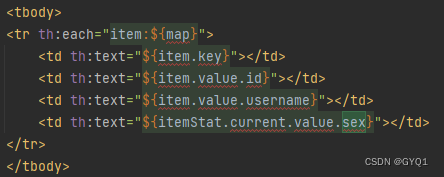
循环map
if属性
语法:th:if=”boolean条件“,条件为true显示内容,th:unless与其作用相反

if中条件为”“(空字符串),结果也为真。null为假。
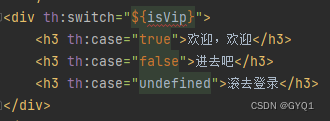
switch,case
th:inline
有三个取值类型(text,javascript和none)
内联text
在html标签外也可以获取表达式的值
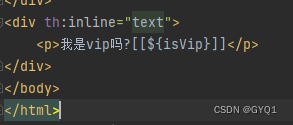 方便拼接
方便拼接
th:inline=”text”也可以不写
字符串连接的其他方式:
单引号和加号
![]()
双竖线
![]()
内联javascript
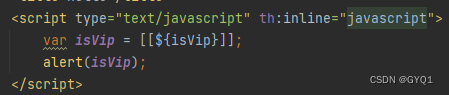
可以在js脚本中使用模板中的数据
Thymeleaf对象
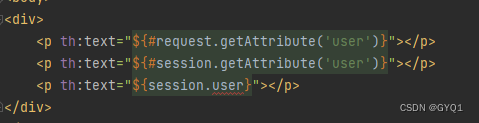
基本对象
#request表示HttpServletRequest
#session表示HttpSession,也可以直接用session表示,它是一个map,可以根据key查找对应值
内置对象的方法
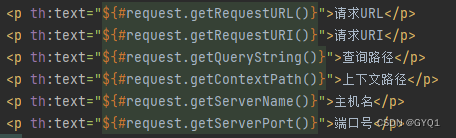
查看文档有更多的对象。
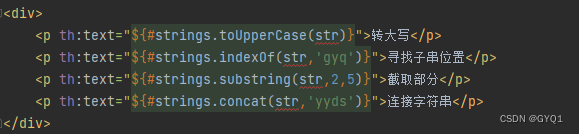
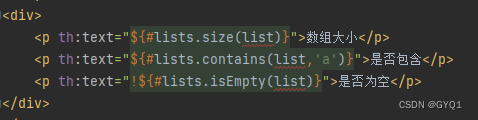
内置工具类对象
数据准备

使用(部分方法)
#dates

#numbers

#strings
#lists
对null的处理
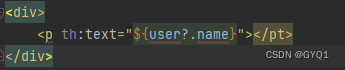
先对?前的进行判断是否存在,不存在就不取后面的值
内容复用
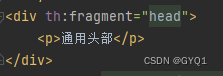
自定义模板,在其它模板中多次使用
语法:th:fragment=“模板自定义名”
例如:
引用模板
语法:~{templatename空格::空格selector}
templatename文件名称,selector自定义模板名称
另一种语法:templatename空格::空格selector
对于使用模板的两个动作:包含模板(th:include),插入模板(th:insert)
insert

include

inlude是使用模板内容替换当前div,insert是加到当前div中
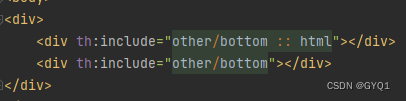
引用整个html文件作为模板

使用其他目录中的模板
templates目录下other目录


 1461
1461


 被折叠的 条评论
为什么被折叠?
被折叠的 条评论
为什么被折叠?
 到【灌水乐园】发言


