


1. RabbitMQ的安装
- 这里是在CentOs7上进行安装
- 可以从我的网盘获取安装包
https://pan.baidu.com/s/19L-qhBoRjvVjHJj2BuTsDQ
提取码:jdw4 - 将以上3个安装包放在一个目录中,依次执行以下命令:
//安装erlang
rpm -ivh erlang-18.3-1.el7.centos.x86_64.rpm
//检测erl
erl
//安装rabbitmq以及环境
rpm -ivh socat-1.7.3.2-1.1.el7.x86_64.rpm
rpm -ivh rabbitmq-server-3.6.5-1.noarch.rpm
//启用UI插件
rabbitmq-plugins enable rabbitmq_management
//配置UI插件的相关信息
cd /etc/rabbitmq/
vim rabbitmq.config
//在文件中输入以下内容
[{rabbit,[{loopback_users,[]}]}].
//启用rabbitmq服务(start位置可以换成restart、stop)
service rabbitmq-server start
//检测服务
systemctl status rabbitmq-server.service
//关闭防火墙
systemctl stop firewalld
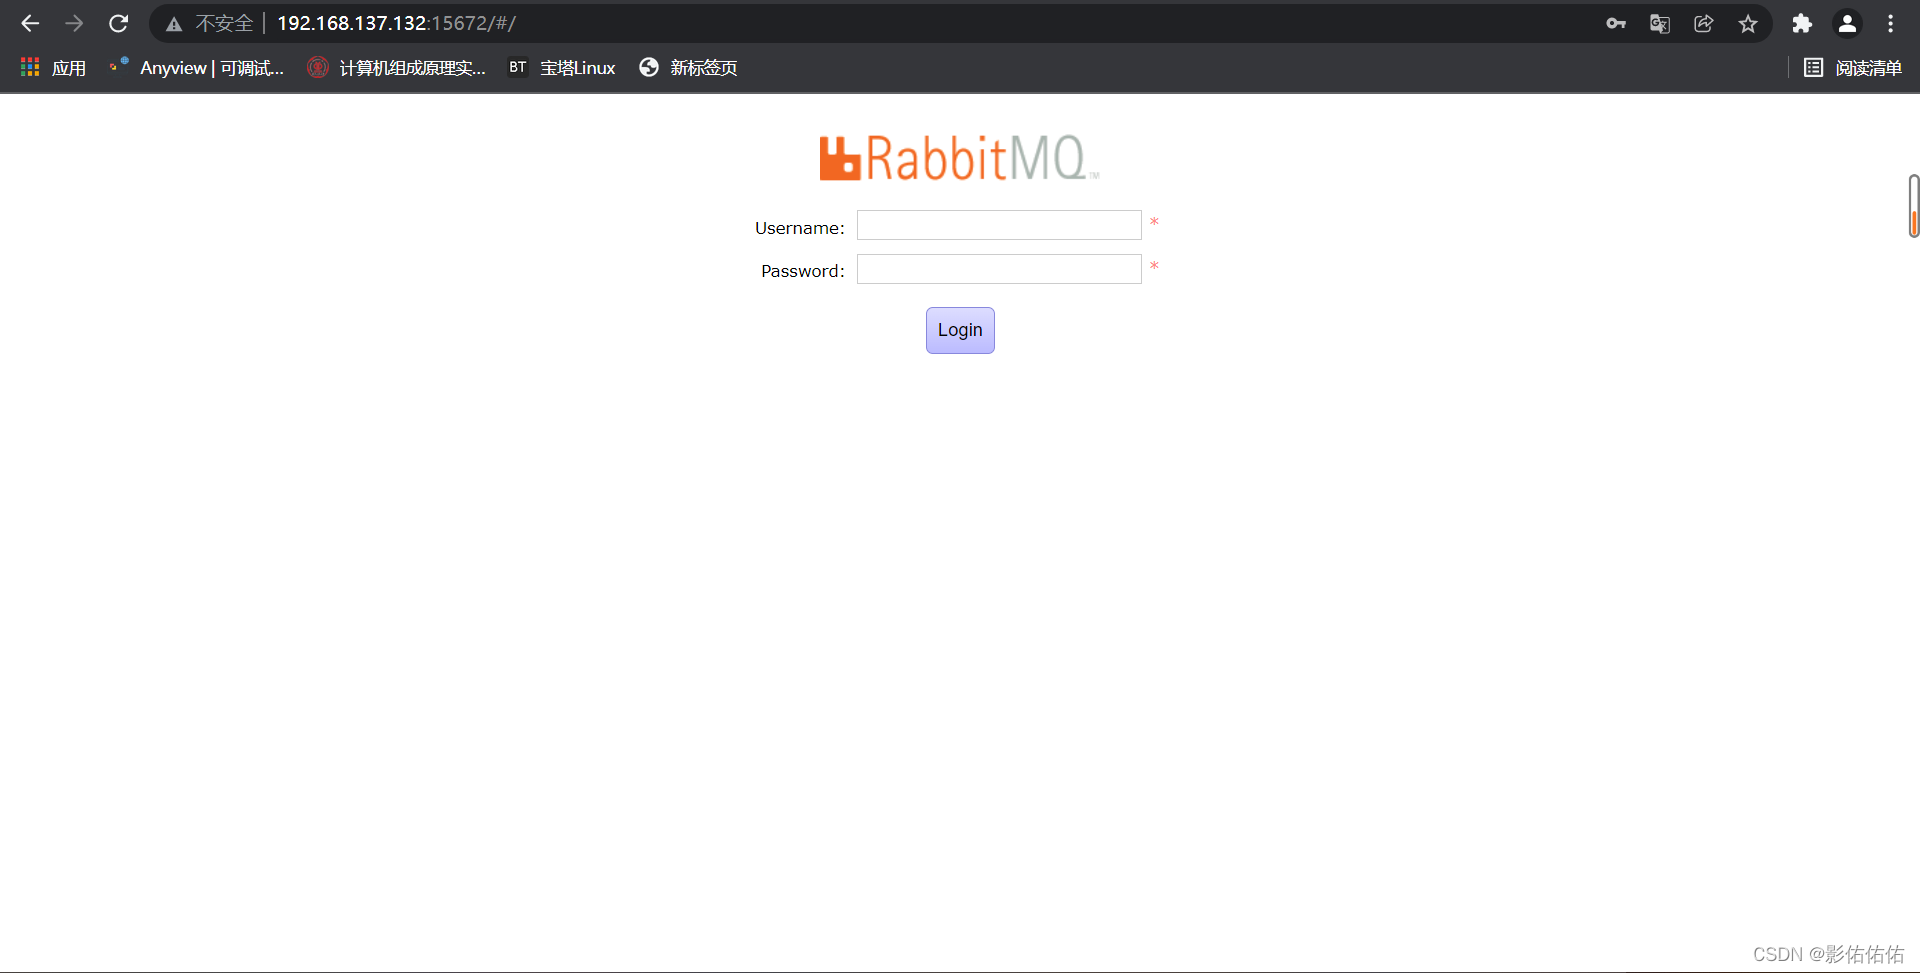
- 访问 [ ip地址:15672 ] 如出现下面的网页,则为成功 :
默认的账号以及密码都是guest
2. SpringBoot集成RabbitMQ
配置文件如下 :
spring:
  rabbitmq:
    host: 192.168.137.132
    username: guest
    password: guest
    #虚拟主机地址
    virtual-host: /
    port: 5672
    listener:
      simple:
        #消费者最小数量
        concurrency: 10
        #消费者最大数量
        max-concurrency: 10
        #限制消费者每次只处理一条信息,处理完再处理下一条
        prefetch: 1
        #被拒绝时重新进入队列
        default-requeue-rejected: true
目录结构如下 :

pom中导入坐标依赖
        <dependency>
            <groupId>org.springframework.boot</groupId>
            <artifactId>spring-boot-starter-amqp</artifactId>
        </dependency>
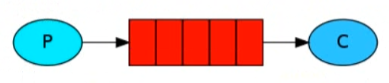
生产者生产消息直接到队列
使用的是rabbitmq中默认的交换机
配置类如下 :
package com.example.rabbitmqdemo.config;

import org.springframework.amqp.core.Queue;
import org.springframework.context.annotation.Bean;
import org.springframework.context.annotation.Configuration;

@Configuration
public class RabbitMqConfig {

    @Bean
    public Queue queue(){
        //第一个参数为队列名,第二个为是否持久化
        return new Queue("queue",true);
    }

}
生产者如下 :
package com.example.rabbitmqdemo.Service;

import lombok.extern.slf4j.Slf4j;
import org.springframework.amqp.rabbit.core.RabbitTemplate;
import org.springframework.beans.factory.annotation.Autowired;
import org.springframework.stereotype.Service;

@Service
@Slf4j
public class SendService {

    @Autowired
    private RabbitTemplate rabbitTemplate;

    public void send(String msg){
        log.info("发送消息"+msg);
        //第一个参数为队列名称,第二个为消息
        rabbitTemplate.convertAndSend("queue",msg);
    }

}
消费者如下 :
package com.example.rabbitmqdemo.Service;

import lombok.extern.slf4j.Slf4j;
import org.springframework.amqp.rabbit.annotation.RabbitListener;
import org.springframework.stereotype.Service;

@Service
@Slf4j
public class ReceiverService {

    @RabbitListener(queues = "queue")
    public void receiver(Object msg){
        log.info("收到消息:"+msg);
    }

}
controller如下 :
package com.example.rabbitmqdemo.controller;

import com.example.rabbitmqdemo.Service.SendService;
import org.springframework.beans.factory.annotation.Autowired;
import org.springframework.stereotype.Controller;
import org.springframework.web.bind.annotation.RequestMapping;
import org.springframework.web.bind.annotation.ResponseBody;

@Controller
public class SendController {

    @Autowired
    private SendService sendService;

    @RequestMapping("send")
    @ResponseBody
    public void test(){
        sendService.send("Hello RabbitMQ");
    }
}
最后访问 localhost:8080/send,结果如下 :

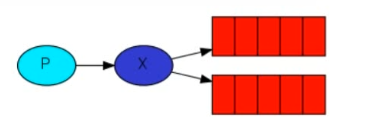
Fanout模式(广播模式)
配置如下:
package com.example.rabbitmqdemo.config;

import org.springframework.amqp.core.Binding;
import org.springframework.amqp.core.BindingBuilder;
import org.springframework.amqp.core.FanoutExchange;
import org.springframework.amqp.core.Queue;
import org.springframework.context.annotation.Bean;
import org.springframework.context.annotation.Configuration;

@Configuration
public class RabbitMqConfig {

    private static final String fanout_queue1 = "fanout_queue1";
    private static final String fanout_queue2 = "fanout_queue2";
    private static final String fanout_exchange = "fanout_exchange";

    @Bean
    public Queue queue1(){
        return new Queue(fanout_queue1);
    }
    @Bean
    public Queue queue2(){
        return new Queue(fanout_queue2);
    }
    @Bean
    public FanoutExchange exchange(){
        return new FanoutExchange(fanout_exchange);
    }

    /**
     * 分别将两个队列绑定到这个交换机上
     * @return
     */
    @Bean
    public Binding binding1(){
        return BindingBuilder.bind(queue1()).to(exchange());
    }
    @Bean
    public Binding binding2(){
        return BindingBuilder.bind(queue2()).to(exchange());
    }

}
生产者如下:
package com.example.rabbitmqdemo.Service;

import lombok.extern.slf4j.Slf4j;
import org.springframework.amqp.rabbit.core.RabbitTemplate;
import org.springframework.beans.factory.annotation.Autowired;
import org.springframework.stereotype.Service;

@Service
@Slf4j
public class SendService {

    @Autowired
    private RabbitTemplate rabbitTemplate;

    public void send(String msg){
        log.info("发送消息"+msg);
        //第一个参数为交换机名称,第二个是路由key,设置为""表示与他绑定的所有队列都可接受到消息
        rabbitTemplate.convertAndSend("fanout_exchange","",msg);
    }

}
消费者如下:
package com.example.rabbitmqdemo.Service;

import lombok.extern.slf4j.Slf4j;
import org.springframework.amqp.rabbit.annotation.RabbitListener;
import org.springframework.stereotype.Service;

@Service
@Slf4j
public class ReceiverService {

    @RabbitListener(queues = "fanout_queue1")
    public void receiver1(Object msg){
        log.info("queue1收到消息:"+msg);
    }

    @RabbitListener(queues = "fanout_queue2")
    public void receiver2(Object msg){
        log.info("queue2收到消息:"+msg);
    }

}
结果如下:

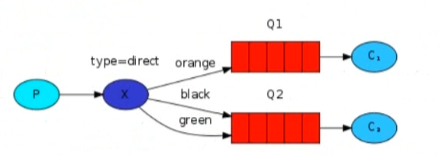
Direct模式
配置类如下:
package com.example.rabbitmqdemo.config;

import org.springframework.amqp.core.*;
import org.springframework.context.annotation.Bean;
import org.springframework.context.annotation.Configuration;

@Configuration
public class RabbitMqConfig {

    private static final String direct_queue1 = "direct_queue1";
    private static final String direct_queue2 = "direct_queue2";
    private static final String direct_exchange = "direct_exchange";
    private static final String routingKey01 = "queue.red";
    private static final String routingKey02 = "queue.green";

    @Bean
    public Queue queue1(){
        return new Queue(direct_queue1);
    }
    @Bean
    public Queue queue2(){
        return new Queue(direct_queue2);
    }
    @Bean
    public DirectExchange exchange(){
        return new DirectExchange(direct_exchange);
    }

    /**
     * 分别将两个队列绑定到这个交换机上
     * @return
     */
    @Bean
    public Binding binding1(){
        return BindingBuilder.bind(queue1()).to(exchange()).with(routingKey01);
    }
    @Bean
    public Binding binding2(){
        return BindingBuilder.bind(queue2()).to(exchange()).with(routingKey02);
    }

}
生产者如下:
package com.example.rabbitmqdemo.Service;

import lombok.extern.slf4j.Slf4j;
import org.springframework.amqp.rabbit.core.RabbitTemplate;
import org.springframework.beans.factory.annotation.Autowired;
import org.springframework.stereotype.Service;

@Service
@Slf4j
public class SendService {

    @Autowired
    private RabbitTemplate rabbitTemplate;

    public void send01(String msg){
        log.info("发送red消息"+msg);
        rabbitTemplate.convertAndSend("direct_exchange","queue.red",msg);
    }

    public void send02(String msg){
        log.info("发送green消息"+msg);
        rabbitTemplate.convertAndSend("direct_exchange","queue.green",msg);
    }

}
消费者如下:
package com.example.rabbitmqdemo.Service;

import lombok.extern.slf4j.Slf4j;
import org.springframework.amqp.rabbit.annotation.RabbitListener;
import org.springframework.stereotype.Service;

@Service
@Slf4j
public class ReceiverService {

    @RabbitListener(queues = "direct_queue1")
    public void receiver1(Object msg){
        log.info("queue1(red)收到消息:"+msg);
    }

    @RabbitListener(queues = "direct_queue2")
    public void receiver2(Object msg){
        log.info("queue2(green)收到消息:"+msg);
    }

}
controller如下:
package com.example.rabbitmqdemo.controller;

import com.example.rabbitmqdemo.Service.SendService;
import org.springframework.beans.factory.annotation.Autowired;
import org.springframework.stereotype.Controller;
import org.springframework.web.bind.annotation.RequestMapping;
import org.springframework.web.bind.annotation.ResponseBody;

@Controller
public class SendController {

    @Autowired
    private SendService sendService;

    @RequestMapping("send1")
    @ResponseBody
    public void send1(){
        sendService.send01("Hello RabbitMQ  Red");
    }

    @RequestMapping("send2")
    @ResponseBody
    public void send2(){
        sendService.send02("Hello RabbitMQ  Green");
    }
}
结果如下:
-
访问localhost:8080/send1

-
访问localhost:8080/send2

Topic模式
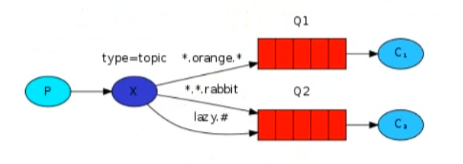
星号(*)代表一个单词
警号(#)代表若干个单词
单词与单词之间使用 . 隔开
比如 : A.* ----> 可以匹配 A.B以及A.C但是不能匹配A.B.C
A.# ----> 既可以匹配A.B又可以匹配A.B.C
其他操作与上面的Direct模式类似,知识routingKey可以使用*以及#代替,使routingKey匹配更灵活


 600
600


 被折叠的 条评论
为什么被折叠?
被折叠的 条评论
为什么被折叠?
 到【灌水乐园】发言


