


效果图见测试结果,有问题评论@
模板消息
开通模板消息功能
登录微信公众平台开通模板消息功能 (未开通时)
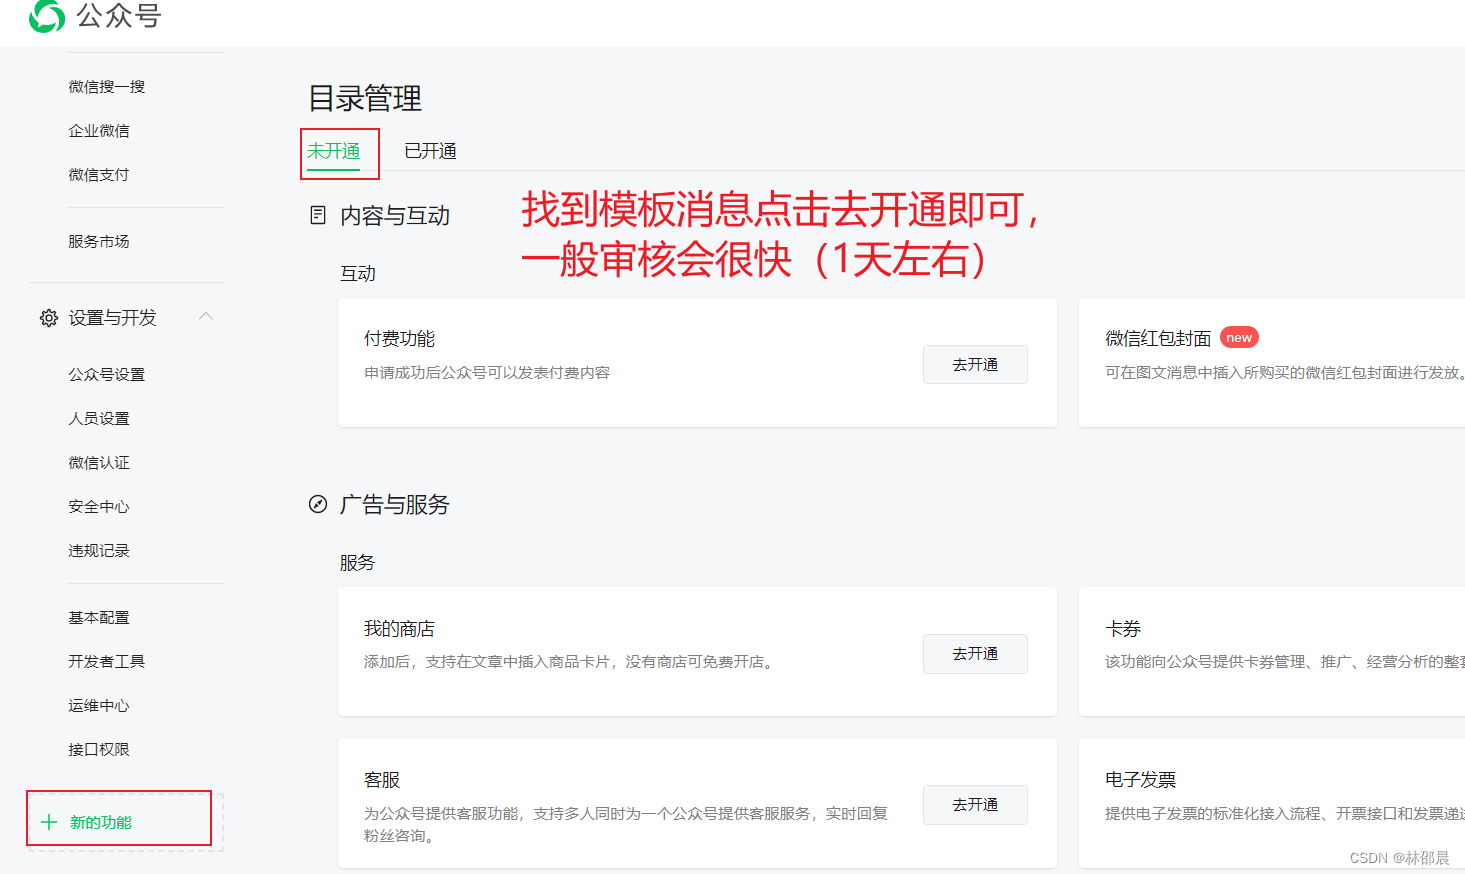
添加模板消息
- 审核通过后,登录微信公众平台,点击
广告与服务 --> 模板消息 - 公众号如果未设置服务类目,则需要先设置服务类目。
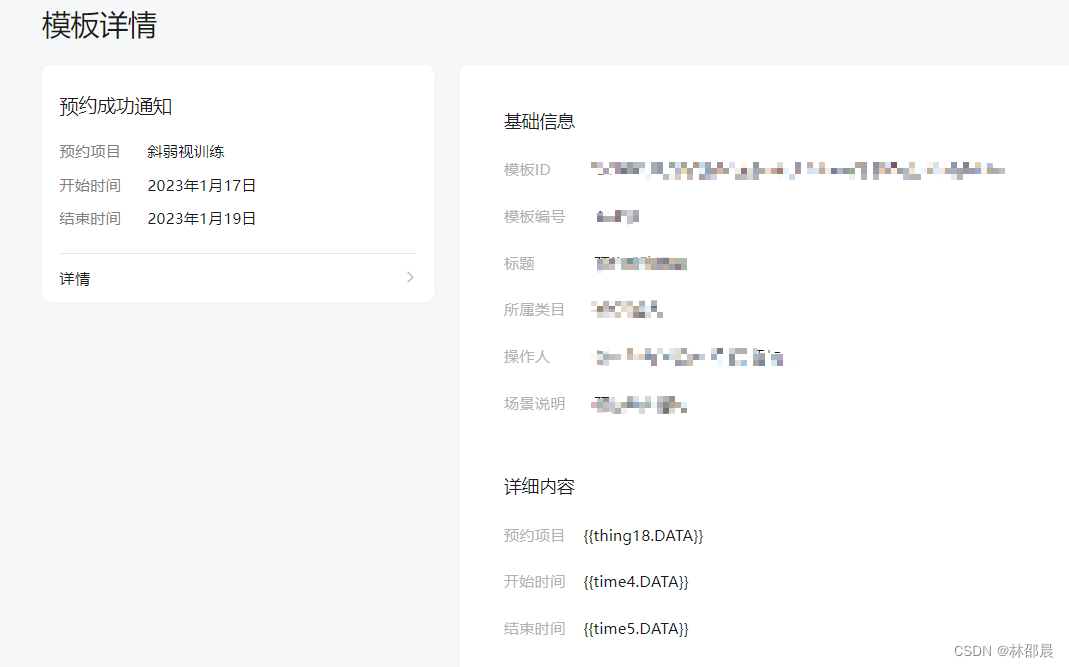
- 然后在模板库中挑选合适的模板消息即可,如下图。
对接开发
引入依赖
参考:https://github.com/Wechat-Group/weixin-java-tools
<!-- 微信框架 -->
<dependency>
	<groupId>com.github.binarywang</groupId>
	<artifactId>weixin-java-mp</artifactId>
	<version>3.6.0</version>
</dependency>
添加模板消息工具类
在业务类中注入工具类即可
commonSendTemplateMsg公共消息通知发送 模板相同的消息
sendTemplateMsg 发送不同的模板消息,需要在业务类中构建消息内容。
/**
 * 微信公众号消息通知工具类
 */
@Slf4j
@Component
public class WeChatTemplateMsgUtils{

    @Autowired
    private WxMpService wxMpService;

    //公共消息通知
    public boolean commonSendTemplateMsg(String openId) {
        //实例化模板对象
        WxMpTemplateMessage wxMpTemplateMessage = new WxMpTemplateMessage();
        //设置模板ID
        wxMpTemplateMessage.setTemplateId(TEMPLATE_ID);
        //设置详情跳转链接
        wxMpTemplateMessage.setUrl(WX_TEMPLATE_DETAILS_URL);
        //设置发送给哪个用户
        wxMpTemplateMessage.setToUser(openId);
        //构建消息格式
        //消息格式自行修改
        List<WxMpTemplateData> listData = new ArrayList<>();
        //WxMpTemplateData:key (time4) 对应 模板消息中的关键词 {{time4.DATA}}
        listData.addAll(Arrays.asList(
                new WxMpTemplateData("time4",DateUtils.parseDateToStr("yyyy-MM-dd hh:mm:ss",sessionInfo.getBiddingStartTime())),
                new WxMpTemplateData("time5",DateUtils.parseDateToStr("yyyy-MM-dd hh:mm:ss",sessionInfo.getBiddingEndTime()))));
        //放进模板对象。准备发送
        wxMpTemplateMessage.setData(listData);
        //接收发送模板消息结果,就是msgId
        boolean flag = false;
        try {
            //发送模板
            String json = wxMpService.getTemplateMsgService().sendTemplateMsg(wxMpTemplateMessage);
            if (StringUtils.isNotEmpty(json)){
                flag = true;
            }
        } catch (WxErrorException e) {
            log.error("发送模板消息异常:{}", e.getMessage());
        }
        return flag;
    }

    /**
     * 设置所属行业
     */
    public boolean setIndustry(WxMpTemplateIndustry wxMpIndustry) throws WxErrorException {
        Boolean flag = wxMpService.getTemplateMsgService().setIndustry(wxMpIndustry);
        return flag;
    }

    /**
     * 获取设置的行业信息
     */
    public WxMpTemplateIndustry getIndustry() throws WxErrorException {
        WxMpTemplateIndustry wxMpTemplateIndustry = wxMpService.getTemplateMsgService().getIndustry();
        return wxMpTemplateIndustry;
    }

    /**
     * 发送模板消息
     */
    public boolean sendTemplateMsg(WxMpTemplateMessage templateMessage) {
        //标识消息是否发送成功,true 成功,false 失败
        boolean flag = false;
        try {
        // result 为消息id
            String result = wxMpService.getTemplateMsgService().sendTemplateMsg(templateMessage);
            if (StringUtils.isNotEmpty(result)){
                flag = true;
            }
        } catch (WxErrorException e) {
            log.error("发送模板消息异常:{}", e.getMessage());
        }
        return flag;
    }


    /**
     * 获得模板ID
     */
    public String addTemplate(String shortTemplateId) throws WxErrorException {
        String result = wxMpService.getTemplateMsgService().addTemplate(shortTemplateId);
        return result;
    }

    /**
     * 获得模板列表
     */
    List<WxMpTemplate> getAllPrivateTemplate() throws WxErrorException {
        List<WxMpTemplate> templateList = wxMpService.getTemplateMsgService().getAllPrivateTemplate();
        return templateList;
    }

    /**
     * 删除模板
     * templateId: 公众帐号下模板消息ID
     */
    boolean delPrivateTemplate(String templateId) throws WxErrorException {
        Boolean flag = wxMpService.getTemplateMsgService().delPrivateTemplate(templateId);
        return flag;
    }

}
wxMpService 注入为空解决
详情见demo 参考:https://github.com/Wechat-Group/weixin-java-tools
完成下面3步即可。
1、application.yml 添加配置
# 微信公众号配置
wx:
  mp:
    configs:
      - appId: xxx # 公众号appid
        secret: xxx # 公众号密钥
2、添加 WxMpProperties 类
@Data
@ConfigurationProperties(prefix = "wx.mp")
public class WxMpProperties {
    /**
     * 多个公众号配置信息
     */
    private List<MpConfig> configs;

    @Data
    public static class MpConfig {
        /**
         * 设置微信公众号的appid
         */
        private String appId;

        /**
         * 设置微信公众号的app secret
         */
        private String secret;

    }

    @Override
    public String toString() {
        return JSONUtil.toJsonStr(this);
    }
}
3、添加 WxMpConfiguration 类
@AllArgsConstructor
@Configuration
@EnableConfigurationProperties(WxMpProperties.class)
public class WxMpConfiguration {
    private final WxMpProperties properties;

    @Bean
    public WxMpService wxMpService() {
        final List<WxMpProperties.MpConfig> configs = this.properties.getConfigs();
        if (configs == null) {
            throw new RuntimeException("添加下相关配置,注意别配错了!");
        }
        WxMpService service = new WxMpServiceImpl();
        service.setMultiConfigStorages(configs
                .stream().map(a -> {
                    WxMpDefaultConfigImpl configStorage = new WxMpDefaultConfigImpl();;
                    configStorage.setAppId(a.getAppId());
                    configStorage.setSecret(a.getSecret());
                    return configStorage;
                }).collect(Collectors.toMap(WxMpDefaultConfigImpl::getAppId, a -> a, (o, n) -> o)));
        return service;
    }
}
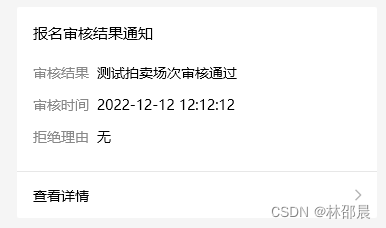
测试结果
手机显示结果
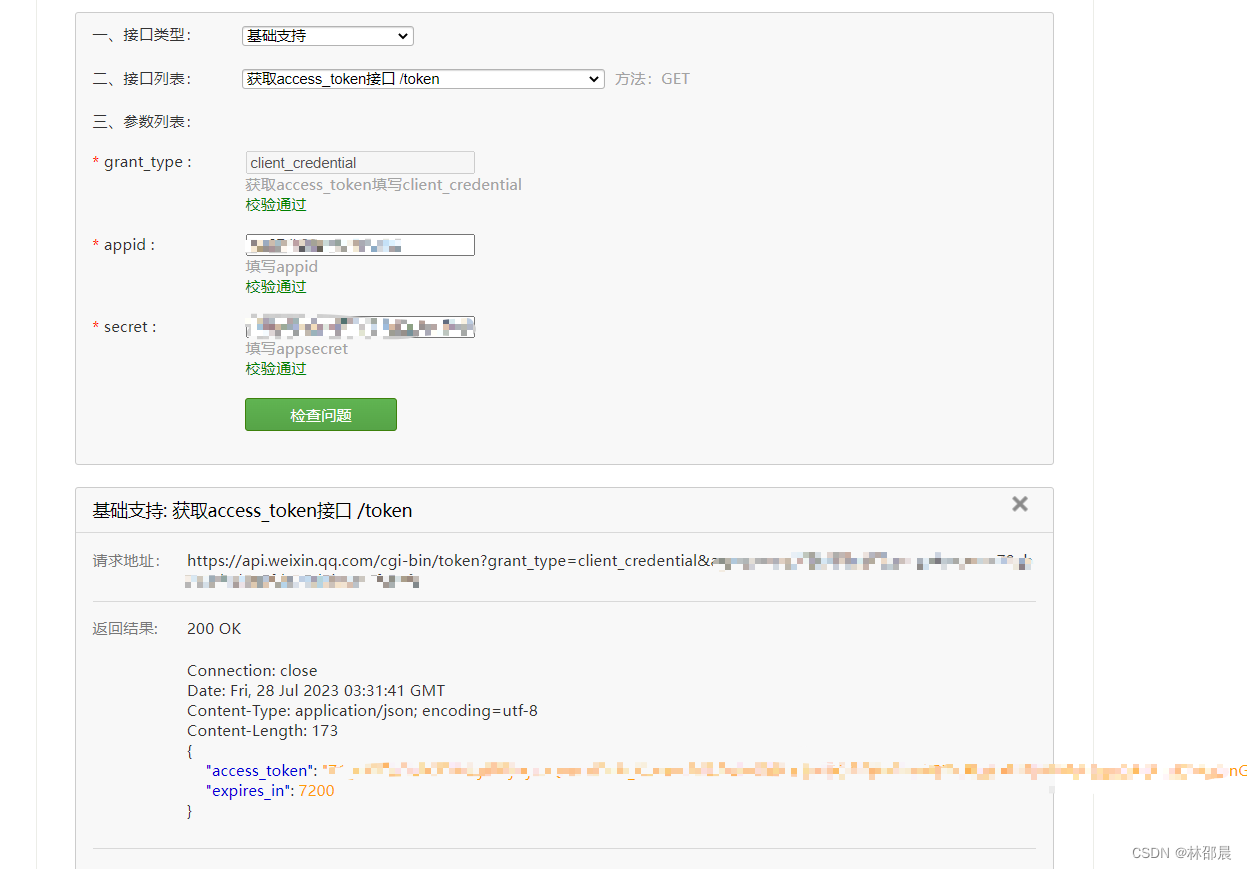
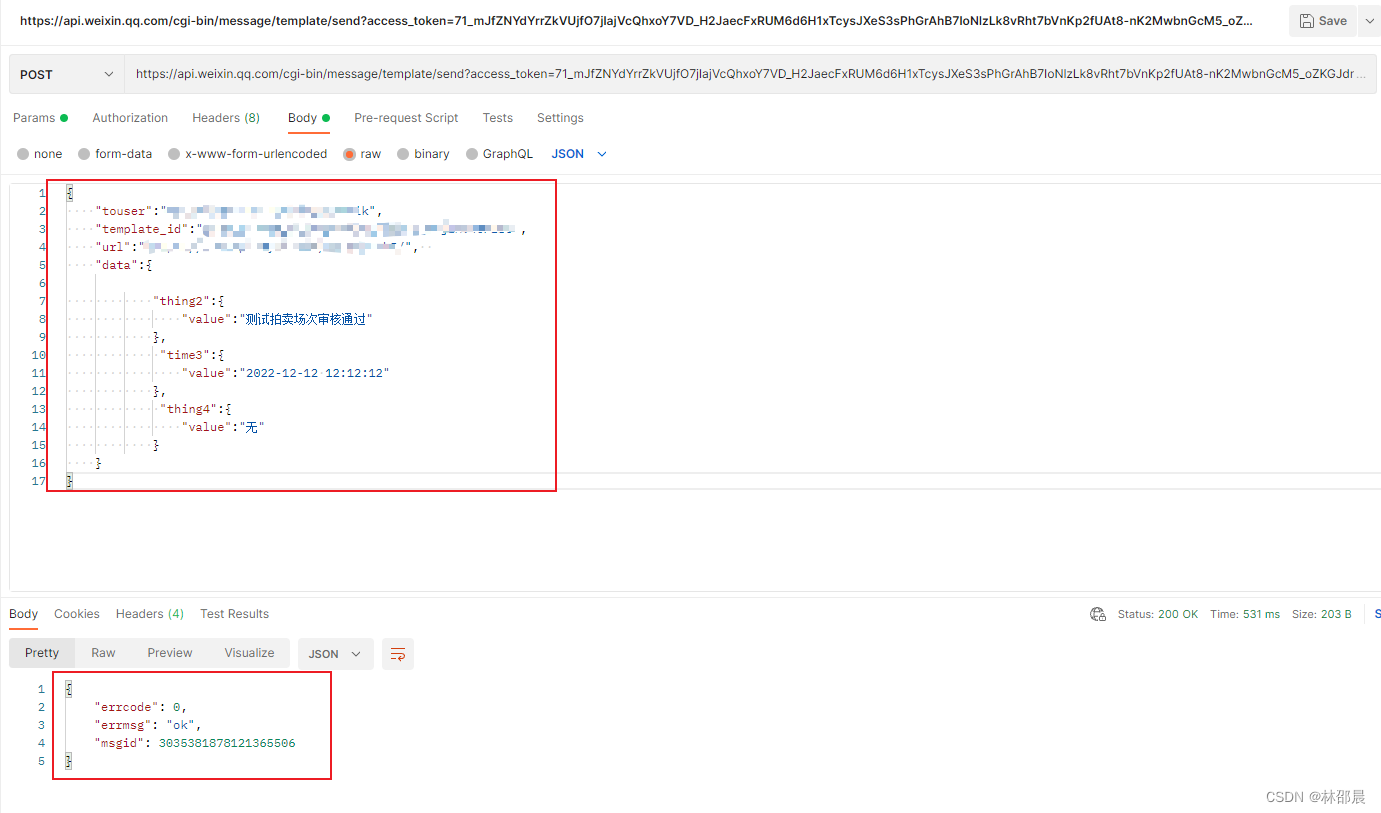
Postman测试结果
access_token可以从微信公众平台接口调试工具中获取,如下图
若获取不成功,需要在公众号平台IP白名单中添加本机IP地址。
设置与开发 ---> 安全中心 ----> IP白名单


 被折叠的 条评论
为什么被折叠?
被折叠的 条评论
为什么被折叠?
 到【灌水乐园】发言


