Android打开系统相机或从相册中选择图片并显示

1.打开系统相机

Intent intent = new Intent(); //调用照相机 
intent.setAction("android.media.action.STILL_IMAGE_CAMERA"); 
startActivity(intent); 

 2.从相册中选择图片并显示

xml代码

<?xml version="1.0" encoding="utf-8"?>
<LinearLayout xmlns:android="http://schemas.android.com/apk/res/android"
    android:layout_width="match_parent"
    android:layout_height="match_parent"
    xmlns:tools="http://schemas.android.com/tools"
    android:orientation="vertical"
    tools:context=".PhotoActivity">
    <ImageView
        android:id="@+id/iv_image"
        android:layout_width="match_parent"
        android:layout_gravity="center_horizontal"
        android:layout_height="400dp"/>
    <LinearLayout
        android:layout_width="match_parent"
        android:layout_height="wrap_content"
        android:orientation="horizontal">
        <Button
            android:id="@+id/btn_upload"
            android:layout_width="0dp"
            android:layout_height="wrap_content"
            android:layout_weight="1"
            android:text="上传"
            android:textStyle="bold"
            android:textSize="20sp"
            android:layout_gravity="bottom" />
    </LinearLayout>
</LinearLayout>

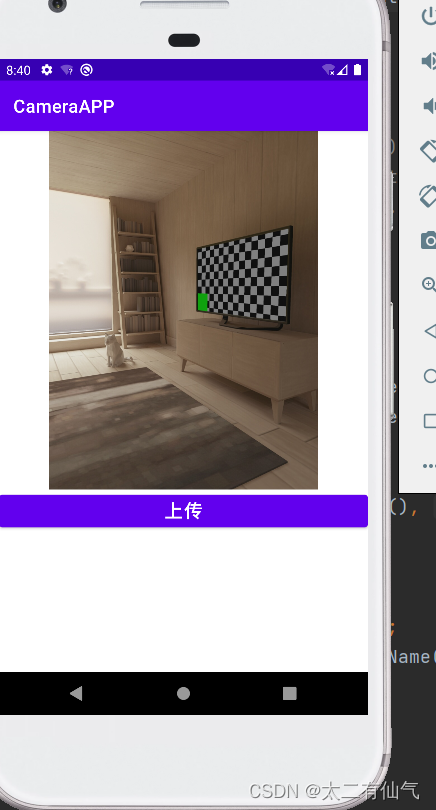
展示

 java代码


import androidx.appcompat.app.AppCompatActivity;
import android.content.Intent;
import android.net.Uri;
import android.os.Bundle;
import android.provider.MediaStore;
import android.util.Log;
import android.view.View;
import android.widget.Button;
import android.widget.ImageView;
import android.widget.Toast;

import java.io.File;


public class PhotoActivity extends AppCompatActivity {

    private Button btn_upload;
    private ImageView iv_image;

    @Override
    public void onCreate(Bundle savedInstanceState) {
        super.onCreate(savedInstanceState);
        Log.e(this.getClass().getName(), "onCreate");
        setContentView(R.layout.activity_photo);
        btn_upload = findViewById(R.id.btn_upload);
        iv_image = findViewById(R.id.iv_image);
        btn_upload.setOnClickListener(new View.OnClickListener() {
            @Override
            public void onClick(View v) {
                Intent intent = new Intent(Intent.ACTION_PICK, null);
                intent.setDataAndType(MediaStore.Images.Media.EXTERNAL_CONTENT_URI, "image/*");
                startActivityForResult(intent, 2);
            }
        });
    }
    @Override
    protected void onActivityResult(int requestCode, int resultCode, Intent data) {
        super.onActivityResult(requestCode, resultCode, data);
        if (requestCode == 2) {
            // 从相册返回的数据
            Log.e(this.getClass().getName(), "Result:" + data.toString());
            if (data != null) {
                // 得到图片的全路径
                Uri uri = data.getData();
                iv_image.setImageURI(uri);
                Log.e(this.getClass().getName(), "Uri:" + String.valueOf(uri));
            }
        }
    }

}

实机演示


  • 5
    点赞
  • 20
    收藏
    觉得还不错? 一键收藏
  • 打赏
    打赏
  • 0
    评论
以下是使用kotlin编写的安卓代码,用于从相册选择图片并将其显示在ImageView。 首先,需要在AndroidManifest.xml文件添加以下权限: ```xml <uses-permission android:name="android.permission.READ_EXTERNAL_STORAGE" /> ``` 然后,在Activity的onCreate方法添加以下代码: ```kotlin val intent = Intent(Intent.ACTION_PICK) intent.type = "image/*" startActivityForResult(intent, 1) ``` 这将打开系统相册应用程序,让用户选择一个图片。 在Activity添加以下方法,以处理用户选择图片: ```kotlin override fun onActivityResult(requestCode: Int, resultCode: Int, data: Intent?) { super.onActivityResult(requestCode, resultCode, data) if (requestCode == 1 && resultCode == RESULT_OK && data != null) { val imageUri = data.data if (imageUri != null) { val bitmap = getBitmapFromUri(imageUri) imageView.setImageBitmap(bitmap) } } } private fun getBitmapFromUri(uri: Uri): Bitmap? { val inputStream = contentResolver.openInputStream(uri) return BitmapFactory.decodeStream(inputStream) } ``` 此代码首先检查requestCode和resultCode是否与我们启动Activity时使用的值匹配。如果匹配,则获取用户选择图片的URI。 然后,我们调用getBitmapFromUri方法,该方法从URI获取输入流,并使用BitmapFactory将其解码为Bitmap对象。最后,我们将该位图设置到ImageView。 请注意,这种方法可能无法在Android 10正常工作,因为Android 10引入了一些更严格的文件访问权限。要在Android 10使用此方法,请确保在AndroidManifest.xml文件添加以下权限: ```xml <uses-permission android:name="android.permission.READ_EXTERNAL_STORAGE" /> <uses-permission android:name="android.permission.WRITE_EXTERNAL_STORAGE" /> ``` 并使用以下代码打开图库: ```kotlin val intent = Intent(Intent.ACTION_OPEN_DOCUMENT) intent.type = "image/*" startActivityForResult(intent, 1) ``` 这将打开系统的文档应用程序,让用户选择一个图片。在处理用户选择图片时,您需要使用以下方法获取输入流: ```kotlin private fun getBitmapFromUri(uri: Uri): Bitmap? { val inputStream = contentResolver.openInputStream(uri) return BitmapFactory.decodeStream(inputStream) } ``` 请注意,Android 10,您需要在AndroidManifest.xml文件添加以下权限: ```xml <uses-permission android:name="android.permission.READ_EXTERNAL_STORAGE" /> <uses-permission android:name="android.permission.WRITE_EXTERNAL_STORAGE" /> ``` 并在应用程序运行时请求这些权限。 以上是使用kotlin编写的安卓代码,用于从相册选择图片并将其显示在ImageView,并保证在Android 10可用。

“相关推荐”对你有帮助么?

  • 非常没帮助
  • 没帮助
  • 一般
  • 有帮助
  • 非常有帮助
提交
评论
添加红包

请填写红包祝福语或标题

红包个数最小为10个

红包金额最低5元

当前余额3.43前往充值 >
需支付:10.00
成就一亿技术人!
领取后你会自动成为博主和红包主的粉丝 规则
hope_wisdom
发出的红包

打赏作者

太二有仙气

你的鼓励将是我创作的最大动力

¥2 ¥4 ¥6 ¥10 ¥20
输入1-500的整数
余额支付 (余额:-- )
扫码支付
扫码支付:¥2
获取中
扫码支付

您的余额不足,请更换扫码支付或充值

打赏作者

实付
使用余额支付
点击重新获取
扫码支付
钱包余额 0

抵扣说明:

1.余额是钱包充值的虚拟货币,按照1:1的比例进行支付金额的抵扣。
2.余额无法直接购买下载,可以购买VIP、C币套餐、付费专栏及课程。

余额充值