


一、WebApi简介
ASP.NET Web API是一个框架,可以轻松构建HTTP服务,覆盖广泛的客户端,包括浏览器和移动设备。 ASP.NET Web API是在.NET Framework上构建RESTful应用程序的理想平台。其中,RESTful属于一种设计风格,REST中的GET,POST,PUT DELETE来进行数据的增删改查,如果开发人员的应用程序符合RESTful原则,则它的服务称为"RESTful风格应用服务"。
二、创建WebApi项目
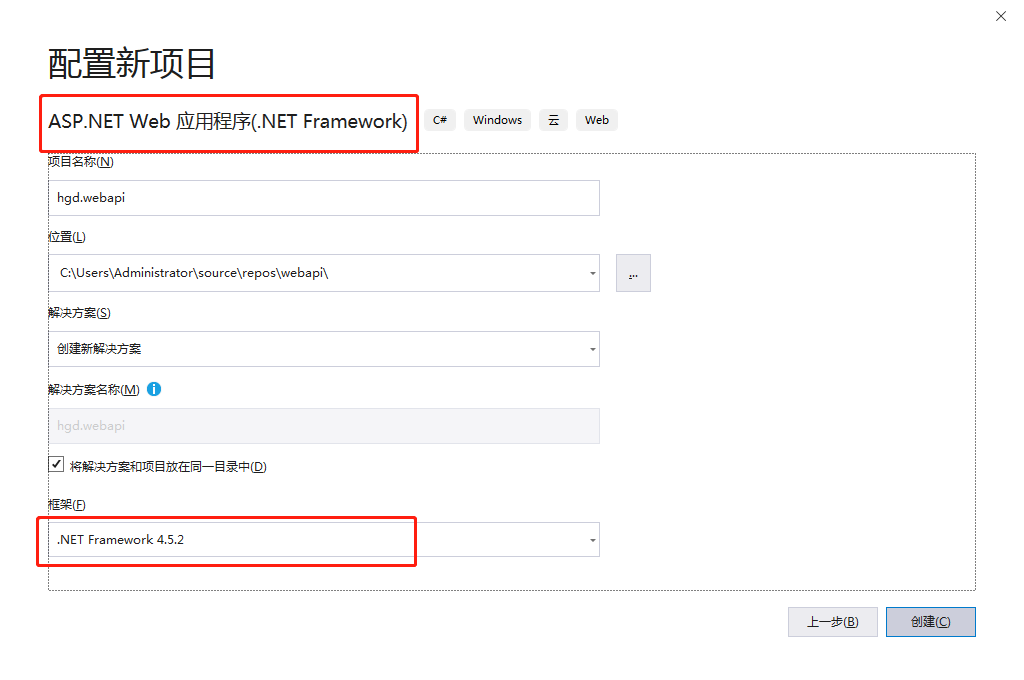
1.打开VS,新建项目,选择ASP.NET Web 应用程序(.NET Framework),框架选择.NET Framework4.5,如下图所示。
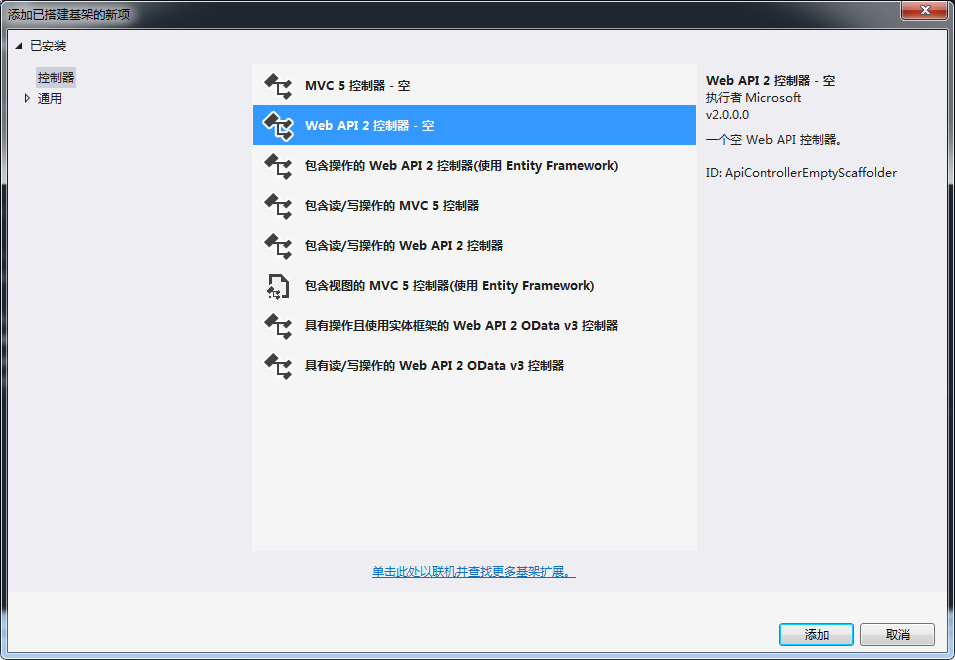
2.选择空项目,勾选Web API选项,去掉https支持,如下图所示

3.Controllers文件夹下新建一个控制器“IndexController”
4.Model文件夹下新建一个Person实体类
publicclass Person
{
publicint Id { get; set; }
publicstring Name { get; set; }
publicstring Sex { get; set; }
publicint Age { get; set; }
}
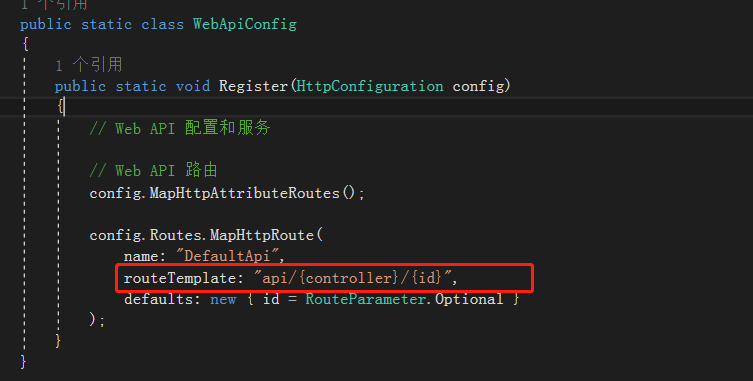
5.在App_Start文件夹下的WebApiConfig定义了我们的路由规则
6.在我们的控制器里写一个Get请求方法,
Person[] person = new Person[]
{
new Person { Id = 1, Name = "张三", Sex = "男", Age = 18 },
new Person { Id = 1, Name = "李四", Sex = "女", Age = 18 },
new Person { Id = 1, Name = "王二", Sex = "男", Age = 22 },
new Person { Id = 1, Name = "麻子", Sex = "男", Age = 23 },
};
[HttpGet]
public IHttpActionResult index()
{
return Ok(person);
}
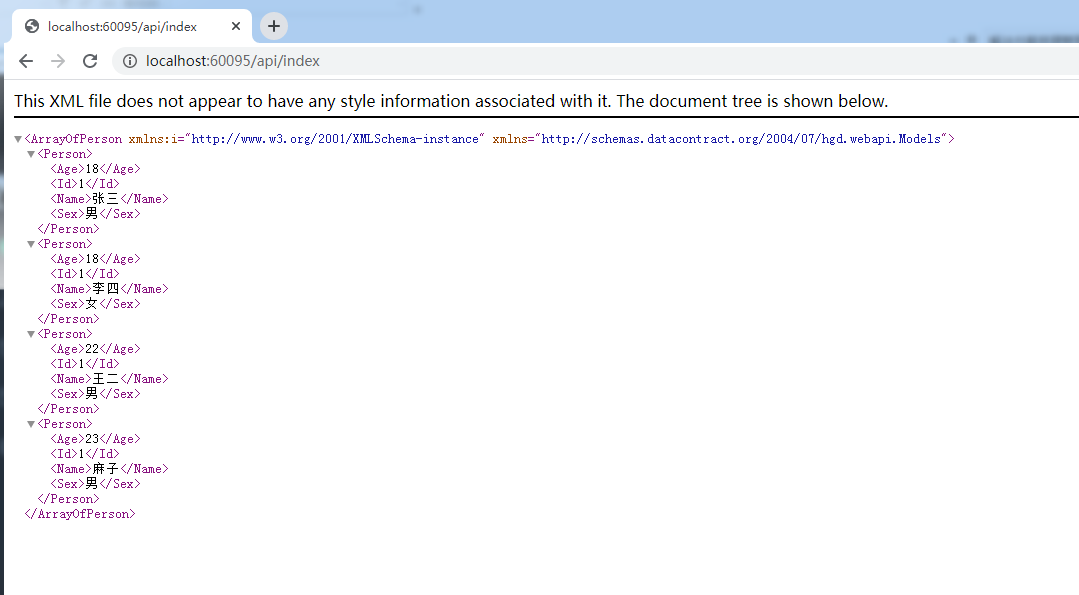
7.运行项目浏览器地址后面加上/api/index效果如下:
8.如果我们再写一个get请求,运行后再次输入http://localhost:xxx/api/index。
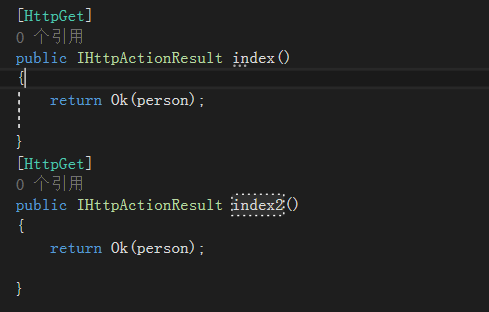
会发现,浏览器报错了,那是因为程序不知道你请求的是哪个方法。

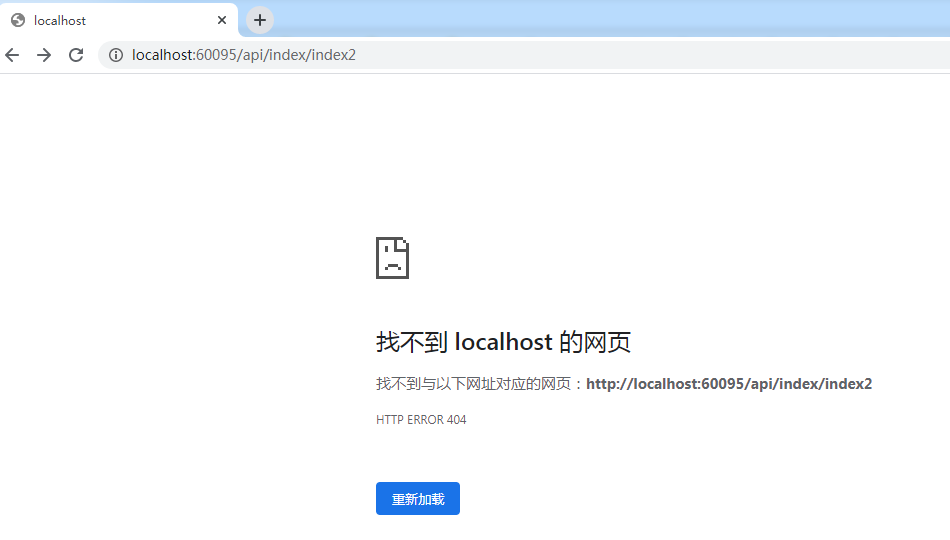
WebAPI可以通过[Route]和[RoutePrefix]来自定义路由,[RoutePrefix]作用于Controller,[Route]作用于Action。我们在控制加上[RoutePrefix]和[Route],修改index2方法的返回为NotFound()。
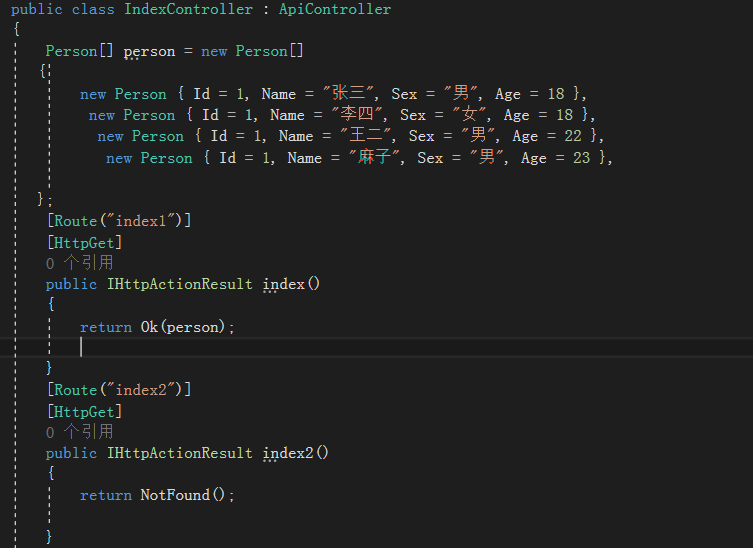
运行并浏览器输入http://localhost:xxx/api/index/index1和index2,会发现index1有数据,index2找不到网页。
9.一般在前后端分离的项目中,后端返回的事json格式的数据,但是我们浏览器中显示的是xml格式的,这里需要修改“WebApiConfig”,添加以下代码,让它默认显示JSON的数据
var formatters = config.Formatters.Where(formatter =>
formatter.SupportedMediaTypes.Where(media =>
media.MediaType.ToString() == "application/xml" || media.MediaType.ToString() == "text/html").Count() > 0) //找到请求头信息中的介质类型 .ToList();
foreach (var match in formatters)
{
config.Formatters.Remove(match); //移除请求头信息中的XML格式
}
打开浏览器请求index1,发现返回的数据已经是json格式的了
当然,我们也可以直接指定返回JSON格式的数据,只需要将returen OK(person)改为returen Json(person),效果是一样的,关于webapi的返回值,可以参考这篇博客https://www.cnblogs.com/refuge/p/8371415.html
三、参数检查验证
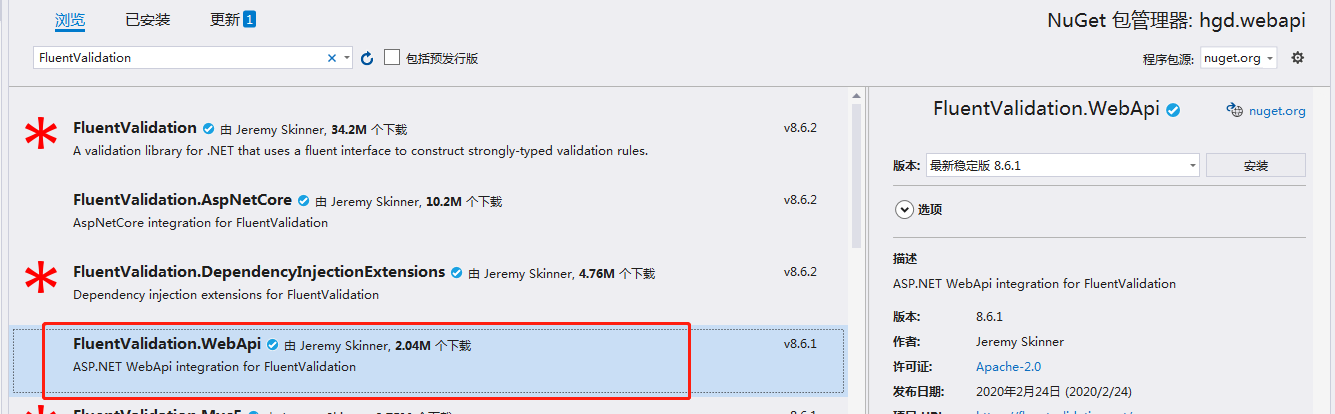
在进行请求接口时,需要先对提交的数据参数做一些验证,验证数据的合法性,如果不合法就不再通过action,直接返回给客户端处理。这里我们使用使用FluentValidation做参数验证
1.Nuget安装FluentValidation.WebApi
2.修改Pserson类
[Validator(typeof(PersonValidator))]
publicclass Person
{
publicint Id { get; set; }
publicstring Name { get; set; }
publicstring Sex { get; set; }
publicint Age { get; set; }
}
publicclass PersonValidator : AbstractValidator<Person>
{
public PersonValidator()
{
RuleFor(m => m.Id).NotEmpty().NotNull().WithMessage("Id不能为空");
RuleFor(m => m.Name).NotEmpty().NotNull().WithMessage("Name不能为空");
}
}
3.让 FluentValidation 生效,在 WebApiConfig中添加如下配置
publicstaticclass WebApiConfig
{
publicstaticvoid Register(HttpConfiguration config)
{
...
FluentValidationModelValidatorProvider.Configure(config);
}
}
4.新建Filter文件夹并添加ParamsFilterAttribute类
publicclass ParamsFilterAttribute : ActionFilterAttribute
{
publicoverridevoid OnActionExecuting(HttpActionContext actionContext)
{
//如果参数非法if ( !actionContext.ModelState.IsValid)
{
actionContext.Response = actionContext.Request.CreateErrorResponse(HttpStatusCode.BadRequest, actionContext.ModelState);
}
//如果没有输入参数elseif (actionContext.ActionArguments.Values.First() == null)
{
actionContext.Response = actionContext.Request.CreateErrorResponse(HttpStatusCode.BadRequest,"请输入参数!");
}
}
}
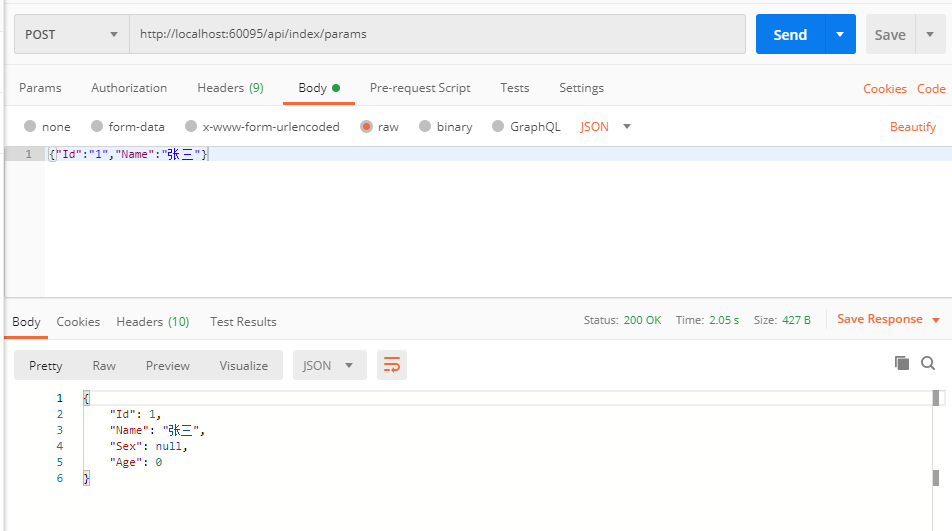
5.控制器新建一个post请求
[HttpPost]
[ParamsFilter]
[Route("params")]
public IHttpActionResult Params([FromBody] Person person)
{
return Json(person);
}
postman模拟post请求,在body什么都不输入,提示请输入参数:

输入id,不输入name,提示name不能为空:

输入正确的参数,返回了数据:


 3196
3196


 被折叠的 条评论
为什么被折叠?
被折叠的 条评论
为什么被折叠?
 到【灌水乐园】发言


