


Windows 2008 Server上FTP服务器安装
一、安装FTP Server端
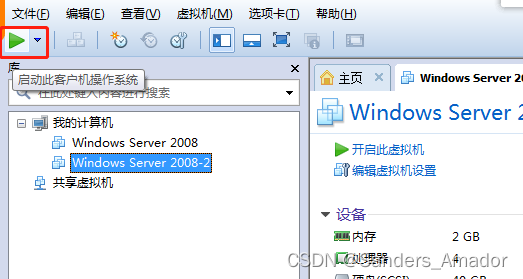
- 启动虚拟机
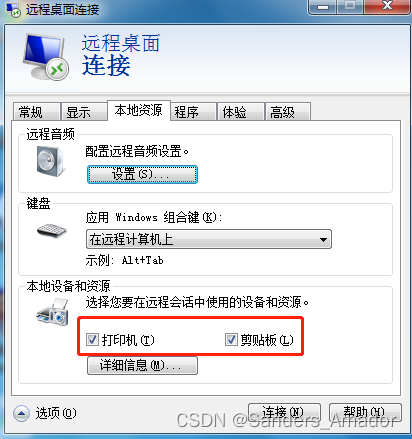
- 远程登录虚拟机:通过mstsc命令,并且对选项进行操作,能够保证本地文件复制粘贴到远程虚拟机
- 复制本地安装包到远程虚拟机当中

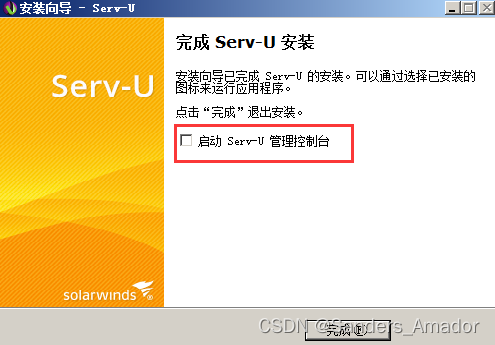
- 运行SU-FTP-Server-Windows-15.0.1.exe,默认安装,安装完成后不要运行服务器软件,“启动Serv-U管理控制台”不要勾选。(建议安装是选择中文简体)
- 安装完成以后,按照《使用说明.txt》进行破解。
- 运行Crack文件夹中的Kill.exe关闭后台服务和进程!
- 复制Crack文件夹中Pa.exe程序到安装目录!
安装目录是C:\RhinoSoft\Serv-U,把pa.exe复制到此目录
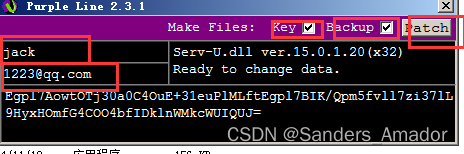
- 运行PA.exe填写“Name”、“mail”,勾选Key选项,然后点击Patch按钮对源程序打补丁即可。
- 运行Crack文件夹中的open.exe启动后台服务和进程!
- 重新运行安装目录下的Serv-U-Tray.exe和Serv-U.exe即可!
- 点击电脑右下角Serv-U图标,弹出提示框,点确定后,设置为可信任站点

- 破解完成完成以后,开始配置FTP服务器。

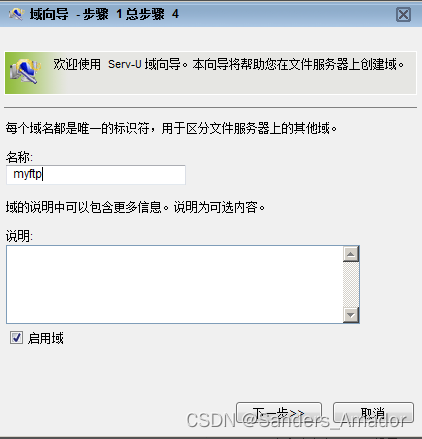
- 点击“是”按钮,进入如下界面,要求输入域名(输入的域名自己记录一下)
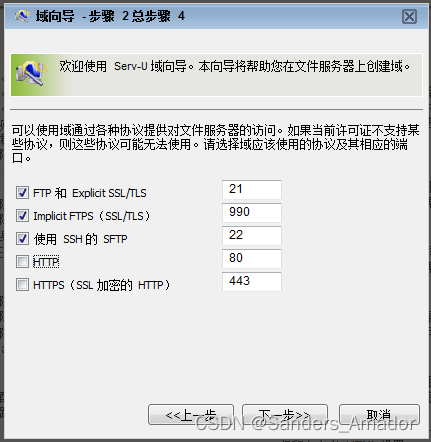
(2)点击下一步,设置访问服务器的方式,考虑到后期还要搭建web服务器,取消HTTP和HTTPS方式。
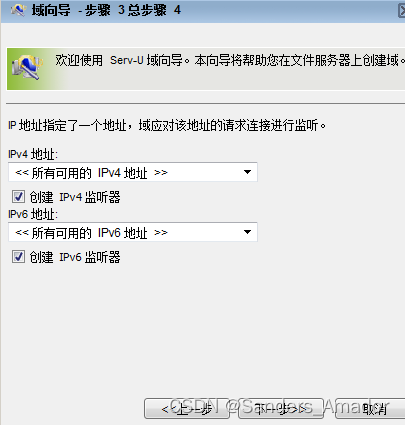
- 点击下一步,输入虚拟机IP地址默认勾选监听。
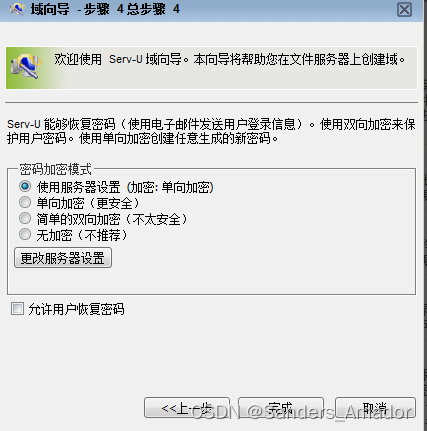
- 点击下一步,选择加密模式
(4)点击完成按钮后,进入FTP服务器账号创建向导,开始创建账号。

点击“是”

点击“是”
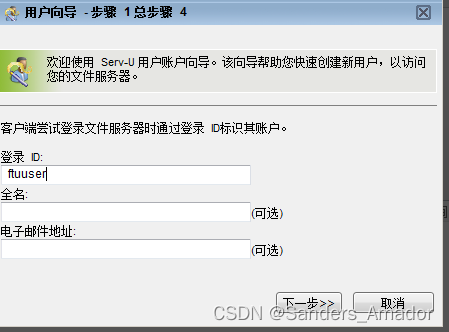
输入用户名:
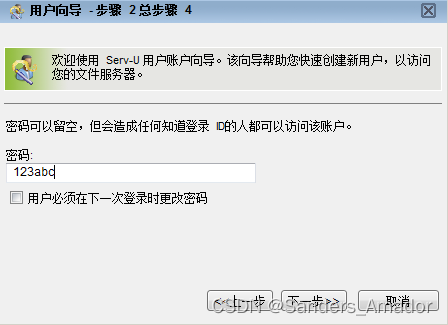
输入密码:
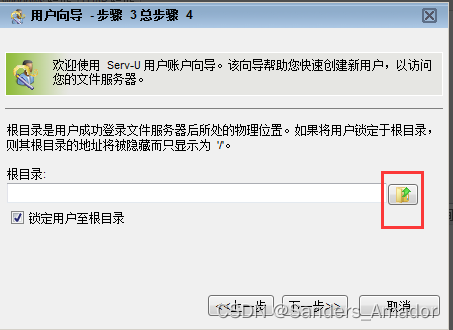
设置用户登录服务器,显示的目录,目录根据自己情况提前创建好,此处创建的目录为c:\ftproot文件夹,设置好目录后,下一步
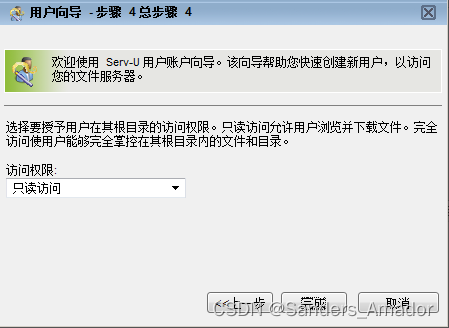
设置文件夹访问权限,(要完全访问权限,不能是只读权限)
二、安装FTP 客户端
- 安装FileZilla-3.5.3客户端工具,这是一个免安装的工具,复制粘贴到自己的电脑中即可。
![]()
三、连接FTP服务器,上传文件
双击FileZilla-3.5.3.exe进入客户端界面
- 输入虚拟机IP地址(也就是FTP服务器IP地址)、用户名和密码。点击快速连接按钮后连接到FTP服务器。
- 浏览本地的磁盘或者文件夹,选择需要上传的文件,直接拖动文件到工具的右侧,或者右击文件后,点击“上传”按钮进行上传。
- 上传完毕后,到虚拟机对应的文件夹中寻找刚才上传的文件。
四、遇到问题,不要慌张,将报错信息复制粘贴到百度中,进行搜索,能够得到许多帮助和提示,甚至是答案。


 1157
1157


 被折叠的 条评论
为什么被折叠?
被折叠的 条评论
为什么被折叠?
 到【灌水乐园】发言


