


一、python常用框架介绍
1.Django
优点:其有世界上最大的社区和最多的包。它的文档十分完善,提供了一站式的解决方案,包括缓存、orm、管理后台、验证、表单处理等,使开发复杂的有数据库驱动的网站变得简单。
缺点:其系统耦合度较高,替换内置功能比较麻烦,学习曲线陡峭。
2.Flask
flask是一个轻量级的web框架,依赖于Werkzeug和Jinjia两个外部库,易拓展,易使用。
3.Tornado
Tornado不但是一个框架,还是个web服务器。最初是为friendfeed开发的,后来也给facebook使用,是为了解决实时服务而诞生的。使用异步非阻塞i/o,运行速度快。
二、使用flask框架
首先需要安装flask框架,有以下两个方法。
- 先安装其所依赖的的两个外部库:Werkzeug和Jinjia。Werkzeug是一个WSGI(在web应用和多种服务器之间的标准python接口)。Jinjia起到渲染模板的作用。再安装flask。
- 使用virtualenvu创建虚拟环境,在虚拟环境下安装flask。
1.在pycharm中创建一个输出'Hello world!'的hello.py程序,运行在浏览器输出。
from flask import Flask        #导入flask类
app = Flask(__name__)        #创建一个该类的实例,第一个参数是应用模块或包的名称

@app.route('/')            #使用route()装饰器告诉flask什么样的URL能触发函数
def hello_world():
    # return 'Hello World!'
    return '你好!'

if __name__ == '__main__':           #确保服务器只会在该脚本被python解释器直接执行时才会运行,而不是作为模块被导入
    app.run()            #使用run()函数让应用运行到服务器上
2.开启调试模式
启用调试模式,修改代码,服务器也会自动载入,并在发生错误是提供一个调试器,定位错误。在项目上线时,需要关闭调试模式。
- 直接在应用对象上设置。
app.debug = True app.run() - 作为run()方法的一个参数引入。
app.run(debug=True)
3.路由
浏览器把请求发给web服务器,web服务器把请求发给flask程序实例。程序实例保存了一个URL到python函数的映射关系(可以知道每个URL请求运行那些代码) 。路由(route)是处理URL和函数之间关系的程序,其中函数被称为视图函数。
使用程序实例提供的app.route装饰器声明路由 。代码中将"/hello"和hello_world()函数绑定,在浏览器中访问网址"http://127.0.0.1:5000/hello"时,URL触发hello_world()函数,执行函数体中代码。
@app.route('/hello')
def hello_world():
    return 'Hello World!'
3.1变量规则
给URL添加变量部分,将这些特殊字段标记为<variable name>,这个部分将会作为命名参数传递到函数。规则可以用<converter:variable name>制定一个可选的转换器。
@app.route('/user/<username>')
def show_user_profile(username):
    # 显示该用户名的用户信息
    return 'User: %s' % username

@app.route('/post/<int:post_id>')
def show_post(post_id):
    # 根据ID显示文章,ID是整型数据,若为其他类型,则为not found
    return 'Post ID: %d' % post_id

3.2视图绑定多个URL
一个视图绑定多个URL。创建index.py文件,为index()视图函数绑定‘\’和‘\index’2个URL。
@app.route('/')
@app.route('/index')
def index():
    return "Welcome to Flask"
4.URL构造
Flask除了能够匹配URL,还能生成URL。可以用url_for来给指定的函数构造URL。 其接受函数名作为第一个参数,也接受对应的URL规则的变量部分的命名参数。未知变量部分会添加到URL末尾作为查询参数。
创建post.py文件。定义一个redirect_to_url()函数,当匹配到/url/路由时,执行redirect_to_url()函数,url_for('show_post',post_id=10)等价于"/posy/10",跳转至/post/<int:post_id>路由,执行show_post函数。
from flask import Flask,url_for
app = Flask(__name__)

@app.route('/post/<int:post_id>')
def show_post(post_id):
    # 根据ID显示文章,ID是整型数据
    return 'Post ID: %d' % post_id

@app.route('/url')
def redirect_to_url():
    # 跳转到show_post()视图函数
    return url_for('show_post',post_id=10)

if __name__ == '__main__':
    app.run(debug=True)
5.http方法
http(与web应用会话的协议)有许多不同访问的URL方法,默认路由只回应GET请求,但通过router()装饰器传递methods参数可以改变。
@app.route('/login',methods=['GET','POST'])
def login():
    if request.method == 'POST':        #请求方式为POST
        do_the_login()
    else:                                #请求方式为GET
        show_the_login_form()
6.渲染模板
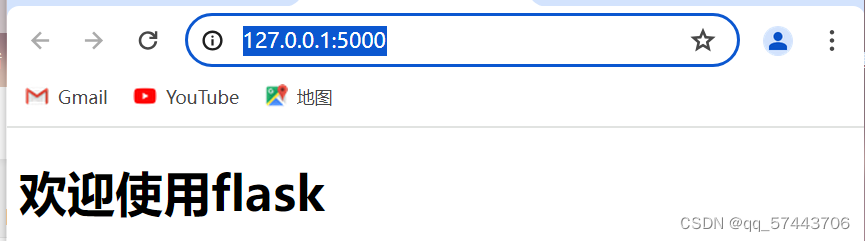
flask采用了强大的JinJa2模板引擎渲染模板。默认情况下,flask在程序文件夹templates子文件中寻找模板。首先在templates文件夹下创建模板文件如下图。然后在venv同级目录下创建app.py文件渲染这些模板。

index.html代码
<!DOCTYPE html>
<html lang="en">
<head>
    <meta charset="UTF-8">
    <title></title>
</head>
<body>
    <h1>欢迎使用flask</h1>
</body>
</html>
user.html代码
<!DOCTYPE html>
<html lang="en">
<head>
    <meta charset="UTF-8">
    <title>title</title>
</head>
<body>
    <h1>Hello,{{ name }}</h1>
</body>
</html>
app.py代码
from flask import Flask,render_template       #导入flask类
app = Flask(__name__)

@app.route('/')
def hello_world():
    return render_template('index.html')  #渲染模板,render_template函数吧JinJa2模板引擎集成到程序里

@app.route('/user/<username>')
def show_user_profile(username):     #显示该用户名的用户信息
    return render_template('user.html',name=username)    #第一个参数是文件名,随后参数是键值对,表示模板变量的真实值。username的值会替换掉user.html中{{name}}

if __name__ == '__main__':
    app.run(debug=True)
运行结果

上述过程中,使用了{{ name }}结构表示一个变量,它是一种特殊的占位符,告诉模板引擎这个位置的值从渲染模板时使用的数据中获取。
从字典中取一个值:{{ mydict['key'] }}
从列表中取一个值:{{ mydict[3] }}
从列表中取一个带索引的值:{{ mydict[myintvar] }}
从对象的方法中取一个值:{{ myobj.somemethod }}
使用过滤器修改变量,中间添加竖线分隔,将变量name的值首字母大写:
Hello,{{ name|capitalize }}


 1587
1587


 被折叠的 条评论
为什么被折叠?
被折叠的 条评论
为什么被折叠?
 到【灌水乐园】发言


