


1 概述
1.1 什么是Mybatis
它是一款半自动的ORM持久层框架,具有较高的SQL灵活性,支持高级映射(一对一,一对多),动态SQL,延迟加载和缓存等特性,但它的数据库无关性较低。
1.2 什么是ORM
ORM(Object-Relational Mapping)是一种将对象模型和关系数据库之间进行映射的技术。它允许开发者使用面向对象的方式来操作数据库,而无需编写繁琐的SQL语句。
使用ORM的好处
- 简化开发:ORM使得数据库操作变得更加简单和直观,开发者可以使用面向对象的方式来操作数据库,而不需要编写大量的SQL语句。这样可以提高开发效率,减少开发工作量。
- 提高可维护性:ORM将数据库操作抽象为对象和方法,使代码更加模块化和可维护。通过ORM,开发者可以更容易地理解和修改数据模型,而不必深入了解底层数据库结构。
- 数据库无关性:ORM提供了对不同数据库的支持,使得应用程序可以在不同的数据库系统上运行,而无需修改大量的代码。这样可以降低应用程序与特定数据库的依赖性,增加了灵活性。
- 性能优化:好的ORM框架通常会提供性能优化的功能,例如缓存、延迟加载等。这些功能可以帮助开发者提高应用程序的性能,并减少数据库的负载。
常见的ORM框架
- Hibernate(Java)
- Entity Framework (.NET)
- Django ORM (Python)
- Sequelize (Node.js)
1.3 为什么mybatis是半自动的ORM框架
相比于完全自动化的ORM框架,MyBatis在某些方面需要开发者手动编写SQL语句和映射配置。
- SQL语句的书写:与完全自动化的ORM框架不同,MyBatis 需要开发者手动编写SQL语句。虽然MyBatis提供了XML配置文件和注解等方式来映射SQL语句,但开发者仍然需要熟悉SQL语法并手动书写SQL。
- 参数传递和结果映射:在MyBatis中,需要手动配置参数传递和结果映射,即需要定义如何将数据库中的数据映射到对象,以及如何将对象中的数据传递给SQL语句。
- 灵活的查询控制:MyBatis允许开发者通过动态SQL等方式来灵活控制查询条件和结果集,但这也需要开发者进行手动的SQL编写和配置。
3 Mybatis的使用
3.1 开发步骤
- 创建Java类:定义数据模型,使用Java类来表示数据库表和记录。每个类对应一张表,每个类属性对应一列,每个方法对应一种操作。
- 配置数据源:在应用程序中配置数据源,包括数据库连接、连接池、数据源配置文件等。
- 编写SQL语句:使用MyBatis的XML配置文件或注解来编写SQL语句,包括查询、插入、更新和删除等操作。在SQL语句中可以使用占位符(#{}或${})来引用Java对象的属性值。
- 映射结果集:通过XML配置文件或注解来映射SQL查询结果集,将结果映射为Java对象。可以使用ResultMap来定义映射规则。
- 执行SQL语句:通过MyBatis的SqlSession接口来执行SQL语句,获取并处理查询结果。可以使用各种方法来调用SQL语句,例如selectOne、selectList、insert、update和delete等方法。
- 优化SQL性能:根据实际情况对SQL查询进行优化,包括缓存、预编译等技术。可以使用缓存来避免重复查询,使用预编译来提高执行效率。
3.2 案例演示
3.2.1 引入依赖或添加jar包
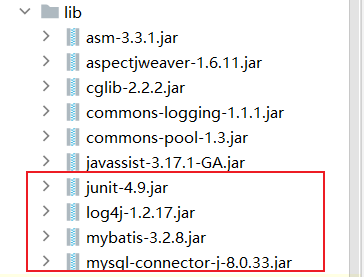
添加jar包(Java项目)
引入依赖(maven项目)
	<dependencies>
        <dependency>
            <groupId>mysql</groupId>
            <artifactId>mysql-connector-java</artifactId>
            <version>8.0.33</version>
        </dependency>
        <dependency>
            <groupId>org.mybatis</groupId>
            <artifactId>mybatis</artifactId>
            <version>3.2.8</version>
        </dependency>
        <dependency>
            <groupId>org.projectlombok</groupId>
            <artifactId>lombok</artifactId>
            <version>1.18.12</version>
            <scope>provided</scope>
        </dependency>
        <dependency>
            <groupId>junit</groupId>
            <artifactId>junit</artifactId>
            <version>4.9</version>
            <scope>test</scope>
        </dependency>
    </dependencies>
3.2.2 创建实体类
public class User implements Serializable {
    private Integer id;
    private String username;
    private Date birthday;
    private String sex;
    private String address;

    private List<Orders> ordersList = new ArrayList<>();

    public List<Orders> getOrdersList() {
        return ordersList;
    }

    public void setOrdersList(List<Orders> ordersList) {
        this.ordersList = ordersList;
    }

    public User() {
    }

    public User(String username) {
        this.username = username;
    }

    public User(Integer id, String username, Date birthday, String sex, String address) {
        this.id = id;
        this.username = username;
        this.birthday = birthday;
        this.sex = sex;
        this.address = address;
    }

    @Override
    public String toString() {
        return "User{" +
                "id=" + id +
                ", username='" + username + '\'' +
                ", birthday=" + birthday +
                ", sex='" + sex + '\'' +
                ", address='" + address + '\'' +
                '}';
    }

    public Integer getId() {
        return id;
    }

    public void setId(Integer id) {
        this.id = id;
    }

    public String getUsername() {
        return username;
    }

    public void setUsername(String username) {
        this.username = username;
    }

    public Date getBirthday() {
        return birthday;
    }

    public void setBirthday(Date birthday) {
        this.birthday = birthday;
    }

    public String getSex() {
        return sex;
    }

    public void setSex(String sex) {
        this.sex = sex;
    }

    public String getAddress() {
        return address;
    }

    public void setAddress(String address) {
        this.address = address;
    }
}
3.2.3 配置全局配置文件(数据库连接、连接池、数据源)
在src目录下创建SqlMapConfig.xml文件
<?xml version="1.0" encoding="UTF-8" ?>
<!DOCTYPE configuration
        PUBLIC "-//mybatis.org//DTD Config 3.0//EN"
        "http://mybatis.org/dtd/mybatis-3-config.dtd">
<configuration>
    <settings>
        <!-- 打印sql日志 -->
        <setting name="logImpl" value="STDOUT_LOGGING"></setting>

    <environments default="development">
        <environment id="development">
            <transactionManager type="JDBC"/>
            <dataSource type="POOLED">
                <property name="driver" value="com.mysql.cj.jdbc.Driver"/>
                <property name="url" value="jdbc:mysql:///mybatis"/>
                <property name="username" value="root"/>
                <property name="password" value="123456"/>
            </dataSource>
        </environment>
    </environments>

    <mappers>
        <mapper resource="com/yy/entity/User.xml"/>
        <mapper resource="com/yy/mapper/UserMapper.xml"/>
    </mappers>
</configuration>
3.2.4 使用MyBatis的XML配置文件来编写SQL语句
创建实体类的配置文件并在测试类中进行SqlSessionFactory以及SqlSession的创建,调用SqlSession的方法
1.创建实体类的配置文件,如:User.xml
<?xml version="1.0" encoding="UTF-8" ?>
<!DOCTYPE mapper
        PUBLIC "-//mybatis.org//DTD Mapper 3.0//EN"
        "http://mybatis.org/dtd/mybatis-3-mapper.dtd">
<mapper namespace="test">
<!--    public User findUserById(int id){}-->
    <select id="findUserById" parameterType="int" resultType="com.yy.entity.User">
        select * from user where id=#{id}
    </select>
<!--    public void addUser(User user){}-->
    <insert id="addUser" parameterType="com.yy.entity.User">
        insert into user (username,birthday,sex,address) values (#{username},#{birthday},#{sex},#{address})
    </insert>
<!--    public void updateUser(User user){}-->
    <update id="updateUser" parameterType="com.yy.entity.User" >
        update user set username=#{username},birthday=#{birthday},sex=#{sex},address=#{address} where id=#{id}
    </update>
<!--    public void delUser(int id){}-->
    <delete id="delUser" parameterType="int">
        delete from user where id=#{id}
    </delete>
</mapper>
2.创建UserTest来进行测试
public class UserTest {
    @Test
    public void findUserById() throws Exception {
        //mybatis核心控制文件
        String resource = "SqlMapConfig.xml";
        //获取配置文件
        InputStream inputStream = Resources.getResourceAsStream(resource);
        //创建会话工厂
        SqlSessionFactory sqlSessionFactory = new SqlSessionFactoryBuilder().build(inputStream);
        //创建会话
        SqlSession sqlSession = sqlSessionFactory.openSession();
        User user = sqlSession.selectOne("test.findUserById",1);

        System.out.println(user);
        sqlSession.close();
    }

    @Test
    public void addUser() throws Exception {
        String resource = "SqlMapConfig.xml";
        InputStream inputStream = Resources.getResourceAsStream(resource);
        SqlSessionFactory sqlSessionFactory = new SqlSessionFactoryBuilder().build(inputStream);
        SqlSession sqlSession = sqlSessionFactory.openSession();

        User user = new User();
        user.setUsername("lisi");
        sqlSession.insert("test.addUser",user);


//        sqlSession.insert("test.addUser",new User("zhangsan"));
        sqlSession.commit();
        System.out.println("添加成功");
        sqlSession.close();

    }
    @Test
    public void updateUser() throws Exception {
        String resource = "SqlMapConfig.xml";
        InputStream inputStream = Resources.getResourceAsStream(resource);
        SqlSessionFactory sqlSessionFactory = new SqlSessionFactoryBuilder().build(inputStream);
        SqlSession sqlSession = sqlSessionFactory.openSession();

        User user = new User();
        user.setId(38);
        user.setUsername("lisi");
        sqlSession.update("test.updateUser",user);
        sqlSession.commit();
        System.out.println("修改成功");
        sqlSession.close();

    }
    @Test
    public void delUser() throws Exception {
        String resource = "SqlMapConfig.xml";
        InputStream inputStream = Resources.getResourceAsStream(resource);
        SqlSessionFactory sqlSessionFactory = new SqlSessionFactoryBuilder().build(inputStream);
        SqlSession sqlSession = sqlSessionFactory.openSession();


        sqlSession.delete("test.delUser",40);

        sqlSession.commit();
        System.out.println("删除成功");
        sqlSession.close();

    }
}
或者创建mapper.xml映射文件来编写SQL语句,再创建Dao类来实现SqlSessionFactory以及SqlSession的创建,调用SqlSession的方法
1.创建mapper接口以及mapper.xml映射文件
mapper接口
public interface UserMapper {
    //查询所有用户
    public List<User> findList();
    //添加用户
    public void addUser(User user);
    //更新用户
    public void updateUser(User user);
    //删除用户
    public void delUser(int id);
}
mapper.xml
    <select id="findList" resultMap="userResultMap">
        select id _id,username,sex,birthday,address from user
    </select>
    <resultMap id="userResultMap" type="com.yy.entity.User">
        <!--        配置数据集表和实体类的映射信息-->
        <id column="_id" property="id"/>
        <result column="username" property="username"/>
        <result column="birthday" property="birthday"/>
        <result column="sex" property="sex"/>
        <result column="address" property="address"/>
    </resultMap>

    <insert id="addUser" parameterType="com.yy.entity.User">
        insert into user (username,birthday,sex,address) values (#{username},#{birthday},#{sex},#{address})
    </insert>
    <update id="updateUser" parameterType="com.yy.entity.User" >
        update user set username=#{username},birthday=#{birthday},sex=#{sex},address=#{address} where id=#{id}
    </update>
    <delete id="delUser" parameterType="int">
        delete from user where id=#{id}
    </delete>
2.创建Dao类
创建UserDao接口
public interface UserDao {
    public User findUserById(int id) throws Exception;
    public void addUser(User user) throws Exception;
    public void updateUser(User user) throws Exception;
    public void delUser(int id) throws Exception;

}
创建UserDaoImpl实现类
public class UserDaoImpl implements UserDao {

    private SqlSessionFactory sqlSessionFactory;


    public UserDaoImpl(SqlSessionFactory sqlSessionFactory) {
        this.sqlSessionFactory = sqlSessionFactory;
    }

    @Override
    public User findUserById(int id) throws Exception{
        SqlSession sqlSession = sqlSessionFactory.openSession();
        User user = sqlSession.selectOne("test.findUserById",id);

        sqlSession.close();
        return user;
    }

    @Override
    public void addUser(User user) throws Exception {
        SqlSession sqlSession = sqlSessionFactory.openSession();
        sqlSession.insert("addUser",user);
        sqlSession.commit();
        sqlSession.close();
    }

    @Override
    public void updateUser(User user) throws Exception {
        SqlSession sqlSession = sqlSessionFactory.openSession();
        sqlSession.update("updateUser",user);
        sqlSession.commit();
        sqlSession.close();
    }

    @Override
    public void delUser(int id) throws Exception {
        SqlSession sqlSession = sqlSessionFactory.openSession();
        sqlSession.delete("delUser",id);
        sqlSession.commit();
        sqlSession.close();
    }

}
3.进行测试
创建UserDaoTest测试类
public class UserDaoTest {
    private SqlSessionFactory sqlSessionFactory = null;
    private UserDaoImpl userDao = null;

    @Before
    public void beforeMethod() throws Exception{
        //mybatis核心控制文件
        String resource = "SqlMapConfig.xml";
        //获取配置文件
        InputStream inputStream = Resources.getResourceAsStream(resource);
        //创建会话工厂
        sqlSessionFactory = new SqlSessionFactoryBuilder().build(inputStream);

        userDao = new UserDaoImpl(sqlSessionFactory);
    }

    @Test
    public void findUserById() throws Exception {
        User user = userDao.findUserById(1);
        System.out.println(user);
    }

    @Test
    public void addUser() throws Exception{

        userDao.addUser(new User("zhaoliu"));

    }
    @Test
    public void updateUser() throws Exception{

        User user = new User();
        user.setId(42);
        user.setUsername("zhao");
        userDao.updateUser(user);
    }
    @Test
    public void delUser() throws Exception{
        userDao.delUser(42);
    }
}
4 Mybatis的SQL优化
4.1 动态SQL
可以根据具体的参数条件,使用Mybatis中的动态标签来对SQL语句进行动态拼接。
4.1.1 <if>
当满足test条件时,才会将<if>标签内的SQL语句拼接上去
<!-- 示例 -->
<select id="findByUsername" resultType="com.yy.entity.User" parameterType="java.lang.String">
        SELECT * FROM user WHERE age >= 18
        <if test="name != null and name != ''">
            AND name like '%${name}%'
        </if>
</select>
4.1.2 <choose>
<choose>和<when> ,<otherwise> 是配套标签,类似于java中的switch,只会选中满足条件的一个
<select id="findActiveBlogLike" resultType="Blog">
  SELECT * FROM BLOG WHERE state = ‘ACTIVE’
  <choose>
    <when test="title != null">
      AND title like #{title}
    </when>
    <when test="author != null and author.name != null">
      AND author_name like #{author.name}
    </when>
    <otherwise>
      AND featured = 1
    </otherwise>
  </choose>
</select>
4.1.3 <where>
<where>标签只会在至少有一个子元素返回了SQL语句时,才会向SQL语句中添加WHERE,如果WHERE之后是以AND或OR开头,会自动将其删掉
<select id="findActiveBlogLike" resultType="Blog">
  SELECT * FROM BLOG
  <where>
    <if test="state != null">
         state = #{state}
    </if>
    <if test="title != null">
        AND title like #{title}
    </if>
    <if test="author != null and author.name != null">
        AND author_name like #{author.name}
    </if>
  </where>
</select>
4.1.4 <foreach>
<foreach>用来做迭代拼接
<select id="findBatch" resultType="com.yy.entity.User" parameterType="list">
        SELECT * FROM user WHERE id in
        <foreach collection="list" item="item" open="(" separator="," close=")">
          #{item}
        </foreach>
</select>
4.1.5 <sql>
<sql>可将重复的SQL片段提取出来,然后在需要的地方,使用标签进行引用
<select id="findUser" parameterType="com.yy.entity.User" resultType="com.yy.entity.User">
	SELECT * FROM user
	<include refid="whereClause"/>
</select>

<sql id="whereClause">
     <where>
         <if test="user != null">
         	AND username like '%${user.name}%'
         </if>
     </where>
</sql>
4.2 缓存
4.2.1 一级缓存
- 默认开启,同一个SqlSesion级别共享的缓存
- 在一个SqlSession的生命周期内,执行2次相同的SQL查询,则第二次SQL查询会直接取缓存的数据,而不再进行对数据库的查找操作
- 一级缓存在什么情况下被清除
- 在同一个SqlSession下执行增删改操作时(不必提交)
- SqlSession提交或关闭时(关闭时会自动提交)
- 对mapper.xml中的某个CRUD标签,设置属性flushCache=true,这样会导致该MappedStatement的一级缓存,二级缓存都失效(一个CRUD标签在mybatis中会被封装成一个MappedStatement)
- 在全局配置文件中设置 <setting name=“localCacheScope” value=“STATEMENT”/>,这样会使一级缓存失效,二级缓存不受影响
4.2.2 二级缓存
- 默认关闭,可通过全局配置文件中的<settings name=“cacheEnabled” value=“true”/>开启二级缓存总开关
<!--        开启二级缓存-->
        <setting name="cacheEnabled" value="true" />
- 在某个具体的mapper.xml中增加<cache />,即开启了该mapper.xml的二级缓存
<!--    开启user支持二级缓存-->
    <cache
            eviction="FIFO"
            flushInterval="60000"
            size="512"
            readOnly="true"/>
- 二级缓存是mapper级别的缓存,粒度比一级缓存大,多个SqlSession可以共享同一个mapper的二级缓存
- 开启二级缓存后,SqlSession需要提交,查询的数据才会被刷新到二级缓存当中
4.3 关联查询
使用 MyBatis 的 <resultMap> 标签以及 <association> 和 <collection> 子标签来定义结果映射
4.3.1 <association>
<association> 主要用于一对一的关联关系,用于将一个实体类的实例关联到另一个实体类的实例。
<!-- 定义 User 实体类的 resultMap -->
<resultMap id="UserResultMap" type="User">
  <id property="id" column="user_id" />
  <result property="name" column="user_name" />
  <result property="age" column="user_age" />
  <!-- 定义一个关联的 Department 实体类 -->
  <association property="department" javaType="Department" resultMap="DepartmentResultMap"/>
</resultMap>

<!-- 定义 Department 实体类的 resultMap -->
<resultMap id="DepartmentResultMap" type="Department">
  <id property="id" column="dept_id" />
  <result property="name" column="dept_name" />
  <result property="location" column="dept_location" />
</resultMap>

<!-- 定义查询语句 -->
<select id="getUserWithDepartment" resultMap="UserResultMap">
  SELECT u.id AS user_id, u.name AS user_name, u.age AS user_age, d.id AS dept_id, d.name AS dept_name, d.location AS dept_location
  FROM user u
  INNER JOIN department d ON u.department_id = d.id
  WHERE u.id = #{id}
</select>
4.3.2 <collection>
<collection> 主要用于一对多或多对多的关联关系,用于将一个实体类的实例关联到多个另一个实体类的实例。
<!-- 定义 Department 实体类的 resultMap -->
<resultMap id="DepartmentResultMap" type="Department">
  <id property="id" column="dept_id" />
  <result property="name" column="dept_name" />
  <result property="location" column="dept_location" />
  <!-- 定义一个关联的 employeeList 集合 -->
  <collection property="employeeList" ofType="Employee" resultMap="EmployeeResultMap"/>
</resultMap>

<!-- 定义 Employee 实体类的 resultMap -->
<resultMap id="EmployeeResultMap" type="Employee">
  <id property="id" column="emp_id" />
  <result property="name" column="emp_name" />
  <result property="age" column="emp_age" />
  <result property="salary" column="emp_salary" />
  <result property="departmentId" column="dept_id" />
</resultMap>

<!-- 定义查询语句 -->
<select id="getDepartmentWithEmployees" resultMap="DepartmentResultMap">
  SELECT d.id AS dept_id, d.name AS dept_name, d.location AS dept_location, e.id AS emp_id, e.name AS emp_name, e.age AS emp_age, e.salary AS emp_salary
  FROM department d
  INNER JOIN employee e ON d.id = e.department_id
  WHERE d.id = #{id}
</select>
4.3 延迟加载
4.3.1 什么是延迟加载
- 延迟加载默认是关闭的
- 延迟加载是结合关联查询进行应用的。也就是说,只在<association>和<collection> 标签上起作用
- 使用延迟加载后,在我们进行关联查询时,系统并不会立即查询关联对象的查询
- 在一个订单(Order)对象中包含了客户(Customer)对象的引用,如果使用延迟加载,那么在获取订单对象时,并不会立即加载关联的客户对象,而是等到真正需要访问客户对象的属性时才会触发加载操作。
4.3.2 延迟加载的使用
通过全局配置文件中的<setting name=“lazyLoadingEnabled” value=“true”/>来开启,开启后,所有的SELECT查询,若有关联对象,都会采用延迟加载的策略。
        <!--打开延迟加载开关-->
        <setting name="lazyLoadingEnabled" value="true"/>

        <!--将积极加载改为消极加载-->
        <setting name="aggressiveLazyLoading" value="false"/>
4.4 逆向工程
利用逆向工程来自动生成实体类,mapper类,mapper.xml文件
方式一:Java代码实现
自动生成类
public class GeneratorSqlmap {

	public void generator() throws Exception{

		List<String> warnings = new ArrayList<String>();
		boolean overwrite = true;
		//指定 逆向工程配置文件
		//这一步骤最为关键,指定了文件就自动生成了
		File configFile = new File("D:\\java\\test\\automatically\\src\\generatorConfig.xml");
		ConfigurationParser cp = new ConfigurationParser(warnings);
		Configuration config = cp.parseConfiguration(configFile);
		DefaultShellCallback callback = new DefaultShellCallback(overwrite);
		MyBatisGenerator myBatisGenerator = new MyBatisGenerator(config,
				callback, warnings);
		myBatisGenerator.generate(null);

	}
	public static void main(String[] args) throws Exception {
		try {
			GeneratorSqlmap generatorSqlmap = new GeneratorSqlmap();
			generatorSqlmap.generator();
		} catch (Exception e) {
			e.printStackTrace();
		}

	}

}
创建generatorConfig.xml配置文件
<?xml version="1.0" encoding="UTF-8"?>
<!DOCTYPE generatorConfiguration
  PUBLIC "-//mybatis.org//DTD MyBatis Generator Configuration 1.0//EN"
  "http://mybatis.org/dtd/mybatis-generator-config_1_0.dtd">

<generatorConfiguration>
	<context id="testTables" targetRuntime="MyBatis3">
		<commentGenerator>
			<!-- 是否去除自动生成的注释 true:是 : false:否 -->
			<property name="suppressAllComments" value="true" />
		</commentGenerator>
		<!--数据库连接的信息:驱动类、连接地址、用户名、密码 -->
		<jdbcConnection driverClass="com.mysql.jdbc.Driver"
			connectionURL="jdbc:mysql://localhost:3306/ssmxiaomi?nullCatalogMeansCurrent=true" userId="root"
			password="123456">
		</jdbcConnection>
		<!-- <jdbcConnection driverClass="oracle.jdbc.OracleDriver"
			connectionURL="jdbc:oracle:thin:@localhost:1521:orcl"
			userId="shaonian"
			password="admin">
		</jdbcConnection>  -->

		<!-- 默认false,把JDBC DECIMAL 和 NUMERIC 类型解析为 Integer,为 true时把JDBC DECIMAL 和
			NUMERIC 类型解析为java.math.BigDecimal -->
		<javaTypeResolver>
			<property name="forceBigDecimals" value="false" />
		</javaTypeResolver>

		<!-- targetProject:生成PO类的位置 -->
		<javaModelGenerator targetPackage="com.yy.ssm.entity"
			targetProject=".\src">
			<!-- enableSubPackages:是否让schema作为包的后缀 -->
			<property name="enableSubPackages" value="false" />
			<!-- 从数据库返回的值被清理前后的空格 -->
			<property name="trimStrings" value="true" />
		</javaModelGenerator>
        <!-- targetProject:mapper映射文件生成的位置 -->
		<sqlMapGenerator targetPackage="com.yy.ssm.mapper"
			targetProject=".\src">
			<!-- enableSubPackages:是否让schema作为包的后缀 -->
			<property name="enableSubPackages" value="false" />
		</sqlMapGenerator>
		<!-- targetPackage:mapper接口生成的位置 -->
		<javaClientGenerator type="XMLMAPPER"
			targetPackage="com.yy.ssm.mapper"
			targetProject=".\src">
			<!-- enableSubPackages:是否让schema作为包的后缀 -->
			<property name="enableSubPackages" value="false" />
		</javaClientGenerator>
		<!--
		指定数据库表
		 -->
		<!--
		 <table tableName="friend"></table>
		 	 <table tableName="moneys"></table> -->
<!--		<table tableName="address"></table>-->
<!--		<table tableName="admin"></table>-->
<!--		<table tableName="carshop"></table>-->
<!--		<table tableName="orderdetail"></table>-->
<!--		<table tableName="product_info"></table>-->
<!--		<table tableName="product_type"></table>-->
		<table tableName="users"></table>
<!--		<table tableName="xmorder"></table>-->


		 	<!--  		 <table tableName="college"></table>
		 	 <table tableName="teacher"></table>
		 	  -->

		<!-- 	<table tableName="admin"></table>
			<table tableName="product_type"></table>
			<table tableName="product_info"></table> -->

				<!-- <table tableName="teacher"></table>	 -->

		<!-- <table tableName="admin"></table> -->

<!-- 		<table tableName="product_info"></table>
		<table tableName="product_type"></table> -->
			<!-- <table tableName="product_info"></table>	 -->

<!-- 		<table tableName="orders"></table>
		<table tableName="orderdetail"></table>
		<table tableName="user"></table> -->
		<!-- <table schema="" tableName="sys_user"></table>
		<table schema="" tableName="sys_role"></table>
		<table schema="" tableName="sys_permission"></table>
		<table schema="" tableName="sys_user_role"></table>
		<table schema="" tableName="sys_role_permission"></table> -->

		<!-- 有些表的字段需要指定java类型
		 <table schema="" tableName="">
			<columnOverride column="" javaType="" />
		</table> -->
	</context>
</generatorConfiguration>
方式二:mybatis官方提供mapper自动生成工具mybatis-generator-core
配置maven插件
<build>
        <plugins>
            <plugin>
                <groupId>org.mybatis.generator</groupId>
                <artifactId>mybatis-generator-maven-plugin</artifactId>
                <version>1.3.7</version>
                <configuration>
                    <!-- 输出日志 -->
                    <verbose>true</verbose>
                    <overwrite>true</overwrite>
                </configuration>
            </plugin>
        </plugins>
    </build>
创建generatorConfig.xml配置文件
<?xml version="1.0" encoding="UTF-8"?>
<!DOCTYPE generatorConfiguration
        PUBLIC "-//mybatis.org//DTD MyBatis Generator Configuration 1.0//EN"
        "http://mybatis.org/dtd/mybatis-generator-config_1_0.dtd">

<generatorConfiguration>
    <!--导入属性配置-->
    <properties resource="properties/xx.properties"></properties>

    <!-- 指定数据库驱动的jdbc驱动jar包的位置 -->
    <classPathEntry location="C:\Users\Vergi\.m2\repository\mysql\mysql-connector-java\8.0.11\mysql-connector-java-8.0.11.jar" />
    <!-- context 是逆向工程的主要配置信息 -->
    <!-- id:起个名字 -->
    <!-- targetRuntime:设置生成的文件适用于那个 mybatis 版本 -->
    <context id="default" targetRuntime="MyBatis3">
        <!--optional,旨在创建class时,对注释进行控制-->
        <commentGenerator>
            <property name="suppressDate" value="true" />
            <!-- 是否去除自动生成的注释 true:是 : false:否 -->
            <property name="suppressAllComments" value="true" />
        </commentGenerator>

        <!--jdbc的数据库连接-->
        <jdbcConnection driverClass="${db.driver}"
                        connectionURL="${db.url}"
                        userId="${db.user}"
                        password="${db.password}">
        </jdbcConnection>


        <!--非必须,类型处理器,在数据库类型和java类型之间的转换控制-->
        <javaTypeResolver>
            <!-- 默认情况下数据库中的 decimal,bigInt 在 Java 对应是 sql 下的 BigDecimal 类 -->
            <!-- 不是 double 和 long 类型 -->
            <!-- 使用常用的基本类型代替 sql 包下的引用类型 -->
            <property name="forceBigDecimals" value="false" />
        </javaTypeResolver>

        <!-- targetPackage:生成的实体类所在的包 -->
        <!-- targetProject:生成的实体类所在的硬盘位置 -->
        <javaModelGenerator targetPackage="mybatis.generator.model"
                            targetProject=".\src\main\java">
            <!-- 是否允许子包 -->
            <property name="enableSubPackages" value="false" />
            <!-- 是否清理从数据库中查询出的字符串左右两边的空白字符 -->
            <property name="trimStrings" value="true" />
        </javaModelGenerator>

        <!-- targetPackage 和 targetProject:生成的 mapper.xml 文件的包和位置 -->
        <sqlMapGenerator targetPackage="mybatis.generator.mappers"
                         targetProject=".\src\main\resources">
            <!-- 针对数据库的一个配置,是否把 schema 作为字包名 -->
            <property name="enableSubPackages" value="false" />
        </sqlMapGenerator>

        <!-- targetPackage 和 targetProject:生成的 mapper接口文件的包和位置 -->
        <javaClientGenerator type="XMLMAPPER"
                             targetPackage="mybatis.generator.dao" targetProject=".\src\main\java">
            <!-- 针对 oracle 数据库的一个配置,是否把 schema 作为子包名 -->
            <property name="enableSubPackages" value="false" />
        </javaClientGenerator>
        <!-- 这里指定要生成的表 -->
        <table tableName="student"/>
        <table tableName="product"/>
    </context>
</generatorConfiguration>
双击执行mybatis-generator的maven插件

4.5 PageHelper分页插件
4.5.1 添加jar包或配置pom.xml
添加jar

配置pom.xml
<dependency>
	<groupId>com.github.pagehelper</groupId>
	<artifactId>pagehelper</artifactId>
	<version>5.1.6</version>
</dependency>
4.5.2 mybatis全局配置文件中配置<plugin>标签
<?xml version="1.0" encoding="UTF-8" ?>
<!DOCTYPE configuration PUBLIC "-//mybatis.org//DTD Config 3.0//EN"
"http://mybatis.org/dtd/mybatis-3-config.dtd">
<configuration>

    <plugins>
        <plugin interceptor="com.github.pagehelper.PageInterceptor">
        </plugin>
    </plugins>
</configuration>
4.5.3 使用插件进行查询
    public PageInfo itemsPage(Integer page, int pageSize, Items items) {
    	//设置分页信息
        PageHelper.startPage(page, pageSize);
        //多条件模糊查询
        List<Items> itemsList = itemsMapper.selectConList(items);
        PageInfo pageInfo = new PageInfo<>(itemsList);
        return pageInfo;
    }


 639
639


 被折叠的 条评论
为什么被折叠?
被折叠的 条评论
为什么被折叠?
 到【灌水乐园】发言


