


1、要求:
- node.js版本必须要在16+以上,不然后续启动不了项目。(解决:简单粗暴重新安装node)下载 | Node.js
创建建议pnpm,不然版本等其他原因有很多的错误 查看版本 node -v
2、创建项目:
使用npm安装:
- npm create vite (后面跟着提示一次创建)
- 启动:npm run dev
- 打包:npm run build
使用pnpm安装:
先要全局安装pnpm 安装指令:npm i -g pnpm
- pnpm create vite (后面跟着提示一次创建)
- 启动:pnpm run dev
- 打包:pnpm run build
3、配置:
3.1 启动项目自动打开浏览器
package.json里面

3.2.ts忽略文件
//@ts-ignore
3.3 配置@指向src路径
在vite.config.ts 中加上
import { defineConfig } from 'vite'
import vue from '@vitejs/plugin-vue'
import path from 'path'
export default defineConfig({
plugins: [
vue(),
],
resolve: {
alias: {
"@": path.resolve("./src") // 相对路径别名配置,使用 @ 代替 src
}
}
})
注意: path 模块是 node.js 的内置模块,而 node.js 默认不支持 ts 文件的
解决:安装 @type/node 依赖包pnpm install @types/node或npm install @types/node --save-dev
在tsconfig.json中加上
"compilerOptions": {
"baseUrl": "./",
"paths":{
"@": ["src"],
"@/*": ["src/*"],
},
},
创建声明文件 在 vite-env.d.ts里
declare module "@";
4、模块
4.1、UI:element-plus安装:
element-plus默认是英文按照下面连接配置中文版的
//引入ElementPlus
import ElementPlus from 'element-plus'
//引入国际化语言中文
import zhCn from 'element-plus/dist/locale/zh-cn.mjs'
//样式
import 'element-plus/dist/index.css'
const app = createApp(App)
app.use(ElementPlus, {
locale: zhCn,
})
注意:可能会报错
无法找到模块“element-plus/dist/locale/zh-cn.mjs”的声明文件。“C:/Users/shmily/vitevuepnpm/node_modules/.pnpm/element-plus@2.4.1_vue@3.3.4/node_modules/element-plus/dist/locale/zh-cn.mjs”隐式拥有 "any" 类型。
如果“element-plus”包实际公开了此模块,请尝试添加包含 `declare module‘element-plus/dist/locale/zh-cn.mjs';` 的新声明(.d.ts)文件ts(7016)
解决:按照提示在 vite-env.d.ts里添加 declare module "element-plus/dist/locale/zh-cn.mjs";
4.2、svg图标的使用与配置:
在开发项目的时候经常会用到svg矢量图,而且我们使用SVG以后,页面上加载的不再是图片资源,这对页面性能来说是个很大的提升,而且我们SVG文件比img要小的很多,放在项目中几乎不占用资源
4.2.1 安装依赖插件 npm安装:npm install svg-sprite-loader --save-dev
pnpm安装:pnpm install vite-plugin-svg-icons -D
4.2.2 在`vite.config.ts`中配置插件
import path from 'path'
import { createSvgIconsPlugin } from 'vite-plugin-svg-icons'
export default defineConfig({
plugins: [
vue(),
createSvgIconsPlugin({
// 需要自动导入的 svg 文件目录 (可自行修改)我的路径如下图所示
iconDirs: [path.resolve(process.cwd(), 'src/assets/icons')], // Specify symbolId format
// 执行icon name的格式 (可自行修改)
symbolId: 'icon-[dir]-[name]',
}),
],
})
4.2.3 入口文件导入
import 'virtual:svg-icons-register'
4.2.4 页面使用
先创建文件夹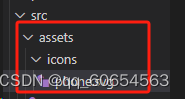
使用要写规定的语法
<svg style="width:30px;height:30px">
<use xlink:href="#icon-phone" fill="red"></use>
</svg>
注意:
【坑】vite-plugin-svg-icons报错:Cannot find package ‘fast-glob‘
下载模块就行
pnpm i fast-glob
4.2.5 svg封装为组件
因为项目很多模块需要使用图标,因此把它封装为组件!!!
在src/components目录下创建一个SvgIcon组件:代码如下
<template>
<!-- svg:图标外层容器节点,内部需要与use标签结合使用 -->
<svg :style="{ width, height }">
<!-- xlink:href执行用哪一个图标,属性值务必#icon-图标名字 -->
<!-- use标签fill属性可以设置图标的颜色 -->
<use :xlink:href="prefix + name" :fill="color"></use>
</svg>
</template>
<script setup lang="ts">
//接受父组件传递过来的参数
defineProps({
//xlink:href属性值前缀
prefix: {
type: String,
default: '#icon-'
},
//提供使用的图标名字
name: String,
//接受父组件传递颜色
color: {
type: String,
default: ''
},
//接受父组件传递过来的图标的宽度
width: {
type: String,
default: '16px'
},
//接受父组件传递过来的图标的高度
height: {
type: String,
default: '16px'
}
})
</script>
<style scoped></style>
什么地方使用就引入
import svgIcon from './components/SvgIcon/index.vue'
<svgIcon name="phone" color="yellow" width="50px" height="50px"></svgIcon>
4.3、路由模块配置:
4.3.1 模块下载
pnpm install vue-router
4.3.2 创建文价夹
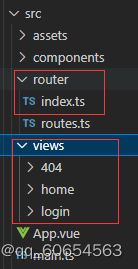
4.3.3 router-index.ts里配置路由
//通过vue-router插件实现模板路由配置
import { createRouter, createWebHashHistory } from 'vue-router'
//创建路由器
const router = createRouter({
//路由模式hash
history: createWebHashHistory(),
routes: [
{
path: '/login',//登录
component: () => import('../views/login/index.vue'),
name: 'login',
meta: {},
},
{
path: '/',//home
component: () => import('../views/home/index.vue'),
name: 'home',
meta: {},
},
{
path: '/404',//404
component: () => import('../views/404/index.vue'),
name: '404',
meta: {},
},
],
// 滚动行为
scrollBehavior() {
return {
left: 0,
top: 0,
}
},
})
export default router
注意:报错 无法找到模块“vue-router”的声明文件。“C:/Users/shmily/vitevuepnpm/node_modules/pnpm/vuerouter@4.2.5_vue@3.3.4/node_modules/vue-router/index.js”隐式拥有“any"类型。 ts(7016)
原因:因为不同版本的Vue和Vue Router可能需要不同的类型声明文件。
解决:安装@types/vue-router': 首先确保你已经安装了vue-router和@vue/router’包,然后运行以下命令来安装 @types/vue-router’,这是Vue Router的类型声明文件:
pnpm i @types/vue-router
4.3.3 main.ts引入
// 引入路由
import gloalRouter from './router/index'
const app=createApp(App)
app.use(gloalRouter)
4.4、axios模块配置:
1.下载模块
pnpm i axios 或 npm i axios
axios的封装与使用 请看http://t.csdnimg.cn/uy0q4


 8771
8771


 被折叠的 条评论
为什么被折叠?
被折叠的 条评论
为什么被折叠?
 到【灌水乐园】发言


