


简单使用
文章目录
目录
一、项目资源链接
https://download.csdn.net/download/qq_60781770/87743941?spm=1001.2014.3001.5501
使用效果
使用步骤
1.后端(springboot)
引入依赖:
<dependency>
	<groupId>com.aliyun.oss</groupId>
	<artifactId>aliyun-sdk-oss</artifactId>
	<version>3.10.2</version>
</dependency>
<dependency>
	<groupId>com.alibaba.cloud</groupId>
	<artifactId>spring-cloud-alibaba-commons</artifactId>
	<version>2.2.7.RELEASE</version>
</dependency>
创建项目文件(仅供参考)
结构树:
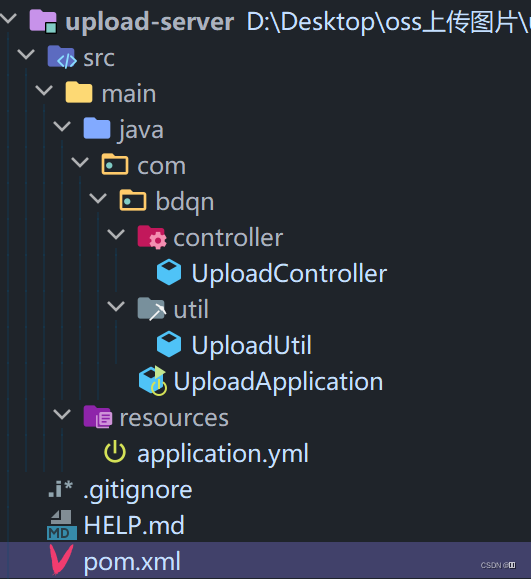
UploadUtil.java
package com.bdqn.util;

import com.alibaba.cloud.commons.lang.StringUtils;
import com.aliyun.oss.OSS;
import com.aliyun.oss.OSSClientBuilder;
import org.springframework.web.multipart.MultipartFile;

public class UploadUtil {

    //域名(开头需要https://,结尾要/)  获取地址:https://oss.console.aliyun.com/bucket/
    private static final String ali_domain = "https://bucketName.oss-cn-shenzhen.aliyuncs.com/";
    //地域节点(开头需要http://)
    private static final String endpoint = "http://oss-cn-shenzhen.aliyuncs.com";
    private static final String accessKeyId = "【你的accessKeyId】";
    //↑ ↑ ↑ ↑ ↑  密钥获取地址 https://ram.console.aliyun.com/manage/ak ↓ ↓ ↓ ↓ ↓ ↓ ↓ ↓
    private static final String accessKeySecret = "【你的accessKeySecret】";
    //作为存放的文件夹,通过前端传入的下标id判断图片放哪个文件夹(主要是为了方便分类管理,也可以不搞)
    private static final String[] typeList = {"goods", "comment", "head", "background","session"};
    private static final String bucketName = "【你的oss自定义存储桶名】";

    /**
     * 上传文件
     * @param file 文件对象
     * @param typeIndex 选择存放的文件夹
     * @param id 作为2级文件夹(如用户id,商品id)
     * @param uid 前端传入的el-upload生成的uid作为文件名
     * @return 图片链接
     * @throws Exception
     */
    public static String uploadImg(MultipartFile file, Integer typeIndex, Integer id, long uid) throws Exception {
        //生成的文件名(类型文件夹/关联id/uid.文件后缀)
        String fileName = String.format("%s/%d/%d%s", typeList[typeIndex], id, uid, file.getOriginalFilename().substring(file.getOriginalFilename().lastIndexOf(".")));
        //OSS客户端对象
        OSS ossClient = new OSSClientBuilder().build(endpoint, accessKeyId, accessKeySecret);
        //上传
        ossClient.putObject(
                bucketName, //仓库名
                fileName, //文件名
                file.getInputStream());
        //关闭连接
        ossClient.shutdown();
        //返回链接
        return ali_domain + fileName;
    }

    /**
     * 删除文件
     * @param url 链接
     * @return
     */
    public static boolean remove(String url) {
        //将前缀截掉
        String str = StringUtils.substringAfter(url, ali_domain);
        OSS ossClient = new OSSClientBuilder().build(endpoint, accessKeyId, accessKeySecret);
        //删除图片
        ossClient.deleteObject(bucketName, str);
        //关闭连接
        ossClient.shutdown();
        return true;
    }

}
UploadController.java
package com.bdqn.controller;

import com.bdqn.util.UploadUtil;
import org.springframework.web.bind.annotation.CrossOrigin;
import org.springframework.web.bind.annotation.PostMapping;
import org.springframework.web.bind.annotation.RequestMapping;
import org.springframework.web.bind.annotation.RestController;
import org.springframework.web.multipart.MultipartFile;

//解决前端跨域
@CrossOrigin
@RestController
public class UploadController {

    @PostMapping("/upload")
    public String upload(MultipartFile file, Integer type, Integer id, long uid) throws Exception {
        return UploadUtil.uploadImg(file, type, id, uid);
    }

    @RequestMapping("/remove")
    boolean remove(String url) {
        return UploadUtil.remove(url);
    }

}
2.前端(vue2+elementUI)
npm安装elementUI包
Element - The world's most popular Vue UI frameworkElement,一套为开发者、设计师和产品经理准备的基于 Vue 2.0 的桌面端组件库![]() https://element.eleme.cn/#/zh-CN/component/installationnpm安装axios和vue-axios
https://element.eleme.cn/#/zh-CN/component/installationnpm安装axios和vue-axios
npm i axios vue-aixos创建项目文件(仅供参考)
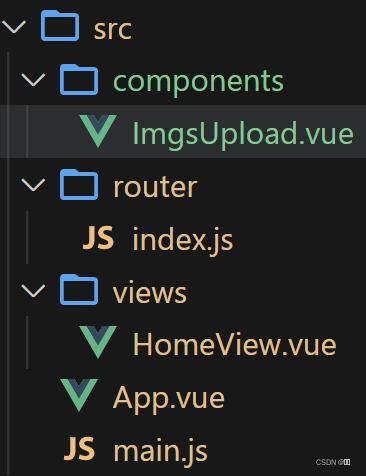
main.js
import Vue from "vue";
import App from "./App.vue";
import router from "./router";
import axios from "axios";
import vueAxios from "vue-axios";
import ElementUI from "element-ui";
import "element-ui/lib/theme-chalk/index.css";
Vue.use(vueAxios, axios);
Vue.use(ElementUI);
axios.defaults.baseURL = "http://127.0.0.1:22222/";

Vue.config.productionTip = false;

new Vue({
	router,
	render: (h) => h(App),
}).$mount("#app");
ImgsUpload.vue(封装组件)
<template>
    <el-upload action="#" accept=".jpeg,.png,.jpg,.bmp,.gif" :http-request="httpRequest" :before-remove="wayRemove"
        :on-remove="remove" :on-change="handleChange" list-type="picture-card" :file-list="images" :show-file-list="true">
        <i slot="default" class="el-icon-plus"></i>
    </el-upload>
</template>
<script>
export default {
    props: {
        //图片类型(0:商品,1:评论)
        type: { type: Number },
        //关联id
        id: { type: Number }
    },
    data() {
        return {
            images: [],
        };
    },
    methods: {
        httpRequest(item) {
            console.log(item);
            var formData = new FormData();
            formData.append('file', item.file);
            formData.append('uid', item.file.uid);//作为文件名
            formData.append('type', this.type);//作为顶层文件夹名(0:"goods", 1:"comment", 2:"head", 3:"background")
            formData.append('id', this.id);
            this.axios
                .post('/upload', formData, { headers: { 'Content-Type': 'multipart/form-data' } })
                .then(res => {
                    this.images.push({ "uid": item.file.uid, "url": res.data })
                    item.onSuccess() //上传成功(打钩的小图标)
                }).catch(e => {
                    this.$message.error("上传失败")
                    item.onError();
                });
        },
        handleChange(file) {
            this.$emit('get', this.images);
        }, wayRemove(file) {
            if (file.status === "success") {
                return this.$confirm('此操作将永久删除该文件, 是否继续?', '提示', {
                    confirmButtonText: '确定',
                    cancelButtonText: '取消',
                    type: 'warning',
                    center: true
                })
            }
        },
        remove(file) {
            this.axios
                .get('/remove?url=' + file.url)
                .then(res => {
                    for (let i = 0; i < this.images.length; i++) {
                        if (this.images[i] == file) {
                            this.images.splice(i, 1); break;
                        }
                    }
                }).catch((e) => {
                    console.log(e);
                    this.$message.error("系统异常,请重试")
                })
        },
    }
}
</script>
<style lang='less' scoped>
/deep/.el-upload-list__item-thumbnail {
    object-fit: cover;
}
</style>
HomeView.vue(调用显示组件)
<template>
  <div style="text-align: center;margin-top: 200px;">
    <imgs-upload :type="0" :id="products.id" v-on:get="imgs => { images = imgs }"></imgs-upload>
  </div>
</template>
<script>
import ImgsUpload from '@/components/ImgsUpload.vue'
export default {
  components: { ImgsUpload },
  data() {
    return {
      products: { id: 1 },
      images: []//图片数量变化使返回到该对象
    }
  }
}
</script>


 被折叠的 条评论
为什么被折叠?
被折叠的 条评论
为什么被折叠?
 到【灌水乐园】发言


