


目录
一、VMware Workstation Pro虚拟机和CentOS Linux release 7.9.2009 (Core)操作系统的安装
一、VMware Workstation Pro虚拟机和CentOS Linux release 7.9.2009 (Core)操作系统的安装
打开liunx在空白桌面右击打开终端, 输入
cat /etc/redhat-release # 查看liunx操作系统版本
二、下载Nginx (官网太慢这里提供镜像地址)
链接地址:Index of /download/ (nginx.org)
1. 选择自己需要下载的版本即可,不用下载到自己的windows,这里选择nginx-1.22.1.tar.gz版本,用wget命令下载。
wget http://nginx.org/download/nginx-1.22.1.tar.gz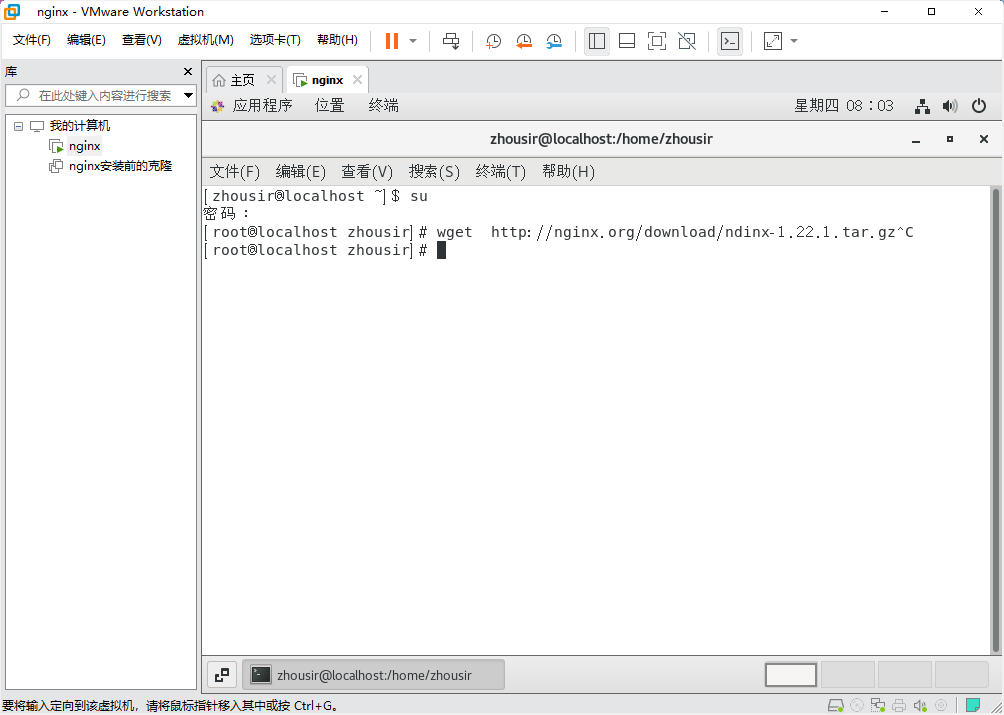
安装pcre openssl gcc库及源码包
1、安装Nginx前需要一些依赖库,创建nginx文件夹:
mkdir -p nginx2、进入nginx文件夹:
cd nginx3、安装pcre openssl gcc库及源码包:
yum -y install pcre pcre-devel openssl openssl-devel gcc gcc-c++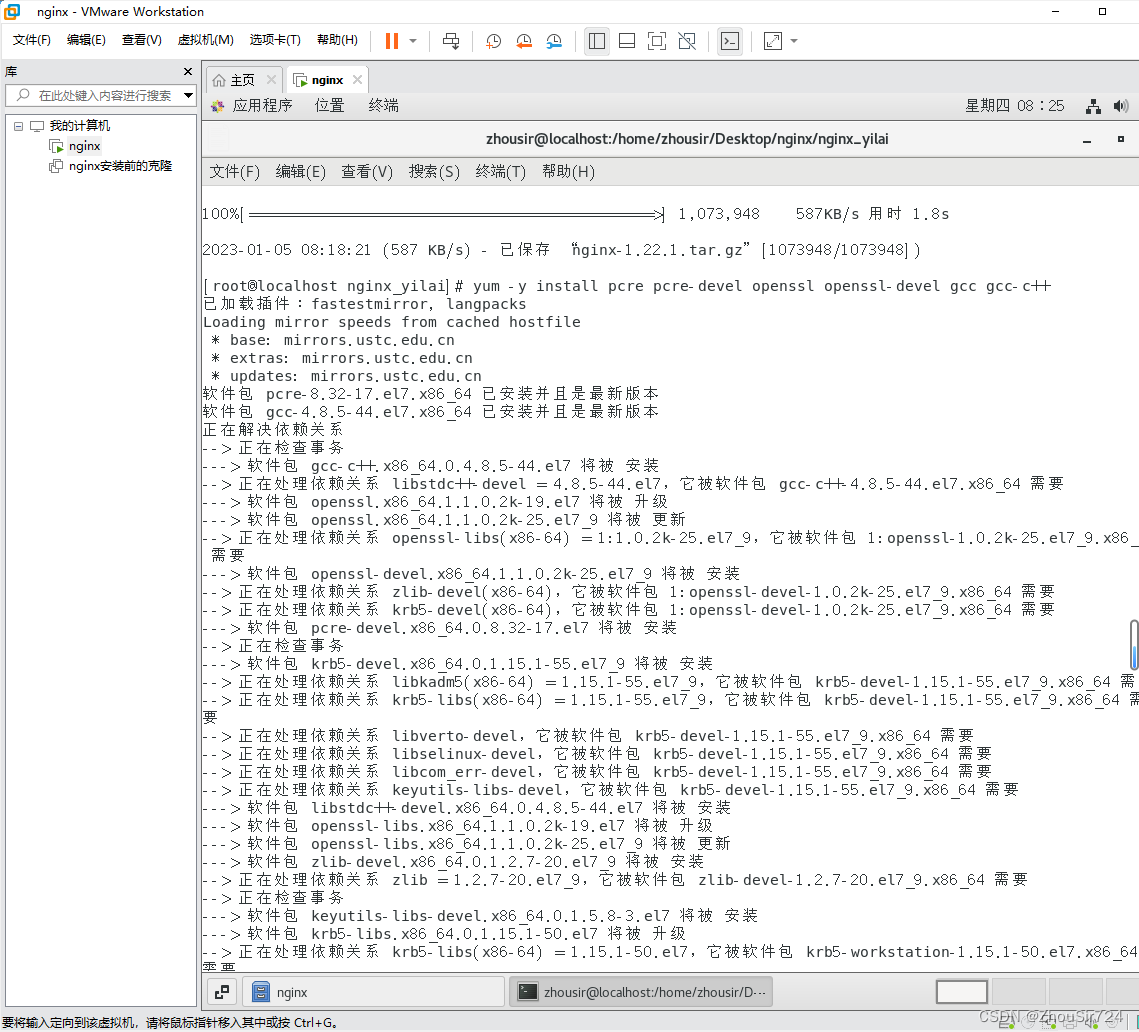
三、安装Nginx
1、解压
tar zxvf nginx-1.22.1.tar.gz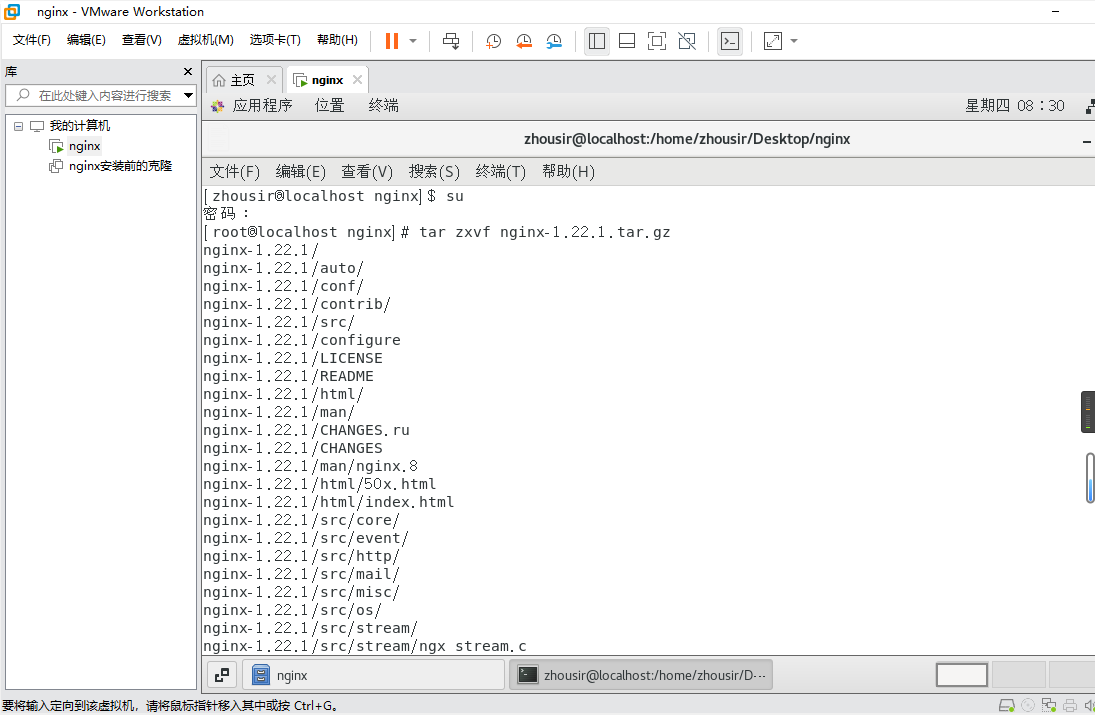
进入解压后的nginx-1.22.1文件夹
rcd nginx-1.22.22、创建Nginx用户
[root@nginx nginx-1.22.1] # useradd nginx -s /sbin/nologin -M3、配置、编译、安装
[root@nginx nginx-1.22.1] # ./configure --user=nginx --group=nginx --prefix=/usr/local/nginx --with-http_stub_status_module --with-http_ssl_module[root@nginx nginx-1.22.1] # make && make install
[root@nginx nginx-1.22.1] # ln -s /usr/local/nginx/sbin/* /usr/local/sbin四、启动Nginx服务器
1、检查配置文件
[root@nginx nginx-1.22.1] # /usr/local/sbin/nginx -t出现以下情况证明配置文件完整:
nginx: the configuration file /usr/local/nginx/conf/nginx.conf syntax is ok
nginx: configuration file /usr/local/nginx/conf/nginx.conf test is successful
2、启动
[root@nginx nginx-1.22.1] # /usr/local/sbin/nginx3、查看端口、进程
[root@nginx nginx-1.22.1] # netstat -lntup | grep nginx
tcp 0 0 0.0.0.0:80 0.0.0.0:* LISTEN 3556/nginx 
[root@nginx nginx-1.22.1] #  lsof -i :80
COMMAND  PID  USER   FD   TYPE DEVICE SIZE/OFF NODE NAME
nginx   3556  root    6u  IPv4  17544      0t0  TCP *:http (LISTEN)
nginx   3557 nginx    6u  IPv4  17544      0t0  TCP *:http (LISTEN)
可以看到,启动后有两个nginx进程运行则表示启动成功。
五、在外部的Windows下访问虚拟机中的Nginx服务
1、查看虚拟机的IP地址
[root@nginx nginx-1.22.1] # ifconfig红框部分即为查看虚拟机的IP地址,但是要想在外部访问需要先关闭防火墙。
安装完成开始学习!!!


 1966
1966


 被折叠的 条评论
为什么被折叠?
被折叠的 条评论
为什么被折叠?
 到【灌水乐园】发言


