


3,SpringBoot整合junit
回顾 Spring 整合 junit
@RunWith(SpringJUnit4ClassRunner.class)
@ContextConfiguration(classes = SpringConfig.class)
public class UserServiceTest {

    @Autowired
    private BookService bookService;

    @Test
    public void testSave(){
        bookService.save();
    }
}
使用 @RunWith 注解指定运行器,使用 @ContextConfiguration 注解来指定配置类或者配置文件。而 SpringBoot 整合 junit 特别简单,分为以下三步完成
- 在测试类上添加
SpringBootTest注解 - 使用
@Autowired注入要测试的资源 - 定义测试方法进行测试
3.1 环境准备
创建一个名为 springboot_07_test 的 SpringBoot 工程,工程目录结构如下
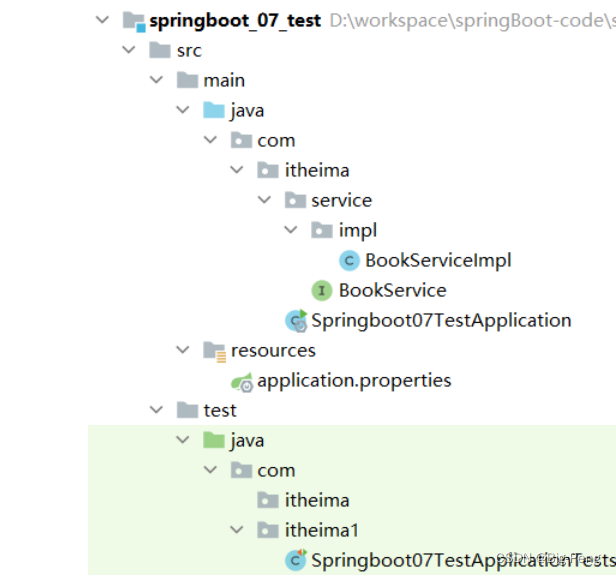
在 com.itheima.service 下创建 BookService 接口,内容如下
public interface BookService {
    public void save();
}
在 com.itheima.service.impl 包写创建一个 BookServiceImpl 类,使其实现 BookService 接口,内容如下
@Service
public class BookServiceImpl implements BookService {
    @Override
    public void save() {
        System.out.println("book service is running ...");
    }
}
3.2 编写测试类
在 test/java 下创建 com.itheima 包,在该包下创建测试类,将 BookService 注入到该测试类中
@SpringBootTest
class Springboot07TestApplicationTests {

    @Autowired
    private BookService bookService;

    @Test
    public void save() {
        bookService.save();
    }
}
==注意:==这里的引导类所在包必须是测试类所在包及其子包。
例如:
- 引导类所在包是
com.itheima- 测试类所在包是
com.itheima如果不满足这个要求的话,就需要在使用
@SpringBootTest注解时,使用classes属性指定引导类的字节码对象。如@SpringBootTest(classes = Springboot07TestApplication.class)


 1170
1170


 被折叠的 条评论
为什么被折叠?
被折叠的 条评论
为什么被折叠?
 到【灌水乐园】发言


