


目录
首页:
我是跟着狂神老师的视频内容来整理的笔记,不得不说,真的收获颇丰,希望这篇笔记能够帮到你。
..... (¯`v´¯)♥
.......•.¸.•´
....¸.•´
... (
 ☻/
/▌♥♥
/ \ ♥♥
1.Spring
1.1 简介
由Rod Johnson创建,雏形是interface21框架。理念是:使现有的技术更加容易使用,本身是一个大杂烩,整合了现有的技术框架!
- SSH: Struct2+Spring+Hibernate
- SSM:SpringMVC+Spring+Mybatis
<!-- https://mvnrepository.com/artifact/org.springframework/spring-webmvc -->
<dependency>
<groupId>org.springframework</groupId>
<artifactId>spring-webmvc</artifactId>
<version>6.0.11</version>
</dependency>
<!-- https://mvnrepository.com/artifact/org.springframework/spring-webmvc -->
<dependency>
<groupId>org.springframework</groupId>
<artifactId>spring-jdbc</artifactId>
<version>6.0.11</version>
</dependency>1.2 优点

2.IOC理论推导
1.UserDao接口

2.UserDaolmpl实现类

3.UserService业务接口

4.UserServicelmpl业务实现类

上面的四个类是我们写项目时的传统的写法。主要就是在实现类中实现功能,最后在业务实现类中最终实现。
2023年12月27日补充,一直不理解为什么要分成这四层。然后今天了解了一下。首先,不要只看图片中所给出的简单的例子。所以UserDao这类接口主要是进行一些与数据库进行交互(增删查改),然后在Userlmpl中进行实现,这样呢就将其进行分隔,弱化了联系,降低了耦合。然后UserService这个接口则主要是定义了一些业务逻辑,包括保存用户、获取用户。但是这些业务逻辑的实现通常会依赖于数据访问层,也就是UserDao。简单来说,UserDao接口里面主要是增删查改这类与数据库进行交互的方法,而UserService中可以调用UserDao,同时还能定义其他的业务方法,是个业务层。
通过在Servicelmpl中创建一个新的的UserDao对象,是可以实现方法的调用的,但是当后面所调用的类变得越来越多以后,这种方法就不太适合了。比如说,多了很多类似于UserDaolmpl的实现类,但是想要调用他们的话,就必须在其对应的Service中进行更改,太过于麻烦,耦合性太强。
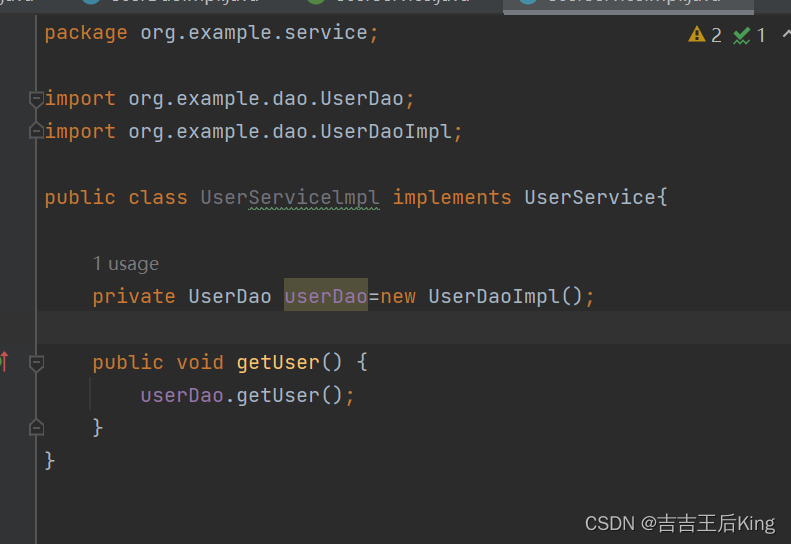
解决方法:
public class UserServicelmpl implements UserService{
    private UserDao userDao;
    //利用set进行动态实现值的注入
    public void setUserDao(UserDao userDao){
        this.userDao=userDao;
    }
    public void getUser() {
        userDao.getUser();
    }
}
实现类:

3.IOC本质


简言之,就是把控制权交给了用户而不是程序员,我们可以通过所选择的来呈现不同的页面或者说是表现方式。用户的选择变多了。
4.HelloSpring
这是一个视频里的小案例,旨在加深对bean的理解。beans.xml的正规名叫做applicationContext.xml,到后面可以用Import进行导入。
代码:
//1.Hello
package org.example;
public class Hello {
    private String str;
    public String getStr() {
        return str;
    }
    public void setStr(String str) {
        this.str = str;
    }
    @Override
    public String toString() {
        return "Hello{"+
                "str="+str+'\''+'}';
    }
}
//2.beans.xml
<?xml version="1.0" encoding="UTF-8"?>
<beans xmlns="http://www.springframework.org/schema/beans"
       xmlns:xsi="http://www.w3.org/2001/XMLSchema-instance"
       xsi:schemaLocation="http://www.springframework.org/schema/beans
        http://www.springframework.org/schema/beans/spring-beans.xsd">
    <!--  这里的name的值就是类中变量名  -->
    <bean id="hello" class="org.example.Hello">
        <property name="str" value="spring"></property>
    </bean>
</beans>

//3.实现测试类MyTest
import org.example.Hello;
import org.springframework.context.ApplicationContext;
import org.springframework.context.support.ClassPathXmlApplicationContext;

public class MyTest {
    public static void main(String[] args) {
        //获取Spring的上下文对象
        ApplicationContext context = new ClassPathXmlApplicationContext("beans.xml");
        Hello hello = (Hello) context.getBean("hello"); //这里的hello就是创建对象的变量名
        System.out.println(hello.toString());
    }
}

idea中自动生成返回对象的快捷键
ctr+alt+v
ERROR
1.

原因:JDK版本过低造成,要大于1.8,我用的2.0
5.IOC创建对象方式
5.1、无参构造 这个是默认的
<bean id="user" class="org.example.pojo.User"> <property name="name" value="张总"></property> </bean>
5.2、有参构造
- 通过下标获得
<bean id="user" class="org.example.pojo.User"> <constructor-arg index="0" value="王总"/> </bean>- 通过变量的类型获得,但不建议用,因为当变量名有很多时便不适用了
<bean id="user" class="org.example.pojo.User"> <constructor-arg type="java.lang.String" value="赵总"/> </bean>- 通过变量名来获得
<bean id="user" class="org.example.pojo.User"> <constructor-arg name="name" value="李总"/> </bean>6.Spring配置说明
6.1、别名
起别名,并不是覆盖原有的变量名

6.2、Bean的配置

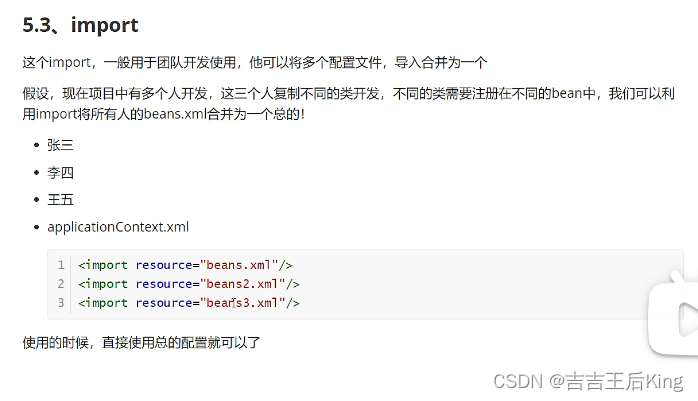
6.3、import
7.DL依赖注入环境
7.1 构造器注入
前面已经说过了。
7.2 Set方式注入
- 依赖注入:Set注入!
1.依赖:bean对象的创建依赖于容器spring
2.注入:bean对象中的所有属性,由容器来注入
7.3 案例(代码)
一个比较全的案例,包括了String,类,数组,list集合,Map,Set,Null,Properties。
代码如下:
7.3.1.Student类
//1.Student
package org.example;

import java.util.*;

public class Student {
    private String name;
    private Address address;
    private String[] books;
    private List<String> hobbys;
    private Map<String,String> card;
    private Set<String> games;
    private String wife; //空指针
    private Properties info; //不是很理解这个的意思

    public String getName() {
        return name;
    }

    public void setName(String name) {
        this.name = name;
    }

    public Address getAddress() {
        return address;
    }

    public void setAddress(Address address) {
        this.address = address;
    }

    public String[] getBooks() {
        return books;
    }

    public void setBooks(String[] books) {
        this.books = books;
    }

    public List<String> getHobbys() {
        return hobbys;
    }

    public void setHobbys(List<String> hobbys) {
        this.hobbys = hobbys;
    }

    public Map<String, String> getCard() {
        return card;
    }

    public void setCard(Map<String, String> card) {
        this.card = card;
    }

    public Set<String> getGames() {
        return games;
    }

    public void setGames(Set<String> games) {
        this.games = games;
    }

    public String getWife() {
        return wife;
    }

    public void setWife(String wife) {
        this.wife = wife;
    }

    public Properties getInfo() {
        return info;
    }

    public void setInfo(Properties info) {
        this.info = info;
    }

    @Override
    public String toString() {
        return "Student{"+
                "name="+name+'\''+
                ",address="+address.toString()+
                ",books="+ Arrays.toString(books)+
                ",hobbys="+hobbys+
                ",card="+card+
                ",games="+games+
                ",wife="+wife+'\''+
                ",info="+info+
                '}';
    }
}
7.3.2 Address类
//2.Address类
package org.example;

public class Address {
    private String address;

    public String getAddress() {
        return address;
    }

    public void setAddress(String address) {
        this.address = address;
    }

    @Override
    public String toString() {
        return address;
    }
}
7.3.3 beans.xml
//3.beans.xml
<?xml version="1.0" encoding="UTF-8"?>
<beans xmlns="http://www.springframework.org/schema/beans"
       xmlns:xsi="http://www.w3.org/2001/XMLSchema-instance" xmlns:util="http://www.springframework.org/schema/util"
       xsi:schemaLocation="http://www.springframework.org/schema/beans
        http://www.springframework.org/schema/beans/spring-beans.xsd http://www.springframework.org/schema/util https://www.springframework.org/schema/util/spring-util.xsd">

    <bean id="address" class="org.example.Address">
        <property name="address">
            <value>西安</value>
        </property>
    </bean>

    <bean id="student" class="org.example.Student">
        <property name="name" value="秦三"/>
        <property name="address" ref="address"/>
        <property name="books">
            <array>
                <value>语文</value>
                <value>数学</value>
                <value>英语</value>
                <value>化学</value>
            </array>
        </property>
        <property name="hobbys">
            <list>
                <value>篮球</value>
                <value>足球</value>
                <value>台球</value>
            </list>
        </property>
        <property name="card">
            <map>
                <entry key="身份证" value="1111111111111"/>
                <entry key="银行卡" value="2222222222222"/>
            </map>
        </property>
        <property name="games">
            <set>
                <value>LOL</value>
                <value>COC</value>
            </set>
        </property>
        <property name="wife">
            <null/>
        </property>
        <property name="info">
            <props>
                <prop key="学号">12345</prop>
                <prop key="性别">男</prop>
                <prop key="姓名">张三</prop>
            </props>
        </property>
    </bean>
    <!-- more bean definitions go here -->

</beans>
7.3.4 Mytest4类
//4.MyTest测试类
import org.example.Student;
import org.springframework.context.ApplicationContext;
import org.springframework.context.support.ClassPathXmlApplicationContext;

public class MyTest4 {
    public static void main(String[] args) {
        ApplicationContext context = new ClassPathXmlApplicationContext("beans.xml");
        Student student = (Student) context.getBean("student");
        System.out.println(student.toString());
    }
}
最后,祝大家身体健康,学习快乐,天天向上!


 1869
1869


 被折叠的 条评论
为什么被折叠?
被折叠的 条评论
为什么被折叠?
 到【灌水乐园】发言


