


 文章详细描述了一个JavaSpringMVC服务器端的UserController,用于处理GET和POST请求,以及Flutter客户端如何通过http包进行HTTP请求的示例。
Java服务器端(Server)
package com.example.signserver.controller;


import com.fasterxml.jackson.annotation.JsonProperty;
import lombok.Data;
import org.springframework.http.MediaType;
import org.springframework.http.ResponseEntity;
import org.springframework.web.bind.annotation.*;

import java.util.Map;

@RestController
@RequestMapping(value = "/base")
public class UserController {
    @GetMapping(value = "/getUser", produces = MediaType.APPLICATION_JSON_VALUE + "; charset=UTF-8")
    public ResponseEntity test(){
        User1 user1 = new User1();
        user1.setFirstName("张三");
        user1.setLastName("李四");
        return ResponseEntity.ok(Map.of("code",200,"data",user1));
    }
    @PostMapping(value = "/setUser", produces = MediaType.APPLICATION_JSON_VALUE + "; charset=UTF-8")
    public ResponseEntity testSet(@RequestBody User1 user) {
        return ResponseEntity.ok(Map.of("code",200,"data",user));
    }
}
@Data
class User1{
    @JsonProperty("first_name")
    private String firstName;
    @JsonProperty("last_name")
    private String lastName;
}
Flutter客户端(Client)
首先在 pubspec.yaml 文件中添加 http 包的依赖,然后运行 flutter pub get 命令来安装该包。最后在 Dart 文件中使用 import 关键字来导入 http 包使用即可。
1、添加依赖
dependencies:
  flutter:
    sdk: flutter
  http: ^0.13.3
2、安装依赖包
运行 flutter pub get 命令来安装该包
flutter pub get3、编写工具类(附使用示例)
import 'dart:convert';
import 'package:http/http.dart' as http;
class HttpUtils {
static Future<Map<String, dynamic>> request(
String url, {
Map<String, String>? headers,
Map<String, dynamic>? params,
dynamic body,
String method = 'GET',
String contentType = 'application/json; charset=utf-8',
}) async {
http.Response response;
if (method.toUpperCase() == 'GET') {
if (params != null && params.isNotEmpty) {
String queryString = Uri(queryParameters: params).query;
url += '?' + queryString;
}
response = await http.get(Uri.parse(url), headers: headers);
} else {
Map<String, String> _headers = {
'Content-Type': contentType,
if (headers != null) ...headers,
};
response = await http.post(Uri.parse(url), headers: _headers, body: body);
}
Map<String, dynamic> result = {
'statusCode': response.statusCode,
'headers': response.headers,
};
if (response.statusCode == 200) {
result['data'] = json.decode(response.body);
} else {
result['data'] = null;
}
return result;
}
}
//使用示例
void main() async {
// GET 请求示例
Map<String, dynamic> response1 = await HttpUtils.request(
'http://localhost:8081/base/getUser',
method: 'GET',
);
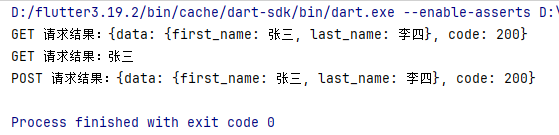
// GET 请求结果:{code: 200, data: {first_name: 张三, last_name: 李四}}
print('GET 请求结果:${response1['data']}');
// GET 请求结果:张三
print('GET 请求结果:${response1['data']['data']['first_name']}');
// POST 请求示例
Map<String, dynamic> response2 = await HttpUtils.request(
'http://localhost:8081/base/setUser',
method: 'POST',
contentType: 'application/json; charset=utf-8',
body: json.encode({'first_name': '张三', 'last_name': '李四'}),
);
// POST 请求结果:{data: {first_name: 张三, last_name: 李四}, code: 200}
print('POST 请求结果:${response2['data']}');
}运行main打印结果:


 1066
1066


 被折叠的 条评论
为什么被折叠?
被折叠的 条评论
为什么被折叠?
 到【灌水乐园】发言


