


 本文详细介绍了如何使用JavaScript实现一个动态的京东秒杀倒计时,包括获取元素、设置目标时间、计算剩余时间并更新显示,以及使用setInterval实现定时更新的功能。
案例分析:
1.这个倒计时是不断变化的,因此需要定时器来自动变化 (setInterval)
2.三个黑色盒子里面分别存放时分秒
3.三个黑色盒子利用innerHTML放入计算的小时分钟秒数4.第一次执行也是间隔毫秒数,因此刚刷新页面会有空白
5.最好采取封装函数的方式,这样可以先调用一次这个函数,防止刚开始刷新页面有空白问题
接下来我们来看看代码,代码中都有注释,希望大家能够看得懂
HTML代码部分
    <div class="Spikes">
      <div class="title">京东秒杀</div>
      <div>
        <div class="description">
          <strong>12:00</strong>
          点场 倒计时
        </div>
        <div class="time">
          <span id="hour">00</span>
          <span id="minute">00</span>
          <span id="second" class="last">00</span>
        </div>
      </div>
    </div>
CSS代码部分
    <style>
      * {
        margin: 0;
        padding: 0;
      }
      .Spikes {
        width: 190px;
        height: 100%;
        color: #fff;
        background: url(images/jd.png) no-repeat;
        overflow: hidden;
      }
      .title {
        margin-top: 31px;
        text-align: center;
        font-size: 30px;
        font-weight: 600;
      }
      .description {
        margin-top: 90px;
        font-size: 14px;
        text-align: center;
      }
      .description strong {
        font-stretch: 18px;
        margin-right: 2px;
      }
      .time {
        margin: 10px auto 31px;
        width: 130px;
        height: 30px;
      }
      .time span {
        position: relative;
        float: left;
        width: 30px;
        height: 30px;
        line-height: 30px;
        background-color: #000;
        text-align: center;
        font-weight: 400;
        font-size: 20px;
        margin-right: 20px;
      }
      .time span::after {
        content: ":";
        position: absolute;
        top: 0;
        right: -20px;
        width: 20px;
        height: 100%;
      }
      .time .last {
        margin-right: 0;
      }
      .time .last::after {
        content: "";
      }
    </style>
上面的基础样式到这就基本完成了,span小盒子来控制倒计时的时分秒,然后通过Spikes函数来更新每一次的时间,再通过计时器每一秒执行一次。
JS代码部分
    <script>
      // 1.获取元素
      let hour = document.getElementById("hour");
      let minute = document.getElementById("minute");
      let second = document.getElementById("second");

      //   目标时间
      let date = new Date("2023-11-26 18:00:00");

      //   2.执行函数
      function Spikes() {
        // 获取当前时间
        let nowTime = new Date();
        // 目标停止时间减去当前时间的差额时间
        let times = (date - nowTime) / 1000;
        // 获取差额的小时
        let h = parseInt((times / 60 / 60) % 24);
        // 判断时间是否小于10个小时,若小于的画在时间前加0
        h = h < 10 ? "0" + h : h;
        hour.innerHTML = h;

        // 获取差额的分钟
        let m = parseInt((times / 60) % 60);
        // 判断时间是否小于10个小时,若小于的画在时间前加0
        m = m < 10 ? "0" + m : m;
        minute.innerHTML = m;

        // 获取差额的秒时
        let s = parseInt(times % 60);
        // 判断时间是否小于10个小时,若小于的画在时间前加0
        s = s < 10 ? "0" + s : s;
        second.innerHTML = s;
      }

      //   刷新页面执行一次
      Spikes();
      //   每过一秒执行一次
      setInterval(Spikes, 1000);
    </script>
基本思路:
-
获取元素:使用
document.getElementById方法获取HTML元素,这些元素用于显示小时、分钟和秒。 -
设定目标时间:创建一个新的
Date对象,该对象表示预设的日期和时间(即目标结束时间)。 -
定义 Spikes 函数:这个函数负责计算从当前时间到目标时间的剩余时间,并将这个时间以小时、分钟和秒的形式显示出来。
首先,它获取当前的日期和时间,然后,它计算目标时间与当前时间的差额(以秒为单位),接着,它提取差额的小时、分钟和秒,并且对它们进行处理以确保小时和分钟始终是两位数(如果小于10)。这通过在数字小于10时在其前面添加0来实现。,最后,它将小时、分钟和秒插入到HTML元素中,这些元素在页面加载时已经通过ID与这些时间对应起来。 -
执行 Spikes 函数:在页面加载时执行一次 Spikes 函数以显示初始的倒计时,然后每秒执行一次以更新倒计时。
完整代码展示
<!DOCTYPE html>
<html lang="en">
  <head>
    <meta charset="UTF-8" />
    <meta name="viewport" content="width=device-width, initial-scale=1.0" />
    <title>Document</title>

    <style>
      * {
        margin: 0;
        padding: 0;
      }
      .Spikes {
        width: 190px;
        height: 100%;
        color: #fff;
        background: url(images/jd.png) no-repeat;
        overflow: hidden;
      }
      .title {
        margin-top: 31px;
        text-align: center;
        font-size: 30px;
        font-weight: 600;
      }
      .description {
        margin-top: 90px;
        font-size: 14px;
        text-align: center;
      }
      .description strong {
        font-stretch: 18px;
        margin-right: 2px;
      }
      .time {
        margin: 10px auto 31px;
        width: 130px;
        height: 30px;
      }
      .time span {
        position: relative;
        float: left;
        width: 30px;
        height: 30px;
        line-height: 30px;
        background-color: #000;
        text-align: center;
        font-weight: 400;
        font-size: 20px;
        margin-right: 20px;
      }
      .time span::after {
        content: ":";
        position: absolute;
        top: 0;
        right: -20px;
        width: 20px;
        height: 100%;
      }
      .time .last {
        margin-right: 0;
      }
      .time .last::after {
        content: "";
      }
    </style>
  </head>
  <body>
    <div class="Spikes">
      <div class="title">京东秒杀</div>
      <div>
        <div class="description">
          <strong>12:00</strong>
          点场 倒计时
        </div>
        <div class="time">
          <span id="hour">00</span>
          <span id="minute">00</span>
          <span id="second" class="last">00</span>
        </div>
      </div>
    </div>

    <script>
      // 1.获取元素
      let hour = document.getElementById("hour");
      let minute = document.getElementById("minute");
      let second = document.getElementById("second");

      //   目标时间
      let date = new Date("2023-11-26 18:00:00");

      //   2.执行函数
      function Spikes() {
        // 获取当前时间
        let nowTime = new Date();
        // 目标停止时间减去当前时间的差额时间
        let times = (date - nowTime) / 1000;
        // 获取差额的小时
        let h = parseInt((times / 60 / 60) % 24);
        // 判断时间是否小于10个小时,若小于的画在时间前加0
        h = h < 10 ? "0" + h : h;
        hour.innerHTML = h;

        // 获取差额的分钟
        let m = parseInt((times / 60) % 60);
        // 判断时间是否小于10个小时,若小于的画在时间前加0
        m = m < 10 ? "0" + m : m;
        minute.innerHTML = m;

        // 获取差额的秒时
        let s = parseInt(times % 60);
        // 判断时间是否小于10个小时,若小于的画在时间前加0
        s = s < 10 ? "0" + s : s;
        second.innerHTML = s;
      }

      //   刷新页面执行一次
      Spikes();
      //   每过一秒执行一次
      setInterval(Spikes, 1000);
    </script>
  </body>
</html>
效果图:
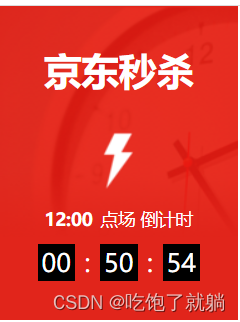
以上就是京东秒杀倒计时的核心代码以及思路分析,希望对大家能够有所帮助。


 4488
4488

 被折叠的 条评论
为什么被折叠?
被折叠的 条评论
为什么被折叠?
 到【灌水乐园】发言


