


目录
之前虽然有简单学习AOP的相关知识,但是却一直未在项目中运用,借此博客巩固。
一、AOP实现日志
首先需要添加SpringAOP依赖:
去Maven仓库中找到Spring AOP的依赖(注意,寻找的其实是用于SpringBoot项目的SpringAOP依赖,如果是用于Spring项目的,Spirng自带的库中是已经添加过该依赖的):
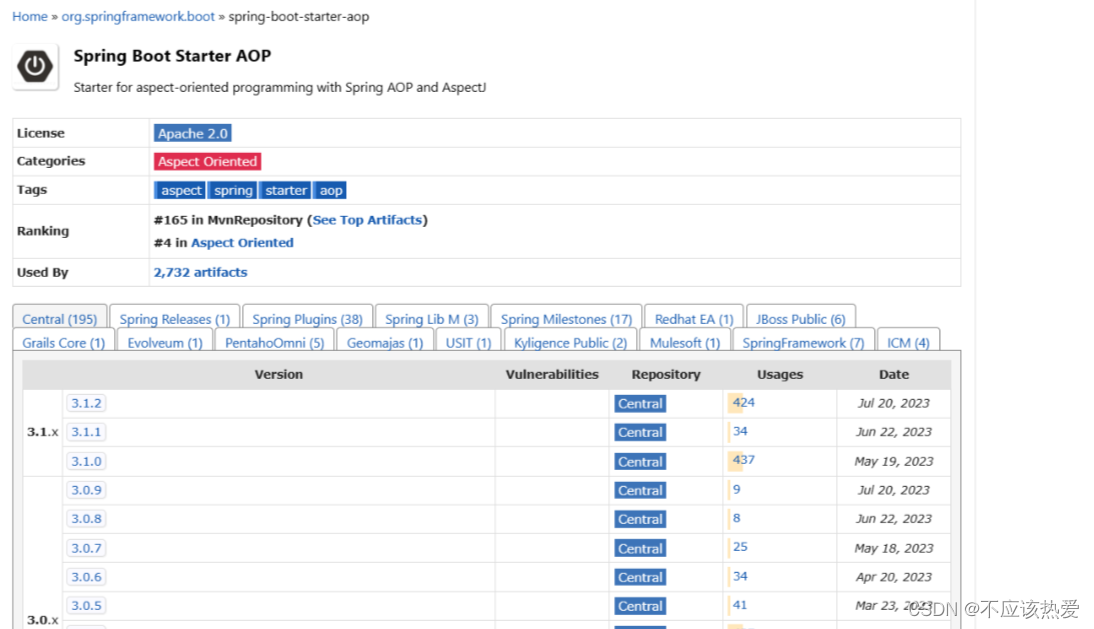
代码如下:
<!-- https://mvnrepository.com/artifact/org.springframework.boot/spring-boot-starter-aop -->
<dependency>
    <groupId>org.springframework.boot</groupId>
    <artifactId>spring-boot-starter-aop</artifactId>
    <version>2.7.10</version>
</dependency>
实际项目中演示如下:
1.1 需求分析:
需要通过日志记录接口调用信息。便于后期调试排查。并且可能有很多接口都需要进行日志的记录。
接口被调用时日志打印效果预览:
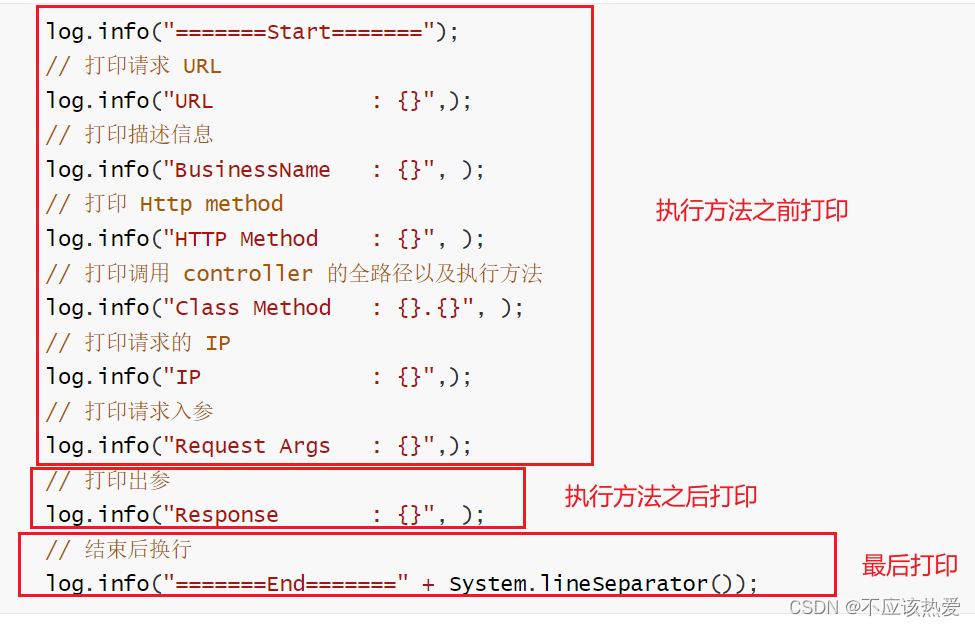
日志打印格式如下:
        log.info("=======Start=======");
        // 打印请求 URL
        log.info("URL            : {}",);
        // 打印描述信息
        log.info("BusinessName   : {}", );
        // 打印 Http method
        log.info("HTTP Method    : {}", );
        // 打印调用 controller 的全路径以及执行方法
        log.info("Class Method   : {}.{}", );
        // 打印请求的 IP
        log.info("IP             : {}",);
        // 打印请求入参
        log.info("Request Args   : {}",);
        // 打印出参
        log.info("Response       : {}", );
        // 结束后换行
        log.info("=======End=======" + System.lineSeparator());
1.2 定义切面类和切点:
注意,这里使用两个注解,分别为 @Component 和 @Aspect 注解。
@Component将这个类注入到Spring容器中
而@Aspect是告诉Spring容器这是一个切面类
@Component //注入容器
@Aspect //用于告诉spring容器这是一个切面类
public class LogAspect {
// 切点
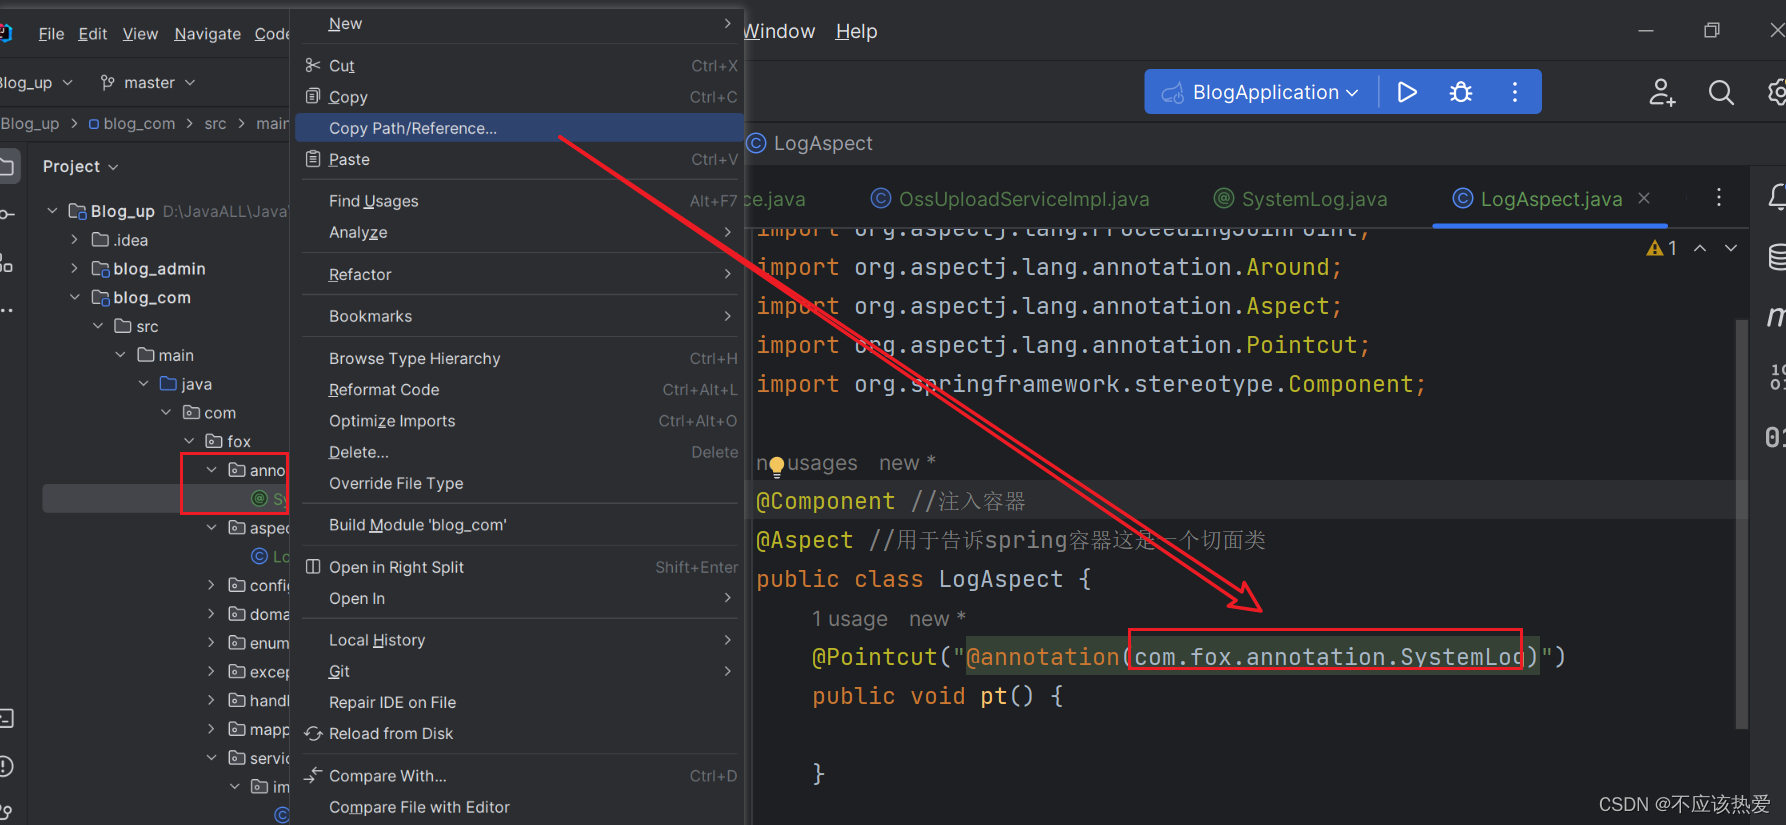
@Pointcut("@annotation(com.fox.annotation.SystemLog)")
public void pt() {
}
}@Pointcut括号中,我们使用的是 自定义注解 的形式,而非切点表达式,实际项目开发中,自定义注解的方式居多,也更方便。
自定义注解如下,后续会添加属性。
package com.fox.annotation;

import org.aspectj.lang.annotation.Around;

import java.lang.annotation.ElementType;
import java.lang.annotation.Retention;
import java.lang.annotation.RetentionPolicy;
import java.lang.annotation.Target;

@Retention(RetentionPolicy.RUNTIME)
@Target({ElementType.METHOD})
public @interface SystemLog {

}
可以通过idea提供的方式: Copy Reference 直接将 自定义注解 的路径找出,写入上面代码所提供的 @annotation 的括号中。
定义环绕通知的时候,我们需要注意异常抛出的方式:不能使用try-catch方式捕获,而是需要直接throws 异常,因为我们需要让项目中的:统一异常处理来进行捕获,而不是自己对其进行捕获操作。
结合上,日志打印的要求,所以我们这里应当选择环绕通知:
所以我们这里通过快捷键:ctrl+alt+T,进行try-final操作:目的是实现我们项目需要的:最后打印。

既然聊到try-final,顺便就简单扩展一下:
扩展:finally中的代码块一定会执行吗?
答案是否定的,正常运行的情况下,finally中的代码是一定会执行的,但是,如果遇到以下异常情况,那么finally中的代码就不会继续执行了。
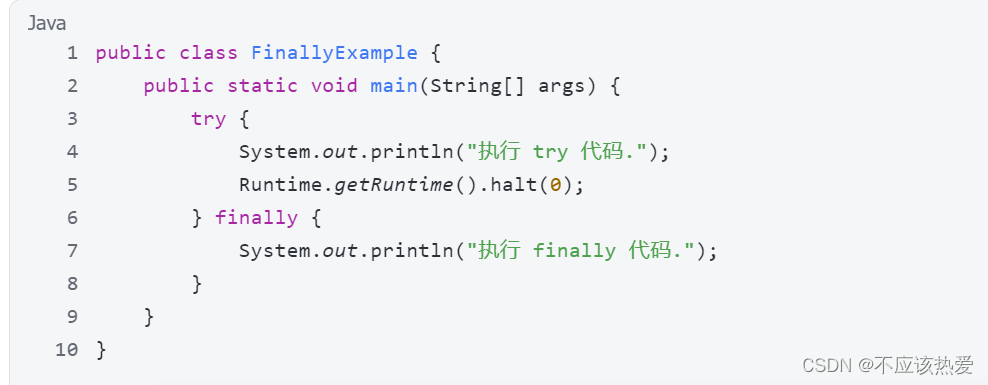
1. 程序在try块中遇到了System.exit() 方法,会立即终于程序的执行,这时finally块中的代码是不会被执行的,例如执行以下代码:
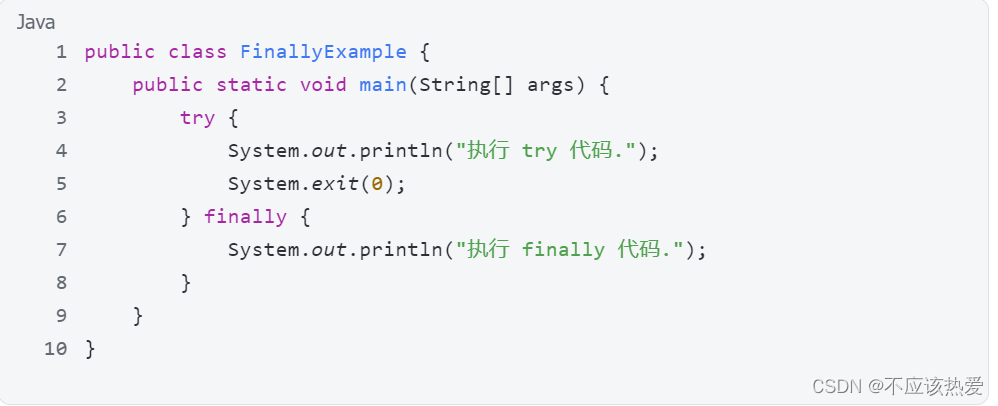
运行结果如下:

2. 在try块中遇到 Runtime.getRuntime().halt() 代码,则会强制终止正在运行的JVM,与System.exit() 方法不同,此方法不会触发JVM关闭序列,因此,当我们调用halt方法时,都不会执行关闭钩子或终结器。实现代码如下:
运行结果如下:
3.程序在 try 块中遇到无限循环或者发生死锁等情况时,程序可能无法正常跳出 try 块,此时 finally 块中的代码也不会被执行。
4. 掉电问题,程序还没有执行到 finally 就掉电了 (停电了),那 finally 中的代码自然也不
会执行。
5.JVM 异常崩溃问题导致程序不能继续执行,那么 finally 的代码也不会执行。
扩展 总结
正常运行的情况下,finally 中的代码是一定会执行的,但是,如果遇到 System.exit0)方法或 Runtime.getRuntime().halt()方法,或者是 try 中发生了死循、死锁,遇到了掉电JVM 崩溃等问题,那么 finally 中的代码也是不会执行的。
1.3 定义环绕通知
大体架构如下,下面我们会对方法内容进一步补充,
另外,这里的@Slf4j 注解是由Lombok提供的,用于提供日志打印的log对象。
@Component //注入容器
@Aspect //用于告诉spring容器这是一个切面类
@Slf4j
public class LogAspect {
    @Pointcut("@annotation(com.fox.annotation.SystemLog)")
    public void pt() {

    }

    @Around("pt()")
    public Object printLog(ProceedingJoinPoint joinPoint) throws Throwable {
        Object ret;
        try {
            handleBefore();
            ret = joinPoint.proceed();
            handleAfter();
        } finally {
            //结束后进行换行
            log.info("=======End=======" + System.lineSeparator());
        }
        return ret;
    }

    private void handleAfter() {

    }

    private void handleBefore() {


    }


}
System.lineSeparator() 是一个系统的换行符,因为Linux和window之类的系统换行符是不同的。
1.4 handleBefore 的具体实现
1.4.1 获取url
思路分析:
由于打印的日志,第一个是需要获取url,那么我们其实就是要获取request对象,
RequestContextHolder.getRequestAttributes() 的返回类型是接口类型,不符合。

那么我们就看看这个 RequestAttributes 的实现类,ctrl+alt+鼠标左键查看:

查看这个类内部,发现里面有我们需要的request对象。

因此,我们可以对最先的代码进行改进,强转为 这个接口的实现类型 即可:

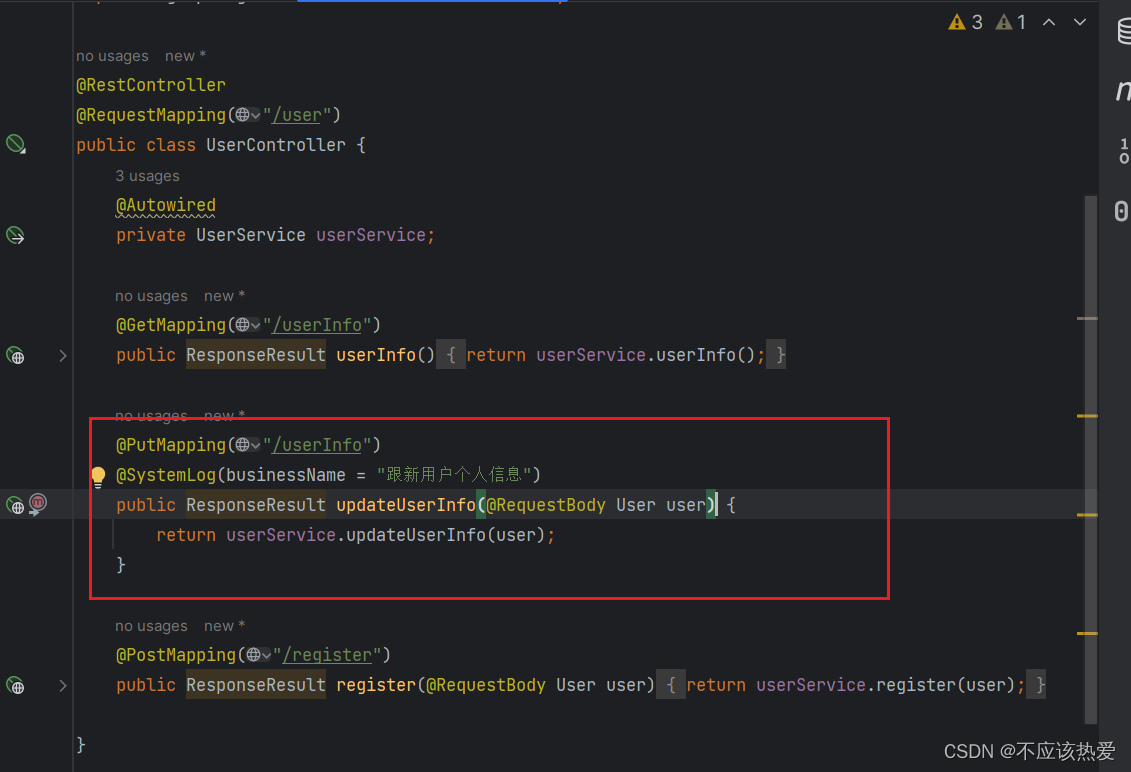
1.4.2 获取接口描述信息
由于日志要求的是打印,该接口的信息,所以我们为自定义注解添加 businessName属性。

自定义注解更新如下:
@Retention(RetentionPolicy.RUNTIME)
@Target({ElementType.METHOD})
public @interface SystemLog {
    String businessName();
}
应用到实际接口中,所以日志中想要获取接口的信息,只要获取SystemLog这个对象即可:
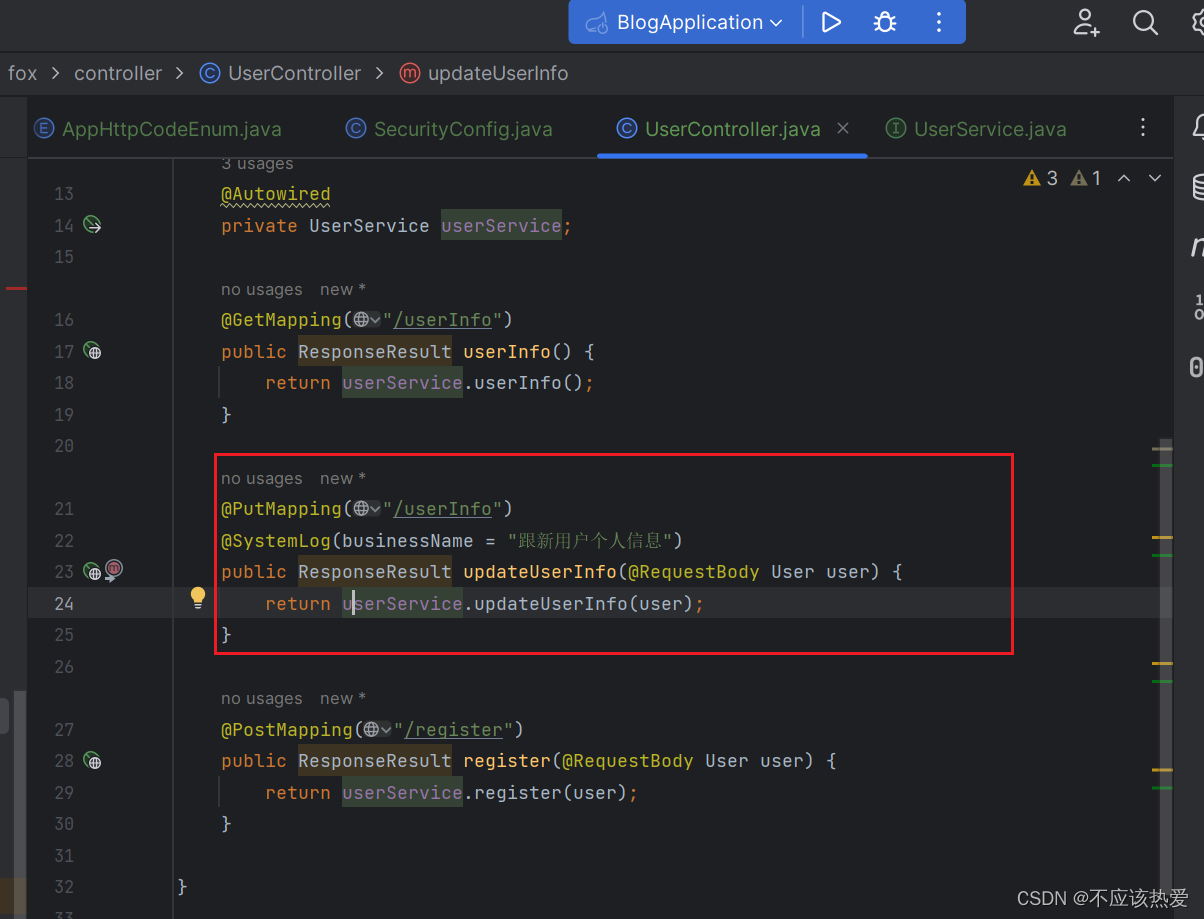
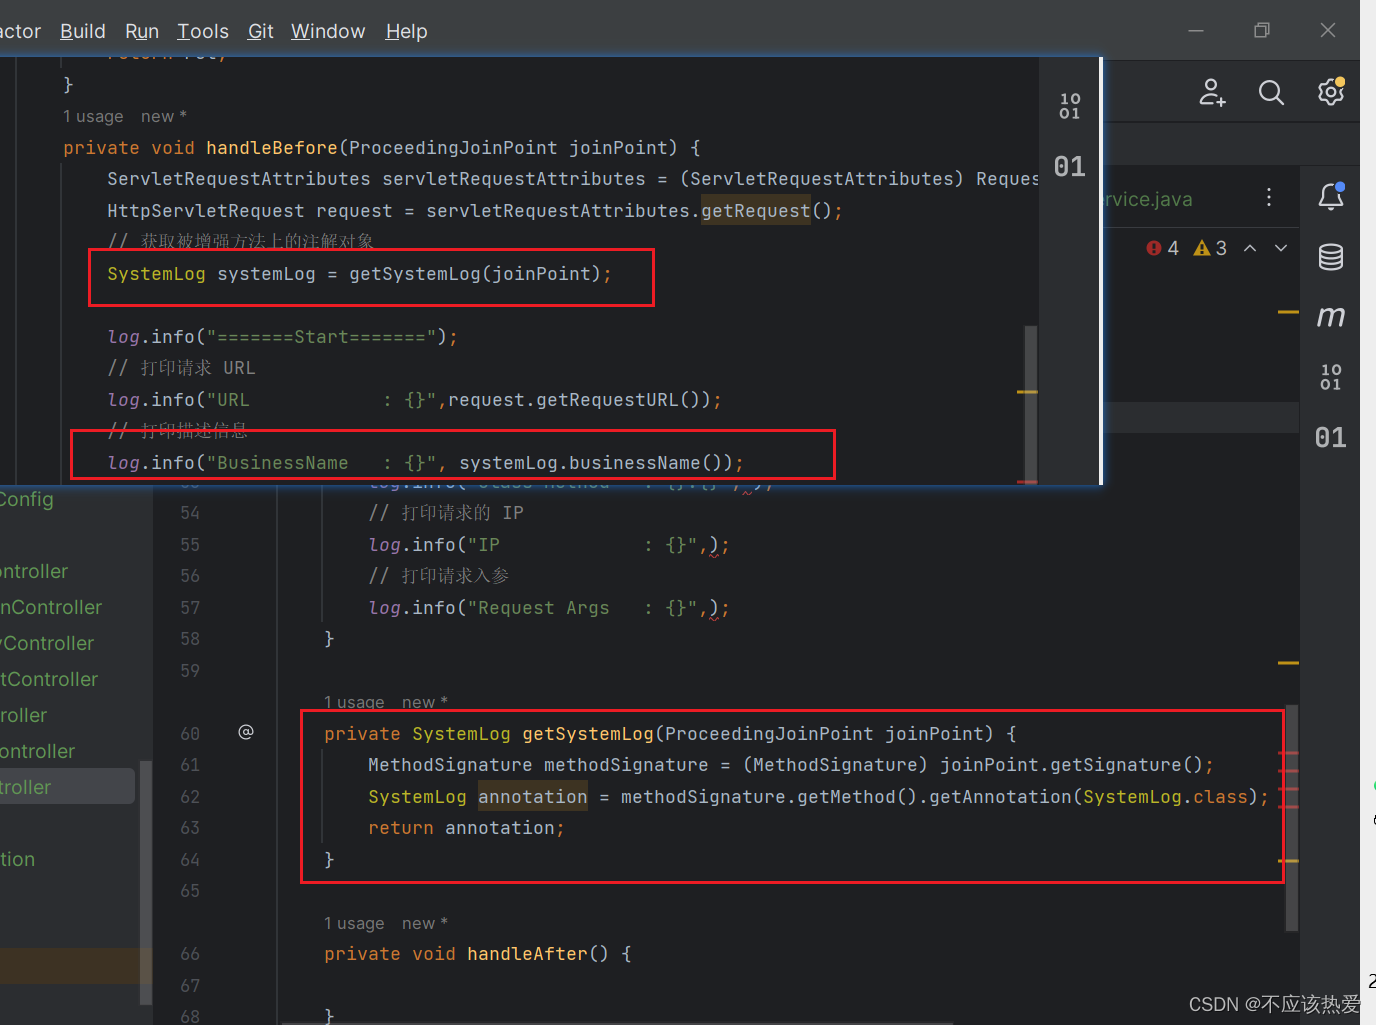
实现代码如下,在getSystemLog中我们通过joinPoint方法进一步获取使用@SystemLog注解的方法信息,然后通过强转子接口的方法,反射等方法拿到SystemLog对象,进而实现打印该接口的信息。
1.4.3 后续获取
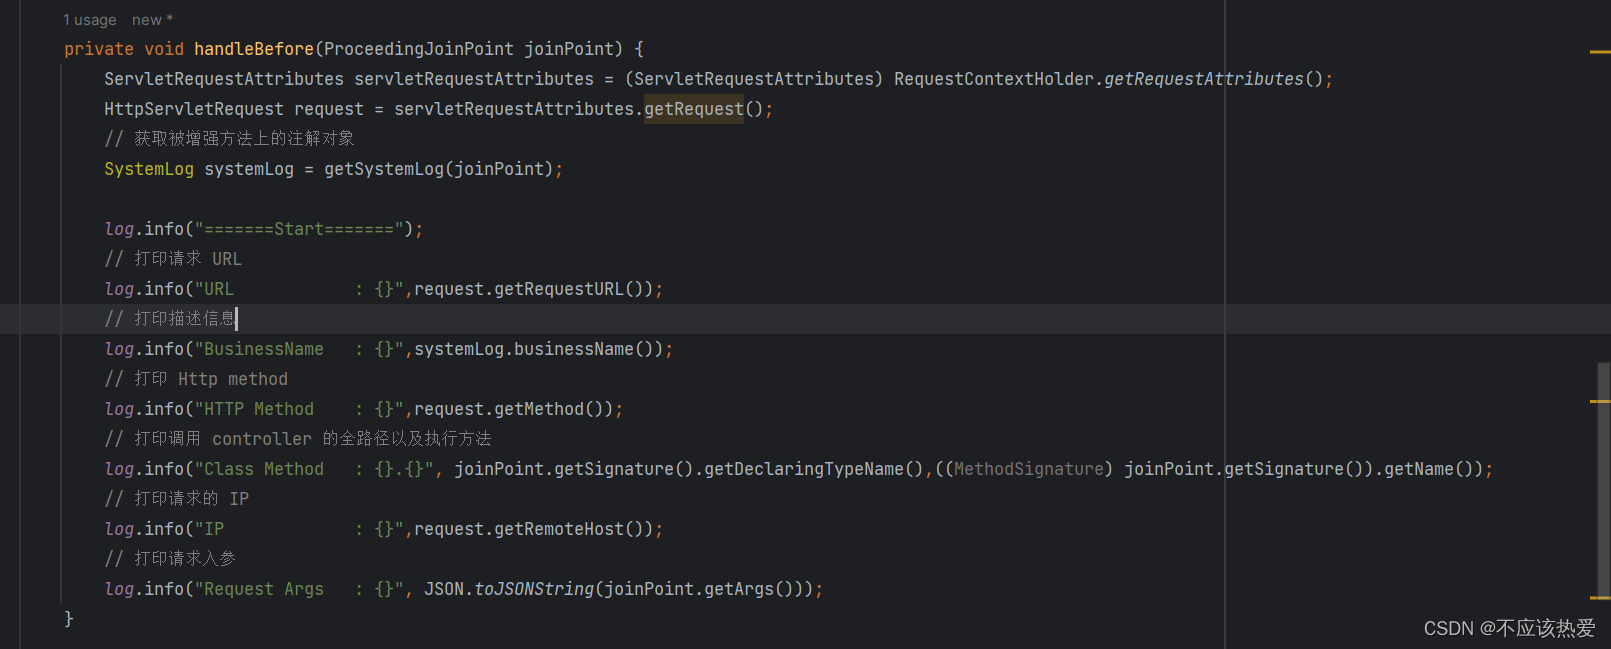
代码实现:
    private void handleBefore(ProceedingJoinPoint joinPoint) {
        ServletRequestAttributes servletRequestAttributes = (ServletRequestAttributes) RequestContextHolder.getRequestAttributes();
        HttpServletRequest request = servletRequestAttributes.getRequest();
        // 获取被增强方法上的注解对象
        SystemLog systemLog = getSystemLog(joinPoint);

        log.info("=======Start=======");
        // 打印请求 URL
        log.info("URL            : {}",request.getRequestURL());
        // 打印描述信息
        log.info("BusinessName   : {}",systemLog.businessName());
        // 打印 Http method
        log.info("HTTP Method    : {}",request.getMethod());
        // 打印调用 controller 的全路径以及执行方法
        log.info("Class Method   : {}.{}", joinPoint.getSignature().getDeclaringTypeName(),((MethodSignature) joinPoint.getSignature()).getName());
        // 打印请求的 IP
        log.info("IP             : {}",request.getRemoteHost());
        // 打印请求入参
        log.info("Request Args   : {}", JSON.toJSONString(joinPoint.getArgs()));
    }
1.5 handleAfter 的具体实现

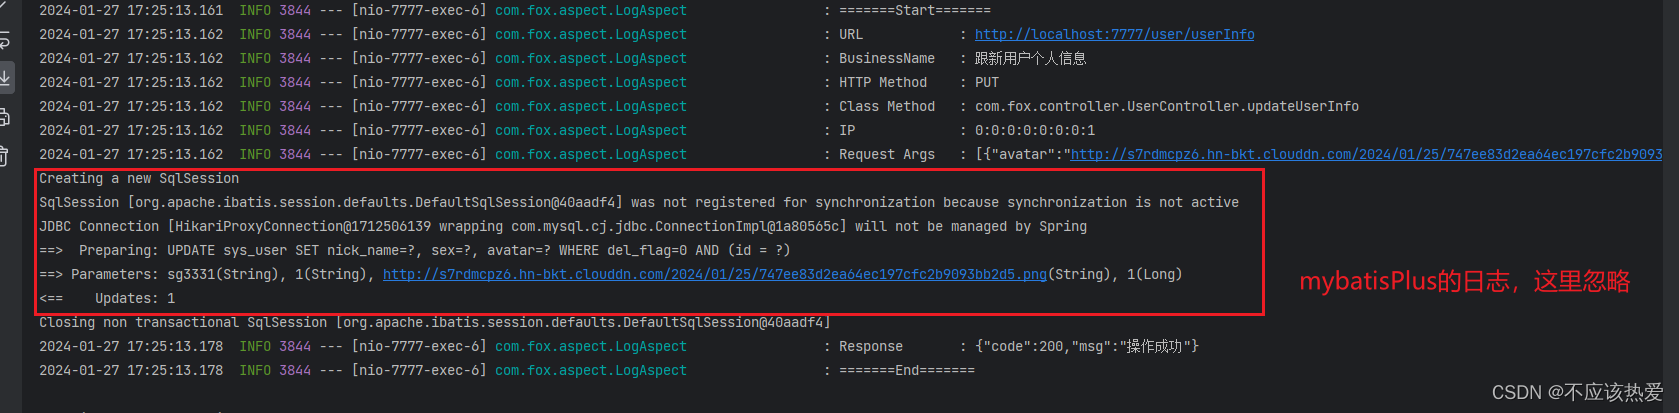
1.6 实现效果
访问带有自定义注解@SystemLog 的接口后,
控制台打印如下:
二、整体代码如下
2.1 自定义注解
package com.fox.annotation;

import org.aspectj.lang.annotation.Around;

import java.lang.annotation.ElementType;
import java.lang.annotation.Retention;
import java.lang.annotation.RetentionPolicy;
import java.lang.annotation.Target;

@Retention(RetentionPolicy.RUNTIME)
@Target({ElementType.METHOD})
public @interface SystemLog {
    String businessName();
}
2.2 AOP切面、切点、环绕通知
package com.fox.aspect;

import com.alibaba.fastjson.JSON;
import com.fox.annotation.SystemLog;
import lombok.extern.slf4j.Slf4j;
import org.aspectj.lang.ProceedingJoinPoint;
import org.aspectj.lang.annotation.Around;
import org.aspectj.lang.annotation.Aspect;
import org.aspectj.lang.annotation.Pointcut;
import org.aspectj.lang.reflect.MethodSignature;
import org.springframework.stereotype.Component;
import org.springframework.web.context.request.RequestContextHolder;
import org.springframework.web.context.request.ServletRequestAttributes;

import javax.servlet.http.HttpServletRequest;

@Component //注入容器
@Aspect //用于告诉spring容器这是一个切面类
@Slf4j
public class LogAspect {
    @Pointcut("@annotation(com.fox.annotation.SystemLog)")
    public void pt() {

    }

    @Around("pt()")
    public Object printLog(ProceedingJoinPoint joinPoint) throws Throwable {
        Object ret;
        try {
            handleBefore(joinPoint);
            ret = joinPoint.proceed();
            handleAfter(ret);
        } finally {
            //结束后进行换行
            log.info("=======End=======" + System.lineSeparator());
        }
        return ret;
    }
    private void handleBefore(ProceedingJoinPoint joinPoint) {
        ServletRequestAttributes servletRequestAttributes = (ServletRequestAttributes) RequestContextHolder.getRequestAttributes();
        HttpServletRequest request = servletRequestAttributes.getRequest();
        // 获取被增强方法上的注解对象
        SystemLog systemLog = getSystemLog(joinPoint);

        log.info("=======Start=======");
        // 打印请求 URL
        log.info("URL            : {}",request.getRequestURL());
        // 打印描述信息
        log.info("BusinessName   : {}",systemLog.businessName());
        // 打印 Http method
        log.info("HTTP Method    : {}",request.getMethod());
        // 打印调用 controller 的全路径以及执行方法
        log.info("Class Method   : {}.{}", joinPoint.getSignature().getDeclaringTypeName(),((MethodSignature) joinPoint.getSignature()).getName());
        // 打印请求的 IP
        log.info("IP             : {}",request.getRemoteHost());
        // 打印请求入参
        log.info("Request Args   : {}", JSON.toJSONString(joinPoint.getArgs()));
    }

    private SystemLog getSystemLog(ProceedingJoinPoint joinPoint) {
        MethodSignature methodSignature = (MethodSignature) joinPoint.getSignature();
        SystemLog annotation = methodSignature.getMethod().getAnnotation(SystemLog.class);
        return annotation;
    }

    private void handleAfter(Object ret) {
        // 打印出参
        log.info("Response       : {}",JSON.toJSONString(ret));
    }

}


 294
294


 被折叠的 条评论
为什么被折叠?
被折叠的 条评论
为什么被折叠?
 到【灌水乐园】发言


