


目录
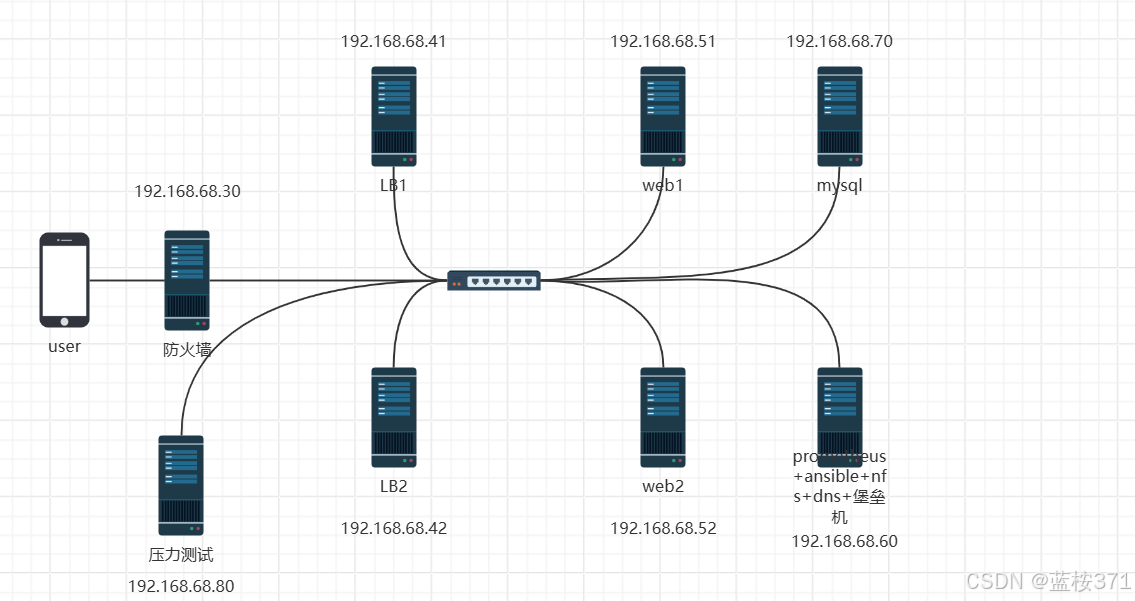
项目架构图
项目步骤
一.网络以及yum源等基本配置
# 所有服务器全做

# 服务器名称配置

[root@localhost ~]# hostnamectl set-hostname web-1 && bash # 其他服务器以此类推

# 网络配置

[root@web1 ~]# cat /etc/sysconfig/network-scripts/ifcfg-ens33
OTPROTO="none"
NAME="ens33"
DEVICE="ens33"
ONBOOT="yes"
IPADDR=192.168.68.51
PREFIX=24
GATEWAY=192.168.68.2
DNS1=114.114.114.114

# 其他服务器根据项目架构图配置静态ip(此处已省略)

......

# 重启网络

[root@web1 ~]# systemctl restart network

[root@web1 ~]# ip add && ip route
1: lo: <LOOPBACK,UP,LOWER_UP> mtu 65536 qdisc noqueue state UNKNOWN group default qlen 1000
    link/loopback 00:00:00:00:00:00 brd 00:00:00:00:00:00
    inet 127.0.0.1/8 scope host lo
       valid_lft forever preferred_lft forever
    inet6 ::1/128 scope host
       valid_lft forever preferred_lft forever
2: ens33: <BROADCAST,MULTICAST,UP,LOWER_UP> mtu 1500 qdisc pfifo_fast state UP group default qlen 1000
    link/ether 00:0c:29:af:35:f8 brd ff:ff:ff:ff:ff:ff
    inet 192.168.68.51/24 brd 192.168.68.255 scope global noprefixroute ens33
       valid_lft forever preferred_lft forever
    inet6 fe80::20c:29ff:feaf:35f8/64 scope link
       valid_lft forever preferred_lft forever
default via 192.168.68.2 dev ens33 proto static metric 100
192.168.68.0/24 dev ens33 proto kernel scope link src 192.168.68.51 metric 100

# 永久关闭selinux和firewalld

[root@web1 ~]# sed -i "/^SELINUX/ s/enforcing/disabled/" /etc/selinux/config
[root@web1 ~]# cat /etc/selinux/config

# This file controls the state of SELinux on the system.
# SELINUX= can take one of these three values:
#     enforcing - SELinux security policy is enforced.
#     permissive - SELinux prints warnings instead of enforcing.
#     disabled - No SELinux policy is loaded.
SELINUX=disabled
# SELINUXTYPE= can take one of three values:
#     targeted - Targeted processes are protected,
#     minimum - Modification of targeted policy. Only selected processes are protected.
#     mls - Multi Level Security protection.
SELINUXTYPE=targeted

[root@web1 ~]# systemctl stop firewalld
[root@web1 ~]# systemctl disable firewalld
Removed symlink /etc/systemd/system/multi-user.target.wants/firewalld.service.
Removed symlink /etc/systemd/system/dbus-org.fedoraproject.FirewallD1.service.

# 重启服务器
reboot / init 6

# 安装阿里云的yum源和epel源
[root@web1 ~]# cd /etc/yum.repos.d
[root@web1 ~]# rm -rf *
[root@web1 ~]# curl -O  http://mirrors.aliyun.com/repo/Centos-7.repo
[root@web1 ~]# yum clean all && yum makecache
[root@web1 ~]# yum install epel-release -y
二.编译安装nginx,并部署web服务
[root@web1 ~]# cat onekey_install_nginx.sh
#!/bin/bash
#解决软件的依赖关系,需要安装的软件包
yum install epel-release -y
yum -y install zlib zlib-devel openssl openssl-devel pcre pcre-devel gcc gcc-c++ autoconf automake make psmisc net-tools lsof vim  wget -y

#新建zj用户和组
id  zj|| useradd zj -s /sbin/nologin

#下载nginx软件
mkdir  /zj -p
cd /zj
wget  https://nginx.org/download/nginx-1.24.0.tar.gz
#解压软件
tar xf nginx-1.24.0.tar.gz
#进入解压后的文件夹
cd nginx-1.24.0
#编译前的配置
./configure --prefix=/usr/local/zj  --user=zj --group=zj  --with-http_ssl_module   --with-threads  --with-http_v2_module  --with-http_stub_status_module  --with-stream   --with-http_gunzip_module
#如果上面的编译前的配置失败,直接退出脚本
if (( $? != 0));then
	exit
fi
#编译,启动2个进程去编译,这样速度快
make -j 2
#编译安装
make  install
#修改PATH变量
echo  "PATH=$PATH:/usr/local/zj/sbin" >>/etc/bashrc
#firewalld and selinux
#stop firewall和设置下次开机不启动firewalld
service firewalld stop
systemctl disable firewalld
#临时停止selinux和永久停止selinux
setenforce 0
sed  -i '/^SELINUX=/ s/enforcing/disabled/' /etc/selinux/config
#开机启动
chmod +x /etc/rc.d/rc.local
echo  "/usr/local/zj/sbin/nginx" >>/etc/rc.local
#启动nginx
/usr/local/zj/sbin/nginx

# 查看nginx进程

[root@web2 ~]# ps aux|grep nginx
root       4681  0.0  0.0  46240  1164 ?        Ss   17:25   0:00 nginx: master process /usr/local/zj/sbin/nginx
zj         4682  0.0  0.1  46700  2152 ?        S    17:25   0:00 nginx: worker process
root       4695  0.0  0.0 112824   984 pts/0    S+   17:34   0:00 grep --color=auto nginx


# 验证部署的nginx服务, 也可以在windows输入ip192.168.68.51/52

[root@comprehensive ~]# curl 192.168.68.51
<!DOCTYPE html>
<html>
<head>
<title>Welcome to nginx!</title>
<style>
html { color-scheme: light dark; }
body { width: 35em; margin: 0 auto;
font-family: Tahoma, Verdana, Arial, sans-serif; }
</style>
</head>
<body>
<h1>Welcome to nginx!</h1>
<p>If you see this page, the nginx web server is successfully installed and
working. Further configuration is required.</p>

<p>For online documentation and support please refer to
<a href="http://nginx.org/">nginx.org</a>.<br/>
Commercial support is available at
<a href="http://nginx.com/">nginx.com</a>.</p>

<p><em>Thank you for using nginx.</em></p>
</body>
</html>
[root@comprehensive ~]# curl 192.168.68.52
<!DOCTYPE html>
<html>
<head>
<title>Welcome to nginx!</title>
<style>
html { color-scheme: light dark; }
body { width: 35em; margin: 0 auto;
font-family: Tahoma, Verdana, Arial, sans-serif; }
</style>
</head>
<body>
<h1>Welcome to nginx!</h1>
<p>If you see this page, the nginx web server is successfully installed and
working. Further configuration is required.</p>

<p>For online documentation and support please refer to
<a href="http://nginx.org/">nginx.org</a>.<br/>
Commercial support is available at
<a href="http://nginx.com/">nginx.com</a>.</p>

<p><em>Thank you for using nginx.</em></p>
</body>
</html>
三.部署MySQL服务
# 执行一键部署的脚本

[root@mysql ~]# vim onekey_install_mysql.sh
[root@mysql ~]# cat onekey_install_mysql.sh
#!/bin/bash

#解决软件的依赖关系并且安装需要工具
yum  install cmake ncurses-devel gcc  gcc-c++  vim libaio lsof bzip2 openssl-devel ncurses-compat-libs net-tools -y

#解压mysql二进制安装包
tar  xf  mysql-5.7.38-linux-glibc2.12-x86_64.tar.gz

#移动mysql解压后的文件到/usr/local下改名叫mysql
#/usr/local/mysql 是mysql的安装目录 --》门店
mv mysql-5.7.38-linux-glibc2.12-x86_64 /usr/local/mysql

#新建组和用户 mysql
groupadd mysql
#mysql这个用户的shell 是/bin/false 属于mysql组
useradd -r -g mysql -s /bin/false mysql

#关闭firewalld防火墙服务,并且设置开机不要启动
service firewalld stop
systemctl  disable  firewalld

#临时关闭selinux
setenforce 0
#永久关闭selinux
sed -i '/^SELINUX=/ s/enforcing/disabled/'  /etc/selinux/config

#新建存放数据的目录 --》仓库
mkdir  /data/mysql -p
#修改/data/mysql目录的权限归mysql用户和mysql组所有,这样mysql用户启动的mysql进程可以对这个文件夹进行读写了
chown mysql:mysql /data/mysql/
#只是允许mysql这个用户和mysql组可以访问,其他人都不能访问
chmod 750 /data/mysql/

#进入/usr/local/mysql/bin目录
cd /usr/local/mysql/bin/

#初始化mysql
./mysqld  --initialize --user=mysql --basedir=/usr/local/mysql/  --datadir=/data/mysql  &>passwd.txt

#让mysql支持ssl方式登录的设置
./mysql_ssl_rsa_setup --datadir=/data/mysql/

#获得临时密码
tem_passwd=$(cat passwd.txt |grep "temporary"|awk '{print $NF}')
  #$NF表示最后一个字段
  # abc=$(命令)  优先执行命令,然后将结果赋值给abc

# 修改PATH变量,加入mysql bin目录的路径
#临时修改PATH变量的值
export PATH=/usr/local/mysql/bin/:$PATH
#重新启动linux系统后也生效,永久修改
echo  'PATH=/usr/local/mysql/bin:$PATH' >>/root/.bashrc

#复制support-files里的mysql.server文件到/etc/init.d/目录下叫mysqld
cp  ../support-files/mysql.server   /etc/init.d/mysqld

#修改/etc/init.d/mysqld脚本文件里的datadir目录的值
sed  -i '70c  datadir=/data/mysql'  /etc/init.d/mysqld

#生成/etc/my.cnf配置文件
cat  >/etc/my.cnf  <<EOF
[mysqld_safe]

[client]
socket=/data/mysql/mysql.sock

[mysqld]
socket=/data/mysql/mysql.sock
port = 3306
open_files_limit = 8192
innodb_buffer_pool_size = 512M
character-set-server=utf8

[mysql]
auto-rehash
prompt=\\u@\\d \\R:\\m  mysql>
EOF

#修改内核的open file的数量
ulimit -n 1000000
#设置开机启动的时候也配置生效
echo "ulimit -n 1000000" >>/etc/rc.local
chmod +x /etc/rc.d/rc.local


#将mysqld添加到linux系统里服务管理名单里
/sbin/chkconfig --add mysqld
#设置mysqld服务开机启动
/sbin/chkconfig mysqld on


#启动mysqld进程
service mysqld start

#初次修改密码需要使用--connect-expired-password 选项
#-e 后面接的表示是在mysql里需要执行命令  execute 执行
#set password='Zj123#';  修改root用户的密码为Zj123#
mysql -uroot -p$tem_passwd --connect-expired-password   -e  "set password='Zj123#';"


#检验上一步修改密码是否成功,如果有输出能看到mysql里的数据库,说明成功。
mysql -uroot -p'Zj123#'  -e "show databases;"

# 执行脚本

[root@mysql ~]# ls
anaconda-ks.cfg   mysql-5.7.38-linux-glibc2.12-x86_64.tar.gz  onekey_install_mysql.sh

[root@mysql ~]# bash onekey_install_mysql.sh

完毕!
Redirecting to /bin/systemctl stop firewalld.service
setenforce: SELinux is disabled
Starting MySQL.Logging to '/data/mysql/mysql.err'.
 SUCCESS!
mysql: [Warning] Using a password on the command line interface can be insecure.
mysql: [Warning] Using a password on the command line interface can be insecure.
+--------------------+
| Database           |
+--------------------+
| information_schema |
| mysql              |
| performance_schema |
| sys                |
+--------------------+

# 重新登陆,让PATH环境变量生效,验证部署效果

[root@mysql ~]# mysql -uroot -p"Zj123#"
mysql: [Warning] Using a password on the command line interface can be insecure.
Welcome to the MySQL monitor.  Commands end with ; or \g.
Your MySQL connection id is 4
Server version: 5.7.38 MySQL Community Server (GPL)

Copyright (c) 2000, 2022, Oracle and/or its affiliates.

Oracle is a registered trademark of Oracle Corporation and/or its
affiliates. Other names may be trademarks of their respective
owners.

Type 'help;' or '\h' for help. Type '\c' to clear the current input statement.

root@(none) 18:04  mysql>show databases;
+--------------------+
| Database           |
+--------------------+
| information_schema |
| mysql              |
| performance_schema |
| sys                |
+--------------------+
4 rows in set (0.00 sec)

root@(none) 18:04  mysql>
四.配置NFS服务器
# 两台web服务器和综合服务器上执行

[root@web1 ~]# yum install nfs-utils -y

# 启动nfs服务并设置开机自启

[root@web1 ~]# systemctl start nfs
[root@web1 ~]# systemctl enable nfs
Created symlink from /etc/systemd/system/multi-user.target.wants/nfs-server.service to /usr/lib/systemd/system/nfs-server.service.

[root@web1 ~]# ps aux|grep nfs
root      13712  0.0  0.0      0     0 ?        S<   19:47   0:00 [nfsd4_callbacks]
root      13718  0.0  0.0      0     0 ?        S    19:47   0:00 [nfsd]
root      13719  0.0  0.0      0     0 ?        S    19:47   0:00 [nfsd]
root      13720  0.0  0.0      0     0 ?        S    19:47   0:00 [nfsd]
root      13721  0.0  0.0      0     0 ?        S    19:47   0:00 [nfsd]
root      13722  0.0  0.0      0     0 ?        S    19:47   0:00 [nfsd]
root      13723  0.0  0.0      0     0 ?        S    19:47   0:00 [nfsd]
root      13724  0.0  0.0      0     0 ?        S    19:47   0:00 [nfsd]
root      13725  0.0  0.0      0     0 ?        S    19:47   0:00 [nfsd]
root      13755  0.0  0.0 112824   984 pts/0    S+   19:48   0:00 grep --color=auto nfs

# 设置共享目录(在综合服务器上执行)

[root@comprehensive ~]# mkdir -p /web/data
[root@comprehensive ~]# cd /web/data/
[root@comprehensive data]# vim index.html
[root@comprehensive data]# cat index.html
<html>
<title>lovestar!!!</title>
<body>
        <p>welcome to see stars!!!</p>
        <img src=lovestar.jpg width=300 height=200>
</body>
</html>
[root@comprehensive data]# ls
index.html  lovestar.jpg


# 设置共享目录权限

[root@comprehensive data]# chmod  777 /web/data/
[root@comprehensive data]# ll /web/
总用量 0
drwxrwxrwx 2 root root 44 8月  23 20:07 data


# 输出共享目录

[root@comprehensive data]# vim /etc/exports
[root@comprehensive data]# cat /etc/exports
/web/data 192.168.68.0/24(rw,sync,all_squash)
[root@comprehensive data]# systemctl restart nfs
[root@comprehensive data]# exportfs -rv
exporting 192.168.68.0/24:/web/data


# 挂载测试nfs服务器的共享目录(2台web服务器)

[root@web1 ~]# mkdir /test
[root@web1 ~]# mount 192.168.68.60:/web/data /test  # 接触挂载  umount /test
[root@web1 ~]# df -Th |egrep test
192.168.68.60:/web/data nfs4       50G  2.1G   48G    5% /test
[root@web1 ~]# cd /test/
[root@web1 test]# ls
index.html  lovestar.jpg
[root@web1 test]# cat index.html
<html>
<title>lovestar!!!</title>
<body>
        <p>welcome to see stars!!!</p>
        <img src=lovestar.jpg width=300 height=200>
</body>
</html>

# 设置开机自动挂载

[root@web-1 ~]# vim /etc/rc.local

mkdir -p /nfs_web_data
mount 192.168.68.60:/web/data /nfs_web_data
五.部署ansible自动化运维工具
# 安装ansible

[root@comprehensive ~]# yum install ansible -y

# 配置主机清单

[web]
192.168.68.51
192.168.68.52
[lb]
192.168.68.41
192.168.68.42
[pressure]
192.168.68.80
[firewalld]
192.168.68.30
[mysql]
192.168.68.70
[comprehensive]
192.168.68.60

# 建立ansible服务器与其他服务器的ssh免密通道

[root@comprehensive ~]# ssh-keygen -t rsa
Generating public/private rsa key pair.
Enter file in which to save the key (/root/.ssh/id_rsa):
Created directory '/root/.ssh'.
Enter passphrase (empty for no passphrase):
Enter same passphrase again:
Your identification has been saved in /root/.ssh/id_rsa.
Your public key has been saved in /root/.ssh/id_rsa.pub.
The key fingerprint is:
SHA256:DsL3pDZW11Amh3qktpREItg9moNECR1fxvm2iEzsL4M root@comprehensive
The key's randomart image is:
+---[RSA 2048]----+
|.+o=.o+o. ..+    |
|  =..+=.. o=     |
| . o.o + =.      |
|  ..*   O .o     |
|   +ooo=S+. .    |
|    +o.Bo.       |
|   . .= o        |
|  E oo..         |
|     o           |
+----[SHA256]-----+

# 将所有服务器都进行如下添加操作
[root@comprehensive ~]# ssh-copy-id -i /root/.ssh/id_rsa.pub root@192.168.68.51
/usr/bin/ssh-copy-id: INFO: Source of key(s) to be installed: "/root/.ssh/id_rsa.pub"
The authenticity of host '192.168.68.51 (192.168.68.51)' can't be established.
ECDSA key fingerprint is SHA256:ZhqJ8GU3h47U9gAo9ba7iTZN21xws5rI7qviWlYG50E.
ECDSA key fingerprint is MD5:7f:59:0e:d5:f9:a0:26:44:ee:5b:3c:1b:10:27:8d:13.
Are you sure you want to continue connecting (yes/no)? yes
/usr/bin/ssh-copy-id: INFO: attempting to log in with the new key(s), to filter out any that are already installed

/usr/bin/ssh-copy-id: INFO: 1 key(s) remain to be installed -- if you are prompted now it is to install the new keys
root@192.168.68.51's password:

Number of key(s) added: 1

Now try logging into the machine, with:   "ssh 'root@192.168.68.51'"
and check to make sure that only the key(s) you wanted were added.

[root@comprehensive ~]# ssh root@192.168.68.51
Last login: Fri Aug 23 17:11:28 2024 from 192.168.68.1
[root@web1 ~]#

#  测试通道效果

[root@comprehensive ~]# ansible web -m shell -a"ip add"
192.168.68.51 | CHANGED | rc=0 >>
1: lo: <LOOPBACK,UP,LOWER_UP> mtu 65536 qdisc noqueue state UNKNOWN group default qlen 1000
    link/loopback 00:00:00:00:00:00 brd 00:00:00:00:00:00
    inet 127.0.0.1/8 scope host lo
       valid_lft forever preferred_lft forever
    inet6 ::1/128 scope host
       valid_lft forever preferred_lft forever
2: ens33: <BROADCAST,MULTICAST,UP,LOWER_UP> mtu 1500 qdisc pfifo_fast state UP group default qlen 1000
    link/ether 00:0c:29:af:35:f8 brd ff:ff:ff:ff:ff:ff
    inet 192.168.68.51/24 brd 192.168.68.255 scope global noprefixroute ens33
       valid_lft forever preferred_lft forever
    inet6 fe80::20c:29ff:feaf:35f8/64 scope link
       valid_lft forever preferred_lft forever
192.168.68.52 | CHANGED | rc=0 >>
1: lo: <LOOPBACK,UP,LOWER_UP> mtu 65536 qdisc noqueue state UNKNOWN group default qlen 1000
    link/loopback 00:00:00:00:00:00 brd 00:00:00:00:00:00
    inet 127.0.0.1/8 scope host lo
       valid_lft forever preferred_lft forever
    inet6 ::1/128 scope host
       valid_lft forever preferred_lft forever
2: ens33: <BROADCAST,MULTICAST,UP,LOWER_UP> mtu 1500 qdisc pfifo_fast state UP group default qlen 1000
    link/ether 00:0c:29:8b:85:9d brd ff:ff:ff:ff:ff:ff
    inet 192.168.68.52/24 brd 192.168.68.255 scope global noprefixroute ens33
       valid_lft forever preferred_lft forever
    inet6 fe80::20c:29ff:fe8b:859d/64 scope link
       valid_lft forever preferred_lft forever
六.部署DNS服务器以及自制域名的解析
1.dns部署
# 安装bind软件

[root@comprehensive ~]# yum install bind* -y

# 启动named服务

[root@comprehensive ~]# systemctl start named
[root@comprehensive ~]# systemctl enable named
Created symlink from /etc/systemd/system/multi-user.target.wants/named.service to /usr/lib/systemd/system/named.service.

# 查看named进程和端口

[root@comprehensive ~]# ps -aux |egrep named
named      8203  0.0  1.4 389516 57380 ?        Ssl  22:01   0:00 /usr/sbin/named -u named -c /etc/named.conf
root       8232  0.0  0.0 112824   988 pts/0    S+   22:03   0:00 grep -E --color=auto named

[root@comprehensive ~]# netstat -anplut |egrep named
tcp        0      0 127.0.0.1:53          0.0.0.0:*               LISTEN      8203/named
tcp        0      0 127.0.0.1:953         0.0.0.0:*               LISTEN      8203/named
tcp6       0      0 ::1:53                :::*                    LISTEN      8203/named
tcp6       0      0 ::1:953               :::*                    LISTEN      8203/named
udp        0      0 127.0.0.1:53          0.0.0.0:*                           8203/named
udp6       0      0 ::1:53                :::*                                8203/named


# 修改配置文件,重启服务(允许其他电脑能过来查询dns域名)

options {
        listen-on port 53 { any; };
        listen-on-v6 port 53 { any; };
        directory       "/var/named";
        dump-file       "/var/named/data/cache_dump.db";
        statistics-file "/var/named/data/named_stats.txt";
        memstatistics-file "/var/named/data/named_mem_stats.txt";
        recursing-file  "/var/named/data/named.recursing";
        secroots-file   "/var/named/data/named.secroots";
        allow-query     { localhost; 192.168.68.0/24; };

[root@comprehensive ~]# systemctl restart named

# 修改本机和其他服务器上的DNS服务器地址

[root@web1 test]# vim /etc/resolv.conf
[root@web1 test]# cat /etc/resolv.conf
# Generated by NetworkManager
#nameserver 114.114.114.114
nameserver 192.168.68.60

# 测试DNS服务器

[root@web1 ~]# yum install bind-utils -y # 获取nslookdup和dig命令

[root@web1 ~]# nslookup www.baidu.com
Server:		192.168.68.60
Address:	192.168.68.60#53

Non-authoritative answer:
www.baidu.com	canonical name = www.a.shifen.com.
Name:	www.a.shifen.com
Address: 183.2.172.42
Name:	www.a.shifen.com
Address: 183.2.172.185
Name:	www.a.shifen.com
Address: 240e:ff:e020:966:0:ff:b042:f296
Name:	www.a.shifen.com
Address: 240e:ff:e020:9ae:0:ff:b014:8e8b

[root@web2 ~]# nslookup www.qq.com
Server:		192.168.68.60
Address:	192.168.68.60#53

Non-authoritative answer:
www.qq.com	canonical name = ins-r23tsuuf.ias.tencent-cloud.net.
Name:	ins-r23tsuuf.ias.tencent-cloud.net
Address: 121.14.77.201
Name:	ins-r23tsuuf.ias.tencent-cloud.net
Address: 121.14.77.221
Name:	ins-r23tsuuf.ias.tencent-cloud.net
Address: 240e:97c:2f:2::4c
Name:	ins-r23tsuuf.ias.tencent-cloud.net
Address: 240e:97c:2f:1::5c
2.自制域名的解析
# 增加web集群项目的域名解析(zj.com)

# 添加下面的配置,增加一个zj.com的域名

[root@comprehensive ~]# vim /etc/named.rfc1912.zones
zone "zj.com" IN {
        type master;
        file "zj.com.zone";
        allow-update { none; };
};

# 创建zj.com的有关数据文件

[root@comprehensive named]# vim zj.com.zone
# 在以下文件(zj.com.zone)的 #后面的纯做解释用,正式修改应删除 #后面内容

$TTL 1D
@       IN SOA  @ rname.invalid. (zj.com.zone
                                        0       ; serial
                                        1D      ; refresh
                                        1H      ; retry
                                        1W      ; expire
                                        3H )    ; minimum
        NS      @
        A       192.168.68.60 # 综合服务器
        AAAA    ::1
www  A  192.168.68.51 # www开头的跳转到web1
db   A  192.168.68.70 # db开头的跳转到MySQL
web  CNAME www
*  A  192.168.68.52 # 任意开头的跳转到web2


[root@comprehensive named]# systemctl restart named # 重启named服务

[root@comprehensive named]# systemctl status named.service # 查看named服务状态
● named.service - Berkeley Internet Name Domain (DNS)
   Loaded: loaded (/usr/lib/systemd/system/named.service; enabled; vendor preset: disabled)
   Active: active (running) since 五 2024-08-23 22:50:53 CST; 7s ago
  Process: 8344 ExecStop=/bin/sh -c /usr/sbin/rndc stop > /dev/null 2>&1 || /bin/kill -TERM $MAINPID (code=exited, status=0/SUCCESS)
  Process: 8392 ExecStart=/usr/sbin/named -u named -c ${NAMEDCONF} $OPTIONS (code=exited, status=0/SUCCESS)
  Process: 8389 ExecStartPre=/bin/bash -c if [ ! "$DISABLE_ZONE_CHECKING" == "yes" ]; then /usr/sbin/named-checkconf -z "$NAMEDCONF"; else echo "Checking of zone files is disabled"; fi (code=exited, status=0/SUCCESS)
 Main PID: 8395 (named)
   CGroup: /system.slice/named.service
           └─8395 /usr/sbin/named -u named -c /etc/named.conf

8月 23 22:50:53 comprehensive named[8395]: network unreachable resolving './NS/IN': 2001:7fd::1#53
8月 23 22:50:53 comprehensive named[8395]: network unreachable resolving './DNSKEY/IN': 2001:500:2d::d#53
8月 23 22:50:53 comprehensive named[8395]: network unreachable resolving './DNSKEY/IN': 2001:500:1::53#53
8月 23 22:50:53 comprehensive named[8395]: network unreachable resolving './DNSKEY/IN': 2001:500:a8::e#53
8月 23 22:50:53 comprehensive named[8395]: managed-keys-zone: Key 20326 for zone . acceptance timer complete: key now trusted
8月 23 22:50:54 comprehensive named[8395]: resolver priming query complete
8月 23 22:50:54 comprehensive named[8395]: checkhints: b.root-servers.net/A (170.247.170.2) missing from hints
8月 23 22:50:54 comprehensive named[8395]: checkhints: b.root-servers.net/A (199.9.14.201) extra record in hints
8月 23 22:50:54 comprehensive named[8395]: checkhints: b.root-servers.net/AAAA (2801:1b8:10::b) missing from hints
8月 23 22:50:54 comprehensive named[8395]: checkhints: b.root-servers.net/AAAA (2001:500:200::b) extra record in hints

# 验证自制域名的增加效果

[root@web1 ~]# nslookup www.zj.com
Server:		192.168.68.60
Address:	192.168.68.60#53

Name:	www.zj.com
Address: 192.168.68.51

[root@web1 ~]# nslookup db.zj.com
Server:		192.168.68.60
Address:	192.168.68.60#53

Name:	db.zj.com
Address: 192.168.68.70

[root@web1 ~]# nslookup zj.com
Server:		192.168.68.60
Address:	192.168.68.60#53

Name:	zj.com
Address: 192.168.68.60
Name:	zj.com
Address: ::1

[root@web1 ~]# nslookup qq.zj.com
Server:		192.168.68.60
Address:	192.168.68.60#53

Name:	qq.zj.com
Address: 192.168.68.52
3.服务出现问题常用解决方式
# 1.检查配置文件

[root@comprehensive named]# named-checkconf /etc/named.rfc1912.zones
[root@comprehensive named]# echo $?
0

# 2.看日志

[root@comprehensive named]# tail -f /var/log/messages
Aug 23 22:50:53 comprehensive named[8395]: network unreachable resolving './DNSKEY/IN': 2001:500:1::53#53
Aug 23 22:50:53 comprehensive named[8395]: network unreachable resolving './DNSKEY/IN': 2001:500:a8::e#53
Aug 23 22:50:53 comprehensive named[8395]: managed-keys-zone: Key 20326 for zone . acceptance timer complete: key now trusted
Aug 23 22:50:54 comprehensive named[8395]: resolver priming query complete

# 3.检查数据文件

[root@comprehensive named]# named-checkzone zj.com  /var/named/zj.com.zone
zone zj.com/IN: loaded serial 0
OK
七.部署prometheus监控整个web集群
一键安装Prometheus+grafana+node_export+altermanager
[root@comprehensive ~]# mkdir -p /prom
[root@comprehensive ~]# cd /prom/
[root@comprehensive prom]# ls
alertmanager-0.23.0-rc.0.linux-amd64.tar.gz grafana-enterprise-9.1.2-1.x86_64.rpm node_exporter-1.4.0-rc.0.linux-amd64.tar.gz prometheus-2.43.0.linux-amd64.tar.gz
# 安装Prometheus
[root@comprehensive prom]# tar -xf prometheus-2.43.0.linux-amd64.tar.gz
[root@comprehensive prom]# ls
alertmanager-0.23.0-rc.0.linux-amd64.tar.gz node_exporter-1.4.0-rc.0.linux-amd64.tar.gz prometheus-2.43.0.linux-amd64.tar.gz
grafana-enterprise-9.1.2-1.x86_64.rpm prometheus-2.43.0.linux-amd64
[root@comprehensive prom]# mv prometheus-2.43.0.linux-amd64 prometheus
[root@comprehensive prom]# ls
alertmanager-0.23.0-rc.0.linux-amd64.tar.gz node_exporter-1.4.0-rc.0.linux-amd64.tar.gz prometheus-2.43.0.linux-amd64.tar.gz
grafana-enterprise-9.1.2-1.x86_64.rpm prometheus
[root@comprehensive prom]# PATH=/prom/prometheus:$PATH
[root@comprehensive prom]# echo 'PATH=/prom/prometheus:$PATH' >>/etc/profile
[root@comprehensive prom]# which prometheus
/prom/prometheus/prometheus
# 将Prometheus做成一个服务进行管理
[Unit]
Description=prometheus
[Service]
ExecStart=/prom/prometheus/prometheus --config.file=/prom/prometheus/prometheus.yml #注意路径要写对
ExecReload=/bin/kill -HUP $MAINPID
KillMode=process
Restart=on-failure
[Install]
WantedBy=multi-user.target
# 重启Prometheus
[root@comprehensive prometheus]# systemctl daemon-reload
[root@comprehensive prometheus]# systemctl start prometheus
[root@comprehensive prometheus]# systemctl enable prometheus
Created symlink from /etc/systemd/system/multi-user.target.wants/prometheus.service to /usr/lib/systemd/system/prometheus.service.
[root@comprehensive prometheus]# ps -aux |egrep prometheus
root 1700 0.8 1.1 798956 44452 ? Ssl 14:36 0:00 /prom/prometheus/prometheus --config.file=/prom/prometheus/prometheus.yml
root 1728 0.0 0.0 112824 988 pts/0 S+ 14:36 0:00 grep -E --color=auto prometheus
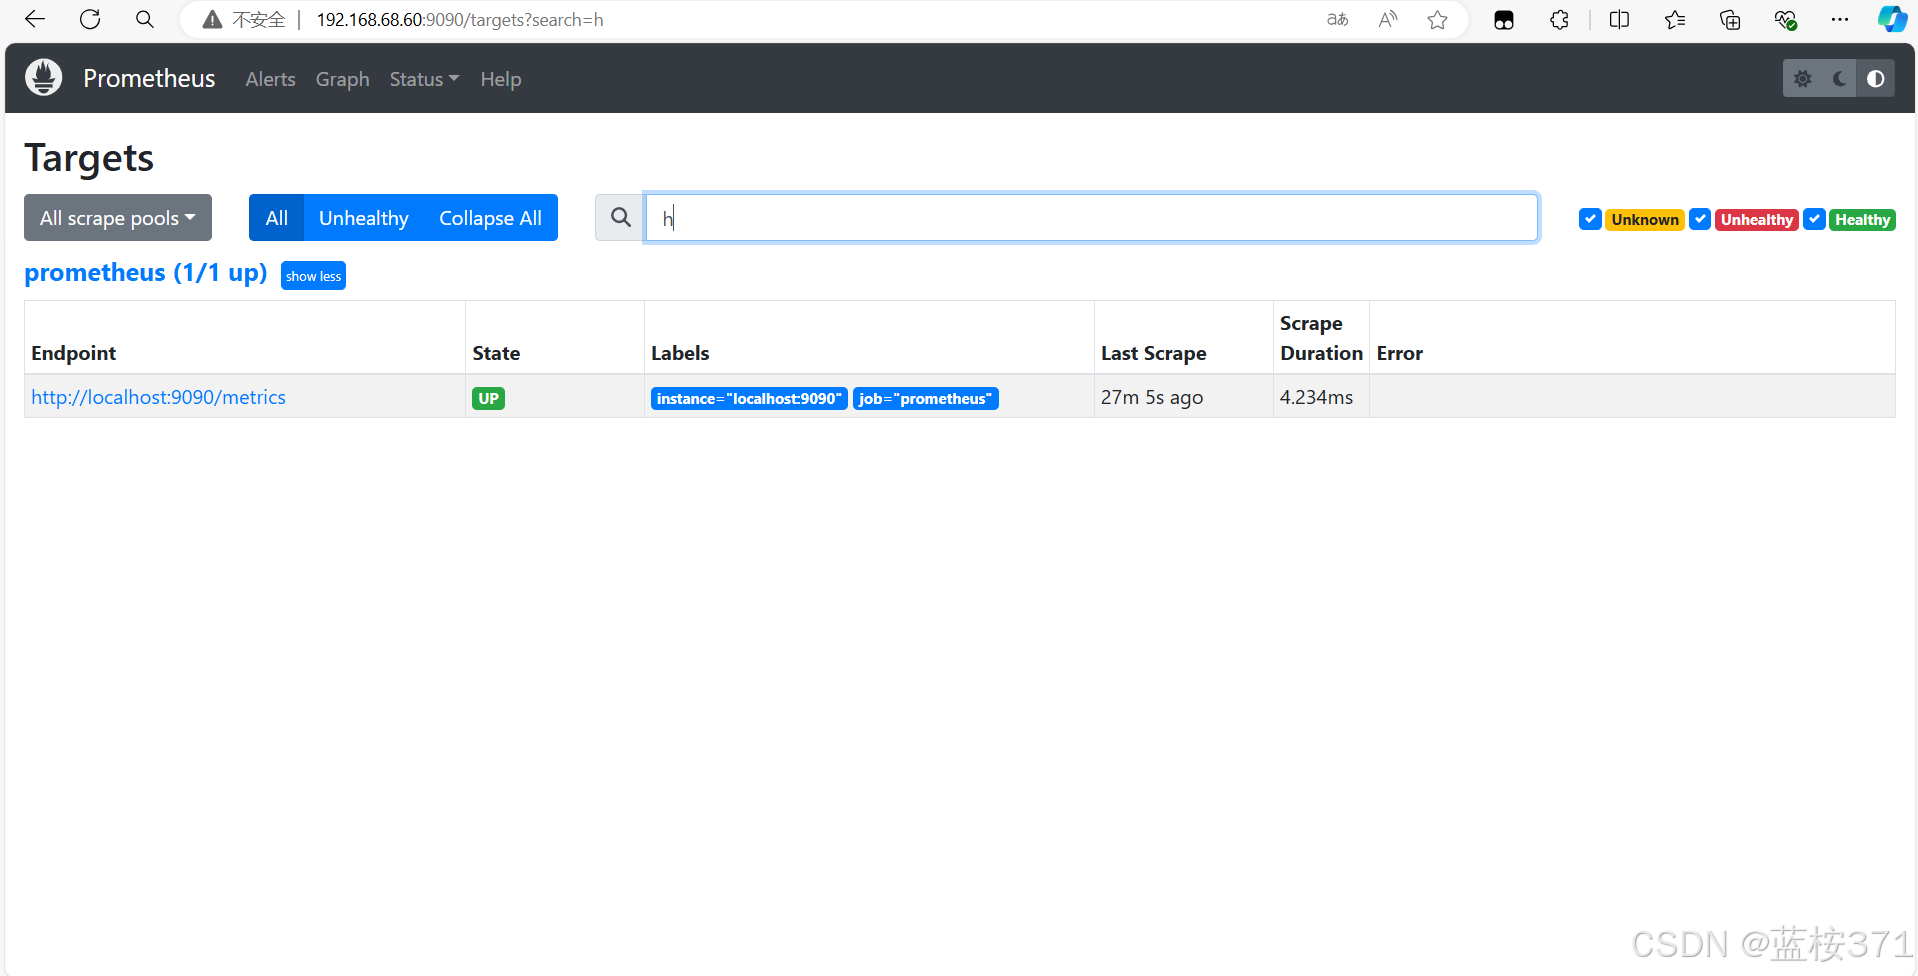
# 测试,登录综合服务器的9090端口
访问http://192.168.68.60:9090
效果图如下
# 安装export(整个web集群)和grafana(综合服务器)
[root@comprehensive prom]# ansible all -m copy -a"src=node_exporter-1.4.0-rc.0.linux-amd64.tar.gz dest=/root"
192.168.68.52 | SUCCESS => {
"ansible_facts": {
"discovered_interpreter_python": "/usr/bin/python"
},
"changed": false,
"checksum": "47cf6dcfa33d46afe456dc6cf679efee32c5195b",
"dest": "/root/node_exporter-1.4.0-rc.0.linux-amd64.tar.gz",
"gid": 0,
"group": "root",
"mode": "0644",
"owner": "root",
"path": "/root/node_exporter-1.4.0-rc.0.linux-amd64.tar.gz",
"size": 9735268,
"state": "file",
"uid": 0
}
192.168.68.51 | SUCCESS => {
"ansible_facts": {
"discovered_interpreter_python": "/usr/bin/python"
},
"changed": false,
"checksum": "47cf6dcfa33d46afe456dc6cf679efee32c5195b",
"dest": "/root/node_exporter-1.4.0-rc.0.linux-amd64.tar.gz",
"gid": 0,
"group": "root",
"mode": "0644",
"owner": "root",
"path": "/root/node_exporter-1.4.0-rc.0.linux-amd64.tar.gz",
"size": 9735268,
"state": "file",
"uid": 0
}
192.168.68.42 | SUCCESS => {
"ansible_facts": {
"discovered_interpreter_python": "/usr/bin/python"
},
"changed": false,
"checksum": "47cf6dcfa33d46afe456dc6cf679efee32c5195b",
"dest": "/root/node_exporter-1.4.0-rc.0.linux-amd64.tar.gz",
"gid": 0,
"group": "root",
"mode": "0644",
"owner": "root",
"path": "/root/node_exporter-1.4.0-rc.0.linux-amd64.tar.gz",
"secontext": "system_u:object_r:admin_home_t:s0",
"size": 9735268,
"state": "file",
"uid": 0
}
192.168.68.41 | SUCCESS => {
"ansible_facts": {
"discovered_interpreter_python": "/usr/bin/python"
},
"changed": false,
"checksum": "47cf6dcfa33d46afe456dc6cf679efee32c5195b",
"dest": "/root/node_exporter-1.4.0-rc.0.linux-amd64.tar.gz",
"gid": 0,
"group": "root",
"mode": "0644",
"owner": "root",
"path": "/root/node_exporter-1.4.0-rc.0.linux-amd64.tar.gz",
"secontext": "system_u:object_r:admin_home_t:s0",
"size": 9735268,
"state": "file",
"uid": 0
}
192.168.68.70 | SUCCESS => {
"ansible_facts": {
"discovered_interpreter_python": "/usr/bin/python"
},
"changed": false,
"checksum": "47cf6dcfa33d46afe456dc6cf679efee32c5195b",
"dest": "/root/node_exporter-1.4.0-rc.0.linux-amd64.tar.gz",
"gid": 0,
"group": "root",
"mode": "0644",
"owner": "root",
"path": "/root/node_exporter-1.4.0-rc.0.linux-amd64.tar.gz",
"size": 9735268,
"state": "file",
"uid": 0
}
192.168.68.30 | SUCCESS => {
"ansible_facts": {
"discovered_interpreter_python": "/usr/bin/python"
},
"changed": false,
"checksum": "47cf6dcfa33d46afe456dc6cf679efee32c5195b",
"dest": "/root/node_exporter-1.4.0-rc.0.linux-amd64.tar.gz",
"gid": 0,
"group": "root",
"mode": "0644",
"owner": "root",
"path": "/root/node_exporter-1.4.0-rc.0.linux-amd64.tar.gz",
"secontext": "system_u:object_r:admin_home_t:s0",
"size": 9735268,
"state": "file",
"uid": 0
}
192.168.68.60 | CHANGED => {
"ansible_facts": {
"discovered_interpreter_python": "/usr/bin/python"
},
"changed": true,
"checksum": "47cf6dcfa33d46afe456dc6cf679efee32c5195b",
"dest": "/root/node_exporter-1.4.0-rc.0.linux-amd64.tar.gz",
"gid": 0,
"group": "root",
"md5sum": "7ba0551da4ff22a0ee53e1eecf00985e",
"mode": "0644",
"owner": "root",
"size": 9735268,
"src": "/root/.ansible/tmp/ansible-tmp-1724484692.01-6330-136876161150559/source",
"state": "file",
"uid": 0
}
192.168.68.80 | CHANGED => {
"ansible_facts": {
"discovered_interpreter_python": "/usr/bin/python"
},
"changed": true,
"checksum": "47cf6dcfa33d46afe456dc6cf679efee32c5195b",
"dest": "/root/node_exporter-1.4.0-rc.0.linux-amd64.tar.gz",
"gid": 0,
"group": "root",
"md5sum": "7ba0551da4ff22a0ee53e1eecf00985e",
"mode": "0644",
"owner": "root",
"secontext": "system_u:object_r:admin_home_t:s0",
"size": 9735268,
"src": "/root/.ansible/tmp/ansible-tmp-1724484704.57-6475-191446970053574/source",
"state": "file",
"uid": 0
}
[root@comprehensive prom]# ansible all -m copy -a"src=install_node_exporter.sh dest=/root"
192.168.68.51 | SUCCESS => {
"ansible_facts": {
"discovered_interpreter_python": "/usr/bin/python"
},
"changed": false,
"checksum": "ef92b8cb80f7ca0ae94a13a732ea6e6555d4e82a",
"dest": "/root/install_node_exporter.sh",
"gid": 0,
"group": "root",
"mode": "0644",
"owner": "root",
"path": "/root/install_node_exporter.sh",
"size": 696,
"state": "file",
"uid": 0
}
192.168.68.52 | SUCCESS => {
"ansible_facts": {
"discovered_interpreter_python": "/usr/bin/python"
},
"changed": false,
"checksum": "ef92b8cb80f7ca0ae94a13a732ea6e6555d4e82a",
"dest": "/root/install_node_exporter.sh",
"gid": 0,
"group": "root",
"mode": "0644",
"owner": "root",
"path": "/root/install_node_exporter.sh",
"size": 696,
"state": "file",
"uid": 0
}
192.168.68.41 | CHANGED => {
"ansible_facts": {
"discovered_interpreter_python": "/usr/bin/python"
},
"changed": true,
"checksum": "ef92b8cb80f7ca0ae94a13a732ea6e6555d4e82a",
"dest": "/root/install_node_exporter.sh",
"gid": 0,
"group": "root",
"md5sum": "6508c12aa07f1dc0bea46a6fb6b697d0",
"mode": "0644",
"owner": "root",
"secontext": "system_u:object_r:admin_home_t:s0",
"size": 696,
"src": "/root/.ansible/tmp/ansible-tmp-1724484747.19-6703-95605750229149/source",
"state": "file",
"uid": 0
}
192.168.68.42 | CHANGED => {
"ansible_facts": {
"discovered_interpreter_python": "/usr/bin/python"
},
"changed": true,
"checksum": "ef92b8cb80f7ca0ae94a13a732ea6e6555d4e82a",
"dest": "/root/install_node_exporter.sh",
"gid": 0,
"group": "root",
"md5sum": "6508c12aa07f1dc0bea46a6fb6b697d0",
"mode": "0644",
"owner": "root",
"secontext": "system_u:object_r:admin_home_t:s0",
"size": 696,
"src": "/root/.ansible/tmp/ansible-tmp-1724484747.18-6705-198588061943119/source",
"state": "file",
"uid": 0
}
192.168.68.30 | CHANGED => {
"ansible_facts": {
"discovered_interpreter_python": "/usr/bin/python"
},
"changed": true,
"checksum": "ef92b8cb80f7ca0ae94a13a732ea6e6555d4e82a",
"dest": "/root/install_node_exporter.sh",
"gid": 0,
"group": "root",
"md5sum": "6508c12aa07f1dc0bea46a6fb6b697d0",
"mode": "0644",
"owner": "root",
"secontext": "system_u:object_r:admin_home_t:s0",
"size": 696,
"src": "/root/.ansible/tmp/ansible-tmp-1724484748.81-6812-10802488249406/source",
"state": "file",
"uid": 0
}
192.168.68.80 | CHANGED => {
"ansible_facts": {
"discovered_interpreter_python": "/usr/bin/python"
},
"changed": true,
"checksum": "ef92b8cb80f7ca0ae94a13a732ea6e6555d4e82a",
"dest": "/root/install_node_exporter.sh",
"gid": 0,
"group": "root",
"md5sum": "6508c12aa07f1dc0bea46a6fb6b697d0",
"mode": "0644",
"owner": "root",
"secontext": "system_u:object_r:admin_home_t:s0",
"size": 696,
"src": "/root/.ansible/tmp/ansible-tmp-1724484748.89-6815-102379563978434/source",
"state": "file",
"uid": 0
}
192.168.68.70 | CHANGED => {
"ansible_facts": {
"discovered_interpreter_python": "/usr/bin/python"
},
"changed": true,
"checksum": "ef92b8cb80f7ca0ae94a13a732ea6e6555d4e82a",
"dest": "/root/install_node_exporter.sh",
"gid": 0,
"group": "root",
"md5sum": "6508c12aa07f1dc0bea46a6fb6b697d0",
"mode": "0644",
"owner": "root",
"size": 696,
"src": "/root/.ansible/tmp/ansible-tmp-1724484748.95-6822-115557668234788/source",
"state": "file",
"uid": 0
}
192.168.68.60 | CHANGED => {
"ansible_facts": {
"discovered_interpreter_python": "/usr/bin/python"
},
"changed": true,
"checksum": "ef92b8cb80f7ca0ae94a13a732ea6e6555d4e82a",
"dest": "/root/install_node_exporter.sh",
"gid": 0,
"group": "root",
"md5sum": "6508c12aa07f1dc0bea46a6fb6b697d0",
"mode": "0644",
"owner": "root",
"size": 696,
"src": "/root/.ansible/tmp/ansible-tmp-1724484747.29-6706-49732370384967/source",
"state": "file",
"uid": 0
}
[root@comprehensive prom]# ansible all -m command -a"bash install_node_exporter.sh"
192.168.68.51 | CHANGED | rc=0 >>
192.168.68.42 | CHANGED | rc=0 >>
Created symlink from /etc/systemd/system/multi-user.target.wants/node_exporter.service to /usr/lib/systemd/system/node_exporter.service.
192.168.68.52 | CHANGED | rc=0 >>
192.168.68.41 | CHANGED | rc=0 >>
Created symlink from /etc/systemd/system/multi-user.target.wants/node_exporter.service to /usr/lib/systemd/system/node_exporter.service.
192.168.68.30 | CHANGED | rc=0 >>
Created symlink from /etc/systemd/system/multi-user.target.wants/node_exporter.service to /usr/lib/systemd/system/node_exporter.service.
192.168.68.80 | CHANGED | rc=0 >>
Created symlink from /etc/systemd/system/multi-user.target.wants/node_exporter.service to /usr/lib/systemd/system/node_exporter.service.
192.168.68.70 | CHANGED | rc=0 >>
Created symlink from /etc/systemd/system/multi-user.target.wants/node_exporter.service to /usr/lib/systemd/system/node_exporter.service.
192.168.68.60 | CHANGED | rc=0 >>
Created symlink from /etc/systemd/system/multi-user.target.wants/node_exporter.service to /usr/lib/systemd/system/node_exporter.service.
# 查看node_exporter进程
[root@comprehensive prom]# ansible all -m shell -a"ps -aux|egrep node"
192.168.68.41 | CHANGED | rc=0 >>
root 8822 0.0 0.7 716544 13276 ? Ssl 15:32 0:00 /node_exporter/node_exporter --web.listen-address 0.0.0.0:9090
root 8897 0.0 0.0 113280 1216 pts/1 S+ 15:35 0:00 /bin/sh -c ps -aux|egrep node
root 8899 0.0 0.0 112824 972 pts/1 S+ 15:35 0:00 grep -E node
192.168.68.51 | CHANGED | rc=0 >>
root 2425 0.1 1.0 717952 20300 ? Ssl 14:56 0:02 /node_exporter/node_exporter --web.listen-address 0.0.0.0:9090
root 3275 0.0 0.0 113280 1212 pts/1 S+ 15:35 0:00 /bin/sh -c ps -aux|egrep node
root 3277 0.0 0.0 112824 968 pts/1 R+ 15:35 0:00 grep -E node
192.168.68.52 | CHANGED | rc=0 >>
root 2426 0.0 1.1 717696 20692 ? Ssl 14:56 0:02 /node_exporter/node_exporter --web.listen-address 0.0.0.0:9090
root 3275 0.0 0.0 113280 1216 pts/1 S+ 15:35 0:00 /bin/sh -c ps -aux|egrep node
root 3277 0.0 0.0 112824 972 pts/1 R+ 15:35 0:00 grep -E node
192.168.68.42 | CHANGED | rc=0 >>
root 8824 0.0 0.7 716288 13112 ? Ssl 15:32 0:00 /node_exporter/node_exporter --web.listen-address 0.0.0.0:9090
root 8899 0.0 0.0 113280 1216 pts/1 S+ 15:35 0:00 /bin/sh -c ps -aux|egrep node
root 8901 0.0 0.0 112824 972 pts/1 S+ 15:35 0:00 grep -E node
192.168.68.60 | CHANGED | rc=0 >>
root 6289 0.3 0.9 352936 36280 pts/0 Tl 15:31 0:01 /usr/bin/python2 /usr/bin/ansible all -m copy -asrc=node_exporter-1.4.0-rc.0.linux-amd64.tar.gz dest=/rootcd
root 6297 0.0 0.8 355972 33924 pts/0 T 15:31 0:00 /usr/bin/python2 /usr/bin/ansible all -m copy -asrc=node_exporter-1.4.0-rc.0.linux-amd64.tar.gz dest=/rootcd
root 6298 0.0 0.8 355992 33920 pts/0 T 15:31 0:00 /usr/bin/python2 /usr/bin/ansible all -m copy -asrc=node_exporter-1.4.0-rc.0.linux-amd64.tar.gz dest=/rootcd
root 6300 0.0 0.8 355960 33932 pts/0 T 15:31 0:00 /usr/bin/python2 /usr/bin/ansible all -m copy -asrc=node_exporter-1.4.0-rc.0.linux-amd64.tar.gz dest=/rootcd
root 6302 0.0 0.8 355980 33948 pts/0 T 15:31 0:00 /usr/bin/python2 /usr/bin/ansible all -m copy -asrc=node_exporter-1.4.0-rc.0.linux-amd64.tar.gz dest=/rootcd
root 6303 0.0 0.8 355968 33976 pts/0 T 15:31 0:00 /usr/bin/python2 /usr/bin/ansible all -m copy -asrc=node_exporter-1.4.0-rc.0.linux-amd64.tar.gz dest=/rootcd
root 7250 13.6 0.9 353472 36856 pts/0 Sl+ 15:35 0:01 /usr/bin/python2 /usr/bin/ansible all -m shell -aps -aux|egrep node
root 7266 0.9 0.9 357972 35864 pts/0 S+ 15:35 0:00 /usr/bin/python2 /usr/bin/ansible all -m shell -aps -aux|egrep node
root 7349 2.0 0.8 355992 34008 pts/0 S+ 15:35 0:00 /usr/bin/python2 /usr/bin/ansible all -m shell -aps -aux|egrep node
root 7359 4.0 0.8 355984 34040 pts/0 S+ 15:35 0:00 /usr/bin/python2 /usr/bin/ansible all -m shell -aps -aux|egrep node
root 7367 2.0 0.8 355984 34148 pts/0 S+ 15:35 0:00 /usr/bin/python2 /usr/bin/ansible all -m shell -aps -aux|egrep node
root 7398 0.0 0.0 113280 1216 pts/10 S+ 15:36 0:00 /bin/sh -c ps -aux|egrep node
root 7400 0.0 0.0 112828 968 pts/10 S+ 15:36 0:00 grep -E node
192.168.68.70 | CHANGED | rc=0 >>
root 2236 0.2 0.9 717696 17528 ? Ssl 15:32 0:00 /node_exporter/node_exporter --web.listen-address 0.0.0.0:9090
root 2312 0.0 0.0 113280 1212 pts/1 S+ 15:36 0:00 /bin/sh -c ps -aux|egrep node
root 2314 0.0 0.0 112824 968 pts/1 S+ 15:36 0:00 grep -E node
192.168.68.30 | CHANGED | rc=0 >>
root 8824 0.0 0.7 716288 13128 ? Ssl 15:32 0:00 /node_exporter/node_exporter --web.listen-address 0.0.0.0:9090
root 8899 0.0 0.0 113280 1216 pts/1 S+ 15:36 0:00 /bin/sh -c ps -aux|egrep node
root 8901 0.0 0.0 112824 968 pts/1 S+ 15:36 0:00 grep -E node
192.168.68.80 | CHANGED | rc=0 >>
root 2018 0.0 0.7 716544 13120 ? Ssl 15:32 0:00 /node_exporter/node_exporter --web.listen-address 0.0.0.0:9090
root 2091 0.0 0.0 113280 1216 pts/1 S+ 15:36 0:00 /bin/sh -c ps -aux|egrep node
root 2093 0.0 0.0 112824 972 pts/1 S+ 15:36 0:00 grep -E node
# 安装grafana
[root@comprehensive prom]# ls
alertmanager-0.23.0-rc.0.linux-amd64.tar.gz install_node_exporter.sh prometheus
grafana-enterprise-9.1.2-1.x86_64.rpm node_exporter-1.4.0-rc.0.linux-amd64.tar.gz prometheus-2.43.0.linux-amd64.tar.gz
[root@comprehensive prom]# yum install grafana-enterprise-9.1.2-1.x86_64.rpm -y
# 查看grafana进程 (监听3000端口)
[root@comprehensive prom]# systemctl start grafana-server
[root@comprehensive prom]# systemctl enable grafana-server
Created symlink from /etc/systemd/system/multi-user.target.wants/grafana-server.service to /usr/lib/systemd/system/grafana-server.service.
[root@comprehensive prom]# ps -aux|egrep grafana
grafana 5647 2.6 1.8 1130316 71092 ? Ssl 15:03 0:00 /usr/sbin/grafana-server --config=/etc/grafana/grafana.ini --pidfile=/var/run/grafana/grafana-server.pid --packaging=rpm cfg:default.paths.logs=/var/log/grafana cfg:default.paths.data=/var/lib/grafana cfg:default.paths.plugins=/var/lib/grafana/plugins cfg:default.paths.provisioning=/etc/grafana/provisioning
root 5675 0.0 0.0 112824 988 pts/0 S+ 15:04 0:00 grep -E --color=auto grafana
[root@comprehensive prom]# netstat -anplut|egrep grafana
tcp 0 0 192.168.68.60:46348 34.120.177.193:443 ESTABLISHED 5647/grafana-server
tcp 0 0 192.168.68.60:55290 185.199.110.133:443 ESTABLISHED 5647/grafana-server
tcp6 0 0 :::3000 :::* LISTEN 5647/grafana-server
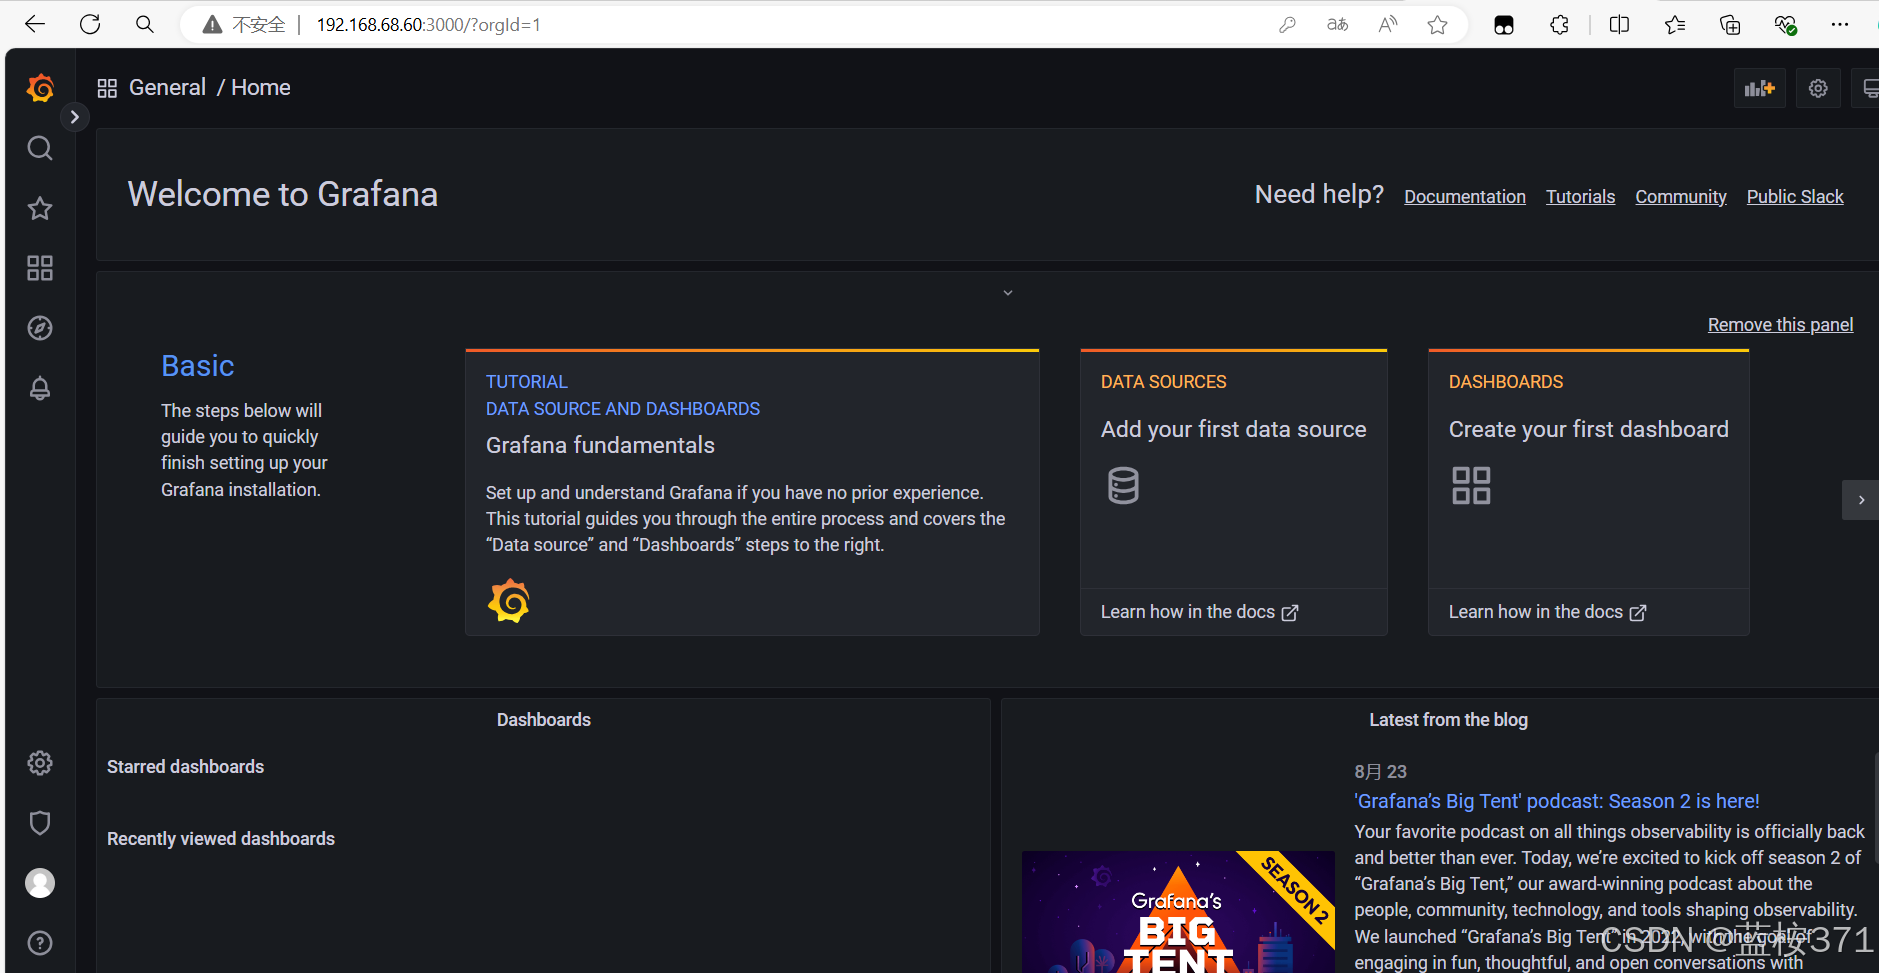
# 登录综合服务器的3000端口查看(账号:admin,密码:admin)
访问http://192.168.68.60:3000
效果图如下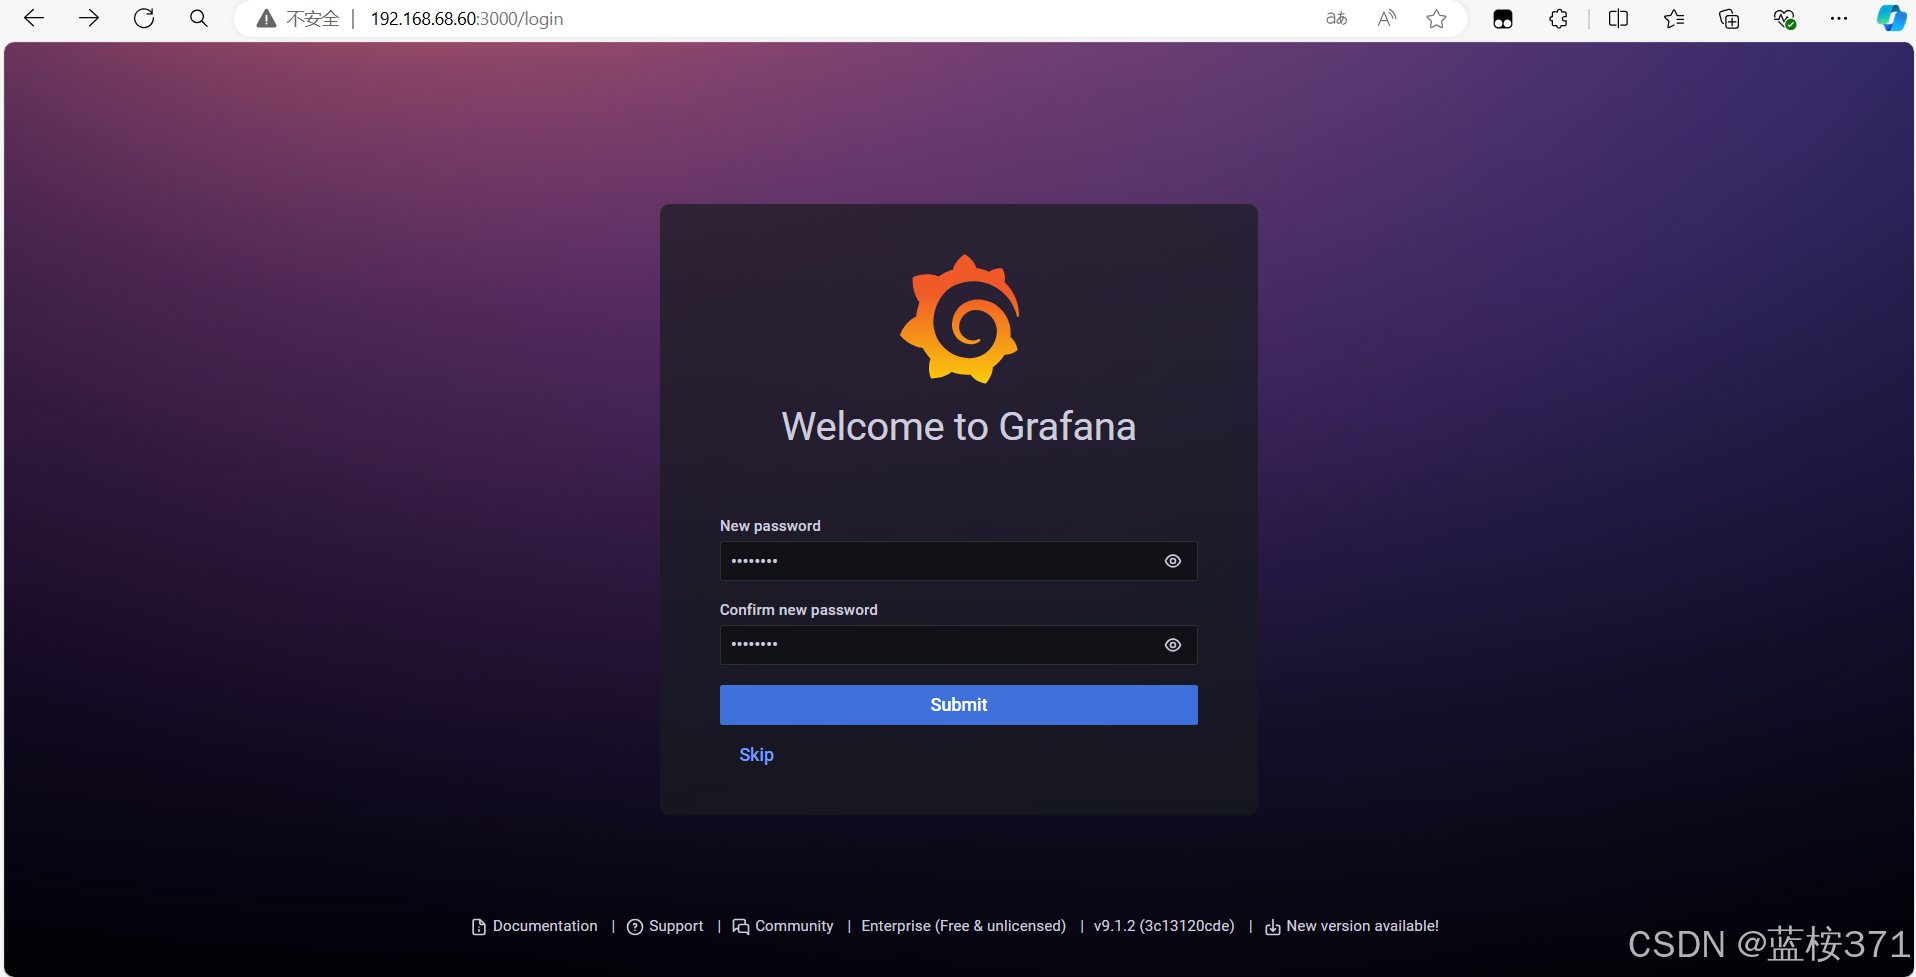
# 添加web集群中被监控的服务器

# 修改prometheus.yaml文件

[root@comprehensive prom]# cd prometheus
[root@comprehensive prometheus]# ls
console_libraries  consoles  LICENSE  NOTICE  prometheus  prometheus.yml  promtool
[root@comprehensive prometheus]# pwd
/prom/prometheus
[root@comprehensive prometheus]# vim prometheus.yml
[root@comprehensive prometheus]# cat prometheus.yml
# my global config
global:
  scrape_interval: 15s # Set the scrape interval to every 15 seconds. Default is every 1 minute.
  evaluation_interval: 15s # Evaluate rules every 15 seconds. The default is every 1 minute.
  # scrape_timeout is set to the global default (10s).

# Alertmanager configuration
alerting:
  alertmanagers:
    - static_configs:
        - targets:
          # - alertmanager:9093

# Load rules once and periodically evaluate them according to the global 'evaluation_interval'.
rule_files:
  # - "first_rules.yml"
  # - "second_rules.yml"

# A scrape configuration containing exactly one endpoint to scrape:
# Here it's Prometheus itself.
scrape_configs:
  # The job name is added as a label `job=<job_name>` to any timeseries scraped from this config.
  - job_name: "prometheus"

    # metrics_path defaults to '/metrics'
    # scheme defaults to 'http'.

    static_configs:
      - targets: ["localhost:9090"]

#添加下面的配置
  - job_name: "web1"
    static_configs:
      - targets: ["192.168.68.51:9090"]
  - job_name: "web2"
    static_configs:
      - targets: ["192.168.68.52:9090"]
  - job_name: "lb1"
    static_configs:
      - targets: ["192.168.68.41:9090"]
  - job_name: "lb2"
    static_configs:
      - targets: ["192.168.68.42:9090"]
  - job_name: "mysql"
    static_configs:
      - targets: ["192.168.68.70:9090"]
  - job_name: "firewalld"
    static_configs:
      - targets: ["192.168.68.30:9090"]
  - job_name: "pressure"
    static_configs:
      - targets: ["192.168.68.80:9090"]

# 重启Prometheus服务

[root@comprehensive prometheus]# systemctl restart prometheus
 # grafana图形化界面实现
先配置prometheus的数据源
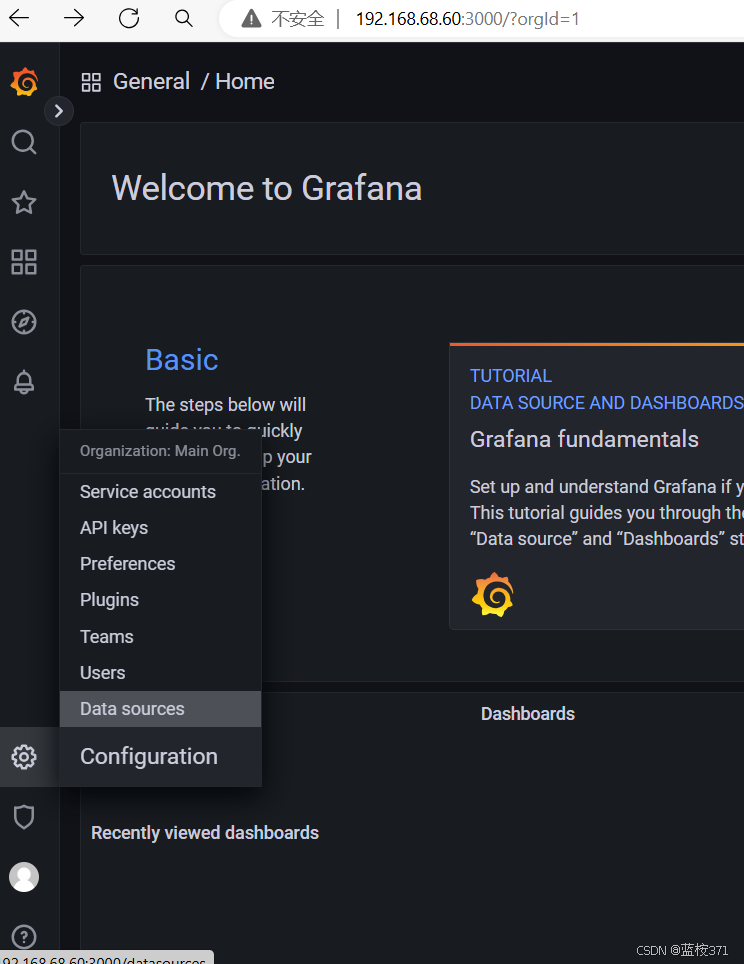
点击添加数据源(add data source)
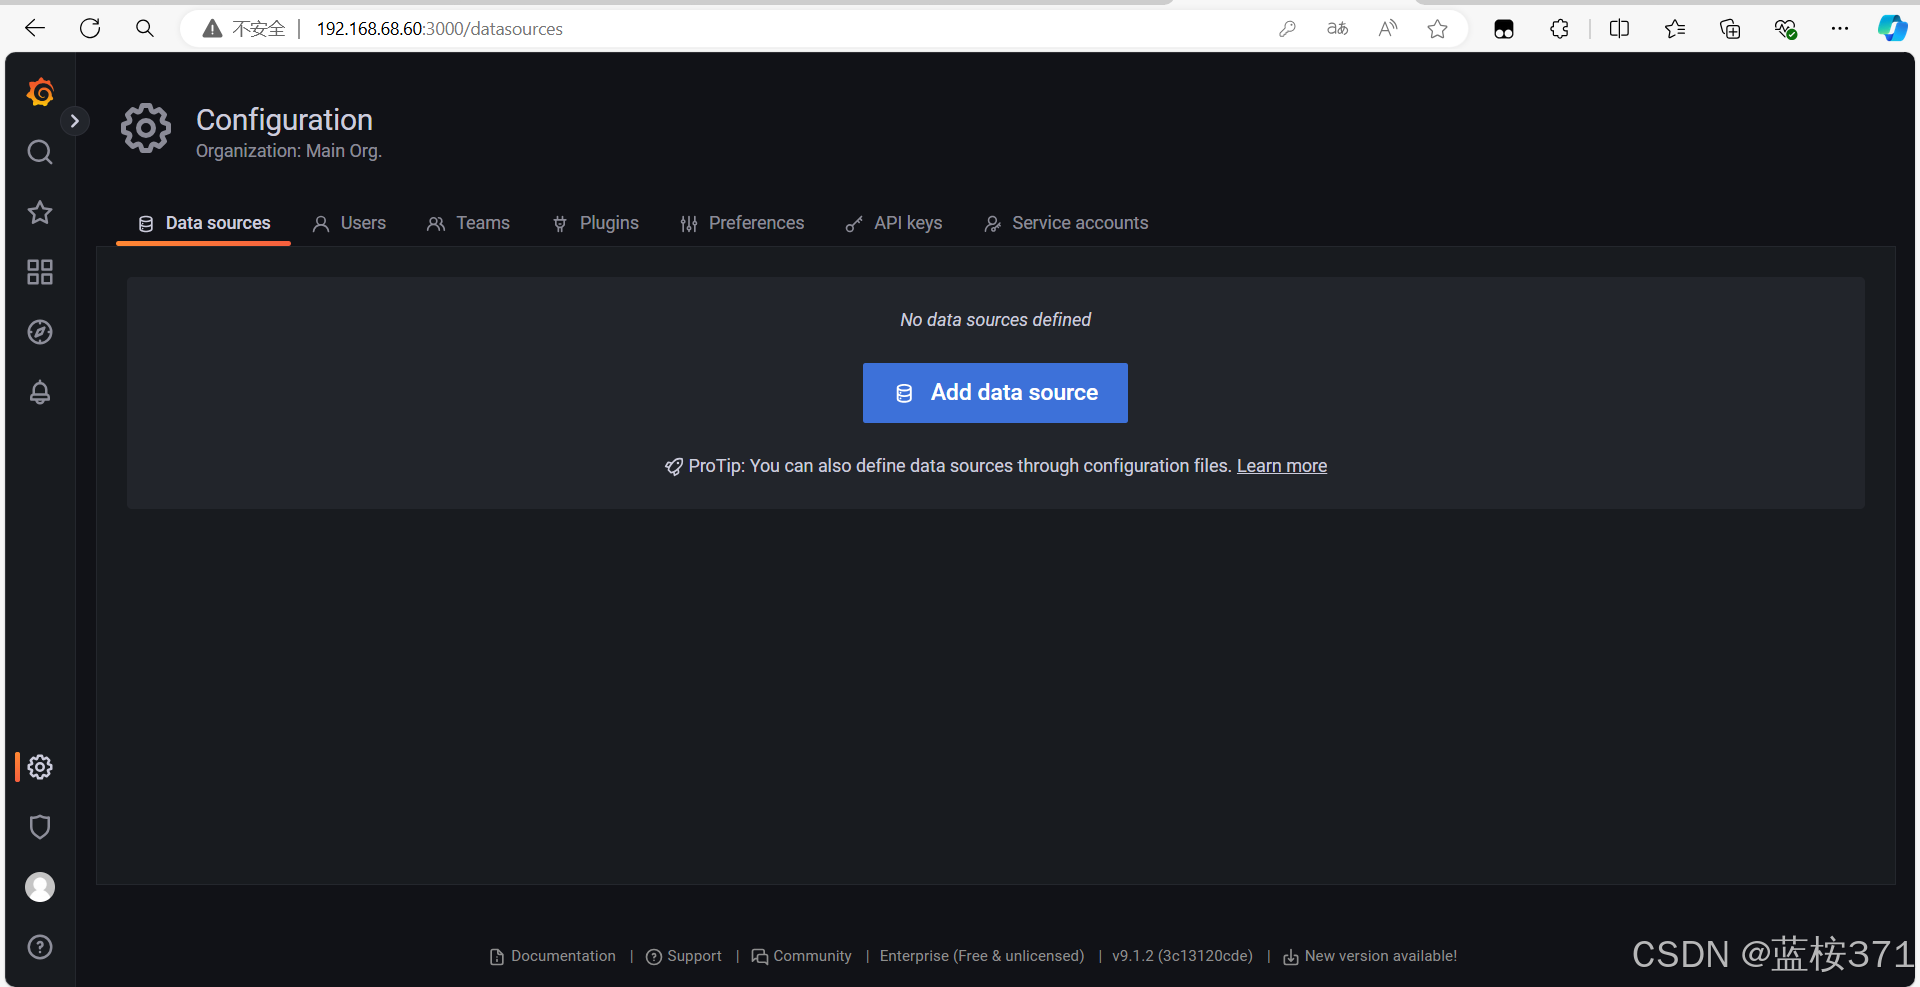
选择Prometheus数据库
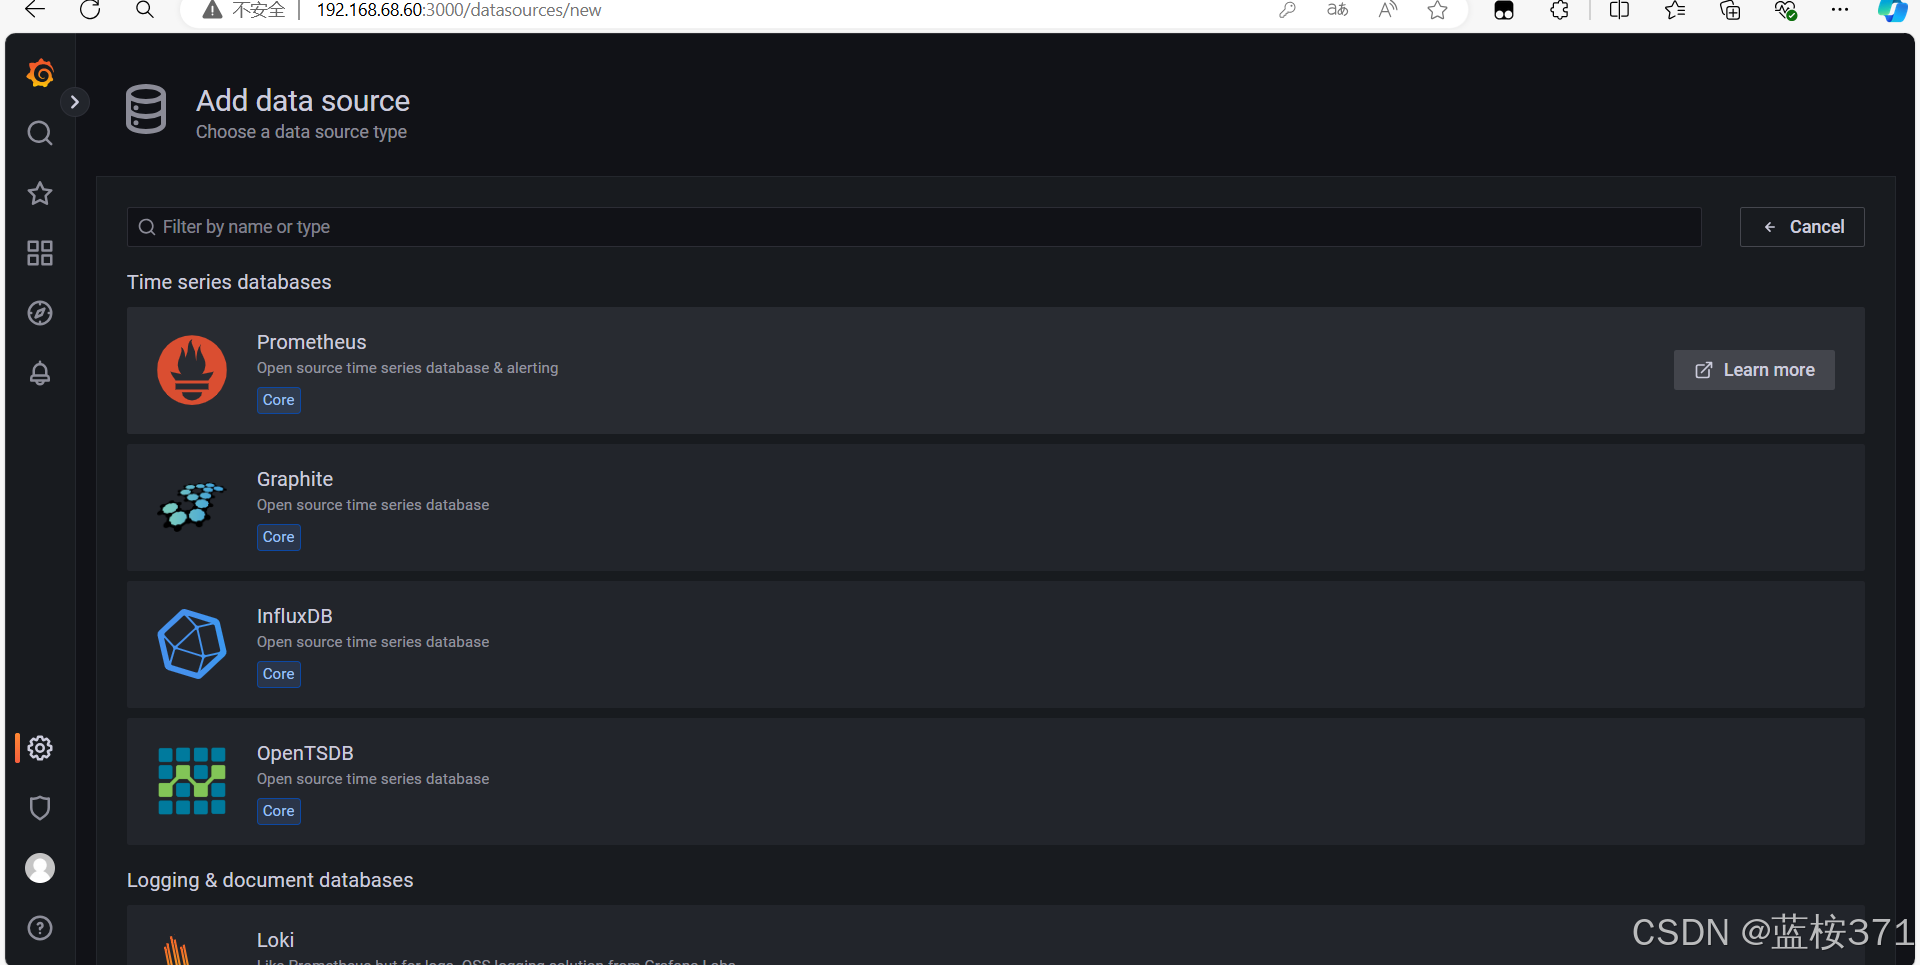
填写配置
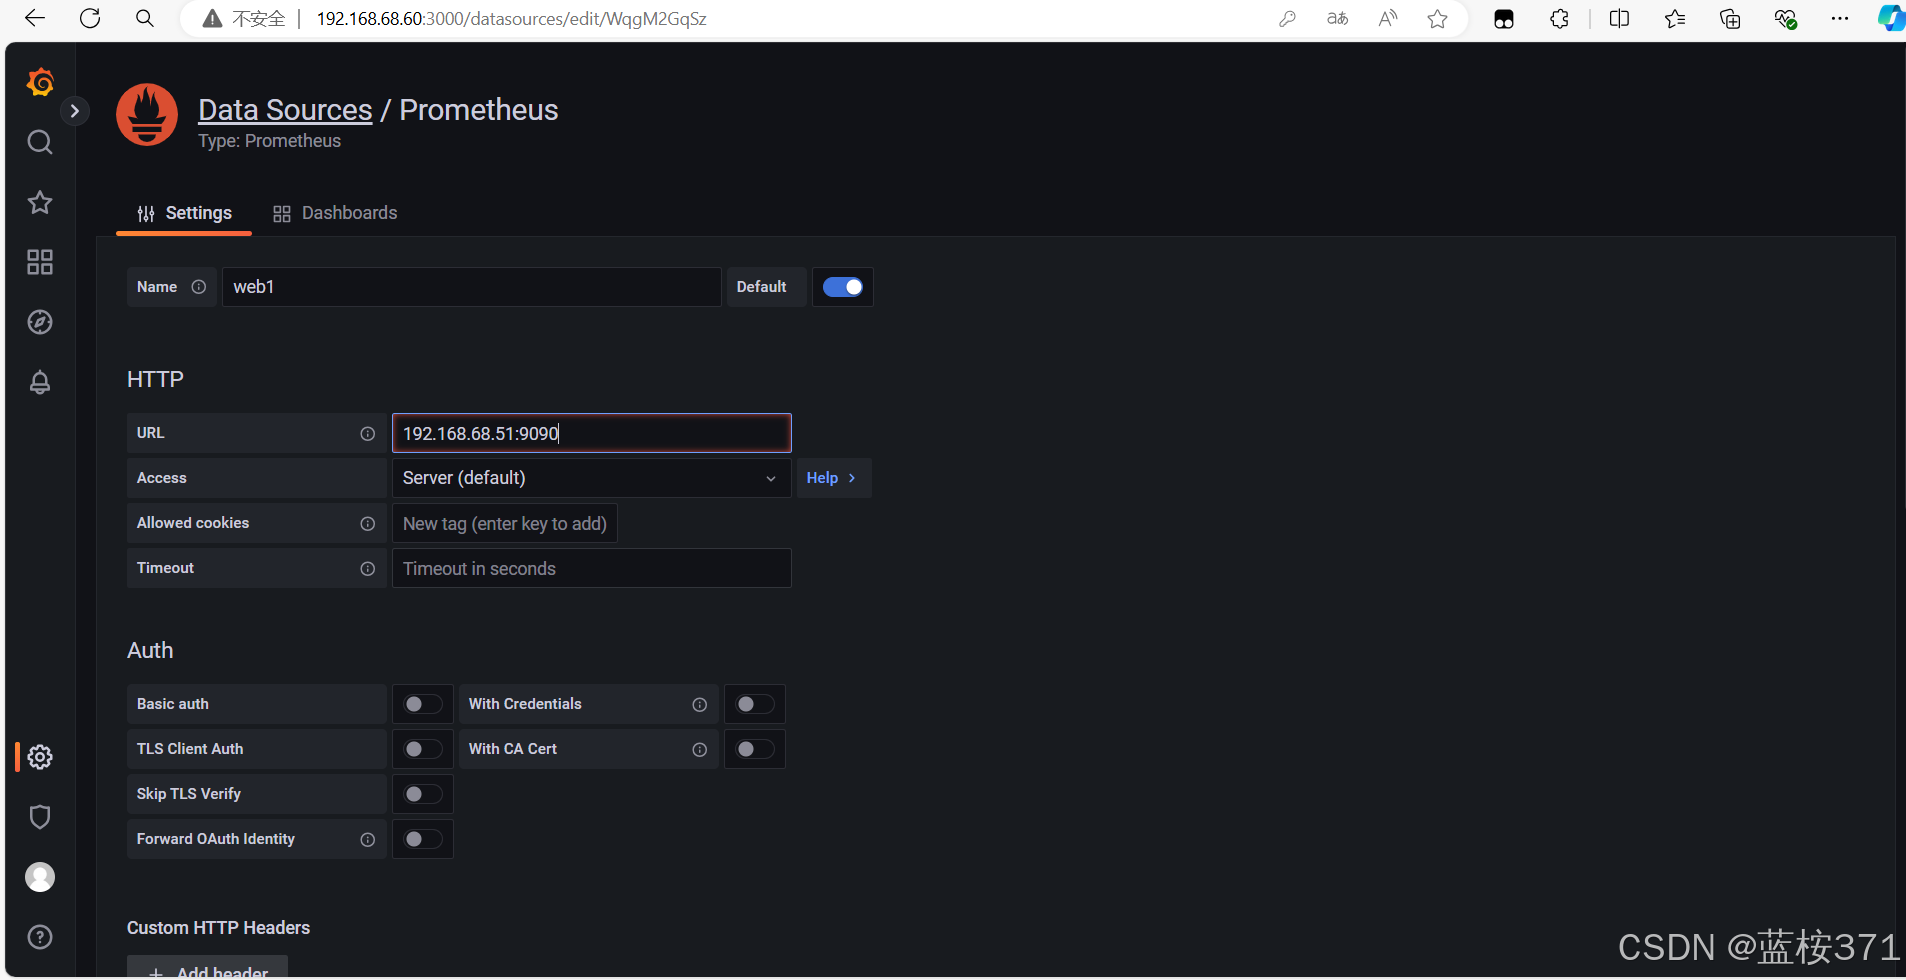

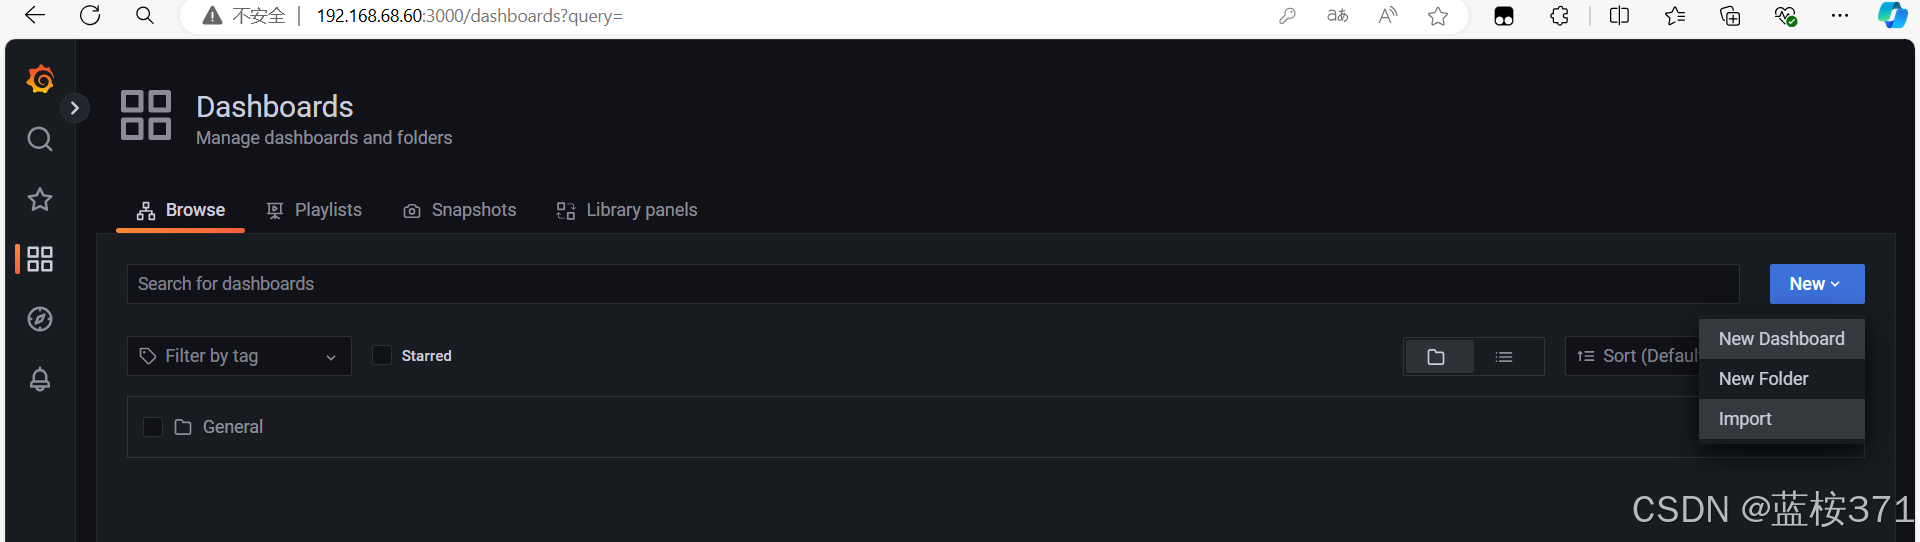
点击Dashboards 进入仪表盘设置
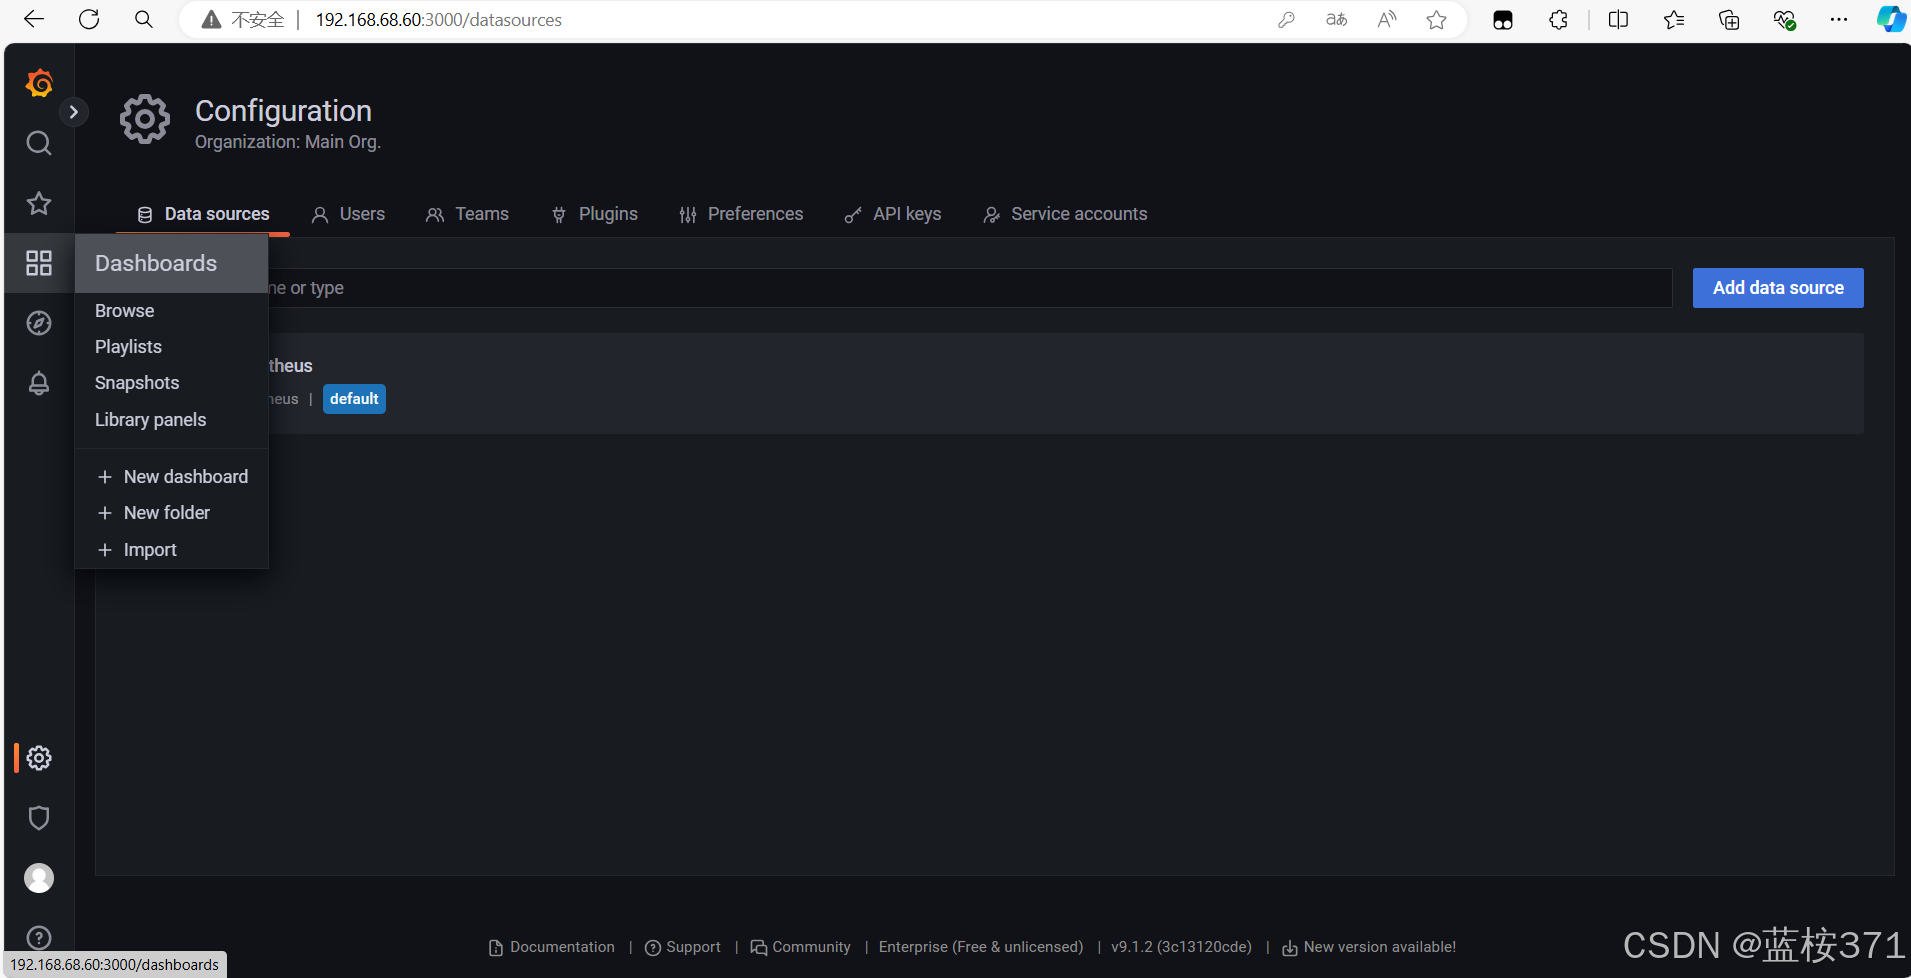
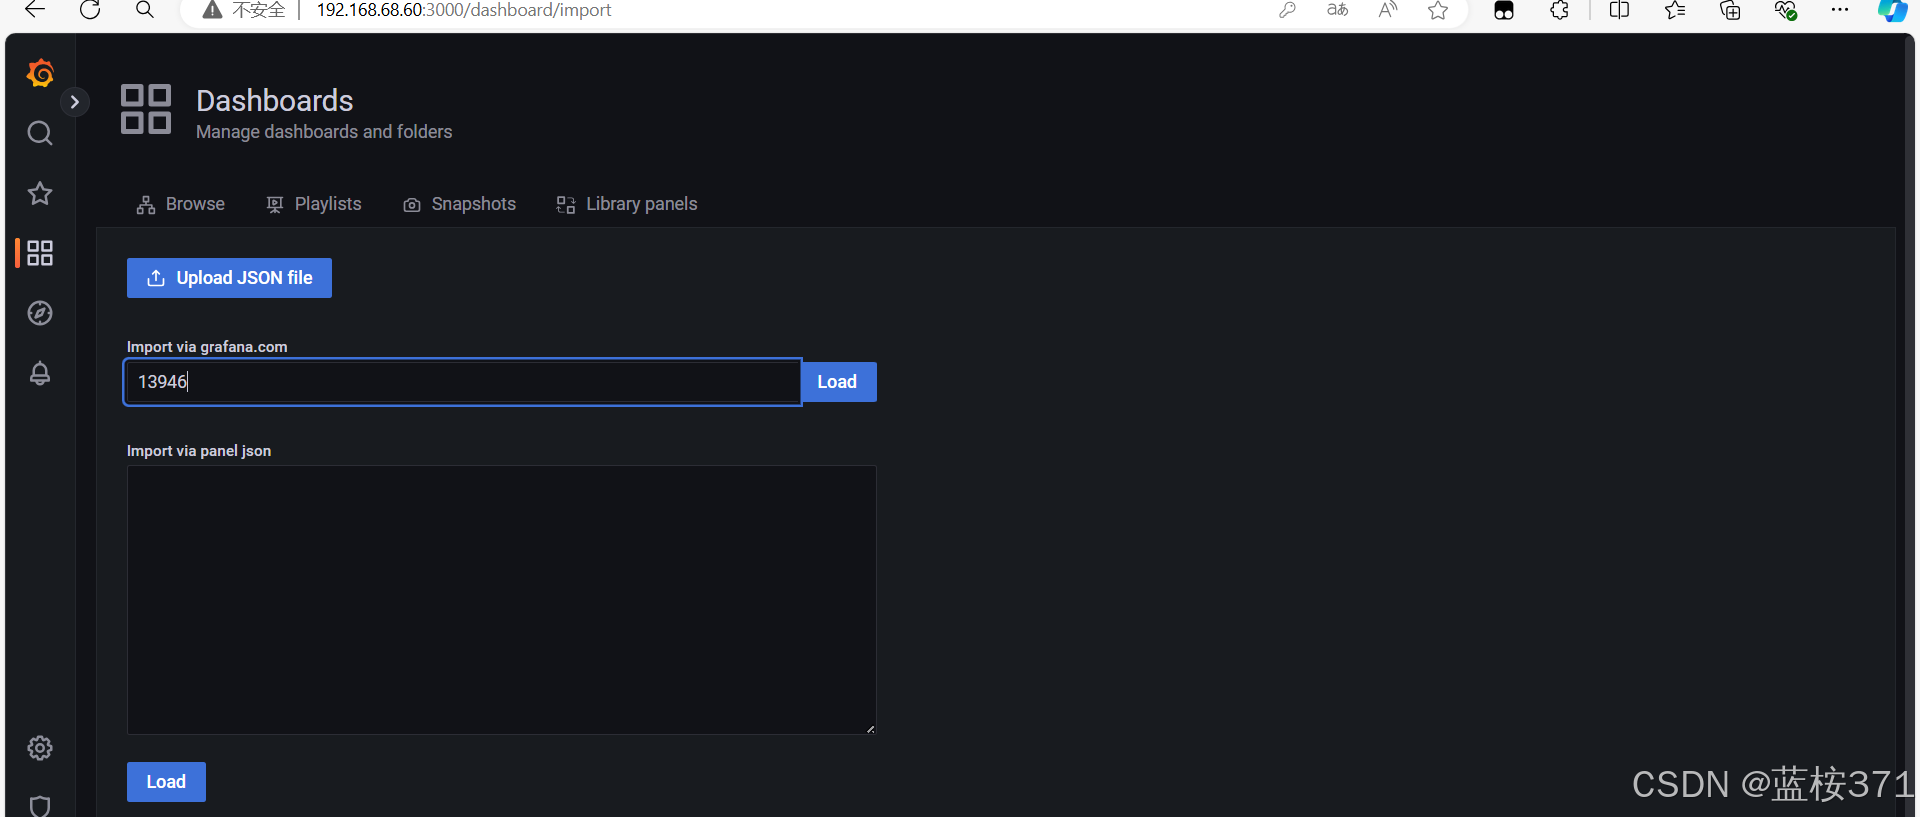
点击import直接导入模板
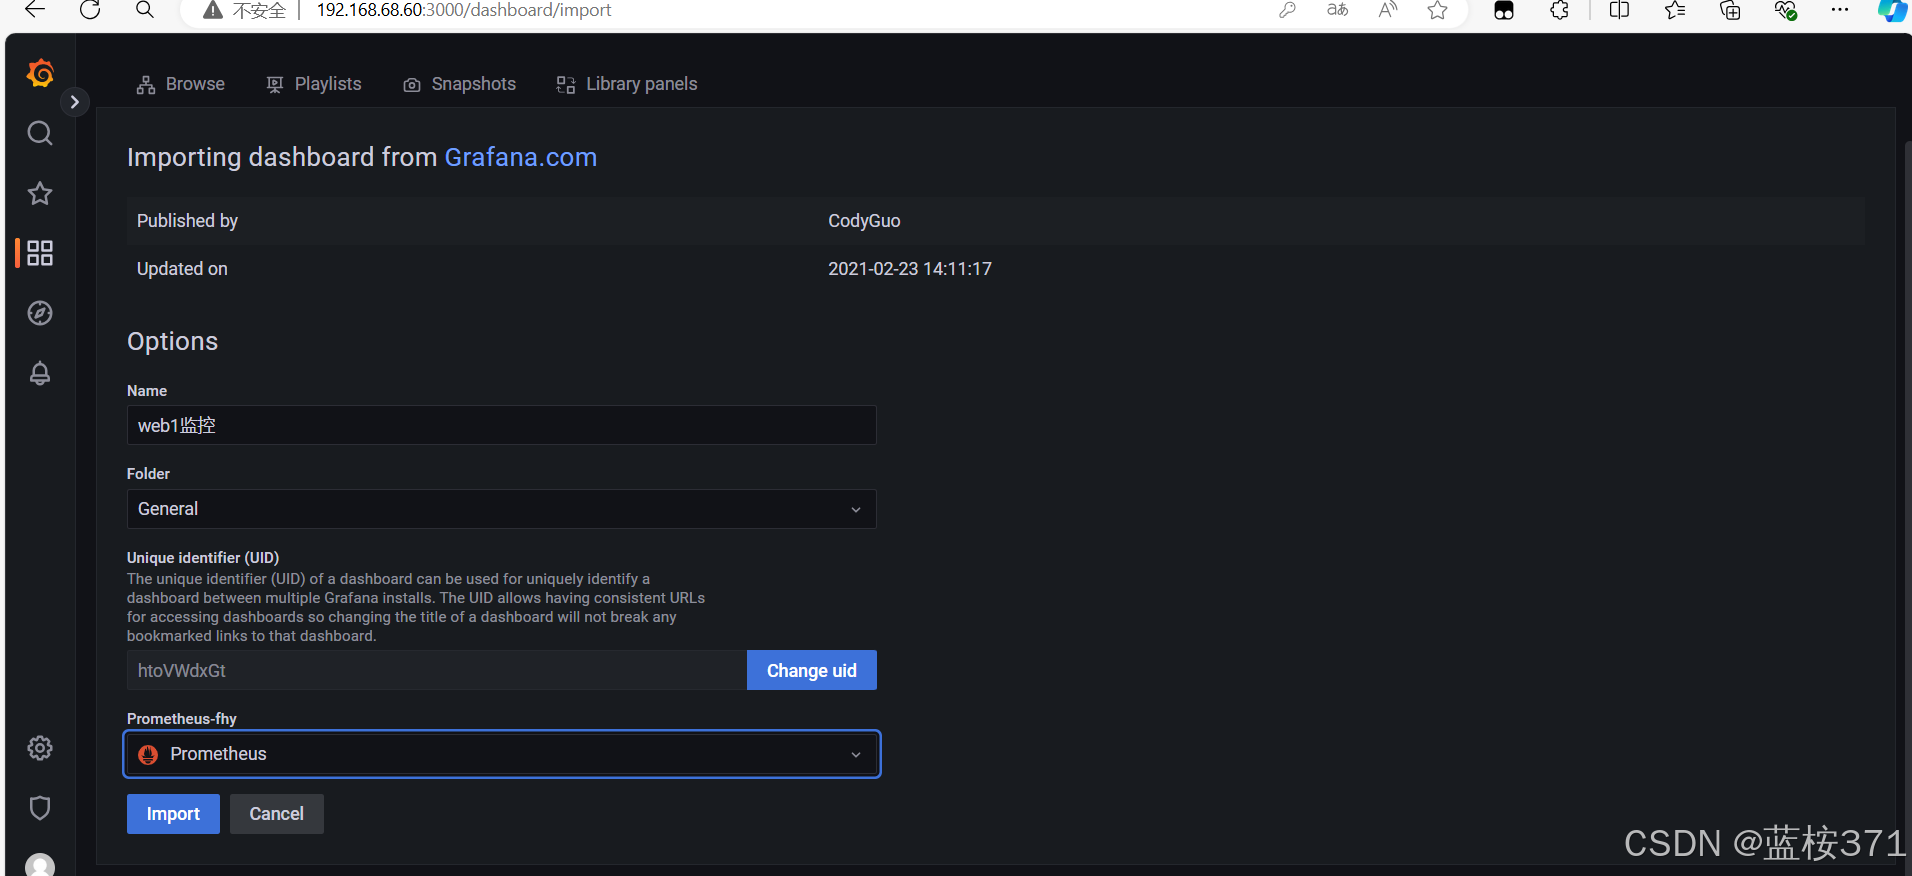
输入13946模板,点击load(需要知道哪些模板可以使用,可以去官方找,也可以百度)
给模板取名,然后选择Prometheus数据库,最后点击import
八.部署堡垒机
# 配置Tcp Wrappers,DMZ区所有的服务器只允许堡垒机ssh访问

[root@comprehensive ~]# vim set_tcp_wrappers.sh
[root@comprehensive ~]# cat set_tcp_wrappers.sh
#!/bin/bash
#set /etc/hosts.allow文件的内容,只允许堡垒机访问sshd服务
 echo  'sshd:192.168.68.60'  >>/etc/hosts.allow
#单独允许我的windows系统也可以访问
 echo  'sshd:192.168.68.1'  >>/etc/hosts.allow
#拒绝其他的所有的机器访问sshd
echo  'sshd:ALL'  >>/etc/hosts.deny

[root@comprehensive ~]# ansible all -m script -a"set_tcp_wrappers.sh"

192.168.68.42 | CHANGED => {
    "changed": true,
    "rc": 0,
    "stderr": "Shared connection to 192.168.68.42 closed.\r\n",
    "stderr_lines": [
        "Shared connection to 192.168.68.42 closed."
    ],
    "stdout": "",
    "stdout_lines": []
}
192.168.68.41 | CHANGED => {
    "changed": true,
    "rc": 0,
    "stderr": "Shared connection to 192.168.68.41 closed.\r\n",
    "stderr_lines": [
        "Shared connection to 192.168.68.41 closed."
    ],
    "stdout": "",
    "stdout_lines": []
}

......


# 测试tcp wrappers

[root@lb1 ~]# ssh root@192.168.68.42
ssh_exchange_identification: read: Connection reset by peer

[root@firewalld ~]# ssh root@192.168.68.42
ssh_exchange_identification: read: Connection reset by peer

[root@comprehensive ~]# ssh root@192.168.68.42
Last login: Sat Aug 24 19:57:59 2024 from 192.168.68.60
[root@lb2 ~]#

# 通过以上测试验证,DMZ区里的服务器只有堡垒机(跳板机)可以ssh到其他的服务器,其他服务器之间不能互相ssh连接,提高了服务器的安全性。
九.部署防火墙
1.网卡配置
# 查看防火墙服务器的防火墙和selinux是否关闭,没有关闭的就关闭

[root@firewalld ~]# systemctl status firewalld
● firewalld.service - firewalld - dynamic firewall daemon
   Loaded: loaded (/usr/lib/systemd/system/firewalld.service; disabled; vendor preset: enabled)
   Active: inactive (dead)
     Docs: man:firewalld(1)
[root@firewalld ~]# getenforce
Disabled

# 配置防火墙服务器的两块网卡(确保有两块网卡,关闭虚拟机去添加一块)

[root@firewalld ~]# yum install net-tools -y

[root@firewalld ~]# cd /etc/sysconfig/network-scripts/
[root@firewalld network-scripts]# ls
ifcfg-ens33  ifdown-eth   ifdown-post    ifdown-Team      ifup-aliases  ifup-ipv6   ifup-post    ifup-Team      init.ipv6-global
ifcfg-lo     ifdown-ippp  ifdown-ppp     ifdown-TeamPort  ifup-bnep     ifup-isdn   ifup-ppp     ifup-TeamPort  network-functions
ifdown       ifdown-ipv6  ifdown-routes  ifdown-tunnel    ifup-eth      ifup-plip   ifup-routes  ifup-tunnel    network-functions-ipv6
ifdown-bnep  ifdown-isdn  ifdown-sit     ifup             ifup-ippp     ifup-plusb  ifup-sit     ifup-wireless
[root@firewalld network-scripts]# cp ifcfg-ens33 ifcfg-ens37
[root@firewalld network-scripts]# ls
ifcfg-ens33  ifdown       ifdown-ippp  ifdown-post    ifdown-sit       ifdown-tunnel  ifup-bnep  ifup-ipv6  ifup-plusb  ifup-routes  ifup-TeamPort  init.ipv6-global
ifcfg-ens37  ifdown-bnep  ifdown-ipv6  ifdown-ppp     ifdown-Team      ifup           ifup-eth   ifup-isdn  ifup-post   ifup-sit     ifup-tunnel    network-functions
ifcfg-lo     ifdown-eth   ifdown-isdn  ifdown-routes  ifdown-TeamPort  ifup-aliases   ifup-ippp  ifup-plip  ifup-ppp    ifup-Team    ifup-wireless  network-functions-ipv6

# ens33作为WAN口,ens37作为LAN口

[root@firewalld network-scripts]# cat ifcfg-ens33
OTPROTO="none"
NAME="ens33"
DEVICE="ens33"
ONBOOT="yes"
IPADDR=192.168.1.168
PREFIX=24
GATEWAY=192.168.1.1
DNS1=114.114.114.114

[root@firewalld network-scripts]# cat ifcfg-ens37
OTPROTO="none"
NAME="ens37"
DEVICE="ens37"
ONBOOT="yes"
IPADDR=192.168.68.30
PREFIX=24

# DMZ区(web集群内部的服务器:web,lb,综合服务器,MySQL,防火墙ens37端口)里的所有服务器网卡类型调整为hostonly模式,即跟vmnet1在同一个网段,网关配置为 LAN口的地址

[root@lb1 ~]# cd /etc/sysconfig/network-scripts/
[root@lb1 network-scripts]# vim ifcfg-ens33
[root@lb1 network-scripts]# cat ifcfg-ens33
BOOTPROTO="none"
NAME="ens33"
DEVICE="ens33"
ONBOOT="yes"
IPADDR=192.168.68.41
PREFIX=24
GATEWAY=192.168.68.30
DNS1=114.114.114.114

[root@lb1 network-scripts]# ip add
1: lo: <LOOPBACK,UP,LOWER_UP> mtu 65536 qdisc noqueue state UNKNOWN group default qlen 1000
    link/loopback 00:00:00:00:00:00 brd 00:00:00:00:00:00
    inet 127.0.0.1/8 scope host lo
       valid_lft forever preferred_lft forever
    inet6 ::1/128 scope host
       valid_lft forever preferred_lft forever
2: ens33: <BROADCAST,MULTICAST,UP,LOWER_UP> mtu 1500 qdisc pfifo_fast state UP group default qlen 1000
    link/ether 00:0c:29:f2:2c:3c brd ff:ff:ff:ff:ff:ff
    inet 192.168.68.41/24 brd 192.168.68.255 scope global noprefixroute ens33
       valid_lft forever preferred_lft forever
    inet6 fe80::20c:29ff:fef2:2c3c/64 scope link
       valid_lft forever preferred_lft forever
[root@lb1 network-scripts]# ip route
default via 192.168.68.30 dev ens33 proto static metric 100
192.168.68.0/24 dev ens33 proto kernel scope link src 192.168.68.41 metric 100
2.配置SNAT和DNAT功能
# 编写snat_dnat脚本

[root@firewalld ~]# mkdir -p /SNAT_DNAT
[root@firewalld ~]# cd /SNAT_DNAT/
[root@firewalld SNAT_DNAT]# vim set_snat_dnat.sh
[root@firewalld SNAT_DNAT]# cat set_snat_dnat.sh
#!/bin/bash
#开启路由功能
echo 1 >/proc/sys/net/ipv4/ip_forward
#修改/etc/sysctl.conf里添加下面的配置
#net.ipv4.ip_forward = 1
#清除防火墙规则
iptables=/usr/sbin/iptables
$iptables -F
$iptables -t nat -F
#set snat policy
$iptables  -t nat -A POSTROUTING  -s 192.168.68.0/24  -o ens33  -j MASQUERADE
#set dnat policy 发布web1出去,提供web服务
$iptables  -t nat -A PREROUTING -d 192.168.1.168 -i ens33 -p tcp --dport 80 -j DNAT --to-destination 192.168.68.51
#set dnat policy 发布web1出去,提供web服务
$iptables  -t nat -A PREROUTING -d 192.168.1.168 -i ens33 -p tcp --dport 3306 -j DNAT --to-destination 192.168.68.70
#发布堡垒机,访问防火墙的2233端口转发到堡垒机的22端口
$iptables  -t nat -A PREROUTING -d 192.168.1.168 -i ens33 -p tcp --dport 2233 -j DNAT --to-destination 192.168.68.60:22

# 查看效果

[root@firewalld SNAT_DNAT]# bash set_snat_dnat.sh
[root@firewalld SNAT_DNAT]# iptables -L -n -t nat
Chain PREROUTING (policy ACCEPT)
target     prot opt source               destination
DNAT       tcp  --  0.0.0.0/0            192.168.1.168        tcp dpt:80 to:192.168.68.51
DNAT       tcp  --  0.0.0.0/0            192.168.1.168        tcp dpt:3306 to:192.168.68.70
DNAT       tcp  --  0.0.0.0/0            192.168.1.168        tcp dpt:2233 to:192.168.68.60:22

Chain INPUT (policy ACCEPT)
target     prot opt source               destination

Chain OUTPUT (policy ACCEPT)
target     prot opt source               destination

Chain POSTROUTING (policy ACCEPT)
target     prot opt source               destination
MASQUERADE  all  --  192.168.68.0/24      0.0.0.0/0

# 保存规则,开机自动开启SNAT和DNAT功能(以下可以用执行bash文件代替)

[root@firewalld SNAT_DNAT]# iptables-save >/etc/sysconfig/iptables_rules
[root@firewalld SNAT_DNAT]# vim /etc/rc.local
iptables-restore </etc/sysconfig/iptables_rules
touch /var/lock/subsys/local
[root@firewalld SNAT_DNAT]# chmod +x /etc/rc.d/rc.local

# 在其他机器上测试SNAT功能

[root@lb1 ~]# ping www.qq.com
PING ins-r23tsuuf.ias.tencent-cloud.net (121.14.77.221) 56(84) bytes of data.
^C64 bytes from 121.14.77.221: icmp_seq=1 ttl=128 time=24.9 ms

--- ins-r23tsuuf.ias.tencent-cloud.net ping statistics ---
1 packets transmitted, 1 received, 0% packet loss, time 0ms
rtt min/avg/max/mdev = 24.901/24.901/24.901/0.000 ms
[root@lb1 ~]# ping www.baidu.com
PING www.a.shifen.com (183.2.172.42) 56(84) bytes of data.
64 bytes from 183.2.172.42 (183.2.172.42): icmp_seq=1 ttl=128 time=23.5 ms
64 bytes from 183.2.172.42 (183.2.172.42): icmp_seq=2 ttl=128 time=24.1 ms
64 bytes from 183.2.172.42 (183.2.172.42): icmp_seq=3 ttl=128 time=133 ms
64 bytes from 183.2.172.42 (183.2.172.42): icmp_seq=4 ttl=128 time=24.8 ms
64 bytes from 183.2.172.42 (183.2.172.42): icmp_seq=5 ttl=128 time=22.7 ms
64 bytes from 183.2.172.42 (183.2.172.42): icmp_seq=6 ttl=128 time=23.8 ms
64 bytes from 183.2.172.42 (183.2.172.42): icmp_seq=7 ttl=128 time=22.1 ms
64 bytes from 183.2.172.42 (183.2.172.42): icmp_seq=8 ttl=128 time=23.8 ms
64 bytes from 183.2.172.42 (183.2.172.42): icmp_seq=9 ttl=128 time=23.9 ms
64 bytes from 183.2.172.42 (183.2.172.42): icmp_seq=10 ttl=128 time=23.0 ms
64 bytes from 183.2.172.42 (183.2.172.42): icmp_seq=11 ttl=128 time=23.2 ms
64 bytes from 183.2.172.42 (183.2.172.42): icmp_seq=12 ttl=128 time=26.3 ms
64 bytes from 183.2.172.42 (183.2.172.42): icmp_seq=13 ttl=128 time=21.6 ms
64 bytes from 183.2.172.42 (183.2.172.42): icmp_seq=14 ttl=128 time=22.8 ms
^C
--- www.a.shifen.com ping statistics ---
14 packets transmitted, 14 received, 0% packet loss, time 13026ms
rtt min/avg/max/mdev = 21.664/31.391/133.330/28.295 ms

[root@lb2 ~]# ping qq.com
PING qq.com (123.150.76.218) 56(84) bytes of data.
64 bytes from 123.150.76.218 (123.150.76.218): icmp_seq=1 ttl=128 time=42.9 ms
64 bytes from 123.150.76.218 (123.150.76.218): icmp_seq=2 ttl=128 time=42.6 ms
64 bytes from 123.150.76.218 (123.150.76.218): icmp_seq=3 ttl=128 time=43.3 ms
^C
--- qq.com ping statistics ---
3 packets transmitted, 3 received, 0% packet loss, time 2003ms
rtt min/avg/max/mdev = 42.632/42.993/43.359/0.341 ms
十.部署两台LB负载均衡服务器
# 安装keepalived和nginx

[root@lb1 ~]# yum install keepalived  -y
[root@lb-1 ~]# systemctl enable  ipvsadm
[root@lb1 ~]# cat onekey_install_nginx.sh
#!/bin/bash
#解决软件的依赖关系,需要安装的软件包
yum install epel-release -y
yum -y install zlib zlib-devel openssl openssl-devel pcre pcre-devel gcc gcc-c++ autoconf automake make psmisc net-tools lsof vim  wget -y

#新建zj用户和组
id  zj|| useradd zj -s /sbin/nologin

#下载nginx软件
mkdir  /zj -p
cd /zj
wget  https://nginx.org/download/nginx-1.24.0.tar.gz
#解压软件
tar xf nginx-1.24.0.tar.gz
#进入解压后的文件夹
cd nginx-1.24.0
#编译前的配置
./configure --prefix=/usr/local/zj  --user=zj --group=zj  --with-http_ssl_module   --with-threads  --with-http_v2_module  --with-http_stub_status_module  --with-stream   --with-http_gunzip_module
#如果上面的编译前的配置失败,直接退出脚本
if (( $? != 0));then
	exit
fi
#编译,启动2个进程去编译,这样速度快
make -j 2
#编译安装
make  install
#修改PATH变量
echo  "PATH=$PATH:/usr/local/zj/sbin" >>/etc/bashrc
#firewalld and selinux
#stop firewall和设置下次开机不启动firewalld
service firewalld stop
systemctl disable firewalld
#临时停止selinux和永久停止selinux
setenforce 0
sed  -i '/^SELINUX=/ s/enforcing/disabled/' /etc/selinux/config
#开机启动
chmod +x /etc/rc.d/rc.local
echo  "/usr/local/zj/sbin/nginx" >>/etc/rc.local
#启动nginx
/usr/local/zj/sbin/nginx

[root@lb1 ~]# bash onekey_install_nginx.sh

[root@lb1 ~]# ps -aux|egrep nginx
root       7793  0.0  0.0  46240  1164 ?        Ss   21:00   0:00 nginx: master process /usr/local/zj/sbin/nginx
zj         7794  0.0  0.1  46700  1916 ?        S    21:00   0:00 nginx: worker process
root       7809  0.0  0.0 112824   988 pts/0    S+   21:01   0:00 grep -E --color=auto nginx

# 配置双vip

[root@lb1 ~]# vim /etc/keepalived/keepalived.conf
[root@lb1 ~]# cat /etc/keepalived/keepalived.conf
! Configuration File for keepalived

global_defs {
   notification_email {
     acassen@firewall.loc
     failover@firewall.loc
     sysadmin@firewall.loc
   }
   notification_email_from Alexandre.Cassen@firewall.loc
   smtp_server 192.168.200.1
   smtp_connect_timeout 30
   router_id LVS_DEVEL
   vrrp_skip_check_adv_addr
  #vrrp_strict
   vrrp_garp_interval 0
   vrrp_gna_interval 0
}

vrrp_instance VI_1 {
    state MASTER
    interface ens33
    virtual_router_id 51 # 不要冲突
    priority 100 # 优先级要有区分
    advert_int 1
    authentication {
        auth_type PASS
        auth_pass 1111
    }
    virtual_ipaddress {
        192.168.68.200
    }
}

vrrp_instance VI_2 {
    state BACKUP
    interface ens33
    virtual_router_id 61
    priority 100
    advert_int 1
    authentication {
        auth_type PASS
        auth_pass 1111
    }
    virtual_ipaddress {
        192.168.68.201
    }
}

[root@lb1 ~]# systemctl daemon-reload
[root@lb1 ~]# systemctl restart keepalived
[root@lb1 ~]# ip add
1: lo: <LOOPBACK,UP,LOWER_UP> mtu 65536 qdisc noqueue state UNKNOWN group default qlen 1000
    link/loopback 00:00:00:00:00:00 brd 00:00:00:00:00:00
    inet 127.0.0.1/8 scope host lo
       valid_lft forever preferred_lft forever
    inet6 ::1/128 scope host
       valid_lft forever preferred_lft forever
2: ens33: <BROADCAST,MULTICAST,UP,LOWER_UP> mtu 1500 qdisc pfifo_fast state UP group default qlen 1000
    link/ether 00:0c:29:f2:2c:3c brd ff:ff:ff:ff:ff:ff
    inet 192.168.68.41/24 brd 192.168.68.255 scope global noprefixroute ens33
       valid_lft forever preferred_lft forever
    inet 192.168.68.200/32 scope global ens33
       valid_lft forever preferred_lft forever
    inet6 fe80::20c:29ff:fef2:2c3c/64 scope link
       valid_lft forever preferred_lft forever

# LB1和LB2互为主备,在第一个负载均衡器 (LB1) 上,VI_1 是 MASTER,VI_2 是 BACKUP,在第二个负载均衡器 (LB2) 上,配置应为镜像配置,即 VI_1 和 VI_2 的 state 配置应与 LB1 对调,优先级设置:在 VI_1 和 VI_2 上使用不同的优先级配置,以确保 MASTER 和 BACKUP 角色分配正确。

[root@lb2 ~]# cat /etc/keepalived/keepalived.conf
! Configuration File for keepalived

global_defs {
   notification_email {
     acassen@firewall.loc
     failover@firewall.loc
     sysadmin@firewall.loc
   }
   notification_email_from Alexandre.Cassen@firewall.loc
   smtp_server 192.168.200.1
   smtp_connect_timeout 30
   router_id LVS_DEVEL
   vrrp_skip_check_adv_addr
  #vrrp_strict
   vrrp_garp_interval 0
   vrrp_gna_interval 0
}

vrrp_instance VI_1 {
    state BACKUP
    interface ens33
    virtual_router_id 51
    priority 100
    advert_int 1
    authentication {
        auth_type PASS
        auth_pass 1111
    }
    virtual_ipaddress {
        192.168.68.200
    }
}
vrrp_instance VI_2 {
    state MASTER
    interface ens33
    virtual_router_id 61
    priority 200
    advert_int 1
    authentication {
        auth_type PASS
        auth_pass 1111
    }
    virtual_ipaddress {
        192.168.68.201
    }
}


[root@lb2 ~]# systemctl daemon-reload
[root@lb2 ~]# systemctl restart keepalived
[root@lb2 ~]# ip add
1: lo: <LOOPBACK,UP,LOWER_UP> mtu 65536 qdisc noqueue state UNKNOWN group default qlen 1000
    link/loopback 00:00:00:00:00:00 brd 00:00:00:00:00:00
    inet 127.0.0.1/8 scope host lo
       valid_lft forever preferred_lft forever
    inet6 ::1/128 scope host
       valid_lft forever preferred_lft forever
2: ens33: <BROADCAST,MULTICAST,UP,LOWER_UP> mtu 1500 qdisc pfifo_fast state UP group default qlen 1000
    link/ether 00:0c:29:6d:77:44 brd ff:ff:ff:ff:ff:ff
    inet 192.168.68.42/24 brd 192.168.68.255 scope global noprefixroute ens33
       valid_lft forever preferred_lft forever
    inet 192.168.68.201/32 scope global ens33
       valid_lft forever preferred_lft forever
    inet6 fe80::20c:29ff:fe6d:7744/64 scope link
       valid_lft forever preferred_lft forever

# 配置负载均衡策略

[root@lb1 ~]# cd /usr/local/zj/conf/
[root@lb1 conf]# ls
fastcgi.conf          fastcgi_params          koi-utf  mime.types          nginx.conf          scgi_params          uwsgi_params          win-utf
fastcgi.conf.default  fastcgi_params.default  koi-win  mime.types.default  nginx.conf.default  scgi_params.default  uwsgi_params.default

[root@lb1 conf]# cat nginx.conf
worker_processes  2;
events {
    worker_connections  2048;
}
http {
    include       mime.types;
    default_type  application/octet-stream;
    sendfile        on;
    keepalive_timeout  65;
#定义一个负载均衡器zjapp
    upstream scapp {
        server 192.168.68.51;
        server 192.168.68.52;
    }
    server {
        listen       80;
        server_name  localhost;

        location / {
	#访问网页根目录直接转发到负载均衡器上进行处理
	     proxy_pass http://zjapp;
	     proxy_set_header   X-Real-IP        $remote_addr;

        }

        }
}

[root@lb1 conf]# nginx -c /usr/local/zj/conf/nginx.conf
nginx: [emerg] host not found in upstream "zjapp" in /usr/local/zj/conf/nginx.conf:21
[root@lb1 conf]# nginx -t
nginx: the configuration file /etc/nginx/nginx.conf syntax is ok
nginx: configuration file /etc/nginx/nginx.conf test is successful
[root@lb1 sbin]# /usr/local/zj/sbin/nginx -s reload
nginx: [emerg] host not found in upstream "zjapp" in /usr/local/zj/conf/nginx.conf:21

# 测试

[root@lb1 conf]# curl 192.168.68.41
<!DOCTYPE html>
<html>
<head>
<title>Welcome to nginx!</title>
<style>
html { color-scheme: light dark; }
body { width: 35em; margin: 0 auto;
font-family: Tahoma, Verdana, Arial, sans-serif; }
</style>
</head>
<body>
<h1>Welcome to nginx!</h1>
<p>If you see this page, the nginx web server is successfully installed and
working. Further configuration is required.</p>

<p>For online documentation and support please refer to
<a href="http://nginx.org/">nginx.org</a>.<br/>
Commercial support is available at
<a href="http://nginx.com/">nginx.com</a>.</p>

<p><em>Thank you for using nginx.</em></p>
</body>
</html>
[root@lb1 conf]# curl 192.168.68.42
<!DOCTYPE html>
<html>
<head>
<title>Welcome to nginx!</title>
<style>
html { color-scheme: light dark; }
body { width: 35em; margin: 0 auto;
font-family: Tahoma, Verdana, Arial, sans-serif; }
</style>
</head>
<body>
<h1>Welcome to nginx!</h1>
<p>If you see this page, the nginx web server is successfully installed and
working. Further configuration is required.</p>

<p>For online documentation and support please refer to
<a href="http://nginx.org/">nginx.org</a>.<br/>
Commercial support is available at
<a href="http://nginx.com/">nginx.com</a>.</p>

<p><em>Thank you for using nginx.</em></p>
</body>
</html>

# 在Web1和Web2上修改nginx.conf配置文件

[root@web1 ~]# cd /usr/local/zj/conf/
[root@web1 conf]# vim nginx.conf
[root@web1 conf]# cat nginx.conf
worker_processes  2;
events {
    worker_connections  2048;
}
http {
    include       mime.types;
    default_type  application/octet-stream;
    log_format  main  '$remote_addr - $remote_user [$time_local] "$request" '
                      '$status $body_bytes_sent "$http_referer" '
                      '"$http_user_agent" "$http_x_forwarded_for"';
    sendfile        on;
    keepalive_timeout  65;
    gzip  on;
    server {
        listen       80;
        server_name  www.zj.com;
        access_log  logs/www.access.log  main;
        location / {
            root   html/www;
            index  index.html index.htm;
        }
        error_page   500 502 503 504  /50x.html;
        location = /50x.html {
            root   html;
        }
    }
    server {
        listen       80;
        server_name  jjj.zj.com;
        access_log  logs/jjj.access.log  main;
        location / {
            root   html/software;
            index  index.html index.htm;
        }
        error_page   500 502 503 504  /50x.html;
        location = /50x.html {
            root   html;
        }
    }
}

# 创建网页内容

[root@web1 ~]# cd /usr/local/zj/html/
[root@web1 html]# ls
50x.html  index.html
[root@web1 html]# mkdir www
[root@web2 html]# mkdir jjj
[root@web1 html]# cp index.html www/
[root@web2 html]# cp index.html jjj/
[root@web1 html]# cd www/
[root@web1 www]# ls
index.html
[root@web1 www]# vim index.html
<!DOCTYPE html>
<html>
<head>
<title>Welcome to www!</title>
<style>
html { color-scheme: light dark; }
body { width: 35em; margin: 0 auto;
font-family: Tahoma, Verdana, Arial, sans-serif; }
</style>
</head>
<body>
<h1>Welcome to www!</h1>
<p>If you see this page, the nginx web server is successfully installed and
working. Further configuration is required.</p>

<p>For online documentation and support please refer to
<a href="http://nginx.org/">nginx.org</a>.<br/>
Commercial support is available at
<a href="http://nginx.com/">nginx.com</a>.</p>

<p><em>Thank you for using nginx.</em></p>
</body>
</html>
[root@web2 html]# cd jjj
[root@web2 jjj]# ls
index.html
[root@web2 jjj]# vim index.html
<!DOCTYPE html>
<html>
<head>
<title>Welcome to jjj!</title>
<style>
html { color-scheme: light dark; }
body { width: 35em; margin: 0 auto;
font-family: Tahoma, Verdana, Arial, sans-serif; }
</style>
</head>
<body>
<h1>Welcome to jjj!</h1>
<p>If you see this page, the nginx web server is successfully installed and
working. Further configuration is required.</p>

<p>For online documentation and support please refer to
<a href="http://nginx.org/">nginx.org</a>.<br/>
Commercial support is available at
<a href="http://nginx.com/">nginx.com</a>.</p>

<p><em>Thank you for using nginx.</em></p>
</body>
</html>

# 修改windows机器里的hosts文件,添加域名解析记录(C:\Windows\System32\drivers\etc\hosts)

192.168.1.168   www.zj.com

192.168.1.125   jjj.zj.com

# 测试负载均衡

[root@web2 html]# curl 192.168.68.41
<!DOCTYPE html>
<html>
<head>
<title>Welcome to www!</title>
<style>
html { color-scheme: light dark; }
body { width: 35em; margin: 0 auto;
font-family: Tahoma, Verdana, Arial, sans-serif; }
</style>
</head>
<body>
<h1>Welcome to www!</h1>
<p>If you see this page, the nginx web server is successfully installed and
working. Further configuration is required.</p>

<p>For online documentation and support please refer to
<a href="http://nginx.org/">nginx.org</a>.<br/>
Commercial support is available at
<a href="http://nginx.com/">nginx.com</a>.</p>

<p><em>Thank you for using nginx.</em></p>
</body>
</html>
[root@web2 html]# curl 192.168.68.41
<!DOCTYPE html>
<html>
<head>
<title>Welcome to jjj!</title>
<style>
html { color-scheme: light dark; }
body { width: 35em; margin: 0 auto;
font-family: Tahoma, Verdana, Arial, sans-serif; }
</style>
</head>
<body>
<h1>Welcome to jjj!</h1>
<p>If you see this page, the nginx web server is successfully installed and
working. Further configuration is required.</p>

<p>For online documentation and support please refer to
<a href="http://nginx.org/">nginx.org</a>.<br/>
Commercial support is available at
<a href="http://nginx.com/">nginx.com</a>.</p>

<p><em>Thank you for using www.</em></p>
</body>
</html>

# 修改防火墙的配SNAT和DNAT功能

[root@firewalld SNAT_DNAT]# vim set_snat_dnat.sh
#!/bin/bash
#开启路由功能
echo 1 >/proc/sys/net/ipv4/ip_forward
#修改/etc/sysctl.conf里添加下面的配置
#net.ipv4.ip_forward = 1
#清除防火墙规则
iptables=/usr/sbin/iptables
$iptables -F
$iptables -t nat -F
#set snat policy
$iptables  -t nat -A POSTROUTING  -s 192.168.68.0/24  -o ens33  -j MASQUERADE
$iptables  -t nat -A PREROUTING -d 192.168.1.168 -i ens33 -p tcp --dport 80 -j DNAT --to-destination 192.168.68.41
#发布堡垒机,访问防火墙的2233端口转发到堡垒机的22端口
$iptables  -t nat -A PREROUTING -d 192.168.1.168 -i ens33 -p tcp --dport 2233 -j DNAT --to-destination 192.168.68.60:22
[root@firewalld SNAT_DNAT]# bash set_snat_dnat.sh
十一.压力测试
# 安装压力测试工具
[root@pressuretest ~]# yum install httpd-tools -y

# 对网址进行检测

[root@pressuretest ~]# ab -n 1000 -c 100 http://192.168.1.168/index.html
This is ApacheBench, Version 2.3 <$Revision: 1430300 $>
Copyright 1996 Adam Twiss, Zeus Technology Ltd, http://www.zeustech.net/
Licensed to The Apache Software Foundation, http://www.apache.org/

Benchmarking 192.168.1.168 (be patient)
Completed 100 requests
Completed 200 requests
Completed 300 requests
Completed 400 requests
Completed 500 requests
Completed 600 requests
Completed 700 requests
Completed 800 requests
Completed 900 requests
Completed 1000 requests
Finished 1000 requests


Server Software:        nginx/1.24.0
Server Hostname:        192.168.1.168
Server Port:            80

Document Path:          /index.html
Document Length:        615 bytes

Concurrency Level:      100
Time taken for tests:   0.194 seconds
Complete requests:      1000
Failed requests:        0
Write errors:           0
Total transferred:      848000 bytes
HTML transferred:       615000 bytes
Requests per second:    5143.82 [#/sec] (mean)
Time per request:       19.441 [ms] (mean)
Time per request:       0.194 [ms] (mean, across all concurrent requests)
Transfer rate:          4259.73 [Kbytes/sec] received

Connection Times (ms)
              min  mean[+/-sd] median   max
Connect:        0    6   5.6      4      26
Processing:     1   13   7.5     12      43
Waiting:        0   11   7.3      9      40
Total:          5   18  10.8     15      59

Percentage of the requests served within a certain time (ms)
  50%     15
  66%     18
  75%     20
  80%     21
  90%     35
  95%     44
  98%     56
  99%     58
 100%     59 (longest request)

# 在web服务器上安装glances软件

[root@web1 ~]# yum install glances -y

[root@pressuretest ~]# ab  -n 100000  -c 1000  http://192.168.1.168/index.html

[root@web1 html]# glances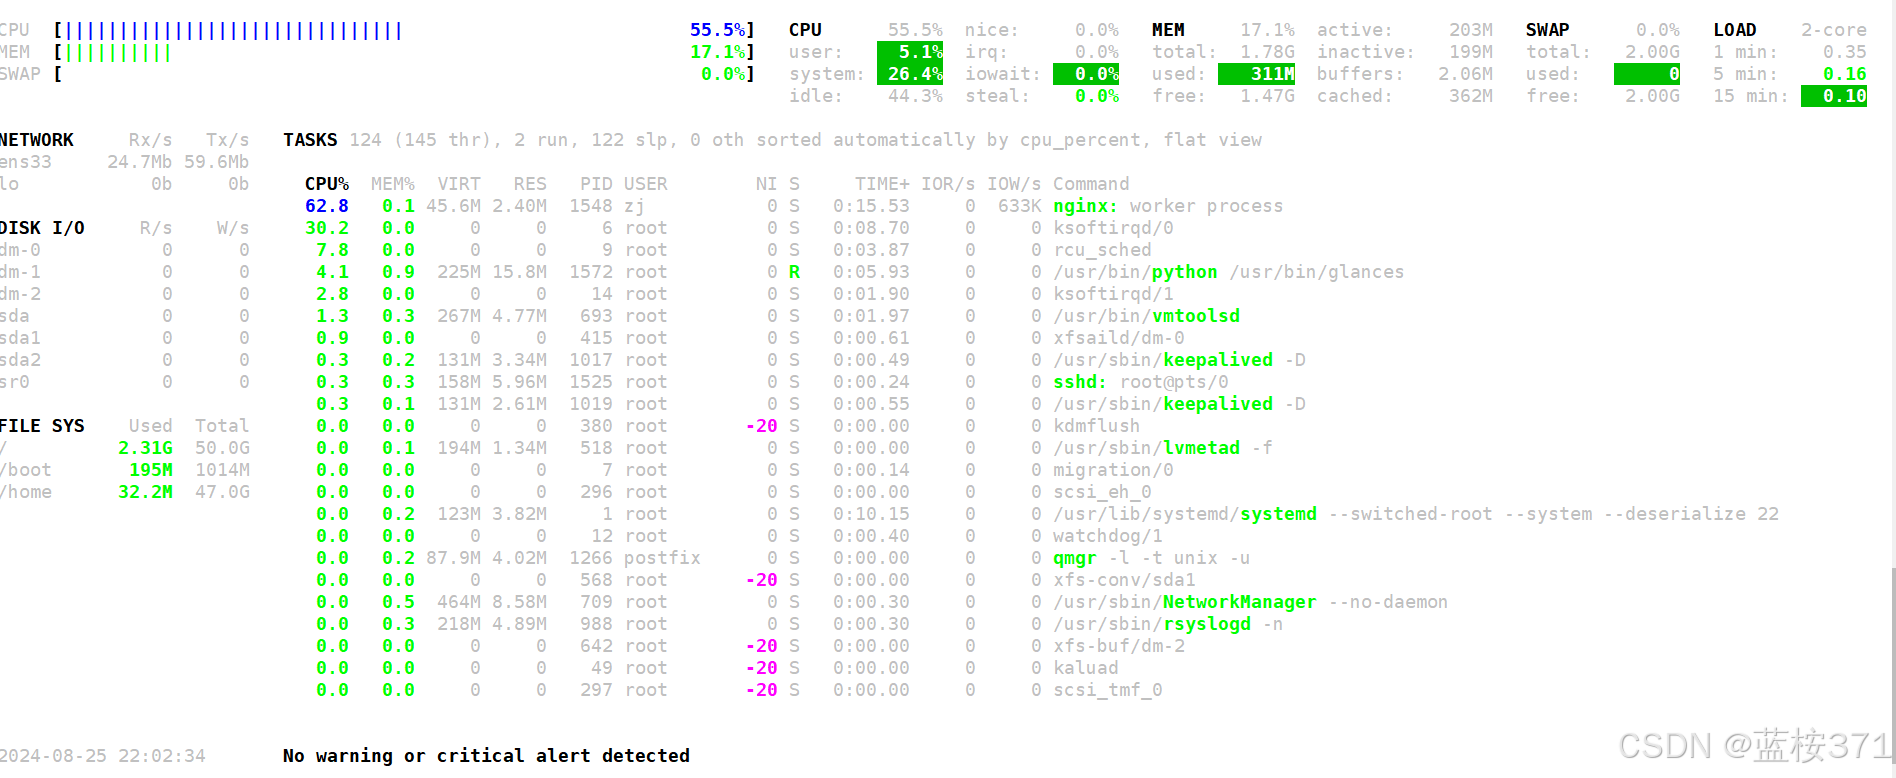
项目收获
1.防火墙和selinux一定要关闭,不然很多服务访问不了
2.配置文件的格式很重要
3.两个nginx的负载均衡器要注意配置应为镜像配置,双vip互为主备,更新keepalived服务后应重载(systemctl daemon-reload)
4.熟练掌握了很多服务(如nginx, mysql)的启动流程及各种工具(如ansible, prometheus)的使用,会根据需求编译安装nginx


 被折叠的 条评论
为什么被折叠?
被折叠的 条评论
为什么被折叠?
 到【灌水乐园】发言


