


目录
ShellString.prototype.to(file)
ShellString.prototype.toEnd(file)
new SftpClient(name) ===> SFTP client object
connect(config) ===> SFTP object
downloadDir(srcDir, dstDir, options) ==> string
rmdir(path, recursive) ==> string
uploadDir(srcDir, dstDir, options) ==> string
自动部署完整代码
package.json
下载这三个包
- shelljs :执行 shell命令
- ssh2-sftp-client 与服务器建立链接(内部有ssh2)
- chalk 打印彩色输出
  "devDependencies": {
    "shelljs": "^0.8.5",
    "ssh2-sftp-client": "^9.1.0",
    "chalk": "4.1.0"
  },
配置脚本命令 deploy 注意后边加上运行环境
执行deploy命令时内部执行了打包动作
  "scripts": {
    "dev": "vue-cli-service serve",
    "staging": "vue-cli-service serve --mode staging",
    "build:prod": "vue-cli-service build",
    "build:stage": "vue-cli-service build --mode staging",
    "preview": "node build/index.js --preview",
    "lint": "eslint --ext .js,.vue src",
    "deploy": "node deploy/index.js --prod"
  },
deploy /config 服务器信息
module.exports = [
  {
    id: 0,
    nodeEnv: "prod",
    name: "正式环境",
    domain: "",
    host: "ip",
    port: 端口,
    username: "用户名",
    password: "密码",
    path: "/data/www/paccount",//部署路径
    removepath: "/data/www/paccount", //删除路径
  },
];
deploy / index 部署命令入口文件
// 服务器配置文件
const config = require("./config.js");
// shell命令
const shell = require("shelljs");
// 输出颜色
const chalk = require("chalk");
// node fs 模块 读写文件
const fs = require("fs");
// node path模块 获取文件路径
const path = require("path");
// SSH2-SFTP-Client 是一个用于在Node.js中进行SSH SFTP操作的强大工具。它允许你建立SSH连接并进行文件传输,非常适用于自动化任务和远程文件管理。本文将引导你如何安装、配置和使用SSH2-SFTP-Client。
const Client = require("ssh2-sftp-client");
// 获取环境变量
const rawArgv = process.argv.slice(2);
// 日期插件
const dayjs = require("dayjs");
//判断环境
const filterStage = rawArgv.includes("--prod") ? "prod" : "stage";
console.log(chalk.blue("当前环境:", filterStage));
// 打包
const compileDist = async () => {
// 根据环境执行打包命令
if (shell.exec(`npm run build:${filterStage}`).code === 0) {
console.log(chalk.green("打包成功"));
}
};
// 部署
async function connectShell(params) {
// 判断需要上传的服务器
config
.filter((item) => item.nodeEnv == filterStage)
.map((item, index) => {
const sftp = new Client();
sftp
.connect({
host: item.host,
port: item.port,
username: item.username,
password: item.password,
})
// 备份
.then(() => {
if (index > 0) {
return "ok";
}
console.log(
chalk.red(`${item.host}--`) + chalk.blue(`---执行下拉文件备份---`)
);
console.log(chalk.blue(`---创建备份文件夹中···---`));
let newFile = `/${item.host}/${dayjs().format(
"YYYY-MM-DD"
)}/dist-${dayjs().format("HH_mm_ss")}`;
// 创建本地文件夹
fs.mkdir(
path.resolve(__dirname, `../distbak${newFile}`),
{ recursive: true },
(err) => {
if (err) throw err;
console.log(chalk.green("---创建备份文件夹成功---"));
}
);
//执行服务器下拉操作
return sftp.downloadDir(
item.path, //服务器路径
path.resolve(__dirname, `../distbak${newFile}`) //写入的本地路径地址
);
})
// 删除
.then(() => {
if (index === 0) {
console.log(
chalk.red(`${item.host}--`) + chalk.blue(`---备份完成---`)
);
}
console.log(
chalk.yellow(`${item.host}--`) +
chalk.red(`---执行删除文件中···---`)
);
// 删除路径 递归删除
return sftp.rmdir(item.path, true);
})
// 上传
.then(() => {
console.log(
chalk.red(`${item.host}--`) + chalk.green(`执行删除文件成功---`)
);
console.log(
chalk.hex("#DEADED").bold(`---${item.host}执行上传文件中···---`)
);
return sftp.uploadDir(path.resolve(__dirname, "../dist"), item.path);
})
// 上传成功 关闭链接
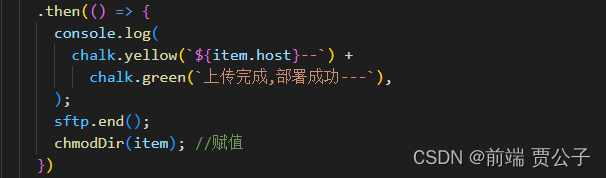
.then(() => {
console.log(
chalk.yellow(`${item.host}--`) + chalk.green(`上传完成,部署成功---`)
);
sftp.end();
})
// 上传失败
.catch((err) => {
console.error(
err,
chalk.red(`${item.host}--`) + chalk.red(`上传失败`)
);
sftp.end();
});
});
}
async function runStart() {
await compileDist();
await connectShell();
}
runStart();
如果需要在服务器执行命令
在部署完成后执行
SSH2是一个用于在网络上安全地访问远程计算机的协议,而上述代码段则使用Node.js的ssh2库来执行SSH连接和操作。这段代码中包含了两个事件处理器:
-
.on("ready", function () { ... }):- 这是ssh2库中的一个事件处理器,它在SSH连接准备就绪时触发。当与远程主机建立SSH连接后,会执行其中的代码块。通常,你可以在这个事件中执行需要在SSH连接建立后执行的操作。
-
.connect({ ... }):- 这是用于建立SSH连接的方法,其中包含了一个包含连接参数的对象,如主机地址、端口、用户名和密码等。在调用
.connect()时,ssh2库将尝试连接到指定的远程主机。
- 这是用于建立SSH连接的方法,其中包含了一个包含连接参数的对象,如主机地址、端口、用户名和密码等。在调用
在代码中,当SSH连接准备就绪("ready")时,它执行了一个命令,使用conn.exec()执行chmod命令,将目标目录的权限设置为755(允许读、写和执行)。如果设置权限成功,它会打印一条成功消息,并结束SSH连接。
总之,上述代码段通过ssh2库建立SSH连接,并在连接就绪后执行特定的命令来更改目标目录的权限。这通常用于在远程服务器上执行操作,例如修改文件权限。
const ClientOrg = require("ssh2").Client;
async function chmodDir(item) {
  if (!item) {
    throw "获取ip配置失败";
  }

  const conn = new ClientOrg();
  conn
    .on("ready", function () {
      conn.exec("chmod  755  /etc/nginx/html -R", function (err, stream) {
        if (err) throw err;
        console.log(
          chalk.red(`${item.host}--`) + chalk.green(`---添加目录权限成功---`),
        );
        conn.end();
      });
    })
    .connect({
      host: item.host,
      port: item.port,
      username: item.username,
      password: item.password,
    });
} 最低0.47元/天 解锁文章


 1万+
1万+

 被折叠的 条评论
为什么被折叠?
被折叠的 条评论
为什么被折叠?
 到【灌水乐园】发言


